• When you click on links to various merchants on this site and make a purchase, this can result in this site earning a commission. Affiliate programs and affiliations include, but are not limited to, the eBay Partner Network.

71 Road Runner Restoration Started

Cool update Louis, I really like how AMD is trying to help us the way they do, I didn't know about this particular bumper and im with you with the back one, its hard enough trying to do these cars as right as we can and AMD sure makes it easier, expensive with some things it seems but at least we have a chance, beats spending a bundle on buying another car for parts, and Mark has a lot of parts to help out as well... Building is getting better for a lot of folks, I do pray those shoulders get better soon bud!
 
Wow......I'm impressed AMD is coming out with that. Didn't see that coming. Quarters for the 65-67 B-Body guys should be next on their radar. Keep on keeping on man!
 
Thanks everyone. I didn't know about the new AMD front bumpers either until I saw a fellow FBBO member's restoration car thread. It was in magnes' first post on his thread "She's a keeper, 72 Satellite". (or something very similar to that)

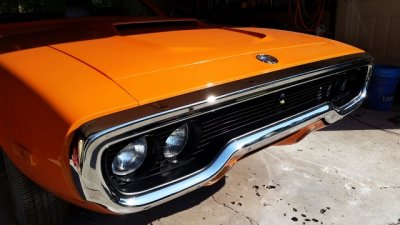
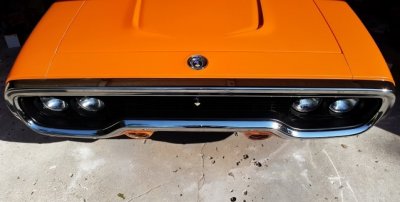
He posted up a few pictures of the new AMD bumper installed and it looks REAL GOOD !!! His car is almost exactly how I have been thinking about doing mine, except his color is different. (Orange vs. Red )

On another good note, I went to see the shoulder surgeon as a follow up visit. He increased my weight restriction from 5 pounds to 25 pounds. I've still been busting at physical therapy (and home with my home exercises) But I still have the problem of being able to fully reach overhead and behind my back. They say it will come back with time.

I'm hoping so.

Take care everyone, and we hope you all had a great Thanksgiving.

- - - Updated - - -

It looks like the front and rear bumpers are now covered by AMD for the 71 RR / SSB / GTX cars. Hopefully soon the rear bumper will be available for a 72 model year.

- - - Updated - - -

View attachment 223778 AMD rear bumper.jpg

- - - Updated - - -

AMD front bumper installed#2.jpgAMD front bumper installed.jpg

- - - Updated - - -

Here are a few photos I took from Magnes' thread. The bumper looks great

- - - Updated - - -

Thanks Magnes.
 
I need the roadrunner 71 top cowl panel. If you have or know some people that have this parts please send a message.

Thanks
Juan
 
Hello again everyone !!!!!!!!!!!!!!!!

There has been a lot happening on the "Home Front" lately. Fortunately it looks like I will be able to fire this thread back up soon.

On Friday I was medically cleared to go back to work on the Fire Truck !!!!!!!!!!!!!!! (after 1 year, 1 month and 11 days but who's counting ???)

Monday is my first shift day back on duty...............

Wish me luck.
 
I'm really happy for you and looking forward to more of your tutorials and general updates.

Please take it slowly and be careful !!!
 
Glad to hear you get to play with your hose again. I was starting to get worried.
 
I spent the past few days reading this thread in my spare time, all I can say is amazing work on all the projects. Seeing someone juggle multiple cars and put out the quality of work that youve been doing is not only impressive, but incredibly motivating. Good luck on the shoulder recovery and I hope you can get back in the saddle soon.
 
Glad to hear you get to play with your hose again. I was starting to get worried.

Probably not as worried as I was !!!!! LOL

Thanks

- - - Updated - - -

Well it looks like I am back in the saddle............... Thanks go out to everyone who have been following along !!!!!

We made some progress during the last two days.

- - - Updated - - -

IMG_0114.jpg

- - - Updated - - -

To begin with, everything that was bolted on the fire wall was removed again and placed back in clean storage................. (enclosed motorcycle hauler)

- - - Updated - - -

This had been bothering me since I knew there was a lot of welding and grinding, sparks flying, in the very near future. I didn't want to loose everything from a fire that could start due to an errant spark or two...............

- - - Updated - - -

IMG_8638.jpg

- - - Updated - - -

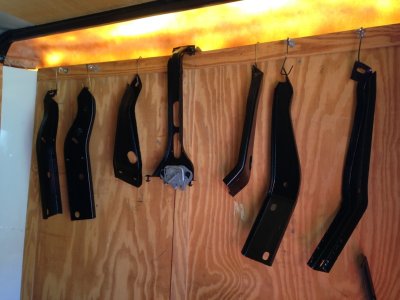
The front bumper brackets have been blasted and painted, along with the hood support bracket and latch.

- - - Updated - - -

IMG_9754.jpg

- - - Updated - - -

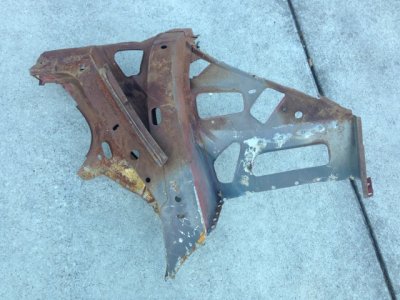
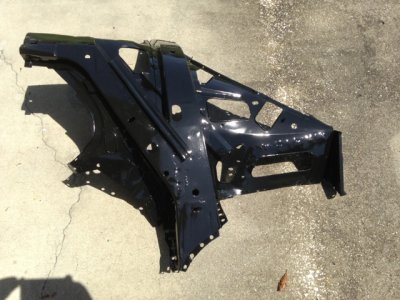
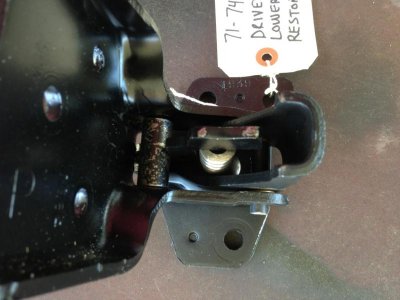
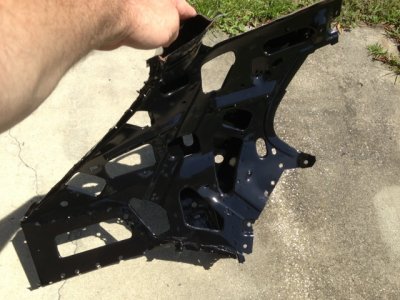
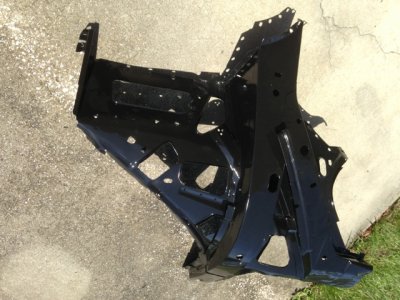
Remember this part I purchased from Mopar Mark ?????

- - - Updated - - -

IMG_2346.jpg

- - - Updated - - -

Here is how it looks now since it has been blasted / painted. Getting ready to weld it in soon...............

- - - Updated - - -

IMG_7991.jpg

- - - Updated - - -

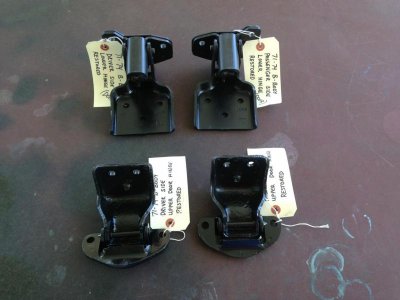
Restored the door hinges. Disassembled / blasted them and installed new pins, bushings, roll pins, springs and rollers. I bought a rebuild kit a while ago from Jeff @521.

- - - Updated - - -

IMG_0437.jpg

- - - Updated - - -

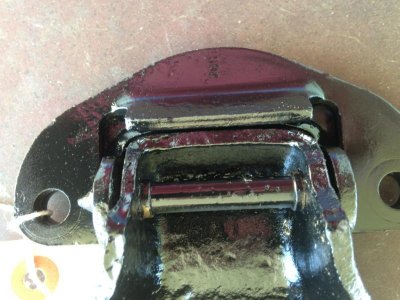
This is a close up of the upper hinge that shows the new door pin and bronze bushings..............

- - - Updated - - -

IMG_3362.jpg

- - - Updated - - -

Followed by a close up of the lower hinge that has all new parts in it as well.

Bushings, spring, and roll pins make this a nice kit.

- - - Updated - - -

IMG_8190.jpgIMG_8247.jpg

- - - Updated - - -

A few final photos showing the "B" pillar support that will soon get welded in place.

- - - Updated - - -

Man you all don't know how GOOD it feels to be able to get back out in the shop......................

I'll not be over doing it though. That's for sure.

Take care.

- - - Updated - - -

I spent the past few days reading this thread in my spare time, all I can say is amazing work on all the projects. Seeing someone juggle multiple cars and put out the quality of work that youve been doing is not only impressive, but incredibly motivating. Good luck on the shoulder recovery and I hope you can get back in the saddle soon.

Thanks for the kind words.

- - - Updated - - -

Sending a large package of luck to you... :)

Looks like it was delivered !!!!!! Thanks !!! (now I'll go knock on some wood, LOL) Don't want to jinx anything..............

- - - Updated - - -

Excellent! Good to hear!!

Thanks my friend !!!!! I'll be looking forward to seeing some pictures of your ride in that sweet shop of your's soon !!!!!!!

- - - Updated - - -

I'm really happy for you and looking forward to more of your tutorials and general updates.

Please take it slowly and be careful !!!

How's this Bryan ?????? Thanks buddy................
 
Very good to see your back in your shop Louis. Looking forward to read your updates again. Very detailed and useful!!! Please start off slowly.. and keep up the good work.
 
Well not much has been done over the last few days....................

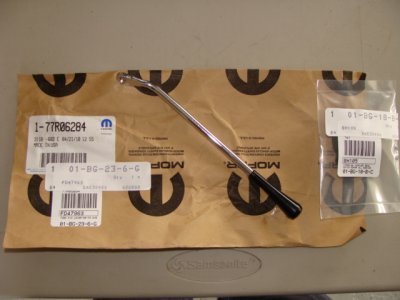
I did some research and found this little jewel : It's a turn signal lever and it is STILL AVAILABLE from Ma Mopar !!!!!

It may not be the "exact" length for a concourse restoration on some cars, but it's good enough for me. It looks like it should fit many years of our cars.

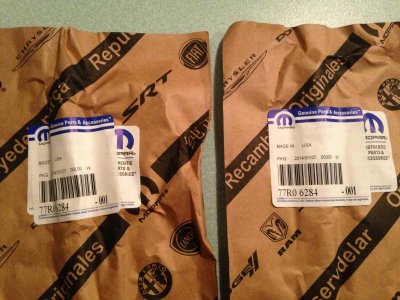
Chrysler Part Number 77R06284 LEVER TURN SIGN 5520000

List price $50.55 (you may be able to get it a little cheaper if you have a buddy in the parts department ;) !!!!! )

- - - Updated - - -

Copy of Duster steering column 011.jpg

- - - Updated - - -

take care...............

- - - Updated - - -

The stickers on the package show the "Year One" part number. That's where I originally purchased the part from for one of my Challengers.
Needless to say the price was a LOT more than the ones I just picked up from the local Dodge dealership. (not to mention the shipping costs)

Trust me, its a good part number. The price is current too. So I bought two more.
 
This thread is exactly what inspired me to go forward with keeping my GTX - Your work is inspiring to a novice like me !
 
Thanks my friend, but there are members here on FBBO who have far better skills than I.

- - - Updated - - -

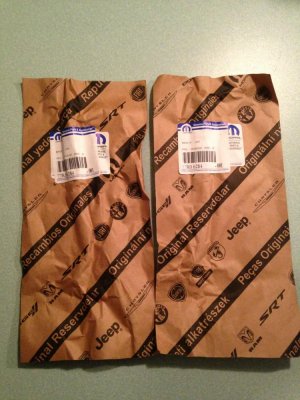
Here are a few pictures of the new turn signal lever packages. If you notice they are in the new style of parts packaging.

- - - Updated - - -

IMG_7263.jpg

- - - Updated - - -

and a close up of the part number............................

- - - Updated - - -

IMG_5807.jpg

- - - Updated - - -

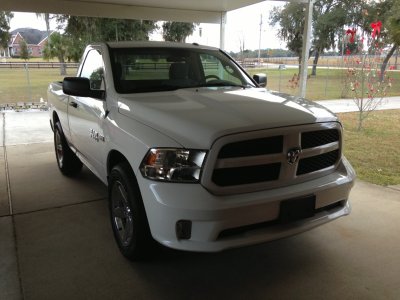
Didn't do anything today on the Satellite. Instead I changed oil in the wife's new 2014 Ram 1500 with a Hemi. It's first oil change. I went with Mobil 1 full synthetic.

- - - Updated - - -

IMG_9404.jpg

- - - Updated - - -

Then I changed out the serpentine belt on my 2003 red Ram and installed new hood lift shocks. Ordered a new belt tensioner, picked up a set of plug wires for it and NGK iridium plugs for it. I'm ashamed to say that everything is original on my truck with 94,000 miles on it.....................
 
Louis, you haven't skipped a beat with the excellent work you're doing. Will have to get ahold of Jeff for a door hinge repair kit myself.

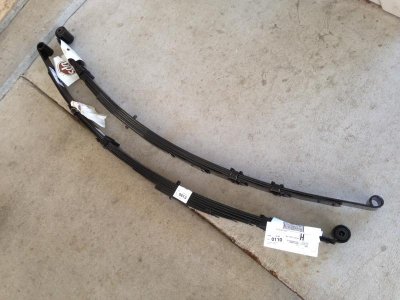
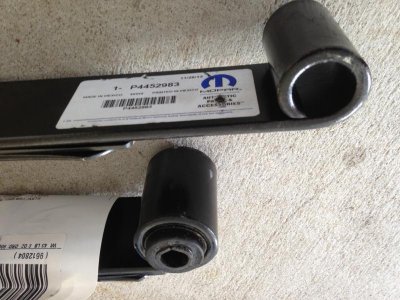
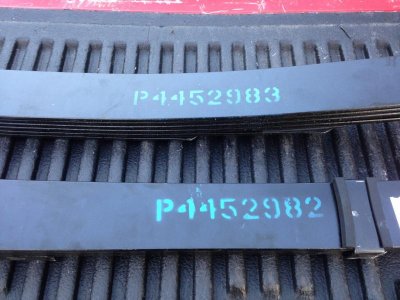
A quick question. Where did you order your leaf springs from? I'm leaning toward getting a new set for my RR.
 
I ordered the leaf springs from Summit Racing if my memory serves me correctly. The ones I got are Mopar Performance ones for a Big Block B Body.

Say that fast 3 times ........ LOL

I think they charged me an $8 up charge for shipping. Since they were over $100 all I had to pay to ship was the $8. They qualified for "free" shipping.

Hope this helps.

- - - Updated - - -

image.jpgimage.jpgimage.jpg

- - - Updated - - -

I just checked their website. They have them in stock at $109.97 each
 
One thing you do when your laid up for a while is think................... Think about what all needs to be done, while you aren't able to do anything about it.

One of the MANY things that was neglected during this time was my poor old 2WD Red 2003 Dodge Ram. Like I mentioned in a post or two ago, pretty much everything on my truck was original. It has 94,000 miles on it. About a month ago before I was cleared for return to work, I had a good friend stop over and he rebuilt the front end on her. He replaced all the ball joints, front bearing hubs, sway bar end links, front brake rotors and pads, and shocks in all 4 corners.

Now I still want to do some preventative maintenance on the cooling system. I picked up all new hoses, a new water pump, thermostat and fan clutch. These parts still need replacing. I don't want to get stranded with a problem since this is my daily driver. Hopefully I can do this in a few days...............

Mean while, I did manage to do a good tune up on the old girl. She needed it.

I know this isn't related to my SSB restoration, but there are some guys on FBBO who have Gen 3 Hemi's. Hopefully this post will help someone if they decide to replace the plugs and wires.

Here goes!!!!

This was a necessity since the ball joints were rusted, squeaking and dry. (and you can't grease them to stop it)

- - - Updated - - -
IMG_5177.jpg

- - - Updated - - -

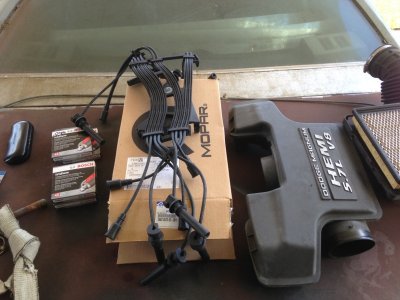
This is what I started with: I bought the factory replacement plug wires since I knew they would fit / function properly.

- - - Updated - - -

I also opted for the Bosch Iridium plugs. The new style Hemi has 16 plugs in it, 2 per cylinder.

- - - Updated - - -
IMG_9368.jpg

- - - Updated - - -

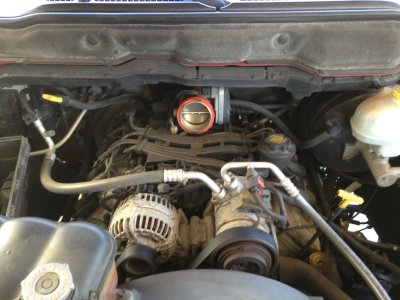
I'm ashamed of this picture, but it shows the ugly truth. The engine compartment in the old girl is pretty dirty. (But it's my daily driver................)

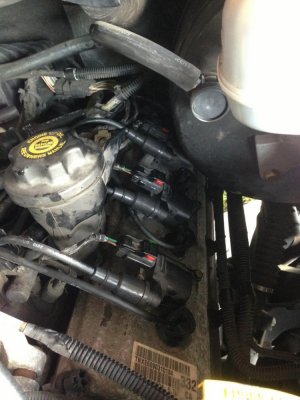
This is what lies under the engine cover. Look at how the plug wires are routed. Now you see why I opted for the factory replacements.

- - - Updated - - -
IMG_1631.jpg

- - - Updated - - -

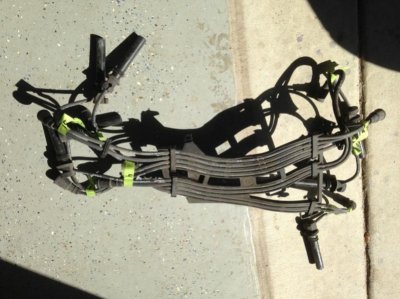
I went ahead and numbered the wires for each cylinder as I pulled them. Then afterwards, I noticed the ARE numbered from the factory........... Doh !!!!!

- - - Updated - - -
IMG_7048.jpgIMG_8720.jpg

- - - Updated - - -

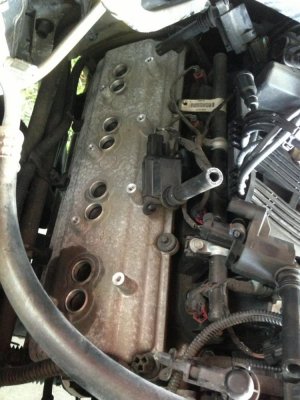
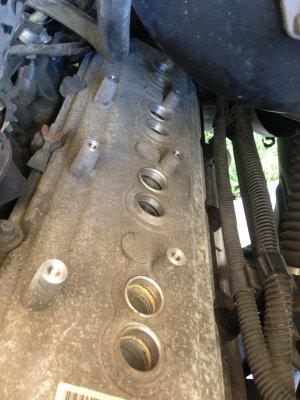
This is what the engine looks like with the coil packs and plug wires removed. The coil pack wires are labelled from the factory with what number cylinder they belong to. makes everything pretty easy.

- - - Updated - - -
IMG_5810.jpg

- - - Updated - - -

I blew out the plug wells and sprayed some penetrating oil in the tubes. Since these plugs were original I didn't want them to seize and destroy the spark plug threads. I also made sure the engine was cold, since this can sometimes affect how the plugs unscrew.

- - - Updated - - -
IMG_4053.jpgIMG_8916.jpg

- - - Updated - - -

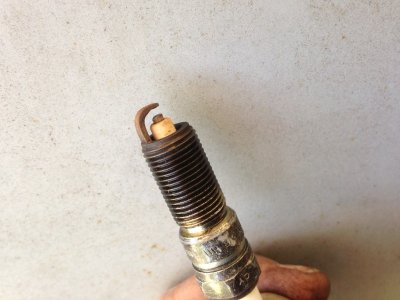
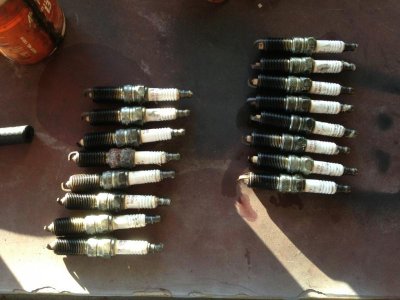
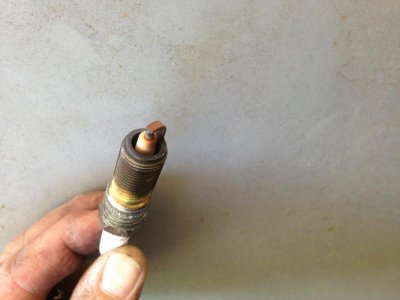
They were burning nice and clean, but you can see how the gap has opened up. They should be set at .045, but these have worn don to .064 as an average gap.

Overall not bad for 94K miles .......................

- - - Updated - - -
IMG_0305.jpgIMG_2326.jpgIMG_9553.jpg

- - - Updated - - -

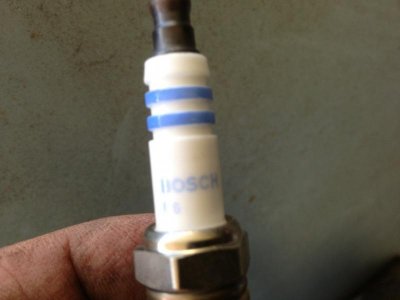
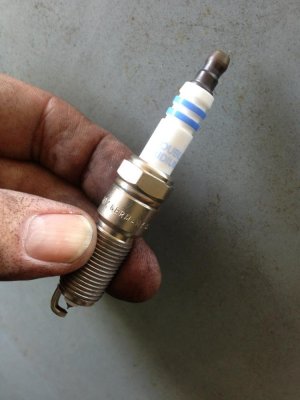
These are the new Bosch plugs. They "claim" a 7 year guarantee. I didn't want to do this again any time soon.

IMG_7549.jpg

- - - Updated - - -

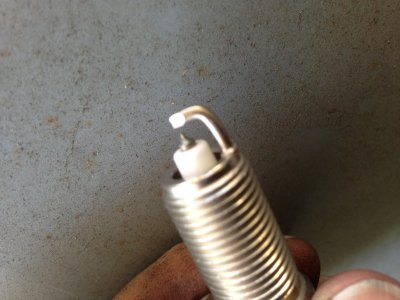
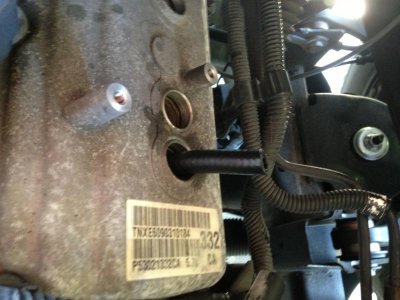
Here is a little trick my Dad taught me many years ago................... It helps to install the plugs, especially in a blind hole like the Hemi's have.

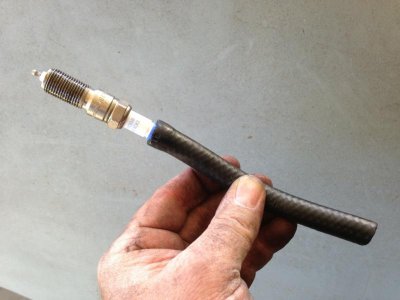
Take a section of rubber fuel line and push the porcelain end into it.

- - - Updated - - -

Then it's simply a matter of twisting the fuel line. I have never had a problem with cross threading the plugs using this method. The hose will slip on the porcelain first.

- - - Updated - - -

View attachment 255933

- - - Updated - - -

This also works when you have a set of tight fitting headers........................

- - - Updated - - -
View attachment 255933

- - - Updated - - -

Then it's a matter of reversing the steps. I used never seize on the plug threads and silicone dielectric contact grease on the plug boots and coil pack sockets.

- - - Updated - - -

View attachment 255934

- - - Updated - - -

Now she is all back together and runs like a Champ. Hopefully the mileage may increase ???? Who knows, but it honestly ran really good before. I was surprised once I saw the gap on the plugs.

- - - Updated - - -

One more thing of the list.............................

Hopefully soon I can get back to the restoration project.

- - - Updated - - -
IMG_4528.jpg
 

Attachments

  • IMG_9755.jpg
    IMG_9755.jpg
    90.4 KB · Views: 292
Hello everyone.

I've been thinking about a LOT of stuff here lately...............

To begin with, I have TOO MANY projects and should probably down size some. I have been toying with the idea of selling off all of my B body cars and parts. I would prefer to make a package deal to someone and sell everything at once. I'm not looking to get rich off of this, but I would like to get most of my money back, and free up some valuable shop / car hauler space. I'm not a car flipper and would rather see these cars completed and back on the road.

Then I can finish up my two Challengers and enjoy them while I still can. I hope you understand, but I'm not getting any younger. Go back and look through the thread if your interested. You can see what all has been collected as far as parts go, and what has been done as far as work on the cars. I have to warn you, there is a LOT of reading............... cool pictures too.

I am going to keep the parts that will fit my Challengers. This will mainly be limited to the six pack set up, engine and 4 speed stuff.

If there is enough interest and I get some good responses, (even though they will be E body cars) I can start a new thread on the Challengers if the majority doesn't mind. A lot of the same techniques used on my Challengers could be used on B body cars as well.

The original car that I started this restoration thread with is a real RM coded N96 Road Runner. 383 column shift auto, B-5 blue, black interior, with a full vinyl top. I have a correct year 383 for it and I may have the numbers matching 727 transmission that came with the car. I have a rust / dent free / complete air grabber hood for this car as well. This car has an open 3.23 geared 8 3/4 with 11 inch drums all around. This car has some rust, but the frame rails and trunk floor are nice.

The second one was an A4 "Winchester Gray" RM coded Road Runner. This car has the original numbers matching 383 engine and column shifted 727 transmission. This car will need lower rear quarters and trunk extensions, but is solid everywhere else. 8 3/4 rear 2.76 open gears and 11 inch drum brakes all the way around.

The last one is the 72 Satellite Sebring. With this car I have invested over 2 grand in just AMD sheet metal alone. I have a 8 3/4 rear for this one too. This car is practically rust free now. It has disc brakes. For this car I have bought a lot of stuff to "Clone" it into a Road Runner. I have several 440 engines and transmissions that I may consider selling as well.

For all of these cars I have the decoded fender and V.I.N. tags, along with clear FL titles registered in my name, so paperwork will not be an issue. I can show you the receipts for most of the parts, so you will know I'm not out to gouge anyone.

Please shoot me a PM if your interested, and I'm sorry for the bad news. I may post the cars and parts up for sale in the "For Sale" section.


Take care.
 
Auto Transport Service
Back
Top