Lots of good work going on here!
You are using an out of date browser. It may not display this or other websites correctly.
You should upgrade or use an alternative browser.
You should upgrade or use an alternative browser.
71 Road Runner Restoration Started
- Thread starter 71airgrabberRR
- Start date
71airgrabberRR
Well-Known Member
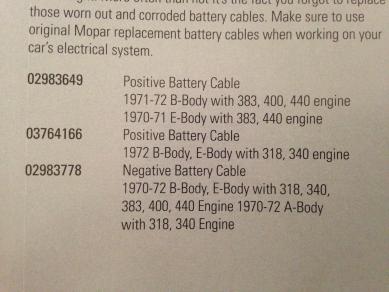
What is that P/N of the neg. battery cables? Are they still available from Ma Mopar?
Thanks!
I just stopped by our local Dodge dealership and the cables are still available.
They list for $89.95 and they have 12 in stock at the distribution hub.
- - - Updated - - -
- - - Updated - - -
Part number is 02983778
- - - Updated - - -
Hope this helps.
- - - Updated - - -
I bought the standard 9" and 18" tongs and I also have the 18" TT-9 tongs that I use the most. I filed the tips to match the original spot welds as the new tips are to small. Plan on making a cart to mount the timer on and hold the spot welder.
good luck!
Pat
They offered a cart for it but didn't have any pictures of it. I will check it out when I pick up the welder to see if they may have located some more info on it. Otherwise I will be making one for sure. Thanks again for all of your help.
- - - Updated - - -
Now I have the cold air assembly and ram air box for my 1500 Ram.
Looks like I have to spend a little time working on the truck now with the exhaust system and hood swap. I'll post up some pics here if you all don't mind.
- - - Updated - - -
Later folks !!!
Bladecutter
"Pursuit of Shape"
Hi Louis, Boy, it sure is looking Good,,,,sano massaging You are doing Friend, major effort.....got my vote & respect.
I got my two 4 cam v-8's today, You know the Bug is getting one, did You ever hear me rattling the bars before about a fake pherrari? Antique Alphabet kit faking 250 GTO Lusso Berlinetta on a Datzun Z. I worked on the first three kits Alhabeg ever sold, in 1983 and now my partner Paul, with Aero Propeller is buying one of the rollers put away for years, the 280Z. Long long but very interezting story, not for here, but the one really interesting aspect is that all trim hardware inc competition alloy gas neck/cap w brass latch is Real OEM Ferrari stuff, Joe Alphabet only sold a handful of kits before Enzo rolled em under in litigations.........we were going to do a Daytona Cobra Coupe 289 clone, but i got this extra toy/lex 4.0 so fingering fate a twat, putting a toyota in a Datsun. I have an Off sense of humor, plus toyota/t(u)rd have me livid, so i thought it might insult them some, lol......it is a pretty bitchen engine, corporate punx aside, a d the kinsler stacks will crown, all USA made electronics to run the custom made efi stax.
I find all that box structure on Your car impressive....looks like a stout sheet metal car, ive never been under the skin on that style......the notched rear frame threw me for a curve. Motors are on Bug tread. ......manana some will be up w engine on tire & pallette behind car for a sense of proportion.....narrowest 4 cam @ 26" wide, shoe in without the shoehorn. Great Work Louis.....jim
I just stopped by our local Dodge dealership and the cables are still available.
They list for $89.95 and they have 12 in stock at the distribution hub.
- - - Updated - - -
View attachment 306664
- - - Updated - - -
Part number is 02983778
- - - Updated - - -
Hope this helps.
- - - Updated - - -
They offered a cart for it but didn't have any pictures of it. I will check it out when I pick up the welder to see if they may have located some more info on it. Otherwise I will be making one for sure. Thanks again for all of your help.
- - - Updated - - -
Now I have the cold air assembly and ram air box for my 1500 Ram.
Looks like I have to spend a little time working on the truck now with the exhaust system and hood swap. I'll post up some pics here if you all don't mind.
- - - Updated - - -
Later folks !!!
Thanks! When I posted, I found the P/N. I think P/N 3764166 is 43" long compared to P/N 2983778 which is 37" long. Other than that, everything is the same. Considering the longer one due to the fact of headers that are going to go on
71airgrabberRR
Well-Known Member
rr Tor-red, I'm pretty sure the first part number you mentioned is for a Positive + cable and not a ground -.
The part number I mentioned was for the ground cable. That's what I thought you were looking for. When running headers I agree that a longer cable would give you more options.
- - - Updated - - -
Thanks 69 GTX !!!!!!!!!!!!!!
- - - Updated - - -
Tomorrow I will try to install the exhaust system on my Ram. I'll snap some photos along the way if anyone is interested...............
- - - Updated - - -
I ran into a small snag with the cold air kit. The box had been opened before we picked it up. Last night I finally got around to inventorying the box contents. That's when I found out the template for cutting the air box was missing.
So after a few calls to our local dealership, I have another kit on the way. They will be warranty returning the box since it has missing parts.
The spot welder did not arrive today
- - - Updated - - -
Here's hoping we all have a great weekend !!!!!!!!!!!!
Later folks....................
- - - Updated - - -
The part number I mentioned was for the ground cable. That's what I thought you were looking for. When running headers I agree that a longer cable would give you more options.
- - - Updated - - -
Lots of good work going on here!
Thanks 69 GTX !!!!!!!!!!!!!!
- - - Updated - - -
Tomorrow I will try to install the exhaust system on my Ram. I'll snap some photos along the way if anyone is interested...............
- - - Updated - - -
I ran into a small snag with the cold air kit. The box had been opened before we picked it up. Last night I finally got around to inventorying the box contents. That's when I found out the template for cutting the air box was missing.
So after a few calls to our local dealership, I have another kit on the way. They will be warranty returning the box since it has missing parts.
The spot welder did not arrive today
- - - Updated - - -
Here's hoping we all have a great weekend !!!!!!!!!!!!
Later folks....................
- - - Updated - - -

71airgrabberRR
Well-Known Member
Well today was one of those days................ Nothing went quite right.
I took my truck over to my neighbors house to use his lift. So far so good..............
- - - Updated - - -
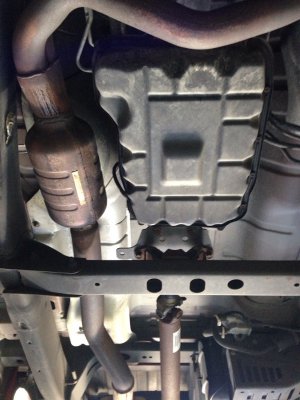
While it was on the lift I snapped these pictures of the exhaust system. You can see how bad it was hacked together. (it was like this when I bought it years ago)
I just never looked at it this closely. Now that it was on the lift, it was the perfect time.......................
- - - Updated - - -
- - - Updated - - -
The cat looking back towards the muffler. Everything so far is stock original....................... At the end of the intermediate pipe you can see where the single Flow master was welded in position.
- - - Updated - - -
- - - Updated - - -
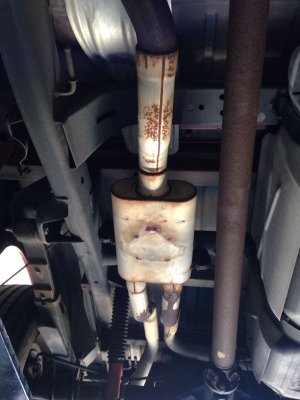
Here is where the original exhaust system was altered. You can see the single muffler and a BUNCH of restrictive bends.
- - - Updated - - -
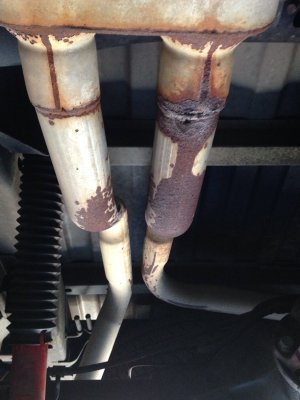
The baffles inside the muffler had broken loose:
- - - Updated - - -
- - - Updated - - -
Dual outlet exhaust tail pipes: These are rusted and had holes in them.
- - - Updated - - -
- - - Updated - - -
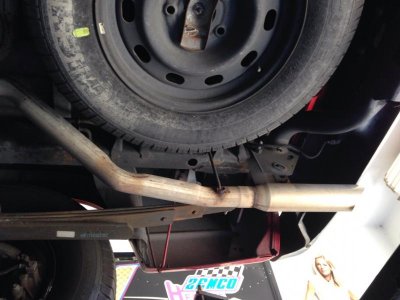
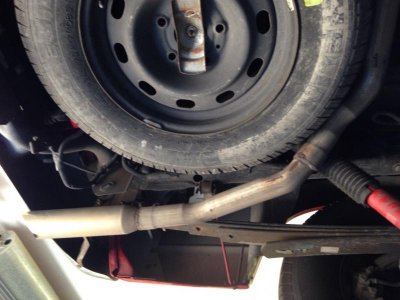
Then we have the right and left side tail pipes:
- - - Updated - - -
Look close at the slip connections. They are wrong and are backwards. I'm sure this caused a little excess back pressure.
- - - Updated - - -
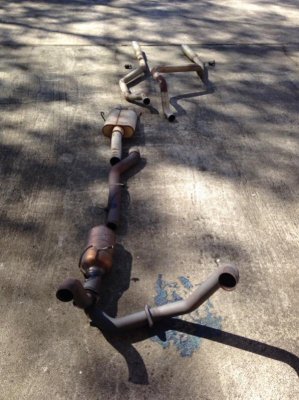
So out comes the Sawzall.............................
- - - Updated - - -
- - - Updated - - -
Looking good so far !!!!!!!!!!!!
- - - Updated - - -
and that's when it hit me like a TON of bricks. I had yet to open the Mopar Performance high flow cat system. Everything was still in the box.
I made a "Rookie" mistake and didn't check the replacement parts before I hacked the old stuff off........................
You see where this is going ??????
- - - Updated - - -
So I unpackaged the high flow cat system hoping for the best.
- - - Updated - - -
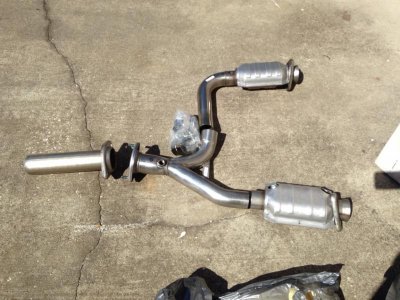
- - - Updated - - -
WRONG answer Private !!!!!!!!!!!!!!!!
- - - Updated - - -
The Mopar Performance system is designed to be used with HEADERS !!!!!!!
and NOT stock manifolds. These have a 3 bolt flange, where the stock manifolds use a 2 bolt flange. Plus the angle is WAY off and the pipes are too short.
- - - Updated - - -
They are "in line" while the stock Y pipe has an up turn to it.
- - - Updated - - -
So I dropped back and regrouped:
- - - Updated - - -
I did some research and spoke with a tech rep from Summit Racing for quite a while. This guy seemed to know what he was talking about. We went over every option available and I ended up having to "Bite the Bullet" and I now have a set of "Mopar Performance" headers on the way.....................
- - - Updated - - -
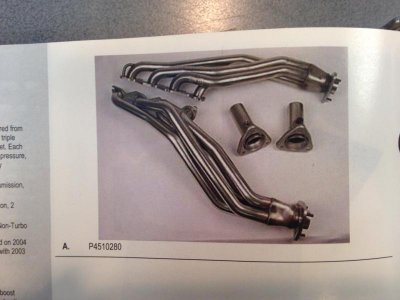
- - - Updated - - -
They are supposed to be the ones used with the cat system I have.
I know I could have probably taken the truck to a local muffler shop, but after judging how the original system looked, I didn't want to chance it.
So our credit card took another hit........................
- - - Updated - - -
But since I have a nice exhaust system (mostly) for the truck now, and a cold air kit, it won't hurt to go ahead and install these headers. Hopefully I will gain some performance out of it.
- - - Updated - - -
I plan on keeping the truck. Life goes on.
- - - Updated - - -
The headers are due to be shipped out by the end of February.
Meanwhile I started blasting the rear valance and the tail light panel in my cabinet.
Hopefully tomorrow I can finish those, along with the K-frame and spray them in black epoxy.
Talk with ya Later !!!!!!!!!!!!!!
- - - Updated - - -

- - - Updated - - -
Here we go again..................
I took my truck over to my neighbors house to use his lift. So far so good..............
- - - Updated - - -
While it was on the lift I snapped these pictures of the exhaust system. You can see how bad it was hacked together. (it was like this when I bought it years ago)
I just never looked at it this closely. Now that it was on the lift, it was the perfect time.......................
- - - Updated - - -

- - - Updated - - -
The cat looking back towards the muffler. Everything so far is stock original....................... At the end of the intermediate pipe you can see where the single Flow master was welded in position.
- - - Updated - - -

- - - Updated - - -
Here is where the original exhaust system was altered. You can see the single muffler and a BUNCH of restrictive bends.
- - - Updated - - -
The baffles inside the muffler had broken loose:
- - - Updated - - -

- - - Updated - - -
Dual outlet exhaust tail pipes: These are rusted and had holes in them.
- - - Updated - - -


- - - Updated - - -
Then we have the right and left side tail pipes:
- - - Updated - - -
Look close at the slip connections. They are wrong and are backwards. I'm sure this caused a little excess back pressure.
- - - Updated - - -
So out comes the Sawzall.............................
- - - Updated - - -

- - - Updated - - -
Looking good so far !!!!!!!!!!!!
- - - Updated - - -
and that's when it hit me like a TON of bricks. I had yet to open the Mopar Performance high flow cat system. Everything was still in the box.
I made a "Rookie" mistake and didn't check the replacement parts before I hacked the old stuff off........................
You see where this is going ??????
- - - Updated - - -
So I unpackaged the high flow cat system hoping for the best.
- - - Updated - - -

- - - Updated - - -
WRONG answer Private !!!!!!!!!!!!!!!!
- - - Updated - - -
The Mopar Performance system is designed to be used with HEADERS !!!!!!!
and NOT stock manifolds. These have a 3 bolt flange, where the stock manifolds use a 2 bolt flange. Plus the angle is WAY off and the pipes are too short.
- - - Updated - - -
They are "in line" while the stock Y pipe has an up turn to it.
- - - Updated - - -
So I dropped back and regrouped:
- - - Updated - - -
I did some research and spoke with a tech rep from Summit Racing for quite a while. This guy seemed to know what he was talking about. We went over every option available and I ended up having to "Bite the Bullet" and I now have a set of "Mopar Performance" headers on the way.....................
- - - Updated - - -

- - - Updated - - -
They are supposed to be the ones used with the cat system I have.
I know I could have probably taken the truck to a local muffler shop, but after judging how the original system looked, I didn't want to chance it.
So our credit card took another hit........................
- - - Updated - - -
But since I have a nice exhaust system (mostly) for the truck now, and a cold air kit, it won't hurt to go ahead and install these headers. Hopefully I will gain some performance out of it.
- - - Updated - - -
I plan on keeping the truck. Life goes on.
- - - Updated - - -
The headers are due to be shipped out by the end of February.
Meanwhile I started blasting the rear valance and the tail light panel in my cabinet.
Hopefully tomorrow I can finish those, along with the K-frame and spray them in black epoxy.
Talk with ya Later !!!!!!!!!!!!!!
- - - Updated - - -

- - - Updated - - -
Here we go again..................
Bladecutter
"Pursuit of Shape"
I dont play with plastic, always figured for me it would equate to playing w fire.....got my M/T's
mounted today, the de-accessoried moteur is lined up close to position & whls/tyres are on.
One word........."HYDE"........adapt & clutch kit monday............nice looking set of
p-p-p-piiippes!!!(cosby, 200 mph) You have there
M8........nice show You have happening Grabber
mounted today, the de-accessoried moteur is lined up close to position & whls/tyres are on.
One word........."HYDE"........adapt & clutch kit monday............nice looking set of
p-p-p-piiippes!!!(cosby, 200 mph) You have there
M8........nice show You have happening Grabber
71airgrabberRR
Well-Known Member
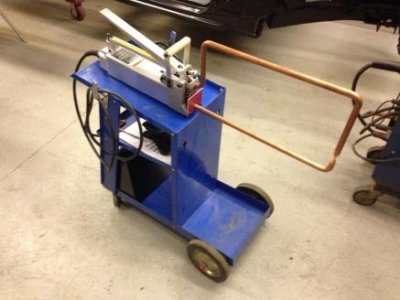
I was able to get a LOT done over the last few days. To begin with I picked the new Miller spot welder up...........
- - - Updated - - -
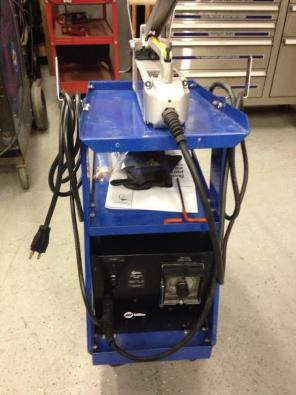
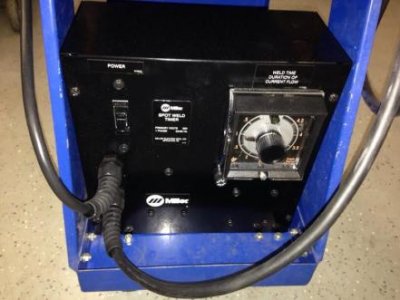
- - - Updated - - -
I used my old blue cart from my MIG welder...............
Now I need to get the correct 220 V outlet for the chord so I can start using this bad boy !!!!!!!!!!!
- - - Updated - - -
- - - Updated - - -
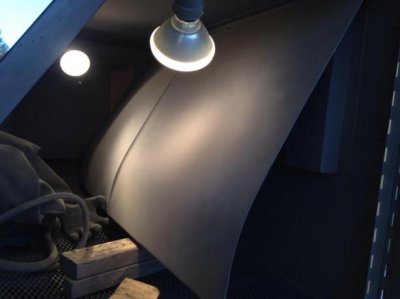
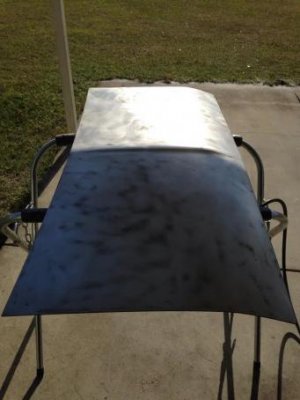
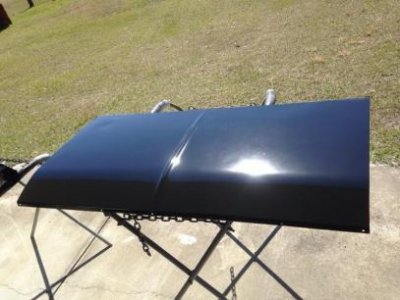
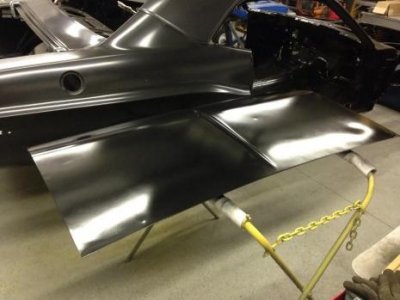
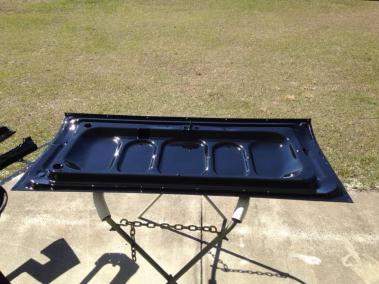
I was able to remove all of the old paint and body filler from the trunk lid. Then I glass beaded it down to nice clean metal...................
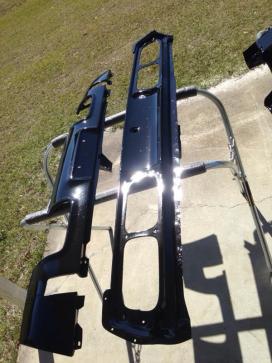
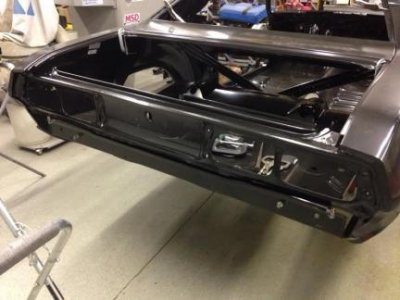
I also glass beaded the rear lower valance, tail light panel and K frame.
- - - Updated - - -
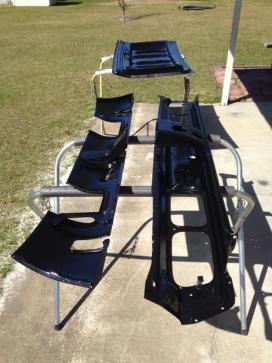
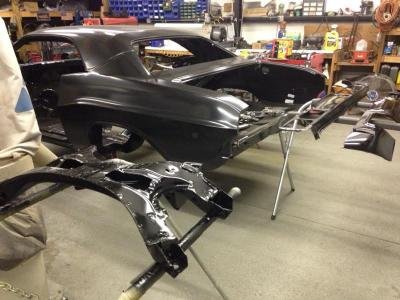
Then today I sprayed these parts in black epoxy primer.
- - - Updated - - -
- - - Updated - - -
- - - Updated - - -
- - - Updated - - -
- - - Updated - - -
- - - Updated - - -
Then I had to set the tail light panel in place just to see how it looked.....................
That's all for now.
The new season of "Vikings" is coming on. Can't miss it. Later folks !!!!!!!!!!
- - - Updated - - -


- - - Updated - - -
I used my old blue cart from my MIG welder...............
Now I need to get the correct 220 V outlet for the chord so I can start using this bad boy !!!!!!!!!!!
- - - Updated - - -


- - - Updated - - -
I was able to remove all of the old paint and body filler from the trunk lid. Then I glass beaded it down to nice clean metal...................
I also glass beaded the rear lower valance, tail light panel and K frame.
- - - Updated - - -
Then today I sprayed these parts in black epoxy primer.
- - - Updated - - -


- - - Updated - - -


- - - Updated - - -

- - - Updated - - -

- - - Updated - - -

- - - Updated - - -
Then I had to set the tail light panel in place just to see how it looked.....................
That's all for now.
The new season of "Vikings" is coming on. Can't miss it. Later folks !!!!!!!!!!
- Local time
- 3:03 PM
- Joined
- Mar 14, 2012
- Messages
- 19,490
- Reaction score
- 41,013
- Location
- Surrey, B.C. Canada
Now I need to get the correct 220 V outlet for the chord so I can start using this bad boy !!!!!!!!!!!!!
If you mean the 220 outlet you have doesn't match the 220 cord on the spot welder, you can get adapters for that. My Miller wire feed and my compressor are both 220 but have different plugs, so I run an adapter on the welder so they both fit the same dryer style outlet. It's actually an adapter cable so I get another 15 feet out of it that way.
Bladecutter
"Pursuit of Shape"
Darn, the pics arent coming up for me right now......we're going to buy a wire feed here soon, going to run some pipe in the fake pherrari.......Good Luck w/ the Miller spotter.I was able to get a LOT done over the last few days. To begin with I picked the new Miller spot welder up...........- - - Updated - - -View attachment 308172View attachment 308173View attachment 308174- - - Updated - - -I used my old blue cart from my MIG welder...............Now I need to get the correct 220 V outlet for the chord so I can start using this bad boy !!!!!!!!!!!- - - Updated - - -View attachment 308175View attachment 308176- - - Updated - - -I was able to remove all of the old paint and body filler from the trunk lid. Then I glass beaded it down to nice clean metal...................I also glass beaded the rear lower valance, tail light panel and K frame.- - - Updated - - -Then today I sprayed these parts in black epoxy primer.- - - Updated - - -View attachment 308177View attachment 308178- - - Updated - - -View attachment 308179View attachment 308180- - - Updated - - -View attachment 308181- - - Updated - - -View attachment 308182- - - Updated - - -View attachment 308183- - - Updated - - -Then I had to set the tail light panel in place just to see how it looked.....................That's all for now. The new season of "Vikings" is coming on. Can't miss it. Later folks !!!!!!!!!!
Now i see them, Nice Louis! Both welder & car.,..sweet ressurection.......i have to to get a hand held blaster.for cleaning up my pan & under pinnings..
Burt36b
Member
Nice project! I had a 1971 Roadrunner 383 Magnum with a 727 torque flight as my first car. It was in pretty bad shape, but the drive train was great. If the car is to be driven often, I would install the 383 and increase the compression. If the car is only to be driven once in a while, I would install the 440 six pack. I would install power disc brakes and air conditioning since I would drive the thing. I liked the factory exhaust manifolds and dual exhaust as a street car. I would also install the Mopar electronic ignition. I am looking at a 1971 project Roadrunner in the near future myself. The motor mounts broke free on my car, but I suspect you can get a newer style that have features to prevent the engine twisting up in the compartment. I hope you post pictures as the project progresses. Good luck!
Burt
Burt
71airgrabberRR
Well-Known Member
Burt36B sounds like you had a nice car.
- - - Updated - - -
I haven't been posting much on here because I have been concentrating on getting my Dodge Ram squared away........................
I did get a lot done on it. Hopefully soon it will be back on the road.
- - - Updated - - -
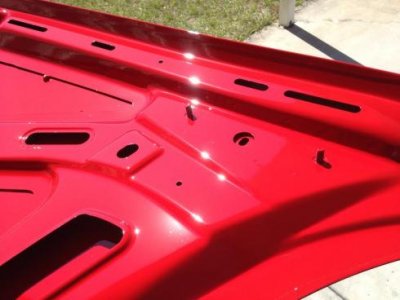
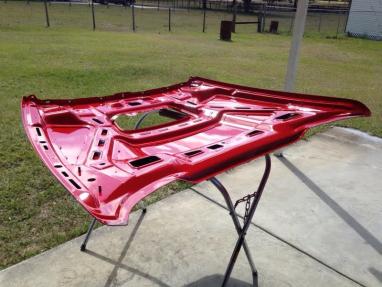
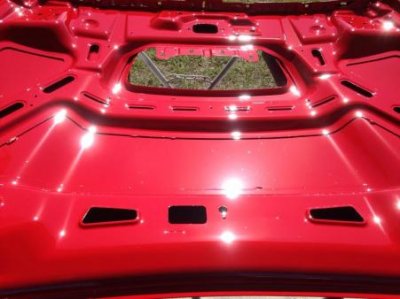
To begin with, I painted the hood.........................
- - - Updated - - -
- - - Updated - - -
I started with the underside and let it dry a few days..............................
- - - Updated - - -
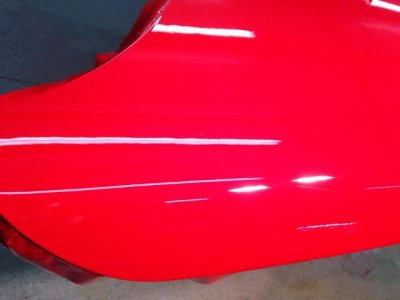
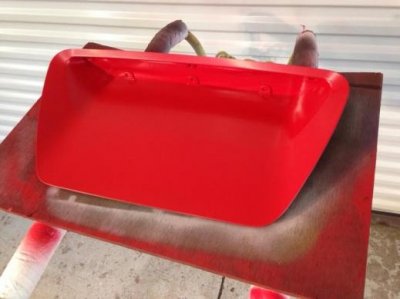
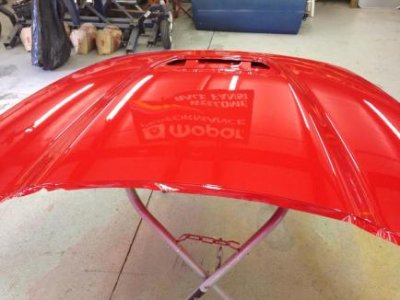
Then after the paint had cured enough, I flipped it over and painted the top side and air intake scoop.
- - - Updated - - -

- - - Updated - - -
I am waiting for the weather to warm up just a little more before I wet sand and buff the clear.........................
- - - Updated - - -
There are a few small dirt particles in the clear that need to be taken care of.................
- - - Updated - - -
- - - Updated - - -
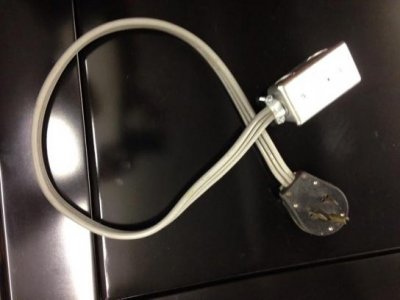
and I made a "pig tail" for the spot welder, so I can use my new Miller spot welder now..............................
- - - Updated - - -
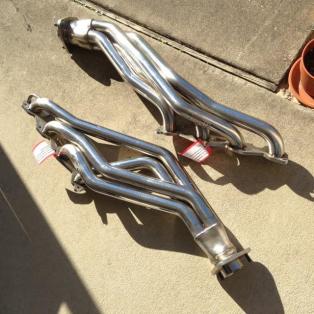
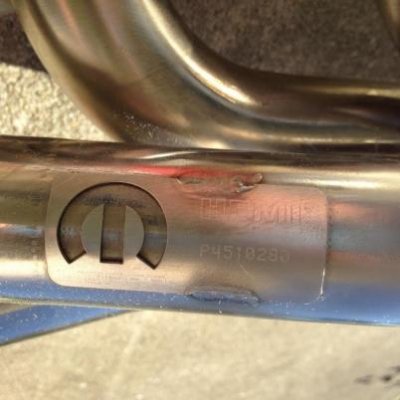
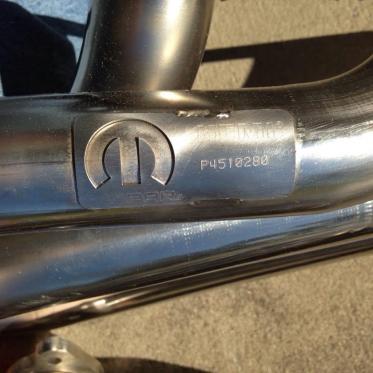
Yesterday the new headers arrived:
- - - Updated - - -
- - - Updated - - -
So today I removed what was left of the exhaust system on the Ram.
- - - Updated - - -
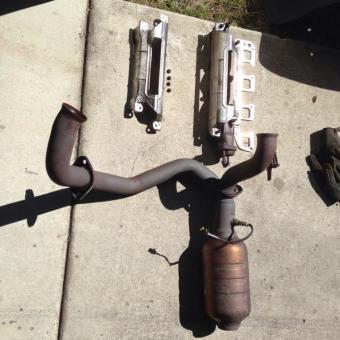
- - - Updated - - -
Once everything was out of the way I cleaned up the port openings.
- - - Updated - - -
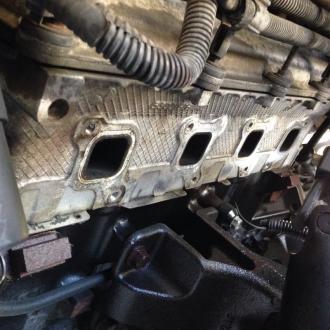
- - - Updated - - -
and bolted the new tubes in place............................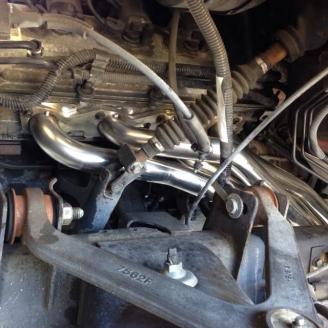
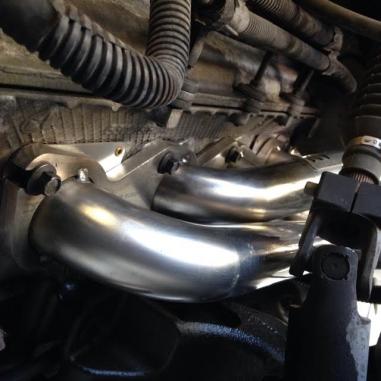
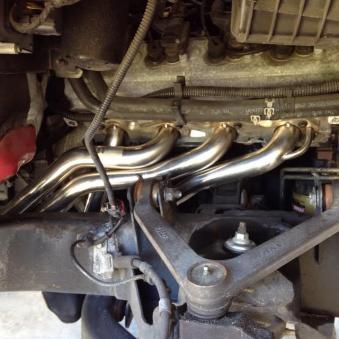
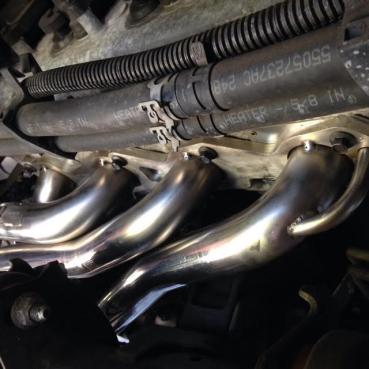
- - - Updated - - -
Removing the inner fender liners made it a LOT easier.....................
- - - Updated - - -
These headers have a nice thick flange and the ports were de-burred.
- - - Updated - - -

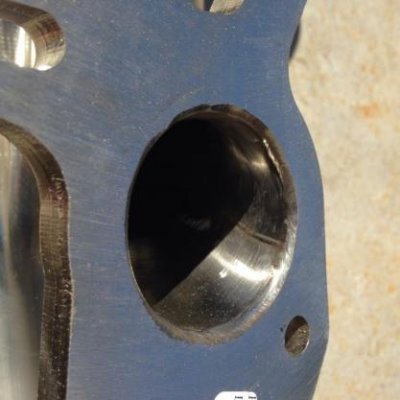
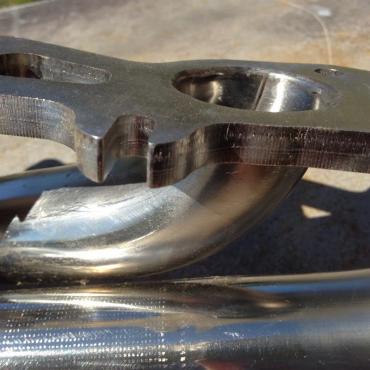
- - - Updated - - -
They fit like a glove.............. I'm VERY impressed with them so far.
- - - Updated - - -
Then it was time to install the high flow cat system...............................
- - - Updated - - -
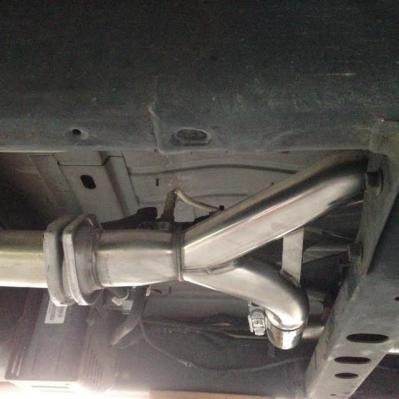
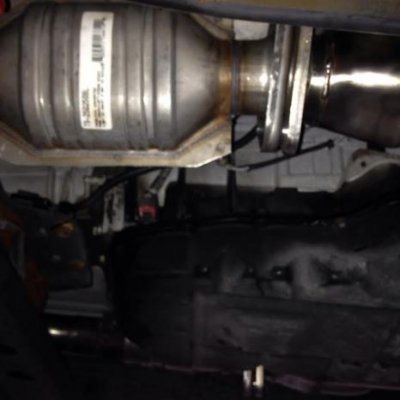
- - - Updated - - -
and finally the Flow Master exhaust.........................
- - - Updated - - -
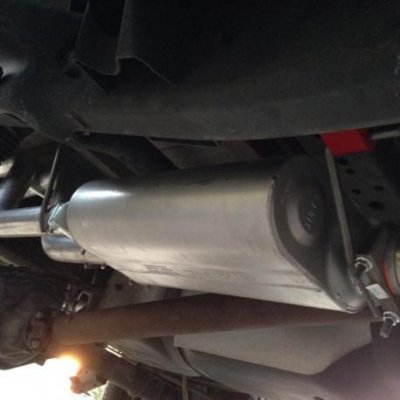
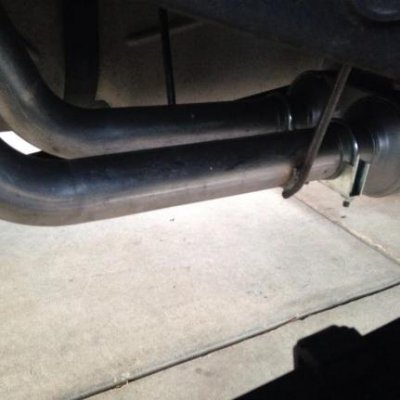
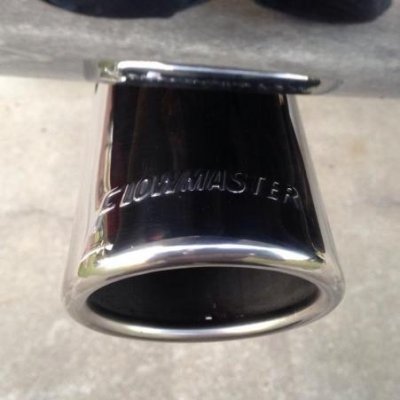
- - - Updated - - -
The truck sounds great and I don't have any leaks (so far) LOL
- - - Updated - - -
Maybe tomorrow I can replace all of the old hoses, thermostat, water pump and fan clutch. Then if I have time I will try to get the cold air kit mounted too.
Until then !!!!!!!!!!!!!!!!!
Have a good one.
- - - Updated - - -
I haven't been posting much on here because I have been concentrating on getting my Dodge Ram squared away........................
I did get a lot done on it. Hopefully soon it will be back on the road.
- - - Updated - - -
To begin with, I painted the hood.........................
- - - Updated - - -


- - - Updated - - -
I started with the underside and let it dry a few days..............................
- - - Updated - - -
Then after the paint had cured enough, I flipped it over and painted the top side and air intake scoop.
- - - Updated - - -


- - - Updated - - -
I am waiting for the weather to warm up just a little more before I wet sand and buff the clear.........................
- - - Updated - - -
There are a few small dirt particles in the clear that need to be taken care of.................
- - - Updated - - -

- - - Updated - - -
and I made a "pig tail" for the spot welder, so I can use my new Miller spot welder now..............................
- - - Updated - - -
Yesterday the new headers arrived:
- - - Updated - - -


- - - Updated - - -
So today I removed what was left of the exhaust system on the Ram.
- - - Updated - - -

- - - Updated - - -
Once everything was out of the way I cleaned up the port openings.
- - - Updated - - -

- - - Updated - - -
and bolted the new tubes in place............................


- - - Updated - - -
Removing the inner fender liners made it a LOT easier.....................
- - - Updated - - -
These headers have a nice thick flange and the ports were de-burred.
- - - Updated - - -


- - - Updated - - -
They fit like a glove.............. I'm VERY impressed with them so far.
- - - Updated - - -
Then it was time to install the high flow cat system...............................
- - - Updated - - -


- - - Updated - - -
and finally the Flow Master exhaust.........................
- - - Updated - - -


- - - Updated - - -
The truck sounds great and I don't have any leaks (so far) LOL
- - - Updated - - -
Maybe tomorrow I can replace all of the old hoses, thermostat, water pump and fan clutch. Then if I have time I will try to get the cold air kit mounted too.
Until then !!!!!!!!!!!!!!!!!
Have a good one.
- Local time
- 12:03 AM
- Joined
- Oct 16, 2013
- Messages
- 1,598
- Reaction score
- 2,726
- Location
- Kiel Germany (back again)
Love your work Louis, looks fantastic. Your posts are really inspirational.
71airgrabberRR
Well-Known Member
I was able to install the cold air kit. It was easy since I had the passenger side inner fender liner removed................
- - - Updated - - -
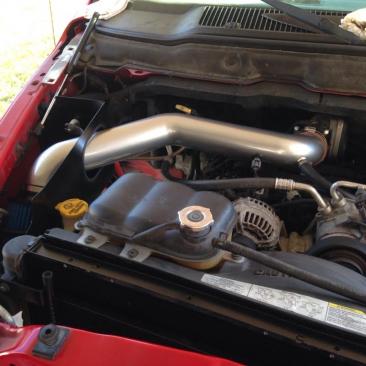
- - - Updated - - -
all of the other mechanical stuff has been done now.
- - - Updated - - -
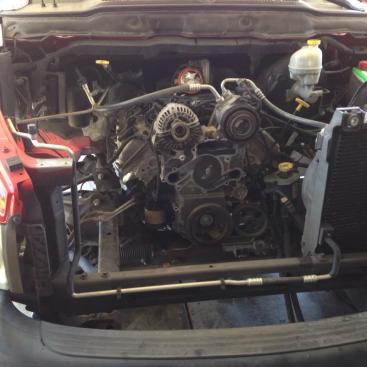
- - - Updated - - -
Here is how it looked with everything apart......................
- - - Updated - - -
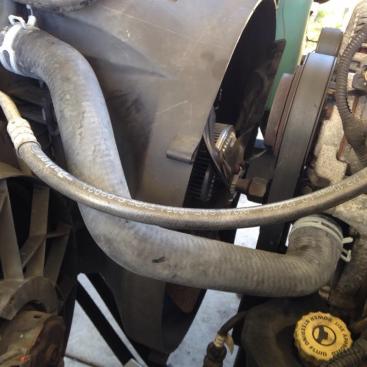
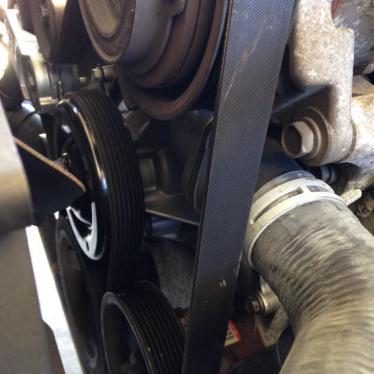
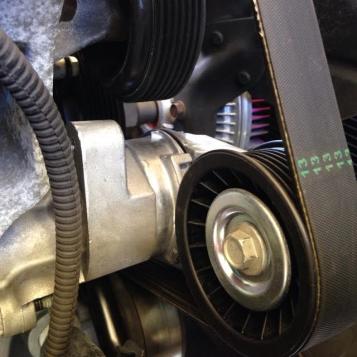
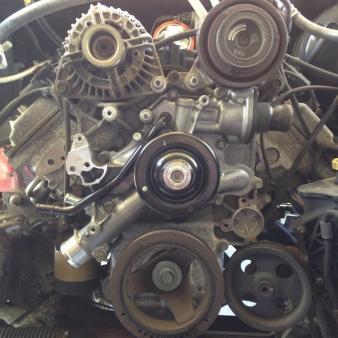
- - - Updated - - -
and now it has all of the new parts back in place..............................
- - - Updated - - -
I installed a new serpentine belt tensioner while I had everything apart.
- - - Updated - - -
Today I wet sanded and buffed out the Ram air hood scoop insert, and started on the hood. The scoop insert is ready to install once the hood has been buffed out.
- - - Updated - - -
Hopefully tomorrow I can get the hood finished...................
- - - Updated - - -
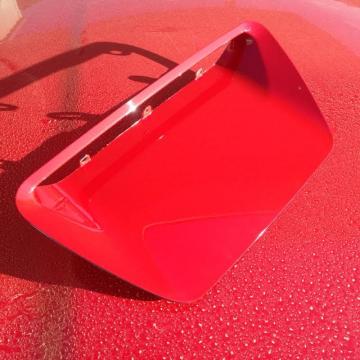
- - - Updated - - -
Here is the hood insert......................
- - - Updated - - -
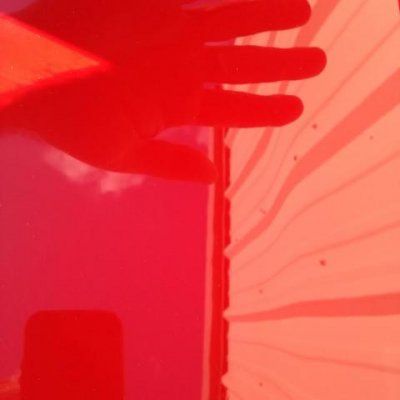
- - - Updated - - -
and a close up of the finish.
- - - Updated - - -
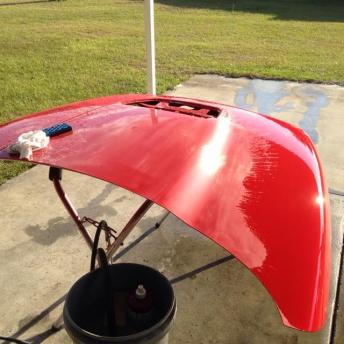
- - - Updated - - -
This one shows the hood after part has been wet sanded with 2000 grit paper.
- - - Updated - - -
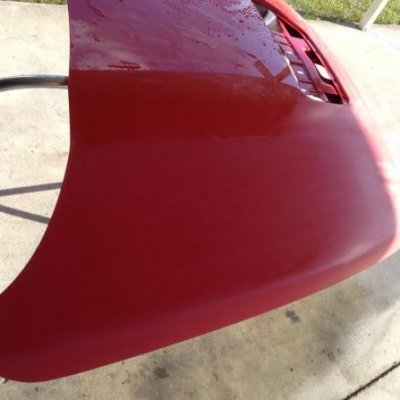
- - - Updated - - -
same thing, different angle.........................
Later Folks !!!!!!!!!!!!!!!!!!!
- - - Updated - - -

- - - Updated - - -
all of the other mechanical stuff has been done now.
- - - Updated - - -

- - - Updated - - -
Here is how it looked with everything apart......................
- - - Updated - - -


- - - Updated - - -
and now it has all of the new parts back in place..............................
- - - Updated - - -
I installed a new serpentine belt tensioner while I had everything apart.
- - - Updated - - -
Today I wet sanded and buffed out the Ram air hood scoop insert, and started on the hood. The scoop insert is ready to install once the hood has been buffed out.
- - - Updated - - -
Hopefully tomorrow I can get the hood finished...................
- - - Updated - - -

- - - Updated - - -
Here is the hood insert......................
- - - Updated - - -

- - - Updated - - -
and a close up of the finish.
- - - Updated - - -

- - - Updated - - -
This one shows the hood after part has been wet sanded with 2000 grit paper.
- - - Updated - - -

- - - Updated - - -
same thing, different angle.........................
Later Folks !!!!!!!!!!!!!!!!!!!
71airgrabberRR
Well-Known Member
I finished wet sanding the hood today.................
- - - Updated - - -
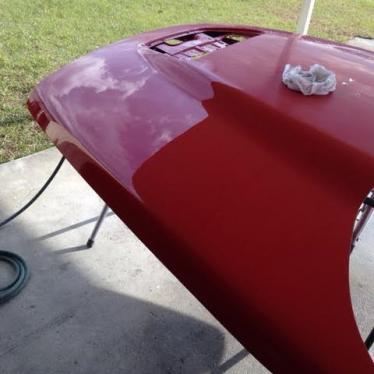
- - - Updated - - -
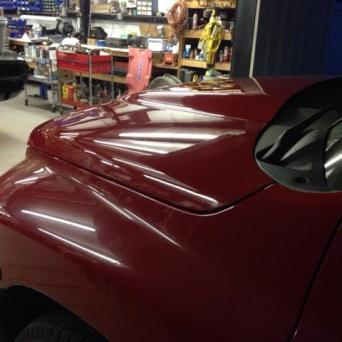
then started buffing it out......................
Here is how it started shaping up.
- - - Updated - - -
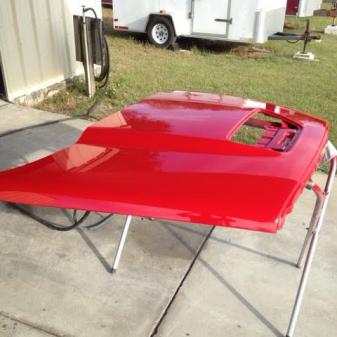
- - - Updated - - -
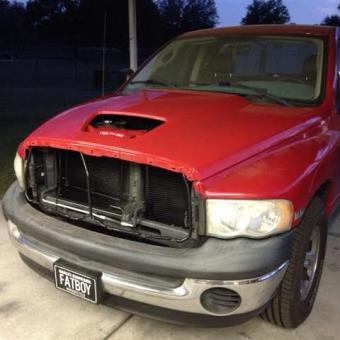
Then I mounted the hood on my truck.
- - - Updated - - -
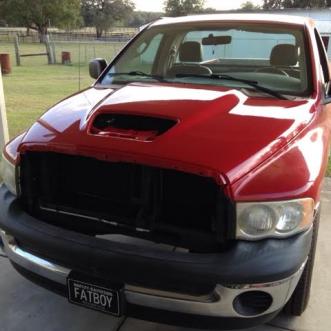
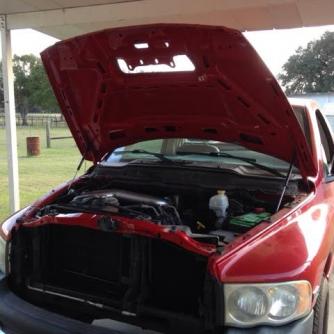
- - - Updated - - -
and started cleaning up the hardware from the original hood.
- - - Updated - - -
- - - Updated - - -
It's hard to see in this photo, but the grill mounting bracket has been installed in this picture.
- - - Updated - - -
and before I knew it, the sun had set and it was dark outside.
- - - Updated - - -
- - - Updated - - -

- - - Updated - - -
then started buffing it out......................
Here is how it started shaping up.
- - - Updated - - -


- - - Updated - - -
Then I mounted the hood on my truck.
- - - Updated - - -


- - - Updated - - -
and started cleaning up the hardware from the original hood.
- - - Updated - - -

- - - Updated - - -
It's hard to see in this photo, but the grill mounting bracket has been installed in this picture.
- - - Updated - - -
and before I knew it, the sun had set and it was dark outside.
- - - Updated - - -

- Local time
- 3:03 PM
- Joined
- Mar 14, 2012
- Messages
- 19,490
- Reaction score
- 41,013
- Location
- Surrey, B.C. Canada
Fatboy looking better all the time!
71airgrabberRR
Well-Known Member
It's been a while since I posted on here. I've been busy with a lot of other things.
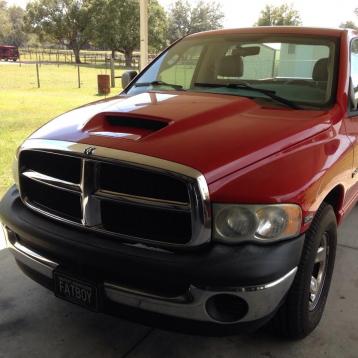
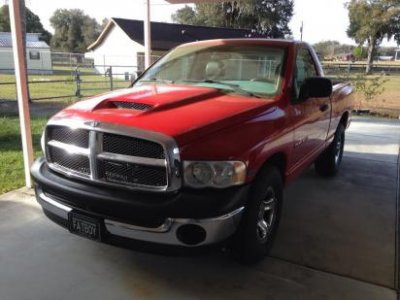
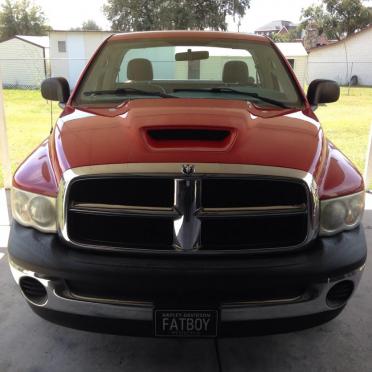
"Fatboy" is back up and running. Here is the end result.
- - - Updated - - -
- - - Updated - - -
I plan on polishing out the head lights one of these days...................
and I still have to cut the cold air box to accept the ram air duct that gets riveted to the underside of the hood.
- - - Updated - - -
I sprayed all of the black plastic on the front bumper with SEM "trim black". It came out pretty nice. These pictures don't do the truck any justice. It really has to be seen in person to get the full effect.
I'm happy with it...................
Later Folks.
- - - Updated - - -
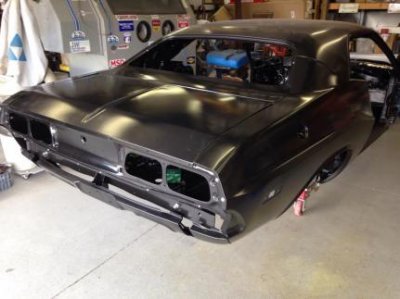
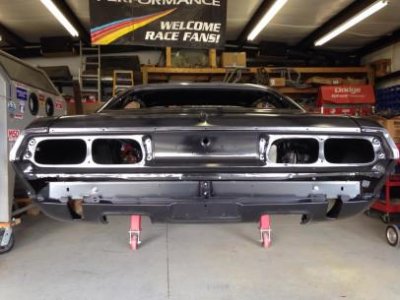
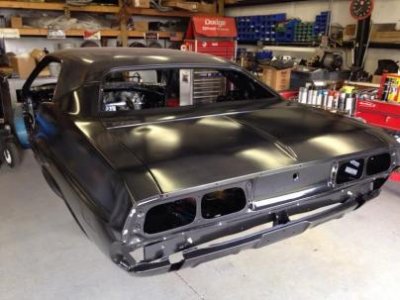
PS: I also managed to get most of the rear sheet metal "mocked up" now on the Challenger. I'm making sure EVERYTHING fits right before I commence welding...............
Here is how she looks currently.........
- - - Updated - - -
- - - Updated - - -
- - - Updated - - -
- - - Updated - - -
"Fatboy" is back up and running. Here is the end result.
- - - Updated - - -


- - - Updated - - -
I plan on polishing out the head lights one of these days...................
and I still have to cut the cold air box to accept the ram air duct that gets riveted to the underside of the hood.
- - - Updated - - -
I sprayed all of the black plastic on the front bumper with SEM "trim black". It came out pretty nice. These pictures don't do the truck any justice. It really has to be seen in person to get the full effect.
I'm happy with it...................
Later Folks.
- - - Updated - - -
PS: I also managed to get most of the rear sheet metal "mocked up" now on the Challenger. I'm making sure EVERYTHING fits right before I commence welding...............
Here is how she looks currently.........
- - - Updated - - -

- - - Updated - - -

- - - Updated - - -

- - - Updated - - -

roadrunnerman
Well-Known Member
that truck looks like a beast with the ram air. Your going to have a brand spanking new car when you get done. Are you going to try for a gold certificate?
71airgrabberRR
Well-Known Member
that truck looks like a beast with the ram air. Your going to have a brand spanking new car when you get done. Are you going to try for a gold certificate?
Thanks for the compliments roadrunnerman !!!!!
As far as the gold certificate, no I'm not. The Challenger will not have a numbers matching drivetrain. It's getting a nicely "Warmed Up" 440 which wasn't available in '73. But otherwise it will be a very nice car when done.
- - - Updated - - -
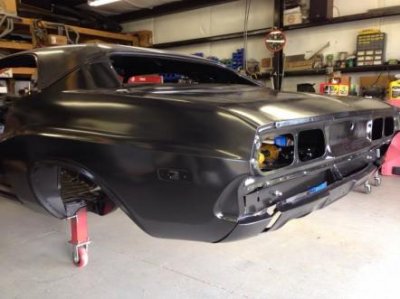
I haven't done anything to the Challenger for a while now. Here's why.........................
- - - Updated - - -
I've been tying up some loose ends. I'm concentrating on finishing up a few projects I started and a "Honey Do" list.
- - - Updated - - -
- - - Updated - - -
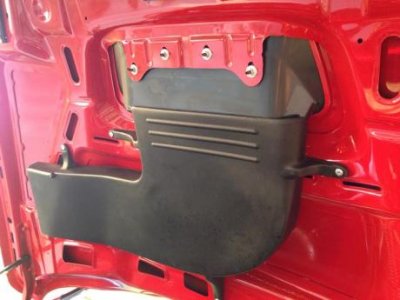
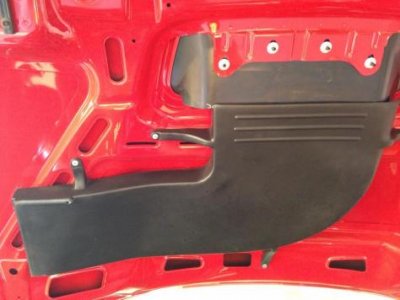
I finally installed the duct work for the "Ram Air" hood on my truck.
- - - Updated - - -
- - - Updated - - -
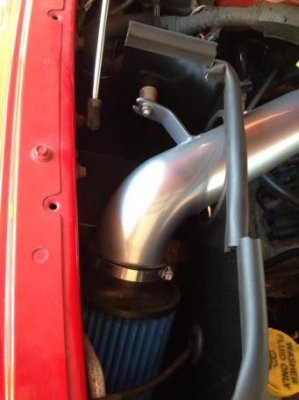
Then I trimmed the "Cold Air Box" as indicated in the instructions so the cold air duct work would seal against the box.
- - - Updated - - -
Now the air inlet coming from the hood scoop is sealed against the cold air box, making it a functional hood scoop.
- - - Updated - - -
So one more "started" project is now completely done / finished.............................
- - - Updated - - -
Now on to the "Honey do"................................
I'll start by saying I have a very understanding wife. Seriously I don't know of another woman who would put up with some of my stunts !!! LOL
Before I hurt my shoulders, (by several months if my memory serves me), I pulled up all of the carpet in our bedroom, living room / formal dining room and master closet.
The "Formal" dining room became a storage area for a hoard of Big Block Mopar engine parts........................
(then I got hurt on the job and couldn't do anything for quite a LONG while.)
Meanwhile we walked around in our house on concrete floors. You see where this is going don't you????
- - - Updated - - -
The stars have finally aligned and the floor is almost done !!!!!!
- - - Updated - - -
- - - Updated - - -
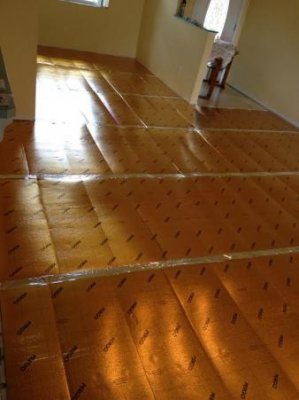
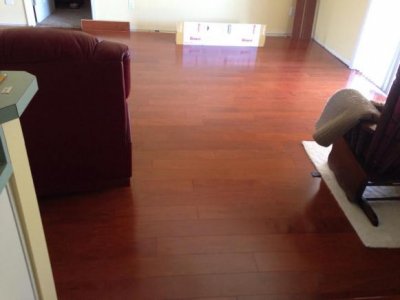
Here I have just finished installing the hard wood floor under layment padding.
- - - Updated - - -
- - - Updated - - -
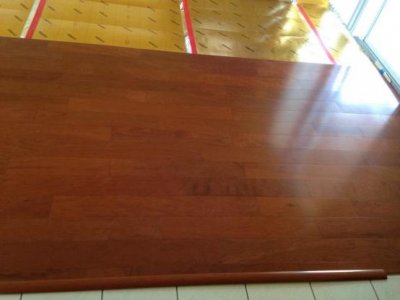
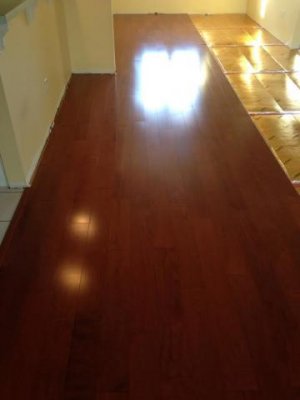
and started installing the wood flooring that has had over 2 years to "adjust" to the "new" environment !!!!!!!!!!!!!!!!!!
- - - Updated - - -
- - - Updated - - -
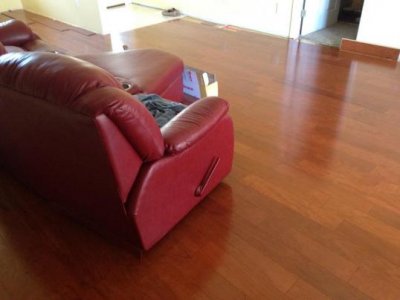
In these photos you can see I have most of the wood down now. Look close in the doorway and you will see new carpet in the bedroom, so that's one less room to install wood.
Also obviously missing are the PILES of Mopar parts in boxes.................
- - - Updated - - -
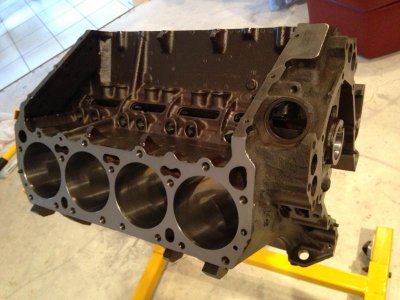
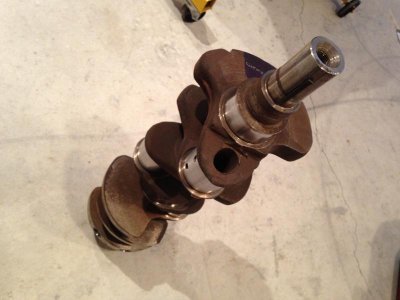
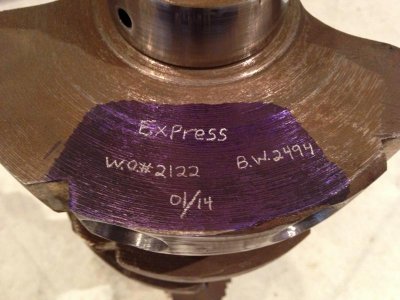
which leads me to the next project that needs to be finished before I do any more body work on the Challenger............................ (I think you will like this one) I started it back in January of 2014.............
- - - Updated - - -
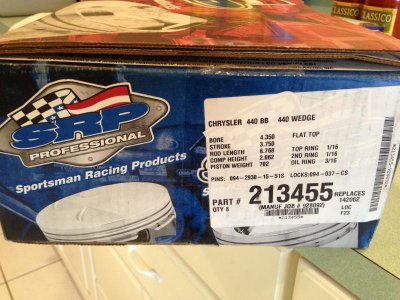
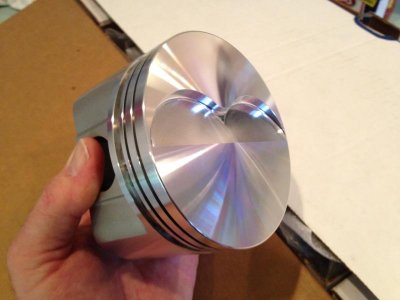
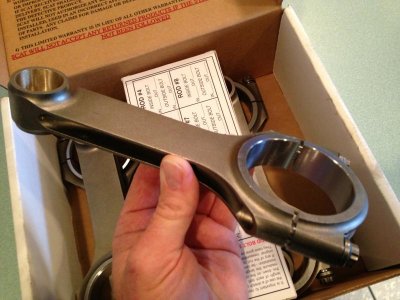
- - - Updated - - -
Look close and you will see the concrete floors............................
Yep, this stuff was in the "Formal" dining room........................
- - - Updated - - -
As soon as I finish the floors, (hopefully in a day or two) I will be breaking out the engine assembly tools and engine test run stand.......................
So please hang in there with me. After all, it's only been a few YEARS !!!!!
man the time has flown.........................
Have a good one.
- - - Updated - - -
and hopefully soon I can scratch another "Started" project off the list.


rr Tor-red, I'm pretty sure the first part number you mentioned is for a Positive + cable and not a ground -.
The part number I mentioned was for the ground cable. That's what I thought you were looking for. When running headers I agree that a longer cable would give you more options.
I was referring to P/N 3764166. A positive, 43" long cable
Similar threads
- Replies
- 127
- Views
- 8K
- Replies
- 0
- Views
- 335
For Sale: Not Mine
1970 Plymouth Road Runner, Sotheby's AZ 2025; VIN: RM23VOG160129
- Replies
- 0
- Views
- 568
- Replies
- 0
- Views
- 235


