• When you click on links to various merchants on this site and make a purchase, this can result in this site earning a commission. Affiliate programs and affiliations include, but are not limited to, the eBay Partner Network.

Finally Bought My Dream Car. 1969 Roadrunner Project

You're doing a fine job for not having any bodywork skills (so you claim) If you put the skins on with the same skill you are doing with what you have done already, they are going to look just fine.
I get plenty of use with a hammer at work.Plus since I work with glass I also have a light touch. So luckily I just incorporate that into this and it worked out. Not to mention research research. I usually soak in a lot of information before I try something. Thank you :happy8:
 
Wow, the dents in the top of that quarter look familiar, I dealt with the same on my 69 RR.

Take it easy with the heat if you can help it. Try to "raise the dents" by reaching inside the trunk opening and pressing firmly against the back side of the dent with the dolly that fits the best. Then strike the top side with the hammer but strike off the dolly, do not strike directly on the dolly. If you hear a "ping" noise, you are DOING IT WRONG. Ping = stretch. You don't want to stretch the metal.

Strike off the dolly around the edge of the dent crater and raise the low areas with the dolly.

When you are done raising the dent with hammer/dolly test the area for oil canning. Push on it with the palm of your hand to simulate the inevitable (some chick is going to hop up on top of that quarter panel and sit on your car like she's in a country music video) You want the top of that quarter to be stout from the back corner of the window to the tail light bezel. If it oil cans, your glaze (filler) will likely pop or crack when wanna be taylor swift load tests it with her bony ***.

This is usually where i use the heat. Not to raise dents but to try and shrink the skin in an area that got stretched from a dent and now oil cans.

But go easy, that heat can be a road that's hard to come back from.

Good luck on the skins.

Prop mentioned that I put some pictures of my skin install in my project thread. I guess I did, I'm so damn slow on my project that I can't remember exactly what I did right now lol.
That's literally exactly what I've been doing and thinking. I pictured in my head someone sitting on the panel and denting it back. It was super flimsy before to the point the dent would pop back but after a couple heat treatments it's stiff enough to lay your hand on firm without it popping back. Thanks for the extra tips
 
Just by looking at the picture (the one looking up the driver side trunk opening from the rear) it looks allot like two of those spot welds are sunken in, I would check those. Not trying to discorage you but when I opened mine up I couldn't believe the rust hidden in between the two panels. It's easy to check, drill a very small hole 1/16 or even smaller into the area that looks like it may be swelled and if it is indeed rust you'll know from all the rust that will come out. I could even see some of it by looking at it from inside the trunk. I hope yours isn't like mine but if it is now is the time to fix it. Good luck
 
Just by looking at the picture (the one looking up the driver side trunk opening from the rear) it looks allot like two of those spot welds are sunken in, I would check those. Not trying to discorage you but when I opened mine up I couldn't believe the rust hidden in between the two panels. It's easy to check, drill a very small hole 1/16 or even smaller into the area that looks like it may be swelled and if it is indeed rust you'll know from all the rust that will come out. I could even see some of it by looking at it from inside the trunk. I hope yours isn't like mine but if it is now is the time to fix it. Good luck
Definitely . I'll check into it might be lead since I didn't get all of it out. If it's rust then I'll find a way to take care of it. I looked at the seam from the inside of the car and it wasn't badly rusted at all
 
You must be talking about a different area, there shouldn't be any lead in the trunk seam. Post #119 3rd picture down, you'll notice two of the forward most spot welds look really deep. Keep up the good work
 
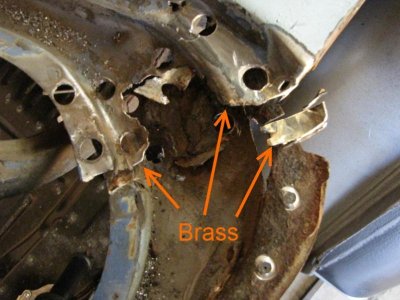
There is some lead and brass brazing in the trunk gutter in the upper corners where it meets the deck filler....Was on my '69 RR anyways. Maybe that's where he's talking about?

ee.jpg
 
Sorry I misread that as roof to quarter seam somehow. Oops haha. I'll check the trunk area when I get home

- - - Updated - - -

Hopefully it's just the lighting I was holding the light at a steep angle to show the quarter dents

 
If you go the skin route just go the panel flange method and lap weld it on the top seam.No ones ever gona see it,also by welding it on top there is less chance of warping as the metal is pretty rigid up there.I used the Goodmark panels and they did need a fair amount of work to make them straight.But they were only $200 a side.might as well plan on the outer wheel houses as long as you got the 1/4 cut off.Daves thread i think has more detailed pics than my 68 GTX thread.
 
Yeah I'm going to replace all the metal I find that is bad. Also my "perfect" front frame rails came in today. Was pretty stoked on them until I noticed the damn front was cut off about an inch. You think that might of been a F****** key thing to mention!...Should of saw it in the pictures but it slipped by me. Pretty annoyed about that. Looks like I'll have some extra fab work on these instead of just a swap and weld in. More I think about it the more it's starting to piss me off.
photo4de.jpg
 
I would still let him know. Maybe he'll cut you a break or a deal on something else. You never know. It's worth a try.
 
I would still let him know. Maybe he'll cut you a break or a deal on something else. You never know. It's worth a try.
Messaged him right after I figured it out wondering why I didn't get told about it. I doubt he would do anything since I got them for 150 and he shipped with the post office and it costed him $98. UPS would of probably been $40 to ship it. I never go through the post office(just sayin). I honestly wouldn't have bought them if I had known about this prior. I figure I'll just cut and dice the front inch to work. Should be easy. But none the less is just something I didn't want to do.
 
another survivor! looks like things are moving along nicely,,
 
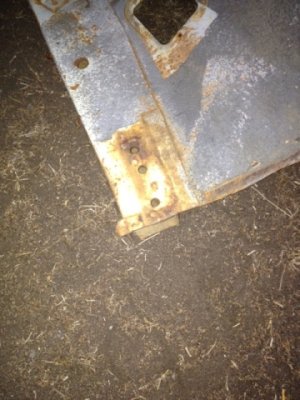
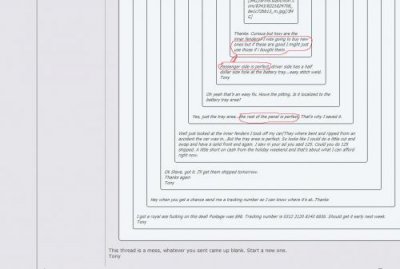
Didn't even notice this but now that I look closer. He cut into the inner fender when he cut them off. Now I cant even use these for my car without surgery. I'm going to file a dispute on paypal if he doesn't answer me by tonight. Such bolshit. He said passenger side was perfect but he forgot to mention he cut into the inner fender an inch!

- - - Updated - - -

Worked it out. I'll be shipping them back on Monday.
 
I'm the guy who sold the framerails. I'll take them back, but next time, try actually looking at the pictures somebody sends you. These "patch panels" were clearly cut clean at both ends. The inner fenders have a straight edge as opposed to the flange they would have if removed directly from the firewall. The framerails themselves were obviously cut at the firewall and core support...intended to be graft in sections for kinked, rotted or cracked frame rails...and that is how I described them. Your oversight is costing us both a bunch of time, energy and cash....but that's how it rolls sometimes.

Oh...and UPS quoted me a price that was only $7 cheaper, so I just shipped the panels with the rest of the stuff that went out that day...just sayin
 
Like I've said before. You knew my intentions for the pieces and failed to mention the fact you had cut off the front of the frame rails. You knew I wanted the front 10 inches as a graft in piece and you knew I wanted the whole inner fender as a swap in piece. You're perfect and my perfect are way different because I would never call a piece perfect if it was blatantly missing the front.
Untitled.jpg
Untitled2.jpg

- - - Updated - - -

Also these 2 pictures you sent me clearly do not show the cut. The look to be intact
8220740413_df71a19da5_m.jpg
8221824708_8e1c72bb13_m.jpg
You tell me how I'm supposed to notice there's a cut in the front when you send me two bite sized images taken from the back side of the inner fenders
 
Not to change the subject, but this is the first I've seen of this thread, and I didn't know that you were a young guy and new to the Mopar thing.
I've looked at the pics you posted of the damaged frame rails. DON'T DO ANYTHING ELSE until you have dropped the K frame and looked at the areas between the K and frame rails themselves. At least half the cars I come across that have had any major hits to the front will have cracks in this area. The K frame is what holds everything from bending, and so the actual bolts are what absorbs the impact. Cracks here are not a total game changer, it just means you have to graft a few inches behind the point where you cut.
 
No cracks. I've already checked

- - - Updated - - -

There was clearly some mistakes on both sides. I'm thinking about just keeping them and working with the front inch since it's better then what I got at the moment. Not to mention don't really feel like dealing with having to ship them. I'll just get my money's worth out of them.
 
Auto Transport Service
Back
Top