• When you click on links to various merchants on this site and make a purchase, this can result in this site earning a commission. Affiliate programs and affiliations include, but are not limited to, the eBay Partner Network.

Finally Bought My Dream Car. 1969 Roadrunner Project

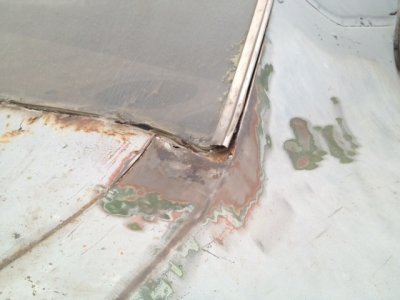
You have the right idea, trunk...quarters....dutchman. One quarter at a time, you won't need to worry about bracing. Judging from the pic's you're also going to need the outer rockers where they are tucked under the quarters back from the door as well as possibly some larger repairs on the outer wheelhouses or new ones. If you can patch that roof rust and possibly fix the window corners with the patches from AMD, I would put quarter skins on the car. JMO.
 
Media Blast is what this car needs! You'll never pick up a wire brush ever again once you get your car media blasted.
Definitely. It's on the list. I'm going to have it done once I remove the trunk floor. I'm going to try and make it as easy as possible for the blaster so he can get it done faster. Which means more $ in my pocket. I'm thinking of telling him to stay away from the roof. Really don't want to risk getting waves but I'm not sure yet.

- - - Updated - - -

You have the right idea, trunk...quarters....dutchman. One quarter at a time, you won't need to worry about bracing. Judging from the pic's you're also going to need the outer rockers where they are tucked under the quarters back from the door as well as possibly some larger repairs on the outer wheelhouses or new ones. If you can patch that roof rust and possibly fix the window corners with the patches from AMD, I would put quarter skins on the car. JMO.
You saying to leave the old quarter on while I replace the other side? Was kinda hoping I would be able to take both quarters off before the blaster(why I was concerned about bracing..but if I can get away with out bracing while having the quarters off I'll begin pulling them off tomorrow). I would save the quarters and go skins. But there's a lot of bondo underneath that grey primer. + I like the Idea of not having to buttweld across the side of the car.... and yeah good eye forgot to mention the outer rockers are shot on the car.
 
If you're ripping both quarters off, I would do some sort of bracing. Skins will cost you $700pr, Full quarters $1450pr......big cost saving and if your metal isn't shot down the gutters, around the window to up the roof, might be worth your while to save that other dough for other panels like the rockers and outer wheelhouses. Also, IMHO..if someone doesn't have a ton of experience, to me skins would be the easier route to go. Mainly because you're working off the old panel placement directly by grafting into it. New quarters, you now need to weld in the proper gap/angle at the Jam, at the quarter window opening, to the roof, in the window opening and corners, along the gutters to the dutchman, truck decklid gap, around the tail light buckets, fill panel and x-member extension. Lotta places to screw up....1/16" over here means 1/8" over there and out of whack 1/4" somewhere else. It can get away from you very quickly. As far as a buttweld down the body, well you have options there. You could run the weld on top of the panels instead of the side, you could flange the old panel and superimpose then weld. Or you could even go the panel adhesive route. Grinding down a buttweld isn't fun, but isn't that hard to do. Yes, you will need some light fill, but you will also need some fill with new quarters as well. But...if you're quarters are shot, well...obviously the answers clear.

No trying to deter you in any manner from full quarters, but be aware they do require a bit more thought and agility to put on without ending up with a crooked car. Going the full quarter route be sure to do a ton of measuring, take a ton of pictures for reference, study the member resto threads where quarters where/are being replaced and don't be afraid to mock up the panels on and off twenty times if that's what it takes.

Blasting is a great idea...gonna save you a lot of time. I would have them epoxy prime it right a way to avoid flash rust. Just touching the metal after blast will create rusty fingerprints on the car.
 
My 68 was over a a half inch off both in height and one rail was in 3/4 of an inch. It was pretty bad. I have a Duster that took a hit in the K frame and it twisted one frame rail. I took it over there and had them look at it and I plan on taking it to them after the first of the year. They are a collision shop which makes them a good candidate for a frame straightening, and they have a real nice frame machine. They have painted a few cars for me and I have had real good experiences with them. They have one guy who does their resto stuff, he is finishing a A66 Challenger right now that got new quarters, trunk floor, extensions, wheel houses, and roof. They used AMD sheetmetal at my recommendation and the car turned out real nice. This isn't a Mopar but this car they painted 5 years ago for me. It still looks real good today, and they really stand behind their work.
 

Attachments

  • DSC04713.jpg
    DSC04713.jpg
    51.6 KB · Views: 495
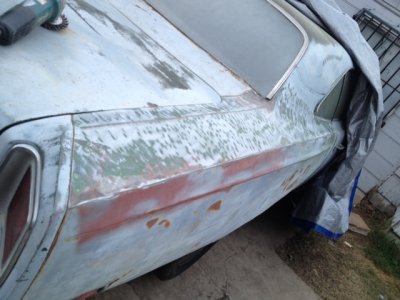
Propswash the more you inform me the more your making me rethink going full quarters. If I went skins I could cut out the window corners and patch in the replacements if I remember correctly. Also I have a pretty nice sized dent in the top of the quarter. But I can push it up with my hand pretty much back into place. Its about a full open hand size. What would you recommend for a dent of this nature. Maybe use the port a pull with the rubber attachment to push the dent out?
 
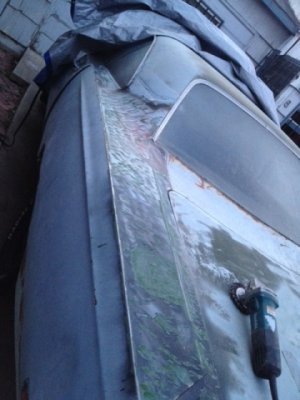
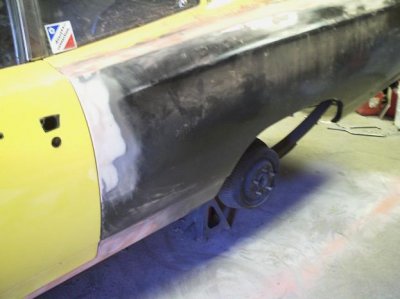
Well I think I'm going to go skins. My quarters look really good on top. A lot better then I expected. Drivers side had one little very itty bitty ding. But not even noticeable. Did some bondo hunting and didn't find anything.

photo13rm.jpg
photo21wa.jpg
Passenger side has the big dent I was talking about. But is otherwise straight.
photo16f.jpg
photo15u.jpg
photo17d.jpg
photo20ml.jpg
halp

- - - Updated - - -

@wingcarenvy That Chevelle is pretty wicked. That shop you showed me never got back to me. Kind of skippin the frame shop for a little bit. Might get the car blasted first. Not in that much of a rush to really get anything done at the moment. Just going with the flow
 
A good media blaster will do the bondo search as part of his job. Roofs, Hoods, are the most prone to behave not nicely when blasted. Got to use a high deflection angle on them to get them clean, slower, but, won't stretch the metal or pound it down this way.
 
I was looking at this How-To on how I might go about doing the skins
http://www.moparmusclemagazine.com/techarticles/body/mopp_0507_panel_rust_removal_2/. I like this way as it seem's fairly simple. I'm a little confused on how they overlap the old metal with the new metal then cut it though. Do you merely just overlap the metal then cut it with the cut-off wheel like shown? Seems like they didn't really explain in detail that key part before they cleco'd everything together. Also do the side marker lights not line up on the roadrunner skins as well? Seems like that would be something they'd fix.
 
That dent doesn't look like anything that can't be dealt with. Few ways to tackle that...Plunger method may work, first you want to clean all the mud out of it to see what you got. You could also use a slide hammer type puller. You could save yourself some coin by buying/renting a slide hammer puller and instead of buying the gun and studs, buy some TIG rod then tac weld it to the dented area, use the puller on the 3-4" long pieces of tac'd on TIG welding rod to pull out. Another method that may work...pop the dent out from the inside, then from the outside use a body hammer and a shrinking dolly (has the crosshatch on the surface) and level it out the best you can. You could also use a body hammer with the shrinking design right on the head of the hammer as well. Once it's as level as you can get it, level out the higher spots with either a flapper disc on a grinder, a file or some 50 grit on a high speed sander (all depends on what tools you have). Level over the rest with some metal to metal filler...Keep it under 1/8 as far as total thickness..the less the better. Another route would be to graft in a new section from a donor car. My current '69 RR project has 4 sections of metal taken from a donor car. The guys on this site were kind enough to cut out an area out of scrapped parts cars to the general size I needed. I shaped and tuned the piece to the exact size I needed and went from there.

Those are just a few ways you could tackle that. Those are what come to mind when looking at your pic's. The trick to restoration is save your money where you can. If new quarters are not essential, like before, I would say go skins. If the outer rockers or outer wheelhouse lips just need patches to fix, well patch them. AMD makes the best fit, but they're the most expensive as well. If you could save yourself some lute by buying the cheaper panels from folks like autobody specialties or Sherman, I would if you're just going to section them for patch material anyways.

As far as going with skins, there are plenty of guys here that can guide you along the way, including myself. I enjoy helping out when I can. Northerndave's thread over in member restorations (69 RR facelift) has a real good depiction on how he did it. Google away on the internet, watch some youtube video's, ask tons of questions to guy that have done it. It's not as hard as you possibly think. Most of all this work a lot of folks could do. It's a matter of putting in the effort to learn and work, having common sense and growing some skills along the way. It's not rocket science by any means. You're off to a great start by already asking questions and documenting your work for further reference down the road. Walk into the project with your chin up, prepared to do what it takes and have a clear goal. If you put your mind to it, you can achieve anything...and that's not just some old saying to rattle the dust off of folks. Some of the biggest and most intense rebuild/modifications going on here at FBBO are not UTI autobody graduates or retired Boyd Coddington employee's, they're guys like you and me that found their dream car and are doing what it takes to bring it back to life. Myself and the other sheetmetal vets will be following along with your thread no matter what route you go..Best of luck Stevo and it's time to roll up the sleeves.
 
Thanks a lot again propwash. There was no mud on the big dent. Just the original paint so luckily that's the worst of it. I definitely wont be doing just patch work on these quarters as they are LOADED with bondo and previous old school slide hammer repair on the sides. So I'll be using the full skin on the car. A plunger might just work perfect on that dent haha. I'll have to give it a shot. If none of the things you mention work out to where I like it I wouldn't mind patching the area like you said. There's no rust but the metal feel's flimsy where that dent is. Idk if that's normal for these cars in that area. Also I see this car as a huge learning experience so I'm not afraid to try anything (Luckily I have some experience ). Never planned on it being a A+ quality show car. But I'd like to get it as perfect as I can. I plan to drive this car pretty hard as well so it will not be a trailer queen. Might be my every other day daily driver.
 
There you go man...Drive the heck out of it! That's what Mopar built it for. Not to shove mirrors under it and park on grassy plots on Sunday afternoons. Sounds like a good plan to me.

As far as that article...halfway decent. Mopar Muscle has some good stuff out it now and then. I believe they where just being a bit finiky with that marker reflector hole. Pretty easy graph to do. I know AMD pretty much has their Q-Panel skins dialed in for the RR,Charger,Coronet these days.

BTW...sorry if it seems like i'm talking at you and explaining things in a real generic and simple manner like you've never done anything before. I honestly don't know your capabilities or what you've done in the past. We get a lot of guys on here that have never tested the waters before when it comes to sheetmetal work so that's why I come across that way
 
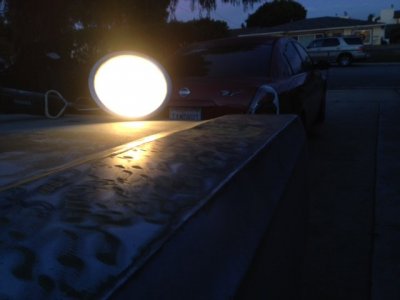
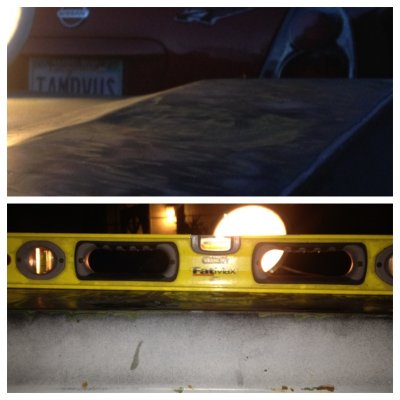
Welp..Pretty much got the dent pushed out. I think with minimal hammer and dolly work it will be perfect. Used my port a puller and a torch. Then when i heated it up I threw a cold wet rag on top of it real fast. Put a flat block of wood the size of the dent on top of the puller then just pushed the dent up until it was flush. The paint gives the illusion of the dent still being there. But it's pretty much worked all up. I'll sand it bare tomorrow to get a better look. Lil before after you can see the level sit's flush across the panel now where as before it was sunk in a 1/4
diptic.jpg

- - - Updated - - -

There you go man...Drive the heck out of it! That's what Mopar built it for. Not to shove mirrors under it and park on grassy plots on Sunday afternoons. Sounds like a good plan to me.

As far as that article...halfway decent. Mopar Muscle has some good stuff out it now and then. I believe they where just being a bit finiky with that marker reflector hole. Pretty easy graph to do. I know AMD pretty much has their Q-Panel skins dialed in for the RR,Charger,Coronet these days.

BTW...sorry if it seems like i'm talking at you and explaining things in a real generic and simple manner like you've never done anything before. I honestly don't know your capabilities or what you've done in the past. We get a lot of guys on here that have never tested the waters before when it comes to sheetmetal work so that's why I come across that way
Oh no dont worry about it. I'm by all means a body work beginner. I've done pretty much everything except body work. So it's come time to learn this part of the hobby. I like when stuff is explained in more detail anyways.:hello2:
 
just had skins put on mine. very pleased with how they turned out.
and Chris.....nice to see you showing off the ultra rare Chevelle striped beauty(road runner site joke)
 

Attachments

  • IMAG0010.JPG
    IMAG0010.JPG
    58.2 KB · Views: 505
just had skins put on mine. very pleased with how they turned out.
and Chris.....nice to see you showing off the ultra rare Chevelle striped beauty(road runner site joke)
Nice! What method did they use or you use to weld the seam?
 
butt weld. buddy doing it, beyond my welding skills for this car.
haven't seen your latest pics over on the runner site.....:poke:
 
butt weld. buddy doing it, beyond my welding skills for this car.
haven't seen your latest pics over on the runner site.....:poke:
Yeah I use my phone a lot and I never fixed my password there so it's always a pain to log on. Usually only go on there through my computer. I'll update everyone over there when I get home if I get a chance :tongue5:
 
I didn't have time to read your full post but I wanted to mention something that you should look at if it hasn't already been brought up. I was in your situation with deciding full quarters or skins on my 69 charger, the quarters didn't look bad except behind the wheel opening and some dents. The area where the quarters are spot welded to the trunk gutters ended up being the deciding factor. Look at the spot welds closely, if you see a hump around the spot welds or what looks like a really deep spot weld suspect a rust build up between the layers pushing them apart and leaving that deep spot weld look. When you have a rusted out trunk that usually means it has had a lot of water in it, add heat and you have a seam box (you can see where I'm going with this). Once I noticed that I drilled into the seam and sure enough out came a lot of rust, further inspection showed the same issues around my tail light panel. I cut everything from the doors back off except the frame rails which where somehow in excellent condition. This was my first full restoration and first time installing any type of quarter panel, personally I think a full quarter panel replacement is a lot easier then a skin replacement. The reason is because, while I may not have replaced a quarter panel before I have done a lot of patch and small panel replacements and warpage is the biggest thing to combat. Welding a full quarter on is nothing but spot welds making it less likely to warp the panel. I didn't think it was hard at all, just a lot of on and off fitting and a lot of clamps, self drilling screws proved to be a huge help. I drilled all of the spot weld holes to be welded and then put a screw in every other one, welded all of the holes then removed the screws and welded them as well. The final result came out really good with no fitment issues. AMD makes some good parts
 
I didn't have time to read your full post but I wanted to mention something that you should look at if it hasn't already been brought up. I was in your situation with deciding full quarters or skins on my 69 charger, the quarters didn't look bad except behind the wheel opening and some dents. The area where the quarters are spot welded to the trunk gutters ended up being the deciding factor. Look at the spot welds closely, if you see a hump around the spot welds or what looks like a really deep spot weld suspect a rust build up between the layers pushing them apart and leaving that deep spot weld look. When you have a rusted out trunk that usually means it has had a lot of water in it, add heat and you have a seam box (you can see where I'm going with this). Once I noticed that I drilled into the seam and sure enough out came a lot of rust, further inspection showed the same issues around my tail light panel. I cut everything from the doors back off except the frame rails which where somehow in excellent condition. This was my first full restoration and first time installing any type of quarter panel, personally I think a full quarter panel replacement is a lot easier then a skin replacement. The reason is because, while I may not have replaced a quarter panel before I have done a lot of patch and small panel replacements and warpage is the biggest thing to combat. Welding a full quarter on is nothing but spot welds making it less likely to warp the panel. I didn't think it was hard at all, just a lot of on and off fitting and a lot of clamps, self drilling screws proved to be a huge help. I drilled all of the spot weld holes to be welded and then put a screw in every other one, welded all of the holes then removed the screws and welded them as well. The final result came out really good with no fitment issues. AMD makes some good parts
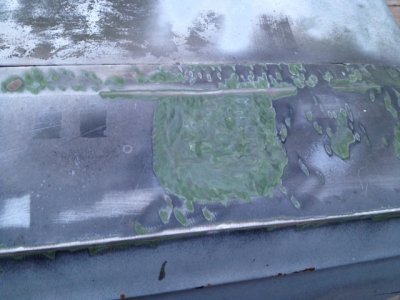
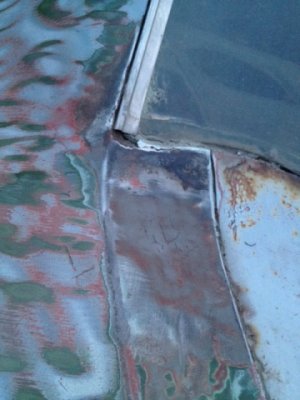
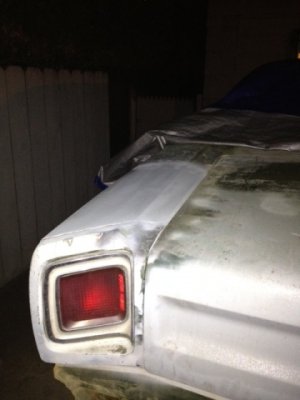
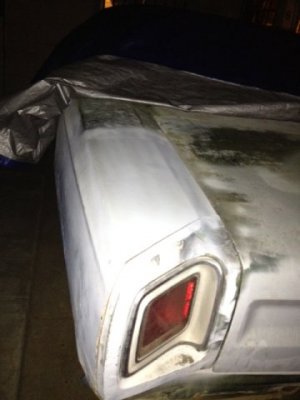
I'll look into that when I get a chance. Probably Thursday. Tonight I just worked on the top of that quarter panel. Have a high spot and 3 little dings to work out. There hardly noticable now unless you shine the light at a angle. But still going to work them a little more. Still way better then what it was.
photo26ag.jpg
photo25g.jpg

photo23xr.jpg
photo22wh.jpg
photo24s.jpg
This was my first shot at hammer dolly work and after researching it for a bit the past couple weeks I just jumped in and went for it. Had a real bad high spot that wouldn't work out no matter how much I worked on it. Heated it cherry red about the size of a quarter with my torch and gave it a little wack and it went down a lot. Going to get back to working on it Thursday.

- - - Updated - - -

Here you go chris.
photo27f.jpg
 
You're doing a fine job for not having any bodywork skills (so you claim) If you put the skins on with the same skill you are doing with what you have done already, they are going to look just fine.
 
Auto Transport Service
Back
Top