• When you click on links to various merchants on this site and make a purchase, this can result in this site earning a commission. Affiliate programs and affiliations include, but are not limited to, the eBay Partner Network.

For the Love for my Father, My 69 GTX Restoration

Status
Not open for further replies.
Original rear bumper brackets were cleaned up and sprayed with semi gloss black. Original hardware was phosphated..
IMG_2090.JPG
IMG_2091.JPG
IMG_2092.JPG
IMG_2093.JPG
IMG_2094.JPG
 
This is a needle in a haystack part to find. The rear license plate bracket with the correct galvanized finish. The new ones are not like this and new galvanizing is not done this way anymore. Thanks to Bill Meerholz he had this one..
IMG_2095.JPG
IMG_2096.JPG
IMG_2097.JPG
 
This ended the installation of the rear bumper........The original rear bumper guards were long gone and I purchased a pair and sent them out for chroming. When I went to install them it ended up I had two for the right side, ughhhh. The guards are hard to find and hard to distinguish R or L and years.

So as I said earlier I scored an NOS set today! So once I get them and test fit them off for chroming they go....

In a month or two I will get back to the rear bumper...
IMG_2108.JPG
IMG_2107.JPG
 
Got my shock washers and radiator cap in today...Thanks again Mark!
IMG_2110.JPG
IMG_2111.JPG
 
Last edited:
Slowly working on installing the door window parts and glass. The vent window chrome was done by Paul's chrome. The glass is from ECS and is absolutely perfect in fit and finish. Notice the correct PPG logo matched from my original glass with matched dates from my original glass.. He is the only one able to supply the market with these correct reproductions.

The vent window seals are NOS and the rubber up stops are NOS as well.

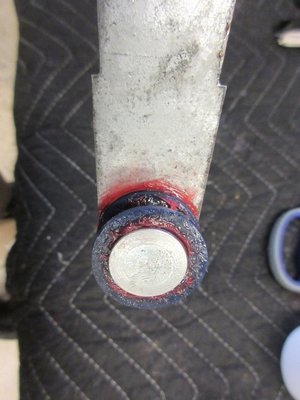
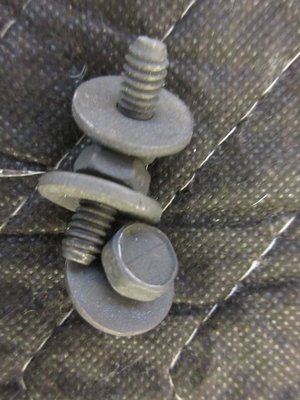
The glass setting tape size I used was 3/64...The last pic shows the correct screw for the vent window frame to the Chrome portion(by rubber up stop)
IMG_2116.JPG
IMG_2117.JPG
IMG_2120.JPG
IMG_2121.JPG
IMG_2122.JPG
IMG_2128.JPG
IMG_2129.JPG
IMG_2130.JPG
IMG_2131.JPG
IMG_2133.JPG
 
Last edited:
So many parts...So little time in the day....equals more days to do this...

NOS ignition and door lock set with keys...

A very important file set for the "at home" restorer to have. When you get to installing door handles, locks, emblems, trim etc you can file out the holes properly so you do not chip/crack the paint. They fill in a bit with body/paint coverage. Once I file them out I have special touch up sticks from hobby lobby I use to apply primer/paint to these areas....

IMG_2148.JPG
IMG_2149.JPG
IMG_2150.JPG
IMG_2151.JPG
IMG_2152.JPG
IMG_2153.JPG
IMG_2154.JPG
IMG_2155.JPG
IMG_2157.JPG
 
The door key cylinders go in one way just line up the right tabs...

Door handles are new and came from Dales Cuda shop. I kept the originals but the new ones are exactly as the originals. My originals handles had the black buttons. The inner door handle supports are from Mega Parts and are a must for anyone. No longer will you draw them in too far or fees the metal from pulling.

The biggest issue with the new door handles is the lever mechanism. Not even close and are clearly different. If you use them the door handle rod will bind and pop off....So REUSE your originals.. The black zinc nut is the original hardware.
IMG_2158.JPG
IMG_2159.JPG
IMG_2160.JPG
IMG_2161.JPG
IMG_2162.JPG
IMG_2163.JPG
IMG_2164.JPG
IMG_2165.JPG
IMG_2166.JPG
IMG_2167.JPG
 
The Epoxy was used on the door handle support brace...

The door mechanisms were plated by Totally Auto.. The screws are originals redone by BME...

Notice the dip line in the door:thumbsup:

IMG_2168.JPG
IMG_2169.JPG
IMG_2170.JPG
IMG_2171.JPG
IMG_2172.JPG
IMG_2173.JPG
IMG_2174.JPG
IMG_2175.JPG
IMG_2176.JPG
IMG_2177.JPG
 
More door parts...

The door handle mechanism was redone by BME in the correct finishes.. Notice the markings on the door handle screw head...


IMG_2178.JPG
IMG_2181.JPG
IMG_2182.JPG
IMG_2183.JPG
IMG_2184.JPG
IMG_2185.JPG IMG_2186.JPG IMG_2187.JPG
 
And more door parts, lol

The door window mechanisms has a long backstory but the person whom tried to restore the originals turned out to be a scam artist and destroyed them. So I got replacements from National Moparts. They had one NOS and they had to hunt through a ton to find me 3 with no rust and correct finish. I removed the springs and cleaned them up and added new roller on the end...
IMG_2195.JPG
IMG_2196.JPG
IMG_2197.JPG
IMG_2198.JPG
IMG_2199.JPG
IMG_2200.JPG
IMG_2201.JPG
IMG_2202.JPG
IMG_2203.JPG IMG_2204.JPG
 
Last edited:
Here is the roller I mentioned above..

The door seals and end caps are NOS..
IMG_2203.JPG
IMG_2204.JPG
IMG_2205.JPG
IMG_2206.JPG
IMG_2207.JPG
IMG_2208.JPG
IMG_2209.JPG
IMG_2210.JPG
IMG_2211.JPG
IMG_2212.JPG
 
Preparing the door glass for install...

The U channel strips are a later NOS part. DO NOT use the new clips or you will have problems raising and lower your glass. Save your originals and reuse them...Note the differences in the pics...Glass setting tape was 3/64
IMG_2216.JPG
IMG_2217.JPG
IMG_2218.JPG
IMG_2219.JPG
IMG_2220.JPG
IMG_2221.JPG
IMG_2222.JPG
IMG_2223.JPG
IMG_2224.JPG
IMG_2225.JPG
 
Status
Not open for further replies.
Auto Transport Service
Back
Top