• When you click on links to various merchants on this site and make a purchase, this can result in this site earning a commission. Affiliate programs and affiliations include, but are not limited to, the eBay Partner Network.

Green stripe part time project

Thanks guys. This is my excuse for not working on it over the winter and spring. Helping my brother on the Clone. What could be better than an inexperienced guy replacing the back end of a car ? How about 2 inexperienced idiots !
1129151211.jpg
 
better be careful...before you know it you'll have your own TV show.....
 
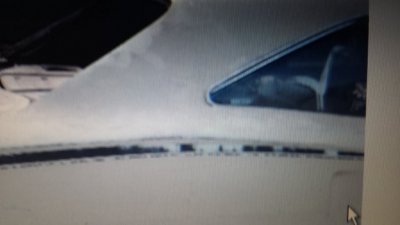
Worked a few hours on the car today hoping to get the interior finished so I can go onto getting the driveline in. Have a question about the airon condition sticker that goes on the passenger side rear window. The instructions that came with it say that cars with the scat pack been emblems the sticker moves from rear corner to front of the window at bottom. My car appeared as it was still in original condition when I bought it, and the AC sticker was under the bee in the rear corner. This car was built in LA so not sure if that means anything. I would like to just redo the car as it was in this picture I took before tearing into this project. Has anyone else seen this or could the cars of been either way ?

20161023_174105.jpg
 
About the only thing I don't like working on is the glass and window mechanisms. Does anyone have a good recommendation on what to use between the vent window glass and the bottom channel for material ? Thought I remember it was about .030 thick.
I also would love to hear any hints on putting the vent window frame assembly back together. I ground the 3 cast rivets out to get it apart for re chrome. What luck has anyone had using something to peen the other 3 casting posts over the channel to lock it in ? This stuff was taken apart overa year ago and I can't remember if there was any sealer in between the two or not.View attachment 214062

Maybe too late but what you need is window setting tape:
https://www.bobdrake.com/Categories7.aspx?Id=glasssettingtape
 
Hey thanks guys for the comments. I did end up getting some of that tape for the vent glass. Worked great.I've got the engine pretty much assembled and just need to finish some accessories on it so I can get it on the dyno. Need to keep going so I can finish this thing.
 
Worked a lititle on the car tonight and a little garage cleaning. Man can the stuff pile up around that car if I'm not working on it. I have this diagram from the mopar service manual on the gas tank vents, but still need a little help. On the short J shaped line I'm holding is there supposed to be a clip of some kind on the cross member to hold it. Diagram doesn't show it but it appears from the bend that the line would go up and behind the cross member . Can someone give me a little assistance here, I would appreciate it.
89594-0378d94dbfb7c5a2306fafdb96d15c5c.jpg
20161117_201619.jpg
 
Crawled under mine to take a photo.... and the clip was not there... I remember taking it off.... Yes there is a clip that I know I have around somewhere for mine. It is flat where it goes in the hole and sort of scissors to compress to remove it. Hard to explain in words. I am not finding a picture/listing for an aftermarket one.... Mine is a '68 though.
 
Crawled under the crusty 69 RR at my brothers and guess what ? It was still there. Pulled on the line a little and the clip popped right out of the hole in backside of the cross member . Here's a pic after I pulled the line from behind the cross member and placed it in front for photo purposes . I now see I had the lines in the wrong positions. Appears the short J shaped line hooks up to the passenger side tank tube.
20161120_162028.jpg
20161120_161725(1).jpg


20161120_161725(1).jpg
 
Worked a few hours on the car today hoping to get the interior finished so I can go onto getting the driveline in. Have a question about the airon condition sticker that goes on the passenger side rear window. The instructions that came with it say that cars with the scat pack been emblems the sticker moves from rear corner to front of the window at bottom. My car appeared as it was still in original condition when I bought it, and the AC sticker was under the bee in the rear corner. This car was built in LA so not sure if that means anything. I would like to just redo the car as it was in this picture I took before tearing into this project. Has anyone else seen this or could the cars of been either way ?

View attachment 367718
On the a/c cars that I've seen, the Scat Pack Bee is at the rear of the glass, and the a/c decal is near the front.
 
Progress ? Would like to be farther than I am, but I've been extremely busy with other projects. Did finish the fuel tank connections.
20161129_200609.jpg
 
I'm trying to rebuild all the components on the car myself, with the exception of some ac parts and the dash cluster. While this practice is a money saver most of the time, and rewarding it takes forever.
I will try to do some updating on pics of stuff I've finished.AC compressor cylinders were in really good condition so just put a quick hone on it and re-ringed.

20151205_171429.jpg 20161203_122016.jpg 20161203_143411.jpg
 
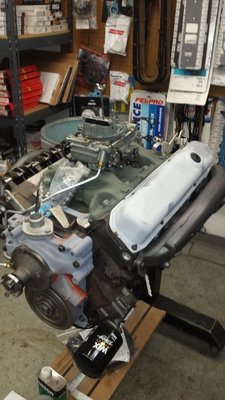
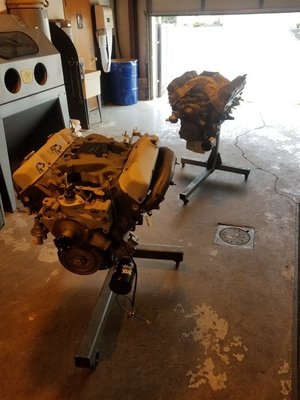
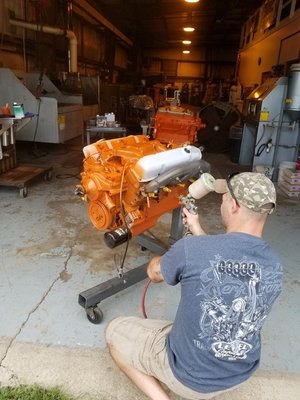
Bet the engine hung on this stand for close to a year at my shop, just waiting to get put on the dyno. Was tied up in my brothers project, and decided to build his engine then dyno and paint them both st the dame time. Took me a little while to figure out the correct bracketry and piece everything together.

20160430_125350.jpg 20140221_173750.jpg 20170521_134801.jpg
 
Thanks for the update; you're doing a great job bringing her back to like new condition!
 
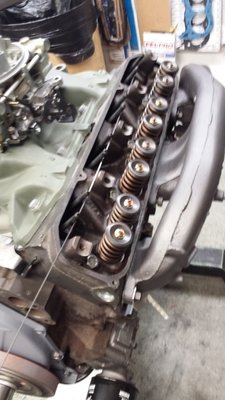
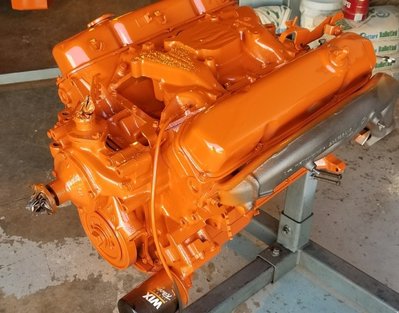
I wanted to keep the engine original looking on the outside, but use a few updates on the inside. The block is dated a couple months later than the car was built, so I didn't get concerned about the casting dates on the rest of the engine. Just made sure I collected parts that were 70 model year. Well except for the water pump casting. That got by me and didn't think anything about it until I went to put the correct heater hose nipples in. Couldn't believe someone didn't make the smaller hose nipple with the larger pipe thread bottom to fit a 69 housing on back. Ended up just making one on a large then got it plated, so I didn't have to use a bushing.
Used a set of Wiseco pistons and a hydraulic roller camshaft for a little sound. Used the stock intake untouched but did perform some bowl work on the 906 heads. Once I got everything together I put it on my shop dyno and ran it to leak check and set timing. Also found out how good these fuel pumps they sell nowadays are. That's sarcasm.
After the dyno it was time to paint.

20170708_143041.jpg 20170708_152649.jpg 20170708_161144.jpg
 
So what were the dyno results? As a mostly stock engine, did it perform as you had expected/hoped?
 
So what were the dyno results? As a mostly stock engine, did it perform as you had expected/hoped?
If did dyno the engine as it goes into the car with the exhaust manifolds. The only change i had to make was a carb change . I had the old original holley rebuilt and re-dyed by some good carb guys, but they were in the process of starting to use their own gaskets made in house and we're found to be just too hard of material for die cast carbs. The fuel leaked out of my carb in so many places that I was afraid of a fire, so I had to put a shop 650 dyno carb on and run the engine. I did this on the 4th of July weekend along with my brothers engine so I didn't want to have the dyno tied up for days while I waited for the carb to get back.
Engine made 360 hp @ 5400 rpm and 407 tq at 4100 rpm. Was richer than it needed to be with the different carb but I didn't care to change jets as I was primarily concerned about no leaks and timing settings. If I'm not mistaken it had 16-17 inches of vaccuum. I'm happy with the results. Wish I was driving it but I'm getting closer as the engine will be going in within the week.
 
DSC00638.jpg
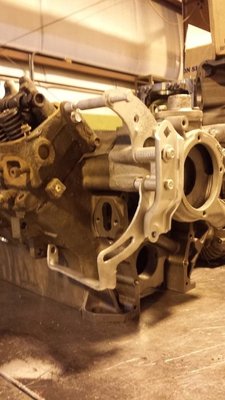
Here's a pic of the rear end parts I reworked a while back. It's a 3:55 posi as the car came with.
 
If did dyno the engine as it goes into the car with the exhaust manifolds. The only change i had to make was a carb change . I had the old original holley rebuilt and re-dyed by some good carb guys, but they were in the process of starting to use their own gaskets made in house and we're found to be just too hard of material for die cast carbs. The fuel leaked out of my carb in so many places that I was afraid of a fire, so I had to put a shop 650 dyno carb on and run the engine. I did this on the 4th of July weekend along with my brothers engine so I didn't want to have the dyno tied up for days while I waited for the carb to get back.
Engine made 360 hp @ 5400 rpm and 407 tq at 4100 rpm. Was richer than it needed to be with the different carb but I didn't care to change jets as I was primarily concerned about no leaks and timing settings. If I'm not mistaken it had 16-17 inches of vaccuum. I'm happy with the results. Wish I was driving it but I'm getting closer as the engine will be going in within the week.

Good numbers for a stock engine!
 
Auto Transport Service
Back
Top