• When you click on links to various merchants on this site and make a purchase, this can result in this site earning a commission. Affiliate programs and affiliations include, but are not limited to, the eBay Partner Network.

Green stripe part time project

your super bee looks great I love the color keep us posted
 
Been a while again, but slowly but surely I'm making some headway. Been busy all year at work so able to find time just recently. I've gotten most of the dash done and most of the firewall. 20140408_210656.jpg
 
looking very good ,I like the color combo :headbang:
 
It may have been awhile and trust me, i know what that's like! im slow.... I have to be honest and read, looked at your project here and there is so many cars i would love to own and more importantly drive and you do have one of my top 10, my cousin had a the same car "back in the day" and i hated the body style and now i wish i could find one myself, but i say that so many times with so many of these old "back in the day" cars even to me it sounds ridiculous lol, I wonder what the rich do when they can get ANY they want and maybe ALL they want... I was always on a personal relationship with my rides, even back then lol, which do i choose to be "the" car of my fleet rofl..... From one nut i rest my case. :)
 
Nice car, all the best on getn' er done!
 
Nice car and very interesting color combo - I am sure it will draw a crowd at a car show.

Hawk
 
You mean I'm not the only one too laugh when I see these programs on tv where they redo these cars in two weeks to resell. I love how they act like came out way better than they thought! I don't think you could put enough people on one of these cars and do it right in a month.20131207_142231.jpg
 
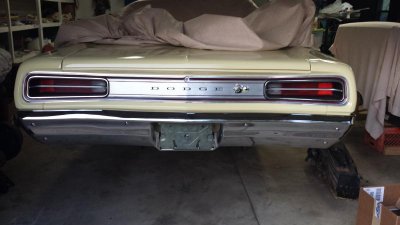
Trying to get the back of the car finished up. A little bit of chrome and some glass makes you think you've accomplished more than you really have!
I'm glad I payed the extra to re-chrome my original parts instead of getting exchange parts. So nice to put parts on that fit properly!20130919_182140.jpg
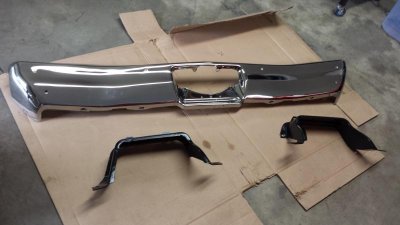
Even though this bumper had a pretty good dent in it Jon at Custom Chrome said no problem,and I'm very happy with the results.20140807_202310.jpg
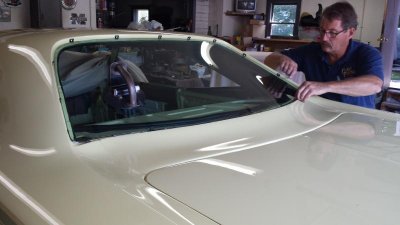
Here is a pic of my rear glass getting checked for fit before we glued it down for good last Friday. I like the color combo a lot better with the green glass.20140926_152943.jpg

20130919_182140.jpg 20140807_202310.jpg 20140926_152943.jpg
 
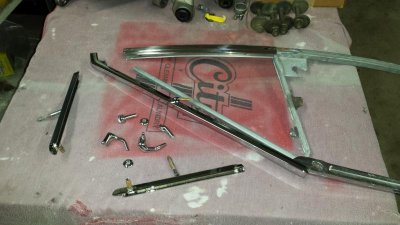
About the only thing I don't like working on is the glass and window mechanisms. Does anyone have a good recommendation on what to use between the vent window glass and the bottom channel for material ? Thought I remember it was about .030 thick.
I also would love to hear any hints on putting the vent window frame assembly back together. I ground the 3 cast rivets out to get it apart for re chrome. What luck has anyone had using something to peen the other 3 casting posts over the channel to lock it in ? This stuff was taken apart overa year ago and I can't remember if there was any sealer in between the two or not.20141005_184924.jpg
 
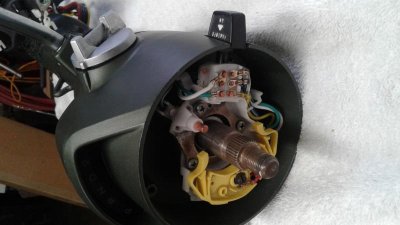
Made some progress everyone. Found out in this process that there's always 1 little part that will stop your progress, for a week or so at time. One headache I would like to pass along might not be a help to some of you experienced rebuilds but r a novice like myself it drove me crazy until I figured it out. While rebuilding my column I replaced the turn signal switch. When testing the dash I couldn't get the turn signals and hazards to work properly. If I disconnected either the hazards or turn signal flasher then one system or the other would work ! Drove me crazy and I couldn't find any thread on here with the same problem. I called Mega who supplied the switch but they said they hadn't heard of any problems with the switch and promptly sent me another for free. After trying the second switch with the same results I then grabbed a column from another 70 b body and compared the wiring. The switch problem came down to the wires installed backwards on the top and bottom of the Hazzard block part of the switch. Drilled the rivets out, swapped the wires, rerivet and amazingly it works properly !20151126_154430.jpg
 
Starting to look like a car again. 20151124_212805.jpg

20151124_212805.jpg
 
Car looks great keep up the good work. The longer you take the nicer it will be.you won't miss anything ether like when you rush the rebuild.
Good luck with it
 
Made some progress everyone. Found out in this process that there's always 1 little part that will stop your progress, for a week or so at time. One headache I would like to pass along might not be a help to some of you experienced rebuilds but r a novice like myself it drove me crazy until I figured it out. While rebuilding my column I replaced the turn signal switch. When testing the dash I couldn't get the turn signals and hazards to work properly. If I disconnected either the hazards or turn signal flasher then one system or the other would work ! Drove me crazy and I couldn't find any thread on here with the same problem. I called Mega who supplied the switch but they said they hadn't heard of any problems with the switch and promptly sent me another for free. After trying the second switch with the same results I then grabbed a column from another 70 b body and compared the wiring. The switch problem came down to the wires installed backwards on the top and bottom of the Hazzard block part of the switch. Drilled the rivets out, swapped the wires, rerivet and amazingly it works properly !View attachment 294403

WOW!! I wonder if that's what my problem is...i have the same one in a '71 GTX. i have an intermittent hazard flashing crazy issue after i let off the brakes, and there isn't even a relay on the hazard circuit!!

what should the color order be??

sjd
 
WOW!! I wonder if that's what my problem is...i have the same one in a '71 GTX. i have an intermittent hazard flashing crazy issue after i let off the brakes, and there isn't even a relay on the hazard circuit!!

what should the color order be??

sjd

As your looking at the hazard block with the on-off knob to the right, the orientation is as follows. Top left-green wire. After rotating the left to center post connector over so that it connects the middle to right post, the white wire will attach at that top right spot then. Yellow wire at bottom left, blue in center and white w/green tracer at bottom left.

Hope this could help someone. Very aggravating to be told by a supplier that they have never heard of a problem. Just hard to believe that nobody ever calls in with a problem.
 
20161012_204630.jpg
20161012_204945.jpg
Well most of the year has come and gone again and I find that I haven't spent much time on the car like I should. My brother has pushed me a little lately to get back on it which helps. Recently got my belts back which has allowed me to get the rest of the interior in. Was originally thinking it was too much green but I think it looks really good once all the pieces are in place.
 
Auto Transport Service
Back
Top