• When you click on links to various merchants on this site and make a purchase, this can result in this site earning a commission. Affiliate programs and affiliations include, but are not limited to, the eBay Partner Network.

Hawk-Rod: The Restoration

Glass certainly makes a difference to the appearance, and also gives motivation, which some of us need a bit of from time to time, lol. Excellent pics on the underneath splash shields too Hawk. You wouldn't by chance have the measurements for the front fender support rods would you? Mine didn't have them but I think I could make some up here. Keep up the good work and great pics. Cheers.
 
Congrats on the great progress Hawk, loving the photos. You are getting so close, your glass looks to be in tiptop condition.
 
While I have been messing around with my steering column, I have been doing a few small jobs on the car...

Since the windshield is in, I put up the upper trim, the rear view mirror and the trim over the A pillars. Quick, but more parts off the shelves!
View attachment 254707

I added gaskets under the fender...
View attachment 254709

Under the car, I riveted in the splash shields and the front fender support rods.
View attachment 254710

...and I added the radiator support thingamabob (that's a technical term) :grin:
View attachment 254711

Nothing earth shattering, but progress...

- - - Updated - - -


I guess I need to figure out how to some of this stuff. I am not a big fan of cloud stuff, but maybe it is time to start...

Imgur is my favorite because you can just drag pictures from your file manager to the website and they load AND because it's easy to hide but share folders .. meaning you can share the link and only the people that have the link can see the pictures in that link/folder (and only that folder).

It's free and really easy to use
 
hey Hawk, while we are on the glass subject, where did you buy the rear run channel for the door glass, if it was replaced. thanks a lot. Lenny
 
Man your doing a clean job hsorman, that car looks great everywhere!
 
Looking better every day Hawk, the headliner and glass are huge milestones in your resto. Great job!

TU.jpg
 
Wow, thanks guys for the positive comments - they mean a lot. At this point in the project, I am behind schedule, out of money and getting a bit stressed about timing. My trip is in September, so I need to get this car done. As you all know, things take time. Lately work has been kicking my a$$ too so that doesn't help either.

Your comments and positive energy are a welcome boost to help me get through to the finish line. Much appreciated! :VB toast:

Hawk
 
inspiration comes when least expected. and from places you would never expect.
 
Glass certainly makes a difference to the appearance, and also gives motivation, which some of us need a bit of from time to time, lol. Excellent pics on the underneath splash shields too Hawk. You wouldn't by chance have the measurements for the front fender support rods would you? Mine didn't have them but I think I could make some up here. Keep up the good work and great pics. Cheers.

Sorry Glenn, I got tied up and then forgot about this question. Check your thread for an update and pictures...
 
Steering column is IN!

The steering column has been a pain, since I had trouble figuring out where to cut my old steering column. Luckily, dsd1967 came through for me and sold me a power steering column. It was in great shape! There was only one problem with it, and that was that it did not have the hole in it for the steering wheel lock.

Now I really don't have the tools to drill a super precise hole, but I messed around with my drill press until I go it centered and positioned properly to drill a hole in the same location as my steering column had.
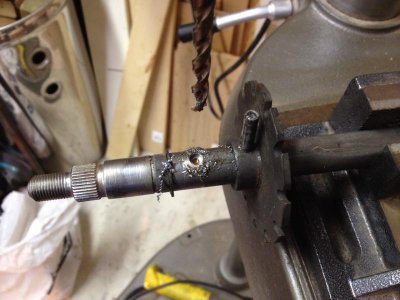
IMG_4589.jpg

After drilling the hole, I used a stone to chamfer the hole like the original (on both sides).
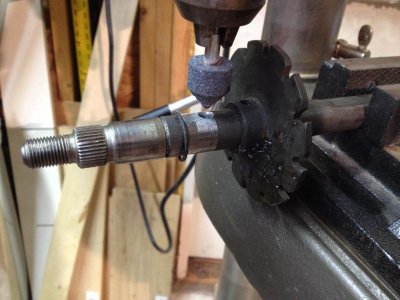
IMG_4592.jpg

Then I was off to the races! So I started assembly: First the steering wheel lock
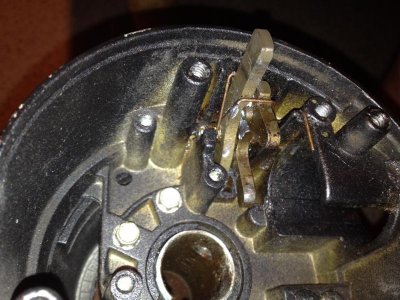
IMG_4577.jpg

Then the plate that holds it together
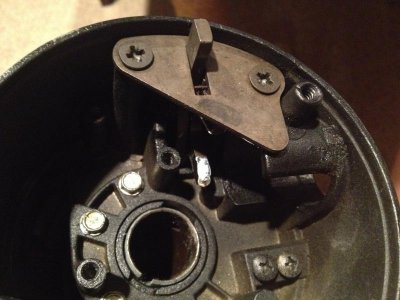
IMG_4579.jpg

Then the switch and key
IMG_4583.jpg

Then it came time to add the power steering coupling to the shaft. I cleaned and painted up everything. I also added grease per the FSM, and I think it was too much - grease squeezed out everywhere and made a mess! The issue I had was I was unable to get the cover on. I just made one heck of a mess...
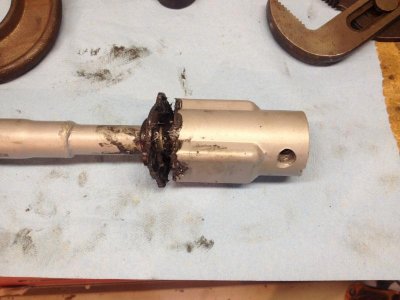
IMG_4645.jpg

It turns out the covers are slightly different year to year:
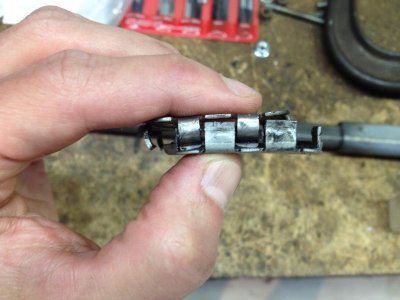
IMG_4644.jpg

Once I got the right cover cleaned up and painted, then I was able to install the cover and wipe away all the excess grease.
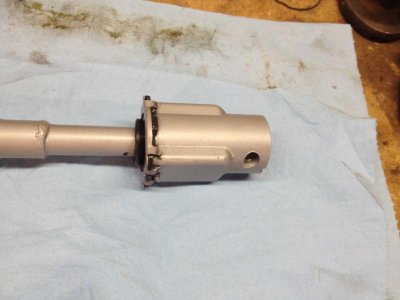
IMG_4649.jpg

Then I installed the lock plate through my new hole. Luckily, the hole was in the right spot!
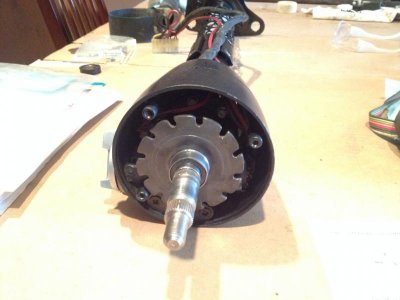
IMG_4651.jpg

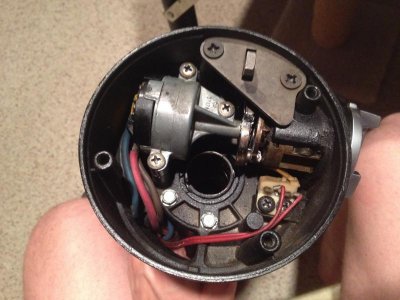
Finally, I put the bearing housing and turn signal switch, steering wheel, etc. back on the column. I refurbished the bearing by soaking an old one in carb cleaner, and then washing and drying the bearing carefully. I then re-greased the bearing and reinstalled it. Here is the final column before installation. Note the goofy hole in the firewall plate. That is for the fuel injection harness. To allow the big a$$ plug to pass through the firewall without frilling a big hole, I cut the slot in the plate. This will allow minimal modifications to the car and still allow the throttle body to be removed for service reasonably easily. It also keeps the wiring for the fuel injection more hidden.
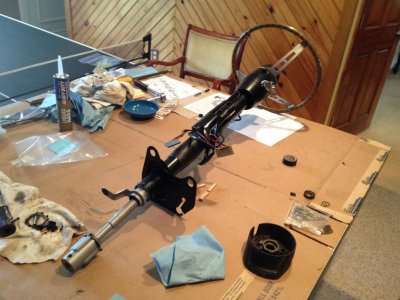
IMG_4656.jpg

This pictures is a bit blurry, but here is how the wiring passes through the plate and connects to the main computer.
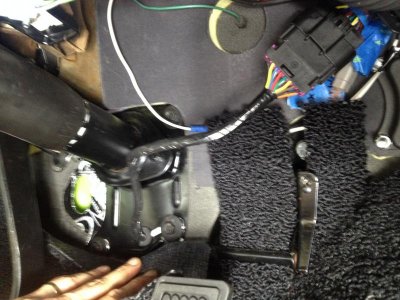
IMG_4666.jpg

Success! Finally the steering column is in!
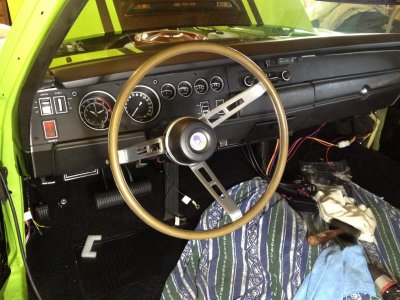
IMG_4658.jpg
 
wheel and column look great in the car......... was gonna give you a call if you didn't post soon :icon_cyclops_ani:
 
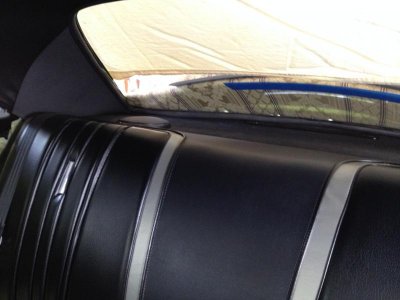
I also got most of the rear package tray completed. I installed the speakers and cut and installed the seat belt retractors for the rear shoulder belts. The rear defroster also went in. I am pretty happy with how the shoulder belt seems to work - I think this will be a cool mod, and one that my wife will like for sure when we carry friends or the kids.

Here is a general shot of the rear of the car. One thing that bugs the crap out of me are my lighter sail panels. I bought them pre-covered to save some time, but they do not match the headliner. CRAP! Oh, well, that will have to be a project for next year - it will have to be OK like this for the trip. Notice the belt over the seat.
IMG_4606.jpg

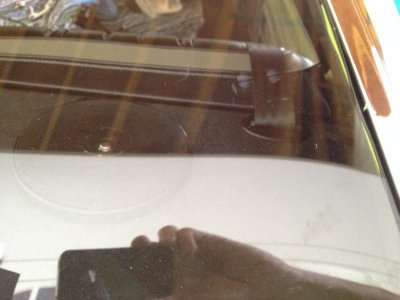
Here is a shot of the retractor through the back window. Not a great shot due to the reflection, but hopefully good enough so you can see the way the belt comes through the package tray.
IMG_4609.jpg
 
Looks good to me! Half of those little things your knit picking will fade into your memory and probably never looked at again. Dash, column and steering wheel all look brand spankin new........ Great job.
 
Fantastic job with the steering column Hawk, I also over greased my coupling. Love the photo of the column in the car, your interior is perfect. Your rear belts blend in so well, had to look hard to see the belt. Exciting times ahead.
 
Electrons!

So no pictures yet, but I am pretty happy.

I just energized my electrical system for the first time. To be safe, I hooked up the positive side with a fuse so if I had any major problems it wouldn't cause any big damage (fuse between the battery cable and battery).

It's ALIVE! The first thing that came on was my key in buzzer. I think this is the first time I have heard that buzzer and NOT been annoyed! :grin:

Many lights work (although a couple bulbs or grounds might need some work), my clock works, radio comes on (no antenna yet), dome light works, map light works, running lights, etc. So far, so good!

Of course, I have a lot more checking and work before I can declare victory, but this is a good first step.

Damn, I have to go to work tomorrow.............................:angryfire:
 
It's aliiiiiiiive!

LOL, I actually came in with a limp and saying exactly that. I often do that, although I mix Quasimoto (sp? from th Hunchback move) with Frankenstein.

I can't wait to get on it tonight and check it out further!
 
Auto Transport Service
Back
Top