• When you click on links to various merchants on this site and make a purchase, this can result in this site earning a commission. Affiliate programs and affiliations include, but are not limited to, the eBay Partner Network.

Hawk-Rod: The Restoration

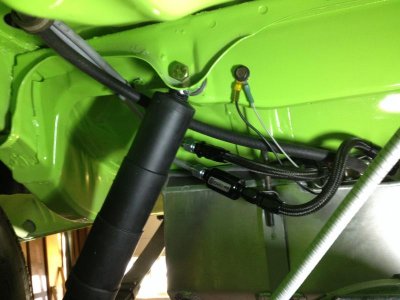
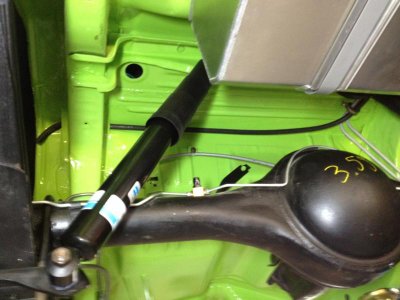
So I finished wiring the fuel sender and the power & ground wires for the electric fuel pump. The last thing I needed was a fuel tank vent. My car was a California car, so it had a non-vented system with the evaporative tube mounted in the trunk. When I restored it, I did not replace it since I was adding the fuel injection tank with need for a vent.

I added a vent line, although it is temporarily just a 5/16th hose. Since I don't know what a proper vent looks like, I would appreciate any comments if you think this is an acceptable routing...

IMG_4419.jpg

IMG_4422.jpg
 
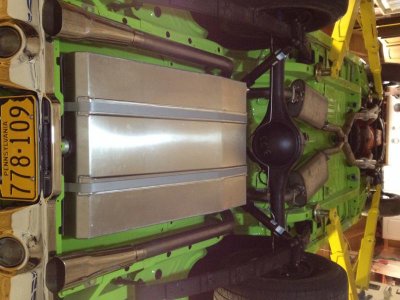
Finished mocking up the exhaust. It is not fully tightened down - I'll wait a bit, make sure everything works OK and then do a final positioning to make it as good as possible. This is the same exhaust I put on the car shortly before I tore the car down for the restoration. It is a Pypes 2 1/2" X-pipe exhaust. Tips are polished stainless steel from Accurate exhaust.

IMG_4424.jpg

Crap - these goes that rotation issue again - not sure how to fix this when it looks OK on my PC and then gets improperly rotated when I upload it to FBBO...
 
when can you fire it up?

I am hoping very soon. I still need to build a relay circuit to control the fuel pump, and spent some of the weekend looking into that. I have a question that I need to ask FAST regarding the most appropriate trigger wire, so I will do that in the next few days and then build the accessory harness.

There are two other things I need to finish to try and start the beast: Painting and installing the radiator fan (minor), and installing the steering column. The steering column will be a bit more involved since I need to shorten it as well as paint the column so it looks as nice as the rest of the interior.

Besides that, I think that is about it. As you can see in the picture, the driveshaft hasn't been painted/cleaned up either, but that won't stop me from starting it!

Chipping away - little by little...
 
Wow you're close Hawk! I can almost hear that Plymouth running from here!

LOL, I keep hearing it in my dreams!

I scheduled the front and back windows to be installed this upcoming Monday. I have elected to farm out this work as I do not want leakers as I have never done a windshield before. This means I need to get the headliner finalized in the next couple of days. Either way, getting those done will be big steps forward...


As always great work and awesome update Hawk!

Be careful to inspect the installer for big belt buckles .. and maybe put some blankets or something to protect the finish on the car so all he has access to rub on is the area he has to address .... right Will LOL
 
That's awesome! Hearing it come to life for the first time is always super exciting. Good luck on getting her fired up soon.
 
As always great work and awesome update Hawk!

Be careful to inspect the installer for big belt buckles .. and maybe put some blankets or something to protect the finish on the car so all he has access to rub on is the area he has to address .... right Will LOL

Thanks for the note of caution. Yeah, I've been fretting about that, so I am working on ways to protect the body as well as the dash. The package tray is no big deal as it still just has the Dynamat - so no worries there. The dash is another story. I'm sure the installer is going to hate me because I will be all over him. He's an old timer who supposedly has a lot of experience with these types of installations - let's hope that turns out OK.

LOL, of course, I really should worry about the idiot (me) installing the headliner and make sure THAT is ok...

- - - Updated - - -

That's awesome! Hearing it come to life for the first time is always super exciting. Good luck on getting her fired up soon.

Looking awesome Hawk! can't wait to see/hear a video of this thing!

Thanks guys - I am chompin' at the bit to hear it run. We'll see how that goes, as there is a lot of complex wiring, computer controlled timing and FI to worry about. I hope all this stuff works or I could have some MAJOR headaches. Either way, I will find out if I did all the right things while studying wiring diagrams and integrating stuff together...

Hawk
 
Your project is looking very close to fruition, looking forward to your completion and hopefully some videos of your machine in action.
 
Lookin great Hawk. My 70rr is an original FJ5 car.
Thanks! My car had been painted yellow, so it was really cool when the Limelight started showing up on disassembly, especially on the posts that were covered with stainless trim. The paint there was pristine, so we used that to color match the paint and get it exactly right. I'll tell you, when you get some sunlight on it the car really 'pops'. There is no doubt this is a high impact color!
 
Headliner is (mostly) in!

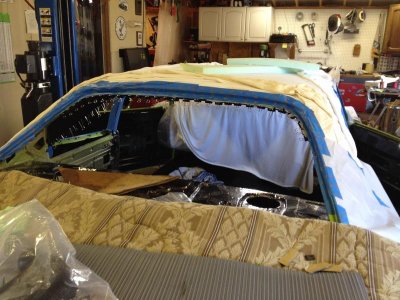
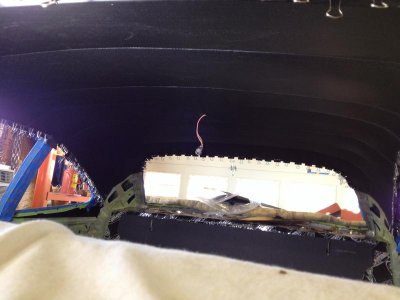
OK, so as scheduled, the headliner was installed today. I'll give the effort a B+, with an A- possible if the heat gun kindly helps out a couple of wrinkles. :icon_pray:

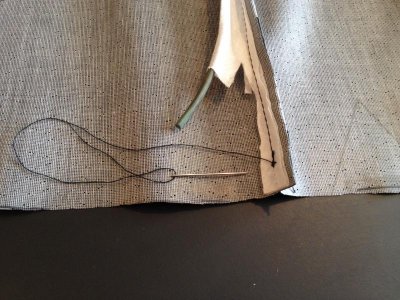
First, I learned after watching a couple of videos on YouTube that you should not cut the bow seams, as the threads will then start separating. Well, crap, I had done that, and sure enough, the threads were starting to separate. So what to do?

Sew! I hadn't done any of this since high school home economics classes, and I sure as heck didn't do a pretty job, but I think it worked...
IMG_4455.jpg

Then to the installation - no in progress shots here because I was up against the working time of the glue. Basically, hooked the rear bow to the two hooks, then gently tightened each bow as I made my way forward. Then I secured the front middle and worked out to the sides of the windshield. Then I worked the sides of the headliner above the side windows. After that, I did the center rear, and worked my way out to the corners. This area around the top of the back window was the hardest for me. It is here where I still have a couple of waves that I just couldn't seem to fully get out...

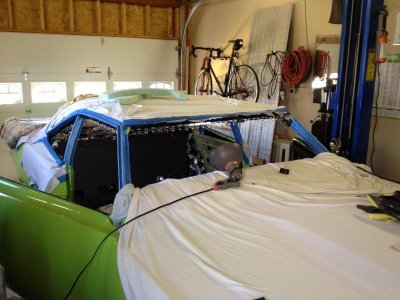
Here are a couple of shots after the headliner was installed. As you can see, I used black binder clips - lots of them. I actually liked the way they worked and would use them again on another. LOL - to me this picture reminds me of the low rider cars with tassels all around them!
IMG_4459.jpg

IMG_4468.jpg

Here is a shot of the headliner. As stated, I still need a heat gun, the back side panels and some final clean up, but overall I think it came out OK.
IMG_4461.jpg

I am now ready for windshield and back window installation on Monday!

Hawk
 
awesome job hawk. that is the same thing I do. the pro's use a steamer but I use a moded heat gun.
 
Nice work! That is an impressive amount of binder clips! I thought Sarge took the cake with his mighty vise grip collection, but your sir have an army going on there.
 
Auto Transport Service
Back
Top