• When you click on links to various merchants on this site and make a purchase, this can result in this site earning a commission. Affiliate programs and affiliations include, but are not limited to, the eBay Partner Network.

Hawk-Rod: The Restoration

I did some research and discovered that subwoofers work much better if they are in the trunk pointed towards the rear of the car. My original plan was to have mine under the back seat, so I decided to switch plans.

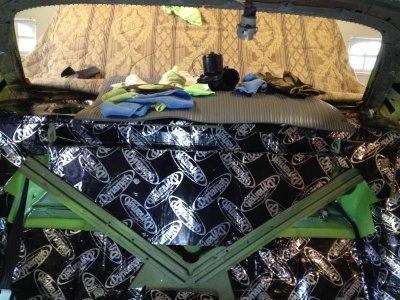
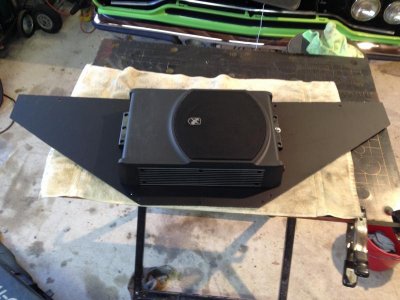
I made a metal panel designed to go between the back seat "V" brace. I had to weld two pieces of metal together (easy for many of you guys, but a big deal for me where I had to avoid warping it). I then painted the one side flat black and mounted the subwoofer to ensure it would fit in between the braces.
IMG_4324.jpg

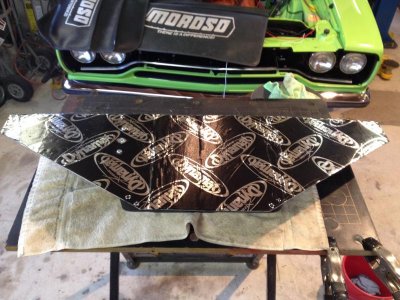
I then put Dynamat on the interior side.
IMG_4325.jpg

Here it is installed in the car.
IMG_4329.jpg

This picture is a bit fuzzy, but here it is with the trunk divider - this fits fine with no fitment issues.
IMG_4330.jpg

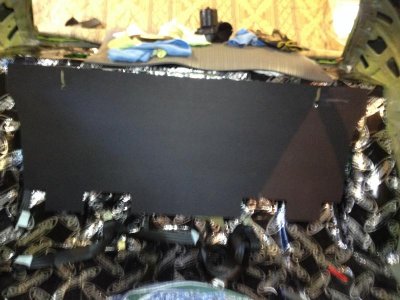
Here is the subwoofer from inside the trunk. Since the panel was painted flat black, it pretty much matches the trunk divider panel and blends in. Hopefully the subwoofer will work well mounted here!
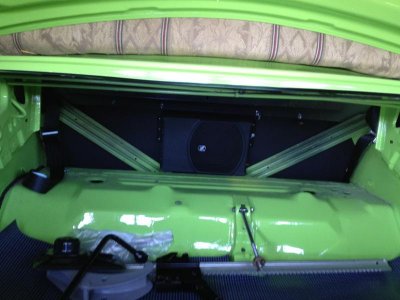
IMG_4335.jpg
 
Excellent work there Hawk,your seatbelt idea is perfect and the subwoofer blends in nice. Got to have good sounds when you are cruising across the country.
 
I like that idea. It is out of the way and looks good and will sound good. I may also use this idea. Thank you.
 
The old trim had fake wood grain on it, and it has grown on me since my car has the "wood" steering wheel and "wood" pistol grip shifter. I guess I will either leave these black or put the fake wood trim on them. I am open for opinions...
[/QUOTE]

The door panels on my Coronet came with the faux wood strips with the red reflective rectangle (I guess so that at night oncoming traffic could see that the door was open). When I dyed them black I had planned on changing out the strips to something more modern like brushed aluminum. But now that they're painted and I'm getting closer to putting the car back together, I'm staying with the faux wood, same as on the dash. Even though modern conveniences are being added for comfort and safety, I still want to keep that 60's feel. JMHO.
 
...I may also use this idea. Thank you.

Go for it! That's what the forum is all about: Getting ideas for things you like (or don't)! Glad you like it!

- - - Updated - - -

The door panels on my Coronet came with the faux wood strips with the red reflective rectangle (I guess so that at night oncoming traffic could see that the door was open). When I dyed them black I had planned on changing out the strips to something more modern like brushed aluminum. But now that they're painted and I'm getting closer to putting the car back together, I'm staying with the faux wood, same as on the dash. Even though modern conveniences are being added for comfort and safety, I still want to keep that 60's feel. JMHO.

Thanks. I may just do that, especially since I may need to carefully hide some seatbelt holes for the front seat belt retractors. However, on a Road Runner, I am not aware that any came with the fake wood - I think they only came painted or chromed. Oh well, it won't be stock!
 
Let me know what you think about that Sub, I installed 2 6 1/2"s, 2 6X9"s and an amp but have been tossing around the idea of adding the same woofer you just bought. Looking great as usual Hsorman
 
I like the that sub install!...I think I'm going to copy that for my sons car... he wants 400 horse more than he want 400 watts...but I think I'll give him both!

- - - Updated - - -

and yes...I'm lurking on his site..he's not home (Mike)
 
Let me know what you think about that Sub, I installed 2 6 1/2"s, 2 6X9"s and an amp but have been tossing around the idea of adding the same woofer you just bought. Looking great as usual Hsorman

Will do. I just found out that my radio is done, so I should be getting that back in a couple of days. Hopefully I can do some of my final electrical work and test out my electrical system in a couple of weeks. I'll keep everyone posted!

- - - Updated - - -

I like the that sub install!...I think I'm going to copy that for my sons car... he wants 400 horse more than he want 400 watts...but I think I'll give him both!

- - - Updated - - -

and yes...I'm lurking on his site..he's not home (Mike)

LOL. I won't tell him you're lurking on his ID! Yeah, the 73 has the same brace, so the same idea should work. Now, this subwoofer is only 125 Watts continuous and 250 Watts max, so you son might reject it!

Hawk
 
Sounds (no pun intended :) ) like its going to sound loud and good bud!!!
 
Sounds (no pun intended :) ) like its going to sound loud and good bud!!!

I hope it sounds decent. Mind you, I don't need a mega-watt system that can rupture eardrums, but I do want to be able to crank "I can't drive 55" or other great tunes as I drive across country!

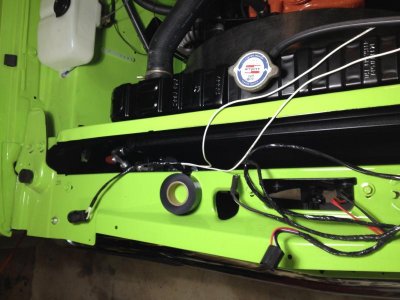
Speaking of tunes and working on the car, I have made some progress this weekend, although picture wise, there is not much to show for it. I did some under hood wiring too, as I wired in the A/C pressure switch wiring with the fame factory style friction tape. I wrapped them in with the forward light harness, so it looks pretty stock. Here is a shot as I was doing the work:
IMG_4336.jpg

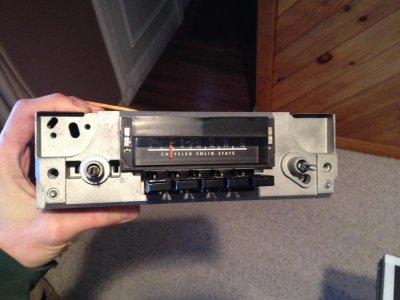
I also got my radio back from Retro Radio, who converted it to an AM/FM, Bluetooth, AUX compatible radio. However, it is still indistinguishable from a stock 1970 AM radio...
IMG_4339.jpg

The radio also has low level outputs for front and rear Right and Left Channels as well as a subwoofer output. I will not currently use the low level outputs, as I will have the radio directly power the front and rear speakers. I will, however, use the subwoofer output. Also note the connectors on the side. These are for the Bluetooth and AUX input. One is for the microphone, the other is the AUX input (like from an iPod), and the third is for an optional button that allows use of some Bluetooth functions. You can use the radio knobs to do the same thing, but I will see how convenient that is.
IMG_4340.jpg
 
Times like these I wish I lived in the USA. Man that radio looks fantastic, I suppose there is nothing stopping me sending my radio to Retro Radio. Put it on my wish list.
More excellent progress Hawk.
 
got to put an eyeball on Hawk's progress yesterday in person........ FRIGGIN OUTSTANDING!!!! .......... A++ my friend, cant wait to go for a ride.
 
Hawk - is Retro Radio the same as www.retrosound.com?

No. They may do the same conversion. The folks who did mine can be found here: http://www.retroradio.biz/

I have spent a lot of time on cleaning up wiring and some other small cleanup work, so I don't feel like I have made good progress. But here are a few shots:

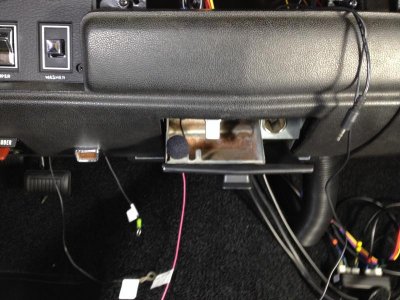
First, for the radio. It is STILL not fully in, because I just can't seem to get it to fit perfectly. This is probably due to the fact that my dash had been hacked up. I guess my repair was less than perfect too. This radio has hands free Bluetooth, so I decided to mount the microphone in the ash tray. I don't smoke anyway, and closing it completely hides the microphone.
IMG_4341.jpg

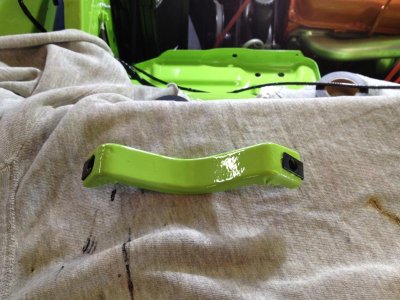
Mark and his wife stopped up to check out the car; it was nice to meet his wife too! Mark also painted my battery brace and a couple of other pieces. Cool! I needed this so I could mount the battery...
IMG_4348.jpg

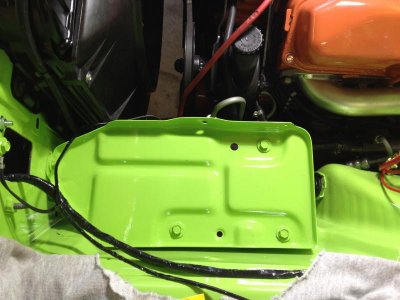
The bolt in the upper right is where the brace bolts to. There was no hole there, so I had to drill one.
IMG_4351.jpg

Once attached, I added a rubber mat to protect the tray...
IMG_4353.jpg

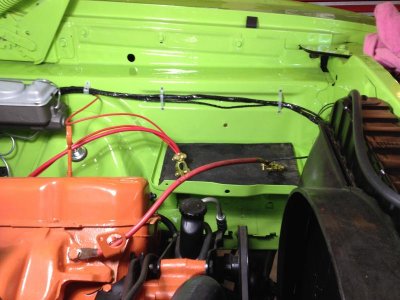
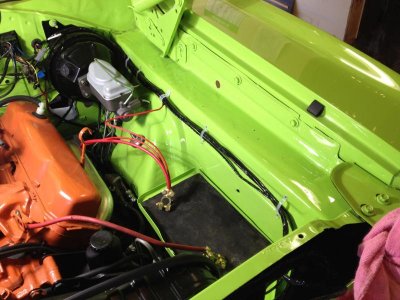
Here are a couple of shots of my final wiring on this side of the engine. The added wires for the fuel injection and air conditioning were wrapped using friction tape to make them look more factory.
IMG_4354.jpg

IMG_4355.jpg

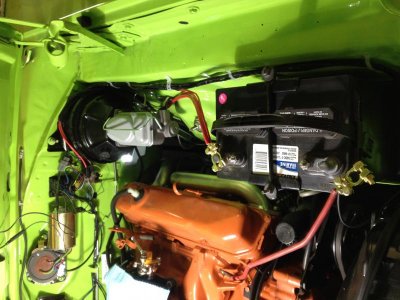
Here it is with a battery. Yes, I know it is a marine battery, but that is what I had. It works, and that will have to be my temporary battery. Sorry, this picture reverted back and is rotated wrong...
IMG_4358.jpg

Getting close to powering up the electrical system, but the details just seem to eat up time!!!
 
Wow, Hawk it sure looks like progress! Im so used to seeing rust when i see clean AND paint! I get excited man! :)
 
Looking good Hawk. I notice your negative battery lead is red. Mine is too, and I thought that someone must have replaced the original at some stage. Do you know if they came out red or black? No biggy, just interested that's all.
 
Auto Transport Service
Back
Top