• When you click on links to various merchants on this site and make a purchase, this can result in this site earning a commission. Affiliate programs and affiliations include, but are not limited to, the eBay Partner Network.

Hawk-Rod: The Restoration

Looking good Hawk. I notice your negative battery lead is red. Mine is too, and I thought that someone must have replaced the original at some stage. Do you know if they came out red or black? No biggy, just interested that's all.

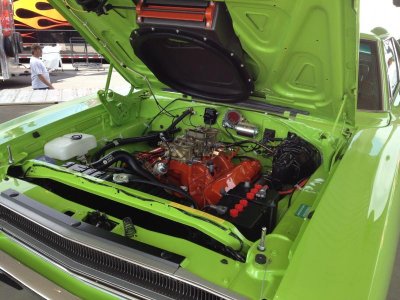
That is what it had, and I did not replace it since it was serviceable. The most trustworthy reference I have is this 440+6 at Carlisle. Note that it has a black battery cable. So I guess at some point I should get a black one...

Hawk

IMG_1258.jpg
 
Looking great Hawk, how long you figure before your pounding the pavement?
 
Getting close to powering up the electrical system, but the details just seem to eat up time!!!

Amen to that! It's like going to the grocery store hungry.......walk in with a small list, walk out with half the damn store in your cart!

Getting close!!!! Getting real close!
 
Looking great Hawk, how long you figure before your pounding the pavement?

Thanks! I originally said I wanted it done by the end of March, but that was when my trip across country was possibly going to be as early as end of May. The trip is now pretty much set for September, so I have some additional time. That is good because the cold weather and tough work schedule have put me behind schedule. I am now hoping to have it drivable up and down the streets by end of April, and done a few weeks after that. We'll see how well I do with that prediction!

- - - Updated - - -

Amen to that! It's like going to the grocery store hungry.......walk in with a small list, walk out with half the damn store in your cart!

You got that right!!! Every time I think I am done, there is always a "oh yeah, I have to do that one little thing" - and then that eats up a couple of hours! Just last night I realized that my clutch pedal safety switch that protects against the car being started had been bypassed when I took the car apart. My pictures didn't match with the schematics, so I had to fix that. Two hours later, it was done. ONE STUPID WIRE!!! ...but, I am trying to keep the quality up and I wanted it to look factory and professional. Oh well...

Getting close!!!! Getting real close!

Prop, as a man I highly respect, you are someone who I will listen to closely. So I hope you are right!!! :grin:
 
Thanks! I originally said I wanted it done by the end of March, but that was when my trip across country was possibly going to be as early as end of May. The trip is now pretty much set for September, so I have some additional time. That is good because the cold weather and tough work schedule have put me behind schedule. I am now hoping to have it drivable up and down the streets by end of April, and done a few weeks after that. We'll see how well I do with that prediction!

- - - Updated - - -


You got that right!!! Every time I think I am done, there is always a "oh yeah, I have to do that one little thing" - and then that eats up a couple of hours! Just last night I realized that my clutch pedal safety switch that protects against the car being started had been bypassed when I took the car apart. My pictures didn't match with the schematics, so I had to fix that. Two hours later, it was done. ONE STUPID WIRE!!! ...but, I am trying to keep the quality up and I wanted it to look factory and professional. Oh well...


Prop, as a man I highly respect, you are someone who I will listen to closely. So I hope you are right!!! :grin:


With all of the deer in your 'hood you better leave it uncorked for the first few trips. You know, for safety.
 
Prop, as a man I highly respect, you are someone who I will listen to closely. So I hope you are right!!!

Thank you sir! And you the same. It's been a pleasure sitting back watching/listening to your ride come together. It's also been fun tagging along, and the anticipation around here of your car getting on the road, a fella could cut with a knife. It's going to be a great day!
 
I've been working on a few odds and ends - but no dramatic progress anywhere.

First my headliner. It had really bad creases from it being folded up. I tested with scrap pieces and discovered that ironing it on the back of the headliner, on high (cotton) with full steam, plus shooting steam with a manual steam button, worked well to smooth the creases. However - no more than 15 seconds in any one area or it would start getting shiny and get ruined! Luckily, this I learned on my scrap pieces. I then ironed the real thing. Here is a shot of it on the ironing board. It is now back in the car and ready for a warm day and the final install.
IMG_4363.jpg

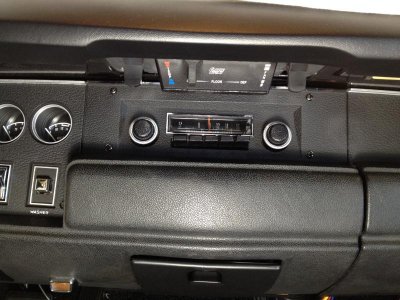
Then I finally finished my radio installation. It was a pain since the dash had been bent, but it ended up looking OK. Here is a shot of the installed "original" radio (now AM/FM, Bluetooth, aux input, etc.).
IMG_4369.jpg

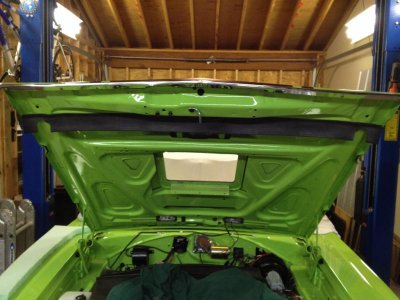
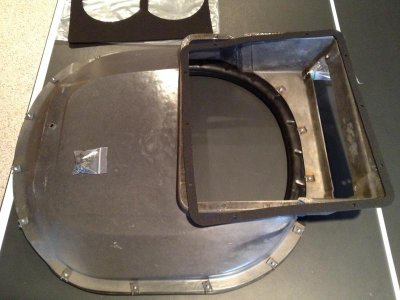
Then I installed the under hood radiator support seal. Astute Mopar guru's will tell me this is for a 68-69 Road Runner and not a 70. Well, this is exactly what came off my original car, so this is what I put back on...
IMG_4380.jpg

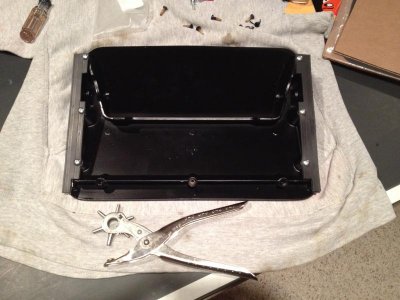
I still don't know exactly how these seals mount to the air grabber scoop, but I tried to copy the 71-72 mounting method. Hopefully that is correct. I used a leather punch to punch the screw holes in the rubber - otherwise the screws pushed the rubber out and made them fit really poorly.
IMG_4372.jpg

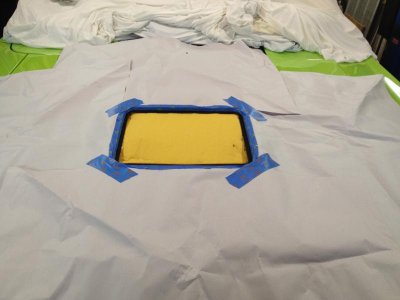
I then sprayed adhesive on my air grabber hood seal and hood - I had to mask up the car to spray the adhesive. Somehow I missed getting a shot of the installed seal, but maybe this can be a teaser for the rest of the air grabber. There is still a bit to go as a number of parts need to be restored before I can mount the air grabber though...
IMG_4378.jpg
 
Looking good Hawk, it wouldn't kill you to touch up the silver on the radio bezel lol.
The seals are correct like that but they are mounted from underneath after the scoop is installed.
Keep going, I'm anxious to see her done.
 
Hawk... Amazing work...just plain amazing. I will be using this as a guide, when I finally tear mine back down to bare metal and start over again.
 
Looking good Hawk, it wouldn't kill you to touch up the silver on the radio bezel lol.

LOL - that is actually that it is so shiny that it is reflecting dark dash pieces. It is a reproduction piece as my car didn't have a radio and Bubba had later hacked his way into adding one with a "custom" metal plate. The other dash pieces are original to the car, so they are repainted with silver paint. I should actually paint silver over the chrome bezel to make it match the rest...

The seals are correct like that but they are mounted from underneath after the scoop is installed.
Keep going, I'm anxious to see her done.

So not sure what you mean here. Are you talking about the seal from the picture below that seals the air grabber box against the hood?

IMG_4381.jpg

- - - Updated - - -

Hawk... Amazing work...just plain amazing. I will be using this as a guide, when I finally tear mine back down to bare metal and start over again.

Thanks - I'm trying. :headbang:
But don't be fooled - it has its fair number of rough spots too - it is NOT a perfect car by any stretch, as much as I would like it to be...

...scratch that. If it were perfect I would be afraid to drive it, and that would be a crying shame. These cars were meant to be driven, and this car will be!!!

Hawk
 
I was talking about the two side seals on the air door itself in your fourth pic
 
I was talking about the two side seals on the air door itself in your fourth pic

Sorry, now that you say that it is obvious. I guess I am just as sharp as a bowling ball today... :iamwithstupid:

Yeah, I kind of assumed they would have to be added after installation, although I was maybe going to see if I could work it in with them on. But then again, that is dumb for six easy screws...

Thanks for confirming the seals!

Hawk
 
Wiring and Air Grabber Stuff!

So I got some key things done today.

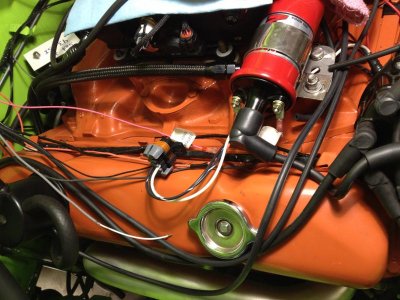
First, I finished the wiring on the passenger side of the engine compartment. I needed to hook the coil and distributor wires up. Basically the stuff left in this picture.
IMG_4384.jpg

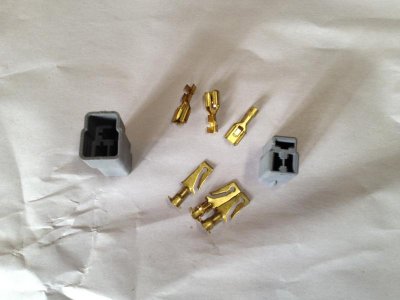
I wanted to use a "vintage" Mopar connector rather than the modern day looking stuff, so I bought this 3x Mopar connector to use. While this wiring is not stock, hopefully this looks "period correct".
IMG_4383.jpg

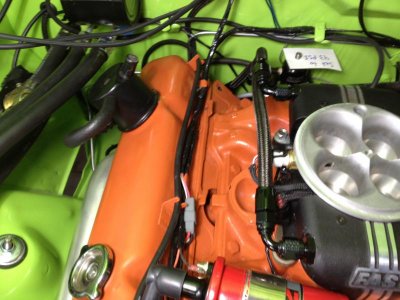
Here is the passenger side of the engine once I got the wiring completed. When it was done, then I wrapped everything in old fashioned friction tape.
IMG_4390.jpg

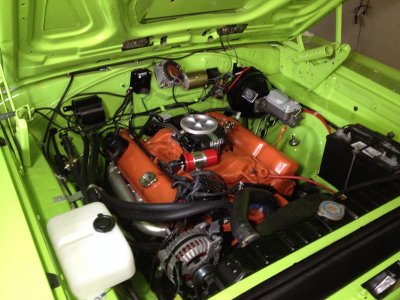
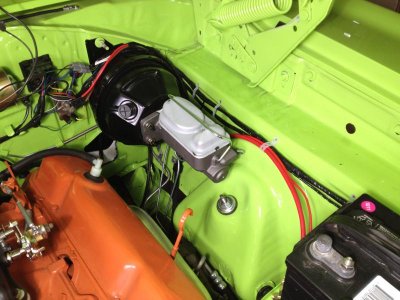
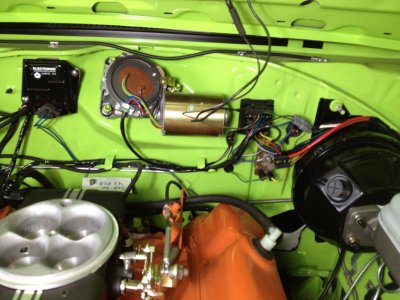
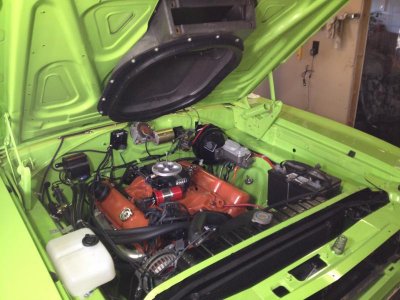
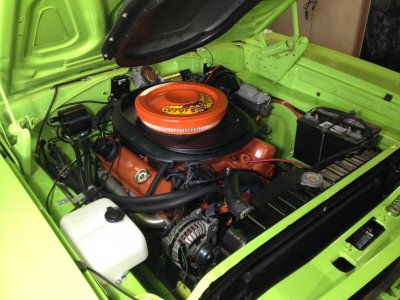
So now I think all the wiring is done under the hood. I still need to refurbish and install a horn and radiator fan, but basically the engine area is done. Oh, I guess I do also need a single outlet air breather rather than the triple used for the California cars...

Here are a couple of shots under the hood of the wiring. I need to bend the metal straps that hold the wiring to the firewall, but I will wait until I am 100% sure I didn't forget some wire somewhere...
IMG_4389.jpg

IMG_4391.jpg

IMG_4392.jpg

Then I turned my attention to some air grabber parts. I bolted on the air box and gaskets.
IMG_4403.jpg

I also had to set the air cleaner on the car just to check it out. I got pretty excited looking at it since it is now starting to look pretty complete! I am happy with the A/C and fuel injection placement as I think this still looks pretty stock.
IMG_4412.jpg

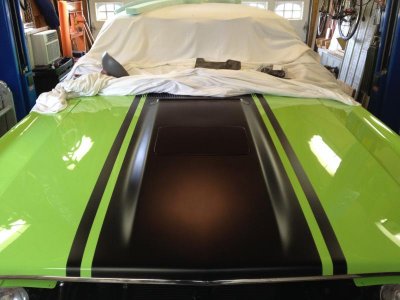
It is nice to see the hood without a hole in it!
IMG_4401.jpg
 
Looking really nice now. Hope you can post a video of the start up and first cruise around. :headbang:
 
Got us on pins and needles Hawk !! Can't wait to see it in person. I'm sure your'e bringing it to Carlisle. Right ??
 
Got us on pins and needles Hawk !! Can't wait to see it in person. I'm sure your'e bringing it to Carlisle. Right ??

God willing, it will be at Carlisle! (mixed in with the 100 other Limelight cars, I'm sure!!!) :icon_razz:
 
Auto Transport Service
Back
Top