You are using an out of date browser. It may not display this or other websites correctly.
You should upgrade or use an alternative browser.
You should upgrade or use an alternative browser.
Hawk-Rod: The Restoration
- Thread starter HawkRod
- Start date
Nice work! That is an impressive amount of binder clips! I thought Sarge took the cake with his mighty vise grip collection, but your sir have an army going on there.
LOL. I think the vice grips are a bit more complex than some crappy binder clips! Either way, they served their purpose well, and I liked the control and ease of use. Careful through! I will train them to protect my car so any car thieves will have their earl lobes, nose and other tender areas attacked!
- - - Updated - - -
For an update, my attempt to get the windows installed today failed. First, I really couldn't get all the clips I needed to get the trim installed. It turned out that was really a blessing in disguise. Mark came up today to help get the rear stainless molding sitting just right, and that took us awhile by itself. (LOL, I think he came up too so I wouldn't screw up his nice paint!). In addition, cleaning and prepping the back window will take a lot longer than I thought. Simply wipe with some window cleaner, right??? No way. There is ground in dirt where the glass and molding contact each other, so this will take some time to clean.
Anyway, so it is back to the drawing board to do some more prep and get my act together. I was rushing this a bit and learned my lesson. When window installation is re-scheduled, I will have the trim polished, clips installed, trim tested, windows cleaned, and materials ready...
Hawk
NZ 70 RR
Well-Known Member
The headliner looks fantastic Hawk, definitely an A.
I can second your comment about doing the prep work. Getting all the small bits ready to go will make the glass fit super easy. I found that the excitement of making progress made me get ahead of myself.
Get up the great work , how is the weather, spring must be in the air ?
I can second your comment about doing the prep work. Getting all the small bits ready to go will make the glass fit super easy. I found that the excitement of making progress made me get ahead of myself.
Get up the great work , how is the weather, spring must be in the air ?
The headliner looks fantastic Hawk, definitely an A.
I can second your comment about doing the prep work. Getting all the small bits ready to go will make the glass fit super easy. I found that the excitement of making progress made me get ahead of myself.
Get up the great work , how is the weather, spring must be in the air ?
Thanks Tony.
Yesterday was a stellar spring day in my neck of the woods; sunny and warm. Nice! The rest of this week is supposed to be rainy, but at least not cold. Trust me, I am SO DONE with the cold for awhile. Only down side with spring is the grass is going to start growing like mad soon - so lots of time behind the mower! That's OK, I'll take that over shoveling snow...
a68postcar
Well-Known Member
hey hawk, check steele rubber products. 70-2389-43 weatherstrip, hood to cowl seal.
hey hawk, check steele rubber products. 70-2389-43 weatherstrip, hood to cowl seal.
Thank you! You are a gentleman and a scholar!
a68postcar
Well-Known Member
lets not get too far out of hand here hawk
Glass!
Got the glass in today. I know it is just two pieces of glass, but what a difference it makes in the look of the car - rather than a car shell, it is starting to look like a proper car!
I had professional window guys install the glass, but I prepped everything for their arrival - I taped around the openings on both the front and back of the car to help protect it during the installation. Also - VERY IMPORTANT: Make sure the molding fits properly before the glass goes in - this will make the final the installation go well.
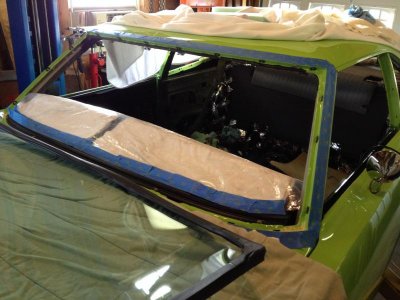
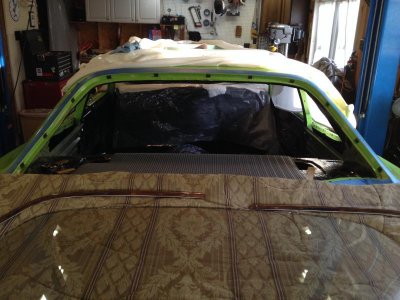
Here is the glass after the installation. Both windows and trim came out great!
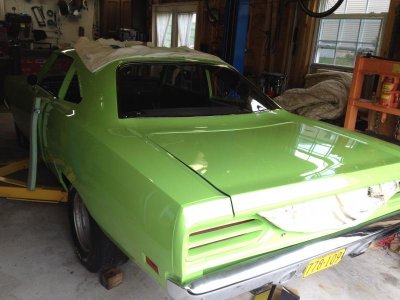
The installers knew I was driving this across country, so they added sealer in the channels to help make sure it seals out the elements. I would have made a mess, but they did a really neat job!
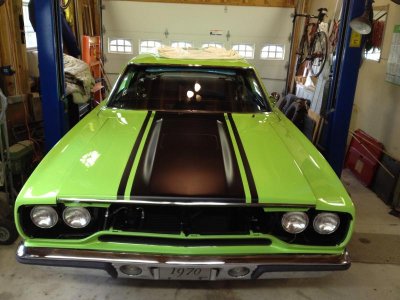
Got the glass in today. I know it is just two pieces of glass, but what a difference it makes in the look of the car - rather than a car shell, it is starting to look like a proper car!
I had professional window guys install the glass, but I prepped everything for their arrival - I taped around the openings on both the front and back of the car to help protect it during the installation. Also - VERY IMPORTANT: Make sure the molding fits properly before the glass goes in - this will make the final the installation go well.


Here is the glass after the installation. Both windows and trim came out great!

The installers knew I was driving this across country, so they added sealer in the channels to help make sure it seals out the elements. I would have made a mess, but they did a really neat job!

HYRDGOON
Well-Known Member
- Local time
- 2:32 PM
- Joined
- Apr 20, 2013
- Messages
- 3,375
- Reaction score
- 2,746
- Location
- Breslau, Ontario, Canada
Looks great Hawk!
- Local time
- 1:32 PM
- Joined
- Jan 1, 2013
- Messages
- 8,050
- Reaction score
- 3,465
- Location
- Mascoutah, Illinois
Congrats on the milestone and tips Hawk
showard
Well-Known Member
Wow! It does look almost finished now. Looking good.
GearAddict
Well-Known Member
Looking pretty sweet Hawk...
The PO filled in the front and rear windshield molding clip screw holes on my RR.. You didn't happen to find the dimensions for the hole placement did ya? I'm assuming yours were still there with no need to drill, but I have to ask, as it's driving me nuts.
The PO filled in the front and rear windshield molding clip screw holes on my RR.. You didn't happen to find the dimensions for the hole placement did ya? I'm assuming yours were still there with no need to drill, but I have to ask, as it's driving me nuts.
Looking pretty sweet Hawk...
The PO filled in the front and rear windshield molding clip screw holes on my RR.. You didn't happen to find the dimensions for the hole placement did ya? I'm assuming yours were still there with no need to drill, but I have to ask, as it's driving me nuts.
Hi Scott,
I took detailed pictures and measurements of both my front and rear window clip placement. However, due to a stupid human malfunction (LOL I could blame it on the PC but it was me who screwed up), I ended up deleting the pictures of the front window. I do still have pictures of the back window. Rather than dump 20 pictures here, I'll send you a PM and I can email you the pictures. If others want the pictures too, let me know...
Hawk
- Local time
- 1:32 PM
- Joined
- Jan 1, 2013
- Messages
- 8,050
- Reaction score
- 3,465
- Location
- Mascoutah, Illinois
You could put them on imgur and share the link and we could all just click that Hawk ;)
- Local time
- 2:32 PM
- Joined
- Jul 17, 2008
- Messages
- 23,936
- Reaction score
- 71,201
- Location
- South Jersey USA
the back side of your trim pieces probably have some sort of residual marks where the clips used to be
a68postcar
Well-Known Member
glass in Jeffs car Wednesday
While I have been messing around with my steering column, I have been doing a few small jobs on the car...
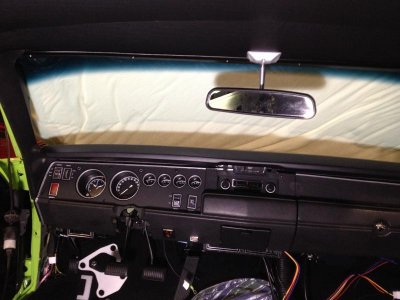
Since the windshield is in, I put up the upper trim, the rear view mirror and the trim over the A pillars. Quick, but more parts off the shelves!
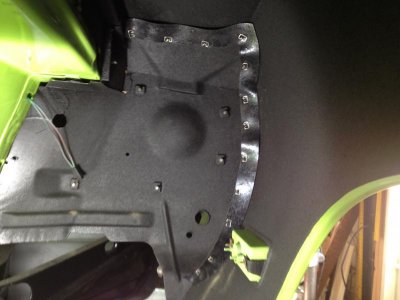
I added gaskets under the fender...
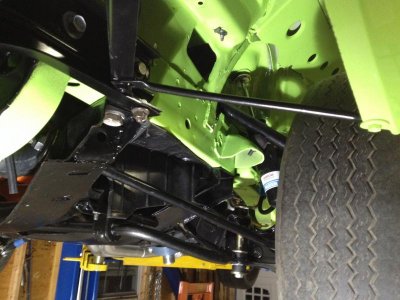
Under the car, I riveted in the splash shields and the front fender support rods.
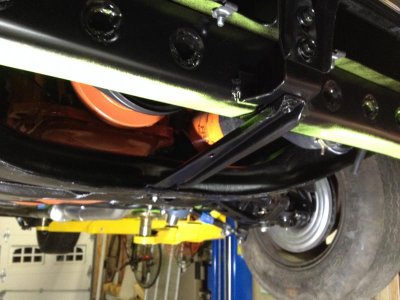
...and I added the radiator support thingamabob (that's a technical term) :grin:
Nothing earth shattering, but progress...
- - - Updated - - -
I guess I need to figure out how to some of this stuff. I am not a big fan of cloud stuff, but maybe it is time to start...
Since the windshield is in, I put up the upper trim, the rear view mirror and the trim over the A pillars. Quick, but more parts off the shelves!

I added gaskets under the fender...

Under the car, I riveted in the splash shields and the front fender support rods.

...and I added the radiator support thingamabob (that's a technical term) :grin:

Nothing earth shattering, but progress...
- - - Updated - - -
You could put them on imgur and share the link and we could all just click that Hawk ;)
I guess I need to figure out how to some of this stuff. I am not a big fan of cloud stuff, but maybe it is time to start...
Similar threads
- Replies
- 62
- Views
- 3K
- Replies
- 107
- Views
- 6K
- Replies
- 178
- Views
- 14K


