• When you click on links to various merchants on this site and make a purchase, this can result in this site earning a commission. Affiliate programs and affiliations include, but are not limited to, the eBay Partner Network.

Modern Bullitt build

More awesome fab work Keepat, looks great. I'm taking note since this will likely be my main project for the winter (installing my A/C unit). A little fruit for thought for you, when dealing with what to do with the unused air intake on the passenger side I took an extra fresh air intake for the driver side and mounted it on the passenger side so it can still be used...... works nice and looks like it was built that way.

I love that idea and would have probably done something like that but the way I routed my AC and heater lines it goes right in that spot so there's no room with this installation, but if the AC lines were taken to another spot you could do that.
Thank you
Pat
 
IMG_20151015_160512.jpg Shop next door had this in for something...
 
I love that idea and would have probably done something like that but the way I routed my AC and heater lines it goes right in that spot so there's no room with this installation, but if the AC lines were taken to another spot you could do that.
Thank you
Pat

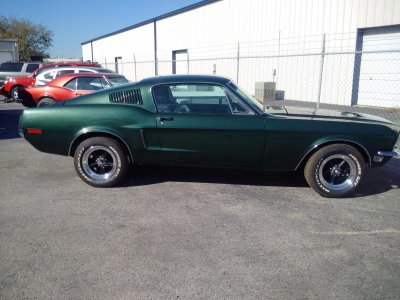
Yeah I guess you did run yours threw the fender area..... man I'm really thinking about pulling my motor and patching the holes I put in for that and doing it like you did! Looks great and I hate junking up the engine compartment with hoses and wires. Don't know if I should thank you or cuss you for causing more work haha.
 
I started the pluming for the brakes by making themounts for the line locks and proportional valve to go under the mastercylinder to help hide it. I need to make room in the inner fender for the frontbrake line and I’ll do this to keep the lines clear of the motor.
Thanks
Pat


IMG_7894_zpsxi5ruikt.jpg


IMG_7901_zpsw9anyil9.jpg


IMG_7903_zpsuq1wmnvi.jpg


IMG_7910_zpsmjpeubav.jpg


IMG_7925_zpss7fj5qmu.jpg

 
A few years back we had a 68 black charger and a green fast back mustang in the stable at the same time.
We drove to a few car shows in SoCal and always did a lap of the show along the way.
Amazingly I was surprised by how few people "got it".
My cars were nowhere close to as clean as yours.
 
A few years back we had a 68 black charger and a green fast back mustang in the stable at the same time.
We drove to a few car shows in SoCal and always did a lap of the show along the way.
Amazingly I was surprised by how few people "got it".
My cars were nowhere close to as clean as yours.

I am also surprised at how few people recognized the cars or are familiar with the movie! I think if they are younger than 40 they probably have never seen the movie. I understand it is not a top 100 or quite frankly not even a top 1000 movie It was actually a lousy script but it is the best car chase and certainly the chase that set the standards for all other car chases thereafter! It's just a generational thing, if there's no special-effects it just doesn't grab the younger minds attention. I have quite a few 35 and under people that I work with that have never seen any of the Godfather movies. Now we have arguably two of the top 10 movies ever made and the younger generation mostly have not watched it. I think if they ever did a remake of the bullitt movie with the right actors and the right cars, hopefully the old cars you might just be able to bring the new generation into it the same way they have followed the fast & furious movie??
Thank you!
Pat
 
Really enjoying watching the progress on this thread. Great inspiration.

Don't lose hope. I'm under 35 and was the only one in my group of friends traveling through San Francisco that had Bullitt chase scenes locations on my must-see list. I also own both Godfather movies (there are only two).

Carrying the torch,
David
 
I had a few people ask how I measure and bend the stainlesssteel tubing, so I thought I would post a little more details on the radiatoroverflow line. I have bent thousands of feet of S/S tubing over the years.Every 55 Fleming yacht commissioned on the east coast I have bent about 80 footof ½” and ¼” tubing, all by measurements and drawings. I sure there are manydifferent ways to bend S/S tubing but what I have found that works best for meis outside to outside tubing measurements. This is easy when working with 90degree bends. In the pictures below you’ll see marks on the tubing. One is anparallel orientation line, then a linedesignating the outside of the tubing after the bend, and the last mark is a Uor C (depending on how you look at it) this designate the direction the bendshould go.


IMG_7928_zpsylvajpdy.jpg


IMG_7929_zpshba7r9xt.jpg


IMG_7932_zpslloh1cdj.jpg


By using a 45 degree fitting in the neck of the radiator I wasable to bend the tubing about 45 degree to start the line. With the first bendclose to the flair its best to flare the line 1[SUP]st[/SUP] as some flaringtools need more room then the bend will leave. You can see two marks in the 3[SUP]rd[/SUP]picture, 1 marking the where the outside of the tubing will be and the othermarking the direction of the bend.


IMG_7937_zpsd6qhh0se.jpg


IMG_7936_zps6f5d2mwr.jpg


Here I’m using a scrap piece of tubing to mark where I willmake the bend, I also measure for the next bend and mark the orientation for thischange indirection.


IMG_7945_zpshbtzwwna.jpg


IMG_7946_zpsx6h47r29.jpg


IMG_7949_zpsuroz98df.jpg


IMG_7956_zps5ixho7kf.jpg


IMG_7960_zpsu33zt72p.jpg


IMG_7967_zpsxpgjicco.jpg


IMG_7969_zpsqr6efv0o.jpg


IMG_7973_zpscqjnonuo.jpg


IMG_7974_zpsn8b2zsow.jpg


IMG_7976_zpsyfwhl6ip.jpg


IMG_7988_zpsqzpkysdp.jpg


IMG_7979_zpsgeq3fhye.jpg


IMG_7990_zps1q0cnpno.jpg


Here are the tools I used to bend and flare the S/S tubing
Thanks
Pat
 
Keepat, you are a master pipe bender. Great photos and work! Kudos
 
Actually just an all around Master Craftsman period !! I can not believe the quality of your build. Thanks for sharing!
Don
 
Pat,

Thanks for the detailed instructions and showing us some of your methods - much appreciated!

Hawk
 
There are 2 small computers that I needed to mount under thedash. One controls the EFI that I mounted on Vintage Air mount so that the troubleshootinglight is just viewable under the dash (sorry no pictures) The 2[SUP]nd[/SUP]controls the ignition and I mounted it to a plate that covers the unused rightside cowl vent.
Thanks
Pat


Pulled the motor back out so I could modify the innerfender to make room for one of the brake lines off the master cylinder.
Thanks
Pat


IMG_8009_zpsqbxtb0cx.jpg


IMG_8010_zpsny4ezgbt.jpg


IMG_8013_zps4wouvwz4.jpg


IMG_8018_zpshpvf26mg.jpg


IMG_8025_zpssasg5ovk.jpg


IMG_8033_zpsib7g19er.jpg


IMG_8047_zpsghqitlez.jpg


IMG_8050_zpstyiapjmb.jpg


IMG_8040_zps1n1lqyja.jpg


IMG_8041_zpslzkkws02.jpg

 
Welded the seams on the inner fender covers, coated themwith bed liner and installed a rubber gasket I got from McMaster Carr. Now theyshould keep most of the water and dirt out.
Thanks
Pat

IMG_8056_zpszddcrn45.jpg


IMG_8060_zpsjkctuy9s.jpg


IMG_8078_zps1a44wnde.jpg


IMG_8073_zpsxcwudfgt.jpg


IMG_8084_zpsecahnv3g.jpg

 
Auto Transport Service
Back
Top