• When you click on links to various merchants on this site and make a purchase, this can result in this site earning a commission. Affiliate programs and affiliations include, but are not limited to, the eBay Partner Network.

My 1967 Belvedere Convertible Plans and Restoration (aka - Mad Scientist Build)

Mini tub in convertible - design time . . .

Part of the rebirth is going to be part design and rebuild . . . Mini Tubs ! ! !

I really want to mini-tub this bad boy, to allow me to be able to put the larger tires/wheels and give me that deep dish look that I love so much. So I've shot a bunch of pictures and drawn out some lines . . . and I've got some questions for the group . . .

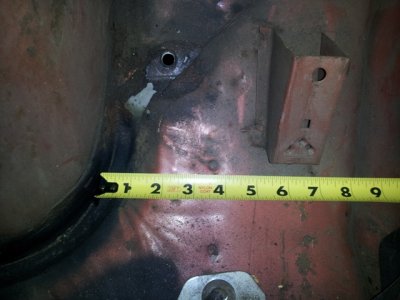
Here's what we're working with here . . . on the top we have 2 3/4 inches to the inner wheel well lip ( this is at the top of the wheel well ).
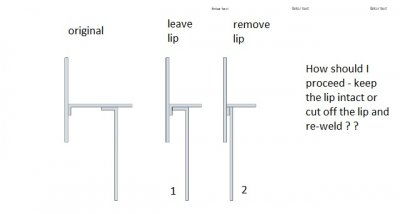
My concern - it the to flange of the frame that is sticking out to the 11/16 mark on the tape.

If I cut this off, am I hurting the strength of the frame torque-box structure ? I know that it'll be re-welded - but is that as good ( or better ) ?
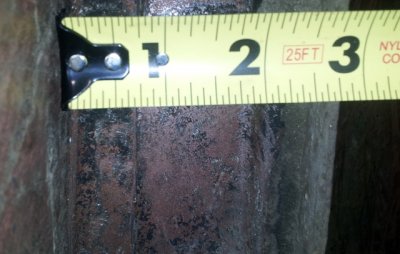
sm_topmeasure.jpg

Now if we move down to the bottom of the wheel well ( just under the seat belt bolt connection ).
Now we're running 3 1/4 inches . . . a 1/2 inch more . . . so now I have to make a 1/2 inch gap ? ?
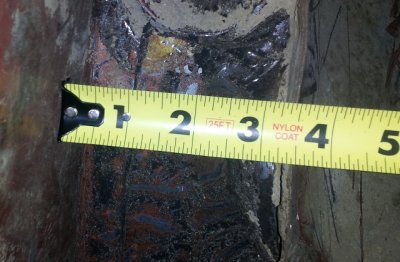
sm_botmeasure.jpg

Inside the car we'll have to move this inside of the well to the right 2 3/4 inches - I've got room.
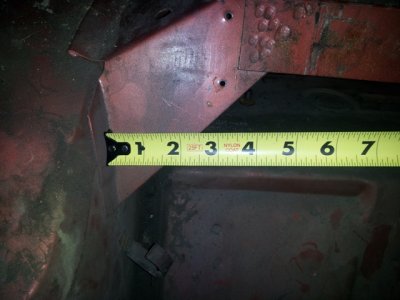
sm_alsomoves.jpg

And I need to move the bottom here either 2 3/4 inches or 3 1/4 inches . . . that what I'm trying to figure out.
Not - I'm going to loose one of my seat belt connections with the cut - so it'll have to be re-located.
sm_alsomoves2.jpg

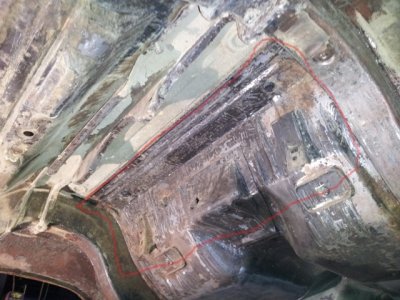
Drew out some lines for the proposed cuts in the cab area of the car . . .
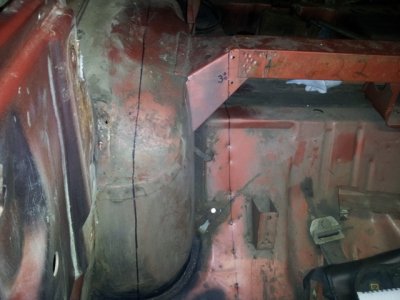
sm_cabcut.jpg

And in the trunk area of the car . . . notice that I've got a little swiss cheese in the trunk that'll need to be cleaned up.
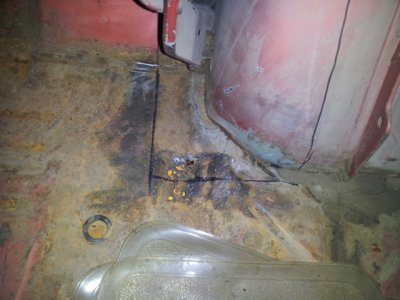
sm_trunkcut.jpg

This is another part of this mini tub project, moving the spring perches to allow pulling the perches in 3" inches.
What you can see is that the original mounting position is much higher than the new on - the frame hangs much lower . . .
so does the mounting hole go at the same lever - and if it does, will the shackles still hold the springs correctly ?
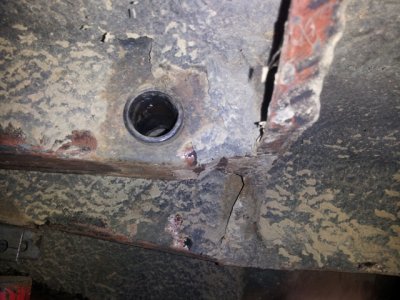
sm_rearspringmount.jpg

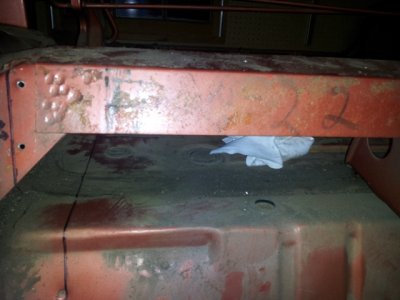
Stumbled on this in the process, had not seen it before. Apparently during the build process, somebody wrote the date on this panel inside the cab area of the car. If you look you can see 6-22 on the panel - my guess is that is the approximate date that the car was built during 1967. Pretty cool ! ! !
Might have to re-shoot the picture to remove the glare.
sm_dated.jpg

So . . . now to figure out how to get this cut out and re-welded back in to give mt tires/wheels some much needed room !

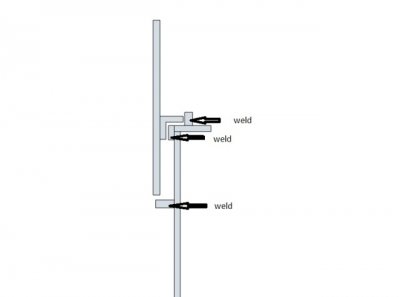
Here's a little diagram to try and illustrate the (2) options:
 

Attachments

  • sm_cutandweld.jpg
    sm_cutandweld.jpg
    25.1 KB · Views: 335
If I may suggest, 5th pic down the proposed line you have marked on the brace (a 3 on it) I would not cut that brace. If you were to brace up the package tray, remove all of the spot weld from the brace and remove it then you could do your tub work. When finished with the tub work you could just reinstall the braces slightly inboard and it would look original. Just a thought
 
If I may suggest, 5th pic down the proposed line you have marked on the brace (a 3 on it) I would not cut that brace. If you were to brace up the package tray, remove all of the spot weld from the brace and remove it then you could do your tub work. When finished with the tub work you could just reinstall the braces slightly inboard and it would look original. Just a thought

Agreed 747Mopar . . . that was the plan . . . the line is just a "view of the direction.

Plan is to grind all welds and leave all the pieces intact.
Cut out the inner wheel well.
Reform that bracket ( and the trunk bracket ) so that they have new flanges to re-weld onto the wheel well top ( similar to how it is now )

Hope that makes sense . . . thanks for watching out 747Mopar . . .

After writing this up . . . I think I see your suggestion . . . let me think on that . . .
 
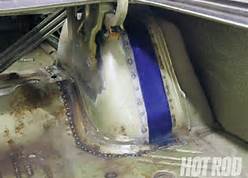
This is the way I was going to do mine before I decided against it.thCAW8AUKD.jpg

- - - Updated - - -

I pondered the same thing with the lip, I guess I'd move the fender all the way back to the rail. If you saved a portion of the floor as in the pic I posted it would allow you to get into the frame rail and add another weld lip (an L shape welded to the inside of the frame and then the floor welded to it).
 
This is the way I was going to do mine before I decided against it.

That's the way that I've seen it done . . . that was the route I was leaning.

Why did you decide against it ?

What way did you do it ? ?

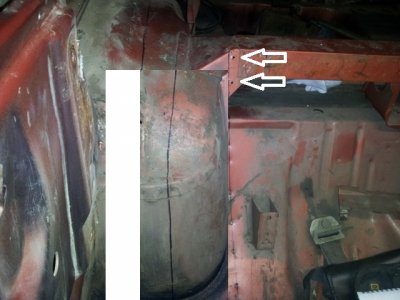
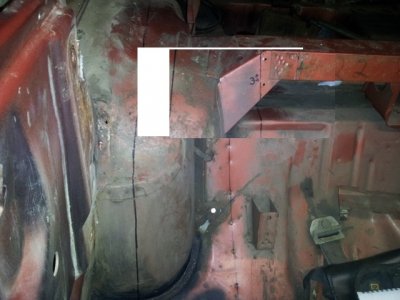
The way on the left is what I was thinking . . . the two holes are to hold a panel on top - think it's the seat backing.
On the left picture - the holes are left alone ( in the same place )
On the right they are moved over 3 inches and the metal moves away from where the holes were.

sm_cabcutmove1.jpgsm_cabcutmove2.jpg

That's exactly why I'm drawing and not cutting yet . . .

Yes, saving part of the floor would give me additional welding area and extra metal for support - that's what I was thinking.

Drew it up so we can make sure we're on the same page - it's a bit over exaggerated - but it might help:

sm_newwelds.jpg
 
Sounds like you got it all figured out 67. I didn't tub mine, after allot of debating and measuring I decided that by just dehumping the outer tub it would allow for 12" wide tires which I thought should be sufficient.
 
Sounds like you got it all figured out 67. I didn't tub mine, after allot of debating and measuring I decided that by just dehumping the outer tub it would allow for 12" wide tires which I thought should be sufficient.

Thanks for the input 747Mopar . . . I'm trying to think it all through "before" I start to cut into the metal.

I don't like the outer hump at all . . . what's it take to "de-hump" the outer tub ? ? I was looking at that too.
Did you cold roll the fender lip too ? ? That would give some extra room as well . . .
 
Page three of my thread has two pics and Daytona kid did the same thing as well.

- - - Updated - - -

Just checked Daytona's thread, pg 10, 12,13.
 
AHA . . . 747Mopar . . . funny how it can make sense once you put it into perspective. Remember, I'm pretty green here.

Now . . . my driver side will be cut off as it's pretty rotted out . . . so that's easy.

BUT, my passenger side is pretty solid - do I have to cut it off to de-hump it ? ? That seems to be the best/easiest way . . .

The inner wheel well on the passenger side needs work . . . this is going to be interesting ! ! !
No, both of mine were really solid and were done on the car, are your quarters coming off? You can do it without pulling the quarters but it is allot easier with them off.
 
No, both of mine were really solid and were done on the car, are your quarters coming off? You can do it without pulling the quarters but it is allot easier with them off.

Gonna look at getting the passenger side done when I cut out the inner wheel well - that'll give me little extra room to work while it's out of the way ( uh, maybe ) . . .

Driver side quarter is coming off (it's rotted pretty badly) - Passenger side might be staying in place ( I'm getting to that point now )

THANKS for all the feedback 747Mopar - great to have such a great group watching and throwing in suggestions ! ! !
 
Be careful if you are going to be welding on the inside of the fenderwell. it is pretty cramped, you WILL get burned and do it in short bursts so you don't get gassed....all of the smoke builds up in the top and will smoke you out pretty quick. Not to mention with your welding hood on your head barely fits.

I had to replace a couple spots on the inner fender from the inside...not my favorite place.

On the mini tub note, take note that if you want a "deep dish wheel" you will need to narrow your rear and to get it to look deep. you will fit more tire with a mini tub but the wheel mounting flange location isn't changing unless you narrow up the axle a bit.

Have you planned out what tire size and wheel you want to fit there? I would make sure I had a complete game plan before cutting into the inner wells.

Thanks KB for the forewarning . . . Hopefully I'll have a little easier time as "some" of it will be able to be welded from the top since I've got a convertible .

Basically, my plans are to open up the wheel wells as much as possible to give me the most possible room in the for whatever tire I choose to run with - and have it fit. By moving the inner well up to the frame rail, it'll gain me almost 3 inches . . . the axles are planned to be shortened only 2 inches - that should work to help out the "deep dish" look on the rear tires.

Still looking and planning at this time - trying to figure the best way to tear into this part of the project.
Are you doing the axle yourself? I did a 9" a few years ago for my old Grand Prix, it isn't to hard if you have the proper jig to get it straight again (mine was homemade) I then just ordered a set of Strange axles. What you need to do it is a really, really rigid piece of shaft and 4 bushings, 2 that fit both the axle bearing bores in the tubes and 2 that fit the bearing clamps in the housing. It is very important that the shaft is rigid and that all bushings fit snug.
 
The inevitable . . .

While scooting around under the car, trying to figure out a game plan for the inner wheel wells . . . figured I'd grab the scraper and get back at the undercoating removal ( that I'm trying to keep putting off ) . . .

Got a part done that had lots of contours and very little smooth surfaces ( what a pain ! )

sm_moreucoating.jpg

Wasn't a HUGE area, but it was a pain and I'll take the "small" victory ! ! ( grin )

Now if I can just finish up all the rest of the contours and protruding metal around the shock supports . . . that would be huge !

- - - Updated - - -

Are you doing the axle yourself? I did a 9" a few years ago for my old Grand Prix, it isn't to hard if you have the proper jig to get it straight again (mine was homemade) I then just ordered a set of Strange axles. What you need to do it is a really, really rigid piece of shaft and 4 bushings, 2 that fit both the axle bearing bores in the tubes and 2 that fit the bearing clamps in the housing. It is very important that the shaft is rigid and that all bushings fit snug.

747Mopar . . . IF I do attempt to do it myself, I've got a buddy ( and engineer extraordinaire ) that I would have help me with the project. I know that with his help, I could get the thing done right - would be kinda fun to be able to say I did it myself ( maybe ). I do live near Charlotte and Statesville ( called Race City ) and a TON of race car shops around that might be willing to knock it out for me for a reasonable rate - haven't investigated it yet . . . that'll probably be coming up in the not too distant future . . .
 
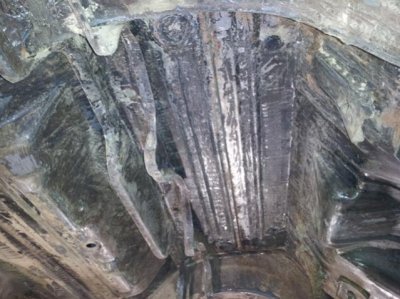
Yet another part of the car undercoatiing-less . . .

Couldn't stand to see it so close and not be done . . . so I turned on the radio and attacked it . . .

Got all the nooks and crannies cleared out by the shock mounts . . . this part is done . . .

sm_ucoatinggone.jpg

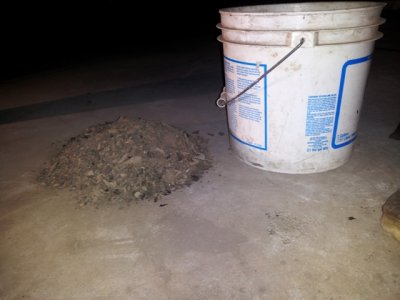
And here's the proof with the pile of undercoating that was removed . . .

sm_anotherpile.jpg

Now all that is left is the trunk area ( and the tank area is mostly cleared from the tank being there ) . . .

I think I'm finally on the home stretch for undercoating removal ! ! !
 
Couldn't stand to see it so close and not be done . . . so I turned on the radio and attacked it . . .

Got all the nooks and crannies cleared out by the shock mounts . . . this part is done . . .


And here's the proof with the pile of undercoating that was removed . . .

Now all that is left is the trunk area ( and the tank area is mostly cleared from the tank being there ) . . .

I think I'm finally on the home stretch for undercoating removal ! ! !

Congrats on the milestone. Did you just use a stiff putty knife or did you help it someway?
 
Undercoating removal . . . with only a putty knife

Congrats on the milestone. Did you just use a stiff putty knife or did you help it someway?

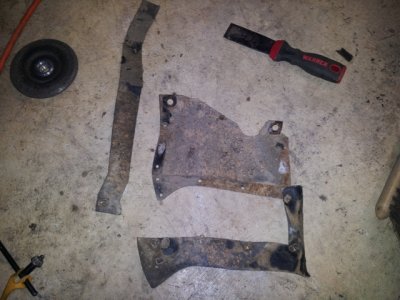
Tallhair . . . the best tool that I found for it was a stiff putty knife like the on in the picture below:

sm-frontfenderpasssplashguard.jpg

With any smooth surface, if you can get an edge started, I found that attacking it about 1/4 - 1/2" at a time works really well - sometimes the full width of the putty knife will knock it off, but not very often. No other assistance was provided - I did not heat it up with a torch. I have tried tapping the putty knife with a hammer, and if you get the angle right, it'll sure help pop that stuff off.

One thing I thought of after the fact, would be to round off the sharp corners a little bit to prevent them from digging in when you hit contours.

Want more detailed pictures . . . I've still got a little more left and I could shoot some for you with more details.
 
PUTTY KNIFE AND A PROPANE TORCH really makes it easy if you want to call it that. I feel for ya 67, that job really sucks but it's gotta be done "at least the car is looking good downstairs".
 
PUTTY KNIFE AND A PROPANE TORCH really makes it easy if you want to call it that. I feel for ya 67, that job really sucks but it's gotta be done "at least the car is looking good downstairs".

Thanks 747Mopar . . . but I have to admit, I'm getting pretty tired of looking at the car from a creeper underneath it ! ! ! I would REALLY like to see what my car looks like as most of the world is going to see it ! ( LOL ) . . . But I do want the bottom to have that "clean" look too . . . so it's all part of the job.

Since I started doing a lot of this work in the heat of the summer, the use of a propane torch was "not" that appealing to me ( LOL ) . . . so I tried it without the torch and got really good results - so I just kept at it with the scraper. Now that it's getting colder outside - I might have to reconsider the torch option ! ! ! Help with warming up the shop at the same time.

Since I have not tried the torch scraper method - I can't provide any insight, positive or negative, to the results or ease of removal.
( is this where I have to say "Your results may vary" ) ( smile )
 
Auto Transport Service
Back
Top