• When you click on links to various merchants on this site and make a purchase, this can result in this site earning a commission. Affiliate programs and affiliations include, but are not limited to, the eBay Partner Network.

My 1967 Belvedere Convertible Plans and Restoration (aka - Mad Scientist Build)

Excellent point Elk. Also ref pics as you go that are saved with file name that indicates side of car, parts, orientation, etc.
 
You are moving along nicely. Just make sure you are bagging everything up and writing in detail where all the fasteners go. And also note if some are missing or broke. It is amazing how much you will forget several months down the line. The clips holding the vent cables are held on with a Phillips screw. After removing that, you will need to gently pry a small tab on the spring clip with a small screwdriver. If you are not careful, you will bend it enough that it wont stay in place on its own.

Yup just a little tab to pry up and the clip will come off. Watch out though they have a tendency to go flying. If you can't get it pm me I think I have something in the shed I could use for a tutorial.
 
That's the fun part...... actually learning something and being able to say you did it yourself.
Carry on!!!!!!

Thanks Superfreak . . . I'm a carrying on ! ! ! Not only am I learning, I'm having a blast doing it ! ! !

Thanks to the great group of guys/gals here that can point me in the right direction ( when needed ).

- - - Updated - - -

Isn't there a screw that holds the clips? Or maybe lift the clip enough to get the cable out. You really got a lot of stuff done after the top was removed.

Thanks Roadrunnerman - I'll look for a screw - I didn't see one ( which is why I asked ) . . . could have missed it.

Would have got even more done if I wasn't fighting with leaves half the weekend ( again ! ) and the mower ! ! ! I'll explain later.

- - - Updated - - -

Wow, check out the progress. I really, really love the car in the picture, the paint job is sweet and I love the deep dish mags. If that car is the goal then I'm really watching now "this is going to be cool".

Thanks 747Mopar . . . I love the deep dish mags too - think I'll need to narrow the rear and mini-tub it. Not doing black . . . working on my color scheme still. I "hope" to use it as a model to give me direction and move forward. Got a second trunk - think I'll work on cutting it up for the tail lights and see how it goes . . . might set it up to be modern or normal ? ? If that can be pulled off . . . will need to investigate that.

- - - Updated - - -

I'm quit sure you'll get it done just fine and you'll continue to get support from bdere. You are really going to town there buddy and I admire your efforts. Nice having a few windows to see out of the garage there. Bet that helps on the light in the day time anyway.

I like your plans too. The rear tail lights remind me of a 70 RR GTX or 66 Imperial or a cross between the tow but the rectangular framing makes me think B body more. Really cool. I love mid 60's C Bodies too.
Thanks Tallhair . . . Yes, I get great support from here ! Thank my luck stars ! ! It's nice to have a model as a goal . . . and see thing getting done. Removing the top was something I should have done a long time ago ( just didn't know where to put it ).

- - - Updated - - -

You are moving along nicely. Just make sure you are bagging everything up and writing in detail where all the fasteners go. And also note if some are missing or broke. It is amazing how much you will forget several months down the line. The clips holding the vent cables are held on with a Phillips screw. After removing that, you will need to gently pry a small tab on the spring clip with a small screwdriver. If you are not careful, you will bend it enough that it wont stay in place on its own.

Thanks H2E . . . I've been doing that, but I might go back tonight and add more details - I had a brief description, but adding details to the bags can't hurt. Plus I'm taking a picture of everything and saving them on my computer too.

Will be looking at the vent cables again tonight and the clips ( I'll be careful ) - would like to get the dash out of the car - probably the wire harness too.

- - - Updated - - -

Yup just a little tab to pry up and the clip will come off. Watch out though they have a tendency to go flying. If you can't get it pm me I think I have something in the shed I could use for a tutorial.

Thanks KB . . . if I can't get it figured out I'll shoot you a PM . . . glad to see you still watching my back ! ! !

OH . . . THE LAWNMOWER . . .

Got a used eXmark 60" mower when my 52" Scag mower blew the crank gasket - plus it cuts the time to cut my grass in half ! ! So last week while mulching up leaves, it dies in the front yard - oh great ! can't get it re-started and it sounds really odd. So I run it down to the local mower place - they knew this mower and worked on it from the guy I bought it from. It did have 1600 hours on it. Gut listens to is on Saturday and tells me something is wrong with the top end - broken cam, lifter, bent valve, valve stuck open, who know what. They'll break it open and give me a call on the estimate to fix it. At 3:00 I call them because I've not gotten any call yet . . . they tell me it's done ! Fixed it . . . no call ? ? ?

So I go to pick it up and the guy tells me one of the hydraulic lifters went out - he'd never seen anything that bad. So they replaced all 4 lifters, and has 3/4 of an hour labor in it . . . total bill $105.00 . . . Guess I lucked out on that ! ! ! ( whew )
 
Last edited:
More stuff removed from the car . . .

Thanks for the help guys on the clips - there was not any screws in them, but they were spring loaded and clipped under the bracket. Just took a little bit of pressure on the arm hold them in place and they popped right off . . . got them all removed.

So now the dash is completely out of the car . . .

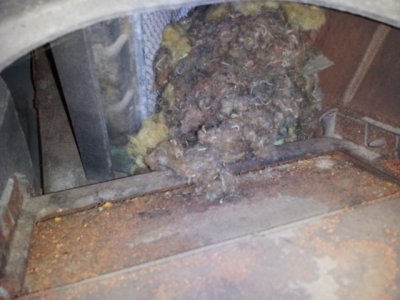
The heater box has been removed - oh, had a critter . . . so after pulling the heater box out, I had all kinds of stuff inside it - dang mice ! ! !

sm_mousehome.jpg

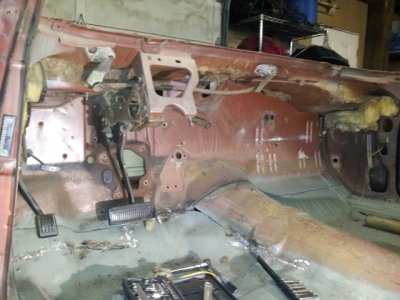
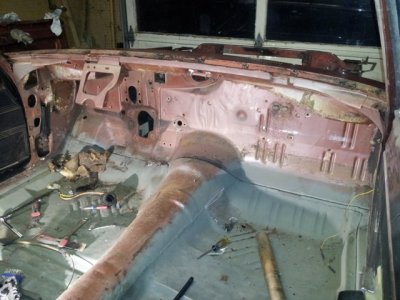
Now the car is looking kinda naked on the inside . . . got most of the stuff cleared out of it now. Basically just a shell.

sm_emptycar.jpg

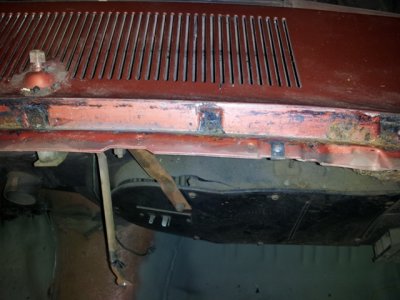
Was really worried about what I was going to find once I pulled the windshield out. I've seen cars on this site where thy had to completely re-weld in all new metal into the windshield wells to get them back into shape to take the windshield again . . . so I did some cleaning on the this in my car and was very pleasantly surprised at the results ! ! !

Take a look . . .

sm_windshieldwells.jpg

Still can see the paint in most of the track . . . gotta love that ! ! ! Thank you Mopar gods ! ! ! Thank you ! ! !

Notice behind the bracket, the heater box is cracked ! ! ! Oh boy ! ! !

Would like to upgrade it to an A/C box . . . so I can add A/C later if I so desire . . . Just a thought . . .
 
I did some cleaning on the this in my car and was very pleasantly surprised at the results ! ! !

Take a look . . .

View attachment 152254

Still can see the paint in most of the track . . . gotta love that ! ! ! Thank you Mopar gods ! ! ! Thank you ! ! !


Congratulations! I know that's a relief and one of the few that that does still have paint I'd say. Nice skeleton you have there
 
I love your enthusiasm. :D

Thanks CudaChick . . . just keep plugging at my car so I can get 'er done ! ! ! ( smile )

Congratulations! I know that's a relief and one of the few that that does still have paint I'd say. Nice skeleton you have there

Thanks Tallhair . . . Yes, the skeleton is in really good shape !! I was shocked . . . but in a GOOD way ! ! ( whew )
 
I've got an extra heater box if you need it but being fiberglass they are easily fixed and the seal kits for them are pretty nice as well. Congrats on the windshield channel, mine got a new (68 RR) cowl. A little suggestion that I did to mine, drill and tap a hole for a grease zerk in the wiper pivots. I didn't take mine apart as they weren't meant to come apart but was just real careful when drilling and used a bottoming tap, it will not only lubricate it but also act as a seal.
 
I've got an extra heater box if you need it but being fiberglass they are easily fixed and the seal kits for them are pretty nice as well. Congrats on the windshield channel, mine got a new (68 RR) cowl. A little suggestion that I did to mine, drill and tap a hole for a grease zerk in the wiper pivots. I didn't take mine apart as they weren't meant to come apart but was just real careful when drilling and used a bottoming tap, it will not only lubricate it but also act as a seal.

747Mopar . . . would you have a picture of how/where to installed it ? Sounds like a great idea . . . I surely can add it to my list ! !

Thanks for the suggestion . . .
 
Sorry I looked for it but musta deleted it. It's not important anyhow, just get it as close to the center as you can and pointed where you can get to it.
 
Guess I've got only a shell left . . . almost . . .

Got out to the shop and continued to remove parts and clean up what's left. So the pedal assembly has been removed, emergency brake, wiper pivots . . . all that's left is the rear wiring harness and the tail lights . . . that won't take very long . . . then I guess I have to get back to removing what's left of the undercoating . . . UGH . . .

She's looking rather empty . . .

sm_empty.jpg
 
Trim pieces Butyl cleanup . . .

The trim pieces of the convertible have a LOT of Butyl on them to help hold them in place and water seal them ? ? ?

And the "stuff" needs to be removed - so I tried lacquer thinner . . . here's the results . . .

View attachment 152436

I dripped the thinner on top of the Butyl . . . and did a little scraping with a scrap piece of wood . . . dumped the scrapping onto a piece of newspaper. Then used a bunch of paper towels and more lacquer thinner to remove the remnants . . . it worked REALLY WELL ! ! !

Good thing - look at the other trim piece in the picture . . . lots of Butyl on these parts ! ! !
 
It's official . . . the car is now only a SHELL ! ! !

The current stage of the Belvedere is a new milestone for me . . . I've never been this far into a rebuild of a car in my life - all the way down to just a shell of the car is left . . . with the exception of the doors ( that could be taken off if I had a place to store them ).

If we only learn when we push our limits . . . then I must be learning because I've just pushed my limits ( big time ) . . .

So here's what I've got done tonight . .


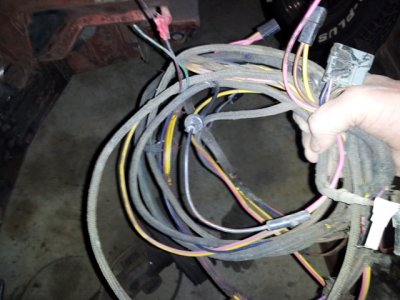
The rear wire harness was completely removed:

sm_rearwireharness.jpg

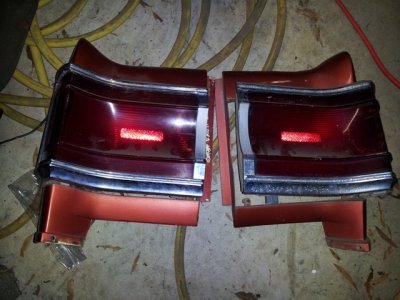
Then the rear taillights and the light bezels were removed . . .

sm_taillights.jpg

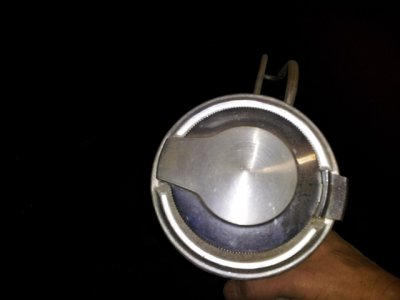
Then the gas cap and the filler tube were all removed . . .

sm_gascap.jpg

The dash was already pulled out and brought into the house, for a project, when I'm not in the shop . . .
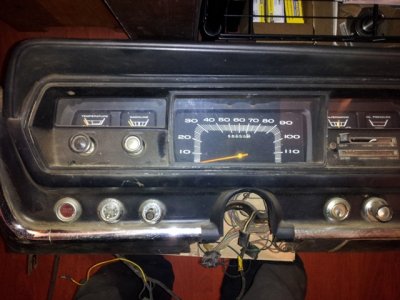
Here the instrument cluster - and the state of it.

sm_dash1.jpg

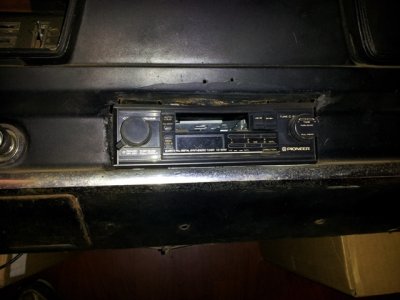
Will have some fun cleaning up this mess - the install of a cd/AM/FM radio . . . what a mess . . .

sm_dash2.jpg

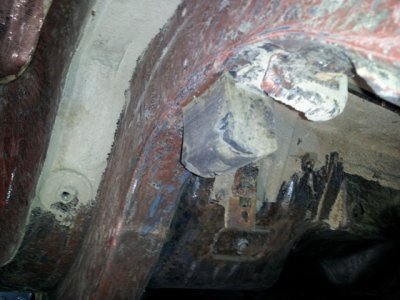
While under the car I noticed that the bump stops were the big rounded ones as expected on a HP 383 car . . .

sm_bumpstop.jpg

My car is now only a shell of a car . . . time to start the rebuilding ! ! ! ( again )

Mini-tubbing the wheel wells is going to be "interesting" . . . need to do some measuring . . .

- - - Updated - - -

You're doing great brother just keep on keeping on.

Thanks Tallhair . . . will do . . . will do . . . ( what else is there to do when it's dark by 5 PM ? ? )
 
The current stage of the Belvedere is a new milestone for me . . . I've never been this far into a rebuild of a car in my life - all the way down to just a shell of the car is left . . . with the exception of the doors ( that could be taken off if I had a place to store them ).

If we only learn when we push our limits . . . then I must be learning because I've just pushed my limits ( big time ) . . .


That's just how I was thinking when my Charger was scattered about in pieces. I'm sure hoping I can get it all back together this winter without to many problems. Thank God for digital cameras and this website - right? I'm curious about your axle bumper. I thought the big round ones were only standard on 440 & Hemi cars - not that it matters. I have a very original 69 RR that has the smaller triangle bumpers. This car of course has the 335 hp 383.
 
That's just how I was thinking when my Charger was scattered about in pieces. I'm sure hoping I can get it all back together this winter without to many problems. Thank God for digital cameras and this website - right? I'm curious about your axle bumper. I thought the big round ones were only standard on 440 & Hemi cars - not that it matters. I have a very original 69 RR that has the smaller triangle bumpers. This car of course has the 335 hp 383.

Good question H2E . . . I would have to say that these are the original ones as they're very firmly molded in with all the undercoating ! I do recall that the other threads were saying that 440 and Hemi cars had the rounded bumper . . . maybe that fact that this is the High Performance 383 car option AND it's a convertible ? ? May the fact that it's a convertible ( heavier ) they beefed it up to the bigger bumpers ? ?

I'm pretty new to this . . . but I'm sure someone on this site can chime in with more details ( or this is new due to limited convertible activity ? )

Hope that helps a bit H2E . . .

Also trying to help out any way I can with providing information and pictures ( yeah digital cameras ) to the group when needed. Let me know if you need anything else as I'm working my way through this huge jigsaw puzzle.

Hope you get yours back together . . . and I hope I do too ! ! ! ( smile )
 
[h=2]It's official . . . the car is now only a SHELL ! ! ![/h]
Cool beans brother. (I have no idea what cool beans means but I'm happy for you;J)


That's just how I was thinking when my Charger was scattered about in pieces. I'm sure hoping I can get it all back together this winter without to many problems. Thank God for digital cameras and this website - right? I'm curious about your axle bumper. I thought the big round ones were only standard on 440 & Hemi cars - not that it matters. I have a very original 69 RR that has the smaller triangle bumpers. This car of course has the 335 hp 383.

Converts and Hemi cars some stuff in common, boxed frames for one. Possible reason for the bigger bumper stops .. i.e. part of the package.

I just looked at my R/T and it's got those big ones too btw but I guess it would since its 440
 
Auto Transport Service
Back
Top