• When you click on links to various merchants on this site and make a purchase, this can result in this site earning a commission. Affiliate programs and affiliations include, but are not limited to, the eBay Partner Network.

My 1967 Belvedere Convertible Plans and Restoration (aka - Mad Scientist Build)

Amen to that "I hate chrome". Polished aluminum or stainless "yes" chrome "no", I really don't like it for the simple fact that once it goes to crap your screwed unless you can afford to have it re-chromed. With stainless or aluminum at least you can sand or buff the bad out. One look under my hood and you'll notice "no chrome at all" just painted parts or natural aluminum which is the look I like anyways. Same goes for wheels "absolutely no chrome wheels ever".

Thanks 747Mopar . . . You and KB are both talking my language - thinking of Powder Coating it - maybe a pewter color - then putting a pewter accent down near the rockers . . . Already sent a PM to CudaChick for information.

Thanks again guys . . .
 
What a great thread!! :D

I enjoyed the chat today Larry. Don't hesitate to ask if you run into any unfamiliar issues as you proceed with the trim pieces. In the meantime, the "Caswell Buff Book," an introduction to metal polishing and restoration, might be of some use to you and a few of your friends posting here:

http://www.caswellplating.com/buffman.htm

It has a TON of basic info to get up to speed and some handy shop-worthy charts for buffing compounds and their related metals.
 
Cooler weather . . . make that colder . . .

Got out in the shop and got 1/2 of the top front trim piece removed from the front window. Also got 3/4 of the rubber gasket on the front window removed from the outside of the glass in preparation for the windshield removal. Note to self - removal of this sticky, tar-like substance that's holding the trim pieces in place is much easier to do in 70+ degree weather than it is in 40 degree weather . . . DUH ! ! !

Working on trying to get the glass out - so that I can get the dash out.

Will continue to plug away at it . . . just trying to be careful on these trim pieces ( and of course the windshield ! )

- - - Updated - - -

What a great thread!! :D

I enjoyed the chat today Larry. Don't hesitate to ask if you run into any unfamiliar issues as you proceed with the trim pieces. In the meantime, the "Caswell Buff Book," an introduction to metal polishing and restoration, might be of some use to you and a few of your friends posting here:

http://www.caswellplating.com/buffman.htm

It has a TON of basic info to get up to speed and some handy shop-worthy charts for buffing compounds and their related metals.

Thanks CudaChick - was great talking to you too, too bad I had to go back to work . . . ( sigh ) . . . will read up some on the buffing that you posted, I'm sure that I can learn a lot more about this process . . . but I think I'll probably be going the powder coating direction. Starting to get an idea on how I would like the car to look . . . saw a great drawing of a concept car - oh man did it look awesome ! ! ! May need to do some drawing on pictures of my car to see what I can attempt.

CUdaChick - Will work on prepping all these pieces - and get up with you on your availability ! ! Do I get my hug yet ? ? ? ( smile )

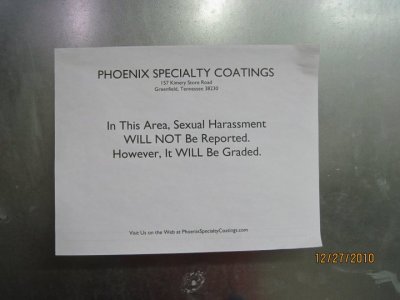
Hey guys, the bad news is I only rated a A- . . . need to work a little harder next time ! ! ! ( wink - CudaChick )
 
Oh no, don't you stress over that A- ... you did great. Most are lucky to get a C. :D

Sexual Harassment Sign.jpg

That 'tar like substance' you're fighting with is called butyl and there's not a lot you can do with it except scrape it out with a dull screw driver. Rubbing alcohol will help with the mess ... a little. But it's pretty much like cleaning the resin out of your bong. :D
 
Oh no, don't you stress over that A- ... you did great. Most are lucky to get a C. :D

That 'tar like substance' you're fighting with is called butyl and there's not a lot you can do with it except scrape it out with a dull screw driver. Rubbing alcohol will help with the mess ... a little. But it's pretty much like cleaning the resin out of your bong. :D

Your are too funny CudaChick. Was that sign already up?

- - - Updated - - -

Got out in the shop and got 1/2 of the top front trim piece removed from the front window. Also got 3/4 of the rubber gasket on the front window removed from the outside of the glass in preparation for the windshield removal. Note to self - removal of this sticky, tar-like substance that's holding the trim pieces in place is much easier to do in 70+ degree weather than it is in 40 degree weather . . . DUH ! ! !

Working on trying to get the glass out - so that I can get the dash out.

Will continue to plug away at it . . . just trying to be careful on these trim pieces ( and of course the windshield ! )

- - - Updated - - -


Thanks CudaChick - was great talking to you too, too bad I had to go back to work . . . ( sigh ) . . . will read up some on the buffing that you posted, I'm sure that I can learn a lot more about this process . . . but I think I'll probably be going the powder coating direction. Starting to get an idea on how I would like the car to look . . . saw a great drawing of a concept car - oh man did it look awesome ! ! ! May need to do some drawing on pictures of my car to see what I can attempt.

CUdaChick - Will work on prepping all these pieces - and get up with you on your availability ! ! Do I get my hug yet ? ? ? ( smile )

Hey guys, the bad news is I only rated a A- . . . need to work a little harder next time ! ! ! ( wink - CudaChick )

Thanks for sharing your work conv67bdere. Not a lot of how to's on converts so this is appreciated. BTW have you thought suspending the conv top from the ceiling? If you have the height it would be up and out of the way.
 
Tallhair . . . I was thinking the same thing last night ! ! ! !

Your are too funny CudaChick. Was that sign already up?

Not only is she funny, she's very easy to talk to, and she's very knowledgeable . . . oh, and fun to flirt with too ! ! ! ( grin )

Thanks for sharing your work conv67bdere. Not a lot of how to's on converts so this is appreciated.

Thanks Tall hair . . . I think . . . you're taking pointers and directions from "this greenhorn" . . . Don't know if that's such a good idea Tallhair ! ! ! Half the time, wait, correct that . . . most of the time I don't have a clue what I'm doing ! I have noticed that there are not many convertible restorations on this site - oh well, they don't know what they're missing ! ! ! ( grin )

BTW have you thought suspending the conv top from the ceiling? If you have the height it would be up and out of the way.

Tallhair . . . funny thing, I was out in the shop last night and I was actually looking at doing just that . . . I don't have a lot of room, the ceilings are only 8 foot tall, but I think that it'll get the thing far enough out of the way to allow me to get what I need to get done to the chassis. Guess I'll let you know in a little bit how it goes as it looks like I'm going to try and hang it from the ceiling joists ! ! !

- - - Updated - - -

Hope I get better grades than I did in school.LMAO

Roadrunnerman . . . this is a whole lot more fun then school ! ! ! LMAO . . .
 
Convertible Belvedere Concept car . . .

Found an absolutely gorgeous picture of a 1966 Concept Car - and I loved the look of it. With all the copyright issues that I've seen with Getty Images I'm afraid to post the entire picture . . . So I'll cut it up into pieces and show the ideas of the car that I really like. Not sure I'm going to pull this thing off, but if I can I'm going to love the result of the car.

Here's the pictures to show the ideas . . .

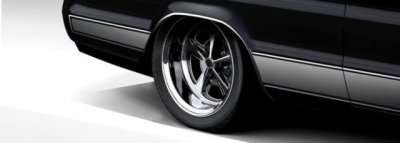
First I really like the deep dish rims in the back, and the rocker stripe that they put on this car . . .

sm_concept1.jpg

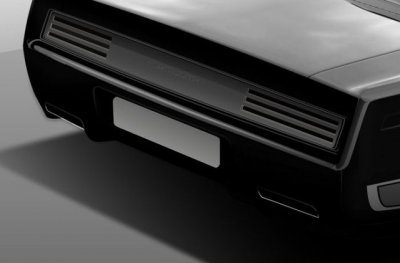
Next, I like what they did with the tail light - LED lights would need to be used too ( of course )
I don't want to pull off the bumpers - gonna have to see how I can incorporate the bumpers into the design.

sm_concept2.jpg

And the rocker stripe as it continues up front into the front air dam . . . Same thing up front - bumpers need to stay.

sm_concept3.jpg

Giving me some ideas for my car . . . got me thinking ! ! !
 
I like the look of some of that concept car. The deep dish wheels look nice but may be hard to get to look nice in reality without a "widebody" type of setup. Either way I know your car will turn out looking incredible with the level of work you do.
 
She's taking her top off . . .

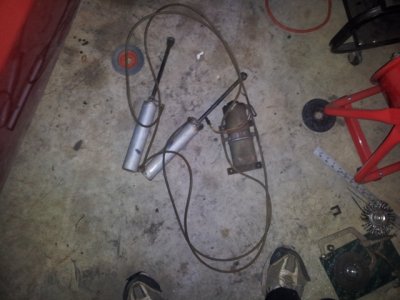
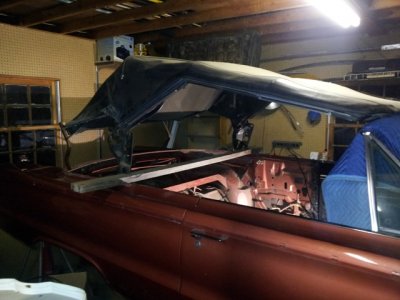
In preparation for suspending the convertible top from the rafters in my garage, I needed to get some of the convertible top stuff disassembled. This included removing the hydraulic cylinders, the pump, unbolting the top and getting it lifted up to the ceiling . . .

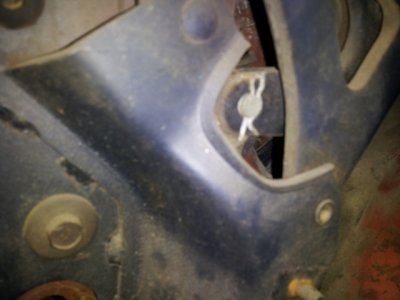
First of all, the hydraulic cylinders needed to be removed:
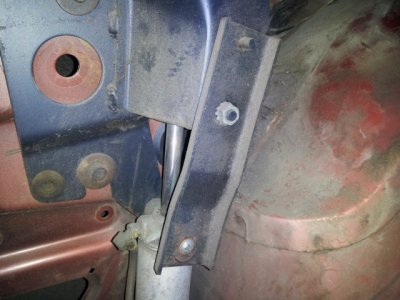
The Nut in the center of the screen was the only thing that needed to be removed - the bracket pulled off and the hydraulic cylinder was able to be removed without breaking the system. I've got a concern about the screw that is in place on the bottom . . . I don't think this is correct. Looks to be a pretty poor attempt to hold the hydraulic cylinders in place . . . this is going to need some attention. In addition, the pin on the passenger side, that hold the cylinder has broken loose and could fall out.

Good thing it's all coming apart so I can fix up all the things that need attention - I keep finding more and more stuff as I go along.

sm_brackets.jpg

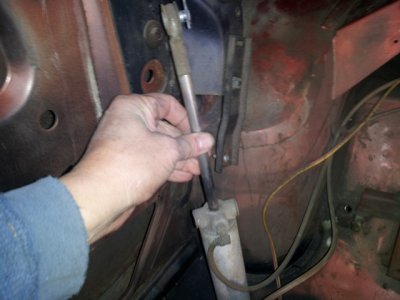
This clip at the top of the hydraulic cylinder, must also be removed, and the pin that it's holding in place pushed out - very simple.

sm_clipremoved.jpg

With that done . . . the cylinder is easily removed . . .

sm_partremoved.jpg

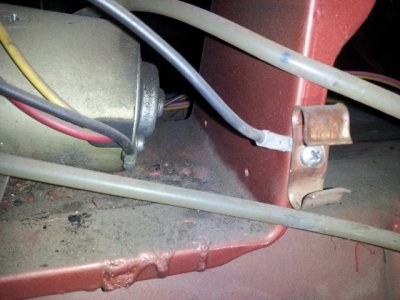
Note to self - ground for the pump is also the brackets that hold the lines in place . . .

sm_pumpground.jpg

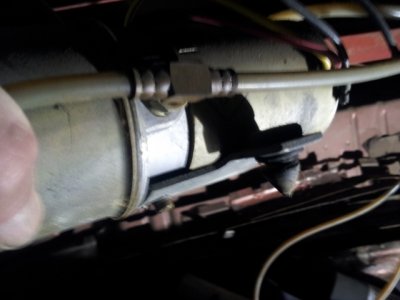
The pump is actually held in place with these rubber grommets . . . the press into the holes and hold it in place.
One of them broke off removing the pump and one was already broken - will need new parts for re-building.

sm_pumpheldinplace.jpg

Cylinders and pump removed - the entire system can be removed from the car intact without breaking the system.

sm_toppumpout.jpg

And lastly . . . she's taking her top off ! ! ! I'm going to cut a 2x4 and place it between the lower brackets to keep it the proper distance apart and prevent it from bending as it's hung from the rafters. Will post a picture when I get it supported and braced.

sm_topcomingoff.jpg

Tomorrow . . . hopefully I can get this hung from the rafters.
 
Should have done that a long time ago . . .

WOW . . . what a difference that makes getting the top out of the way . . . was able to get a bunch of stuff done today, but first . . .

To get the top hung from the rafter, I needed a form to hold the top in the proper orientation.
So I broke out the chop saw, cut some 2x4s and plywood to make the form.
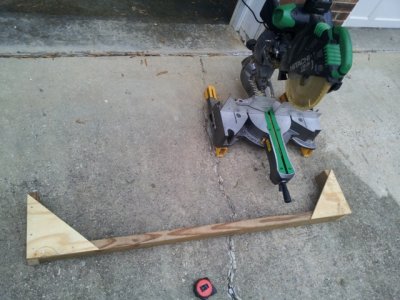
sm_makeform.jpg

This will help keep the top the correct distance and keep it from bending out of shape.
Now with that in place - it's screwed in with some lag bolts - time to raise the top out of my way . . .
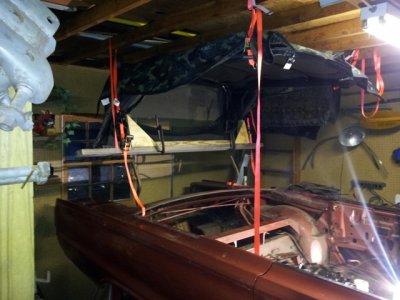
sm_topsuspended.jpg

After getting the top out of the way, I was so happy to get some room, that I just kept going. Got the last piece of top window trim removed, which allowed me to work on the gasket holding the windshield in place . . . which resulted in getting the windshield loose . . .
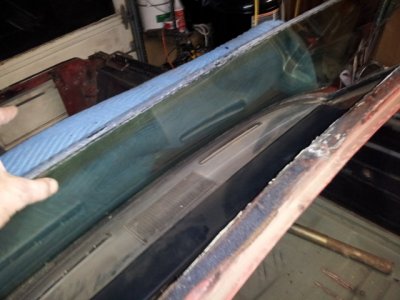
sm_windshieldloose.jpg

Which then allowed me to remove the windshield, wrap it in a moving blanket, and store it in the attic out of the way.
The Belvedere is now topless and windowless . . . it's really coming apart . . .
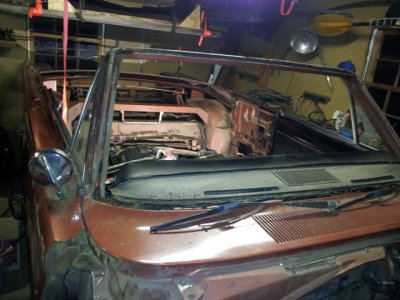

sm_windshieldout.jpg

Now that I can get to the dash bolts, I was able to drop the dash and try to figure out how to get it removed.
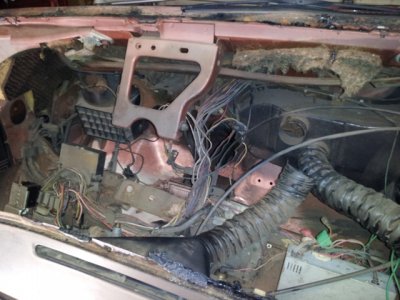
sm_dashdropped.jpg

Getting it tore down . . . might as well do it the "right" way - if you're going to do it ! ! !
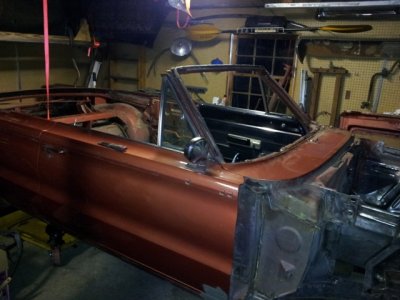
sm_comingapart.jpg

After pulling the connecting block, I figured out why the extra wire was run through the firewall . . . can you guess ? ? ?
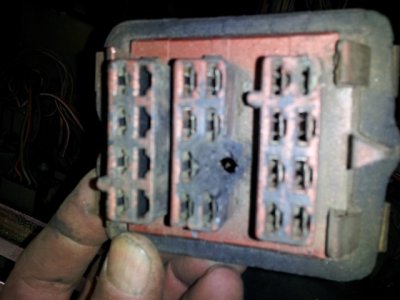
sm_nowiknowwhy.jpg

Lastly . . . haven't had too much time to dig into these, but how does one un-clip these to remove the dash ? ? ?
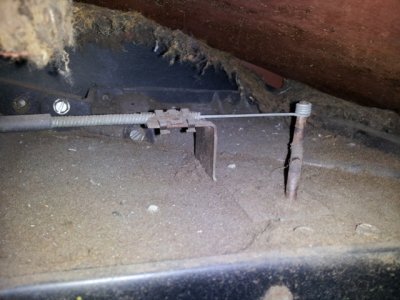
sm_howtounhook.jpg

Initially the plan was to get the engine in and drive the car . . . but after finding this site and seeing all the great work being done, I decided that doing it "right" was better then doing it quickly . . . so I should have taken the top off a long time ago. Oh well . . . let the repairing continue ! ! !

Ugh, that means I'll be back on undercoating removal again . . . YUCK ! ! !
 
I really enjoyed your posts convert brother! Some top work will be in my future after the mechanicals are taken care of
 
I really enjoyed your posts convert brother! Some top work will be in my future after the mechanicals are taken care of

Thanks Tallhair . . . I really appreciate the words of support . . .

If the Mopar gods are nice to me, "maybe" I'll get this thing done right ! ! !

Got a whole lot to learn yet ! ! !
 
That's the fun part...... actually learning something and being able to say you did it yourself.
Carry on!!!!!!
 
Isn't there a screw that holds the clips? Or maybe lift the clip enough to get the cable out. You really got a lot of stuff done after the top was removed.
 
Wow, check out the progress. I really, really love the car in the picture, the paint job is sweet and I love the deep dish mags. If that car is the goal then I'm really watching now "this is going to be cool".
 
Thanks Tallhair . . . I really appreciate the words of support . . .

If the Mopar gods are nice to me, "maybe" I'll get this thing done right ! ! !

Got a whole lot to learn yet ! ! !

I'm quit sure you'll get it done just fine and you'll continue to get support from bdere. You are really going to town there buddy and I admire your efforts. Nice having a few windows to see out of the garage there. Bet that helps on the light in the day time anyway.

I like your plans too. The rear tail lights remind me of a 70 RR GTX or 66 Imperial or a cross between the tow but the rectangular framing makes me think B body more. Really cool. I love mid 60's C Bodies too.

images?q=tbn:ANd9GcRIwZOH1vMdkTD1a1O5_0_BX_HHu9EvVSNgqfLJgft4dDTy68W__w.jpg
 
You are moving along nicely. Just make sure you are bagging everything up and writing in detail where all the fasteners go. And also note if some are missing or broke. It is amazing how much you will forget several months down the line. The clips holding the vent cables are held on with a Phillips screw. After removing that, you will need to gently pry a small tab on the spring clip with a small screwdriver. If you are not careful, you will bend it enough that it wont stay in place on its own.
 
Auto Transport Service
Back
Top