• When you click on links to various merchants on this site and make a purchase, this can result in this site earning a commission. Affiliate programs and affiliations include, but are not limited to, the eBay Partner Network.

My 1967 Belvedere Convertible Plans and Restoration (aka - Mad Scientist Build)

With that attitude, things get done!

You bet! Let'er rip tater chip! All kinds of great MoJo going on here. And Hotchkis swinging by.......wow! I was happy when the mailman walked up and asked if the half torn down car in the garage was a mopar. You got cutting edge dudes just swinging by.
 
I gotta ask, is this just a shed/carport, or does it have stairs that lead to a secret lair/fallout shelter or something? Never seen anything like it... image.jpg
 
Nice work, looks like some solid progress on the Convert. I feel for ya, not to many things more uncomfortable than super hot humid work making you sweat like a pig then being covered in grinding dust "I can smell you all the way up here"!!!:icon_puke_r:

LMAO 747 Mopar . . . I'm sure you can smell me all the way up there, but a shower is always waiting after my "sauna" and metal shaving sprinkling . . . UGH !

- - - Updated - - -

I do feel for you with the humid stuff, not had to much yet but it will catch up soon i expect, looks like its not stoping you though, looking good man!

Thanks Ron - it seems to be a bit warmer and humid this year, but I do what I can . . . fans sure help out !

- - - Updated - - -

is it me or is he getting way to fast at this cutting and welding stuff?! Great progress and way to advance the skillz.

Also if you wanted to drill out the spotwelds you could completely remove those old spring hangers. They don't add any structural integrity to the frame and only hold the spring perch for the rear of the car. May be difficult to completely remove but would open things up back there.

How awesome is it to have all this attention from the vendors. You are helping the car hobby and our cars in the process. Kudos and keep on keepin on.

I'll have to give you a call soon to fill you in on all that has been going on but the Coronet comes home this upcoming weekend!!!!!

Thanks KB67 . . . I keep what you told me in mind, if you mess up, cut it out, and weld new metal in ! I'm getting the hang of this stuff and having a blast. Look forward to your call, really curious how the new job and new place are coming along . . . and you're getting the car back this weekend - CAN'T wait to see some pics of it . . . it's gonna be sooo cool ! ! !

- - - Updated - - -

"is it me or is he getting way to fast at this cutting and welding stuff?"

Ive thought the same thing for awhile now, he is good and faster i believe as well, But then again the speed ive been moving at, well, lets just say it wouldn't take much to break my speed! I seem to learn a lot and one thing ive noticed is, hes going to that shop, hot, cold or high water! :) With that attitude, things get done!

Thanks Ron . . . REALLY appreciate the support that I get from everybody . . . it sure helps keep one motivated ! !

- - - Updated - - -

You bet! Let'er rip tater chip! All kinds of great MoJo going on here. And Hotchkis swinging by.......wow! I was happy when the mailman walked up and asked if the half torn down car in the garage was a mopar. You got cutting edge dudes just swinging by.

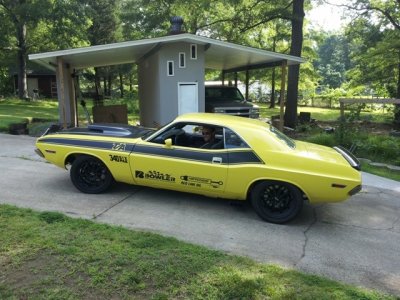
Thanks Prop - your build was just one of the reasons I went down this path or total restoration . . . thanks for pointing me in the right direction ! ! Kevin at Hotchkis offered their assistance with anything "custom" that I may need . . . I'm sure I'll be letting them weld some of the more "visible" pieces that may go on my car . . . their welding is a work of art, mine looks like turkey turds . . . ( sigh )

- - - Updated - - -

I gotta ask, is this just a shed/carport, or does it have stairs that lead to a secret lair/fallout shelter or something? Never seen anything like it...View attachment 195173

LMAO Herr_Poopschitz . . . well . . . it's actually my well house, and I got tired of it looking like an outhouse at the top of my driveway. There are more pictures earlier in my thread, I wish it had a secret passage to an underground shop, that would be so cool ! ! Look all the way back to post 172, and 174, 175 . . . in that area . . . it'll show a little of the transition . . .
 
Ahhhhh . . . . the smell of burning and grinding metal in the evening . . .

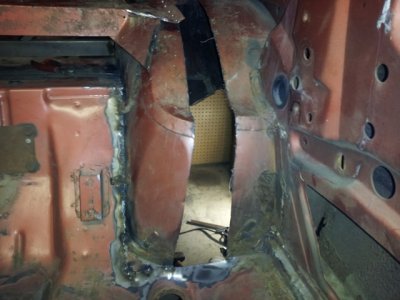
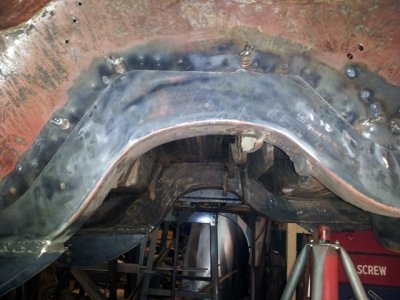
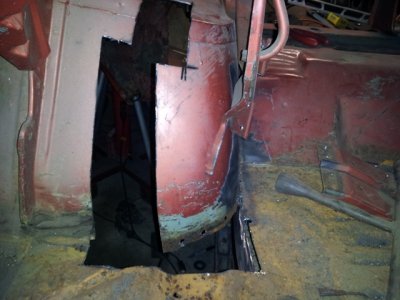
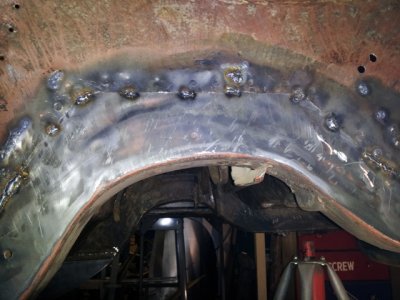
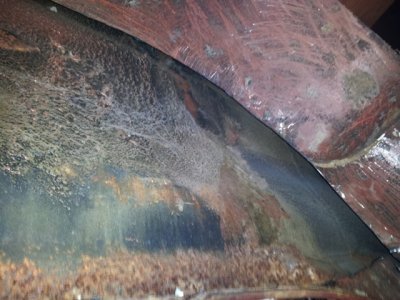
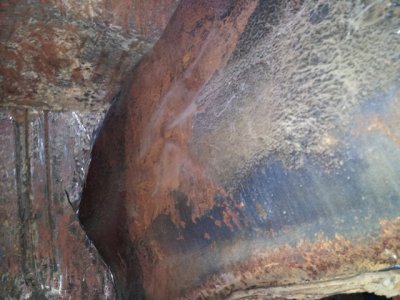
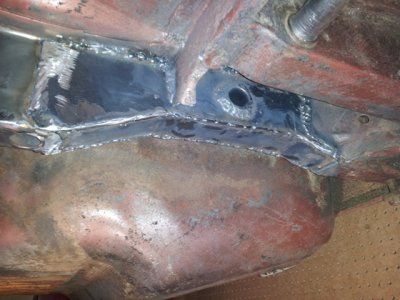
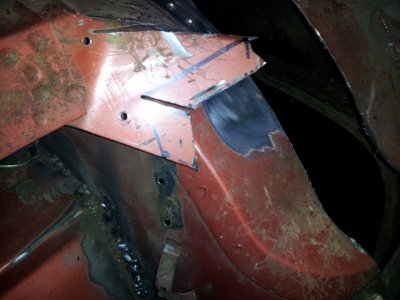
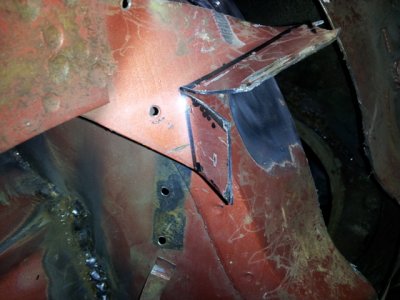
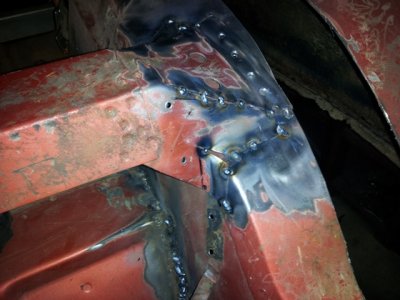
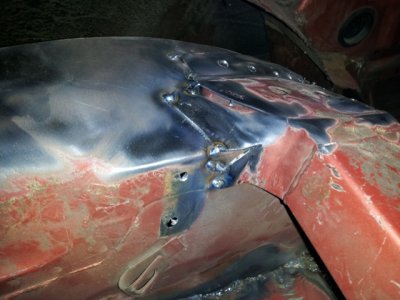
Spent the last two days in the shop working on the inner wheel well, got the extra lip cut all the way off, got the frame and the floor tacked and working on welding it all the way across the cut for strength, and trying to move the attachment braces out of the way. All of this is in preparation to put the inner well snug up against the frame and get it all welded into place . . . after that, then I'll be able to weld the 3" splices into the center section of the well . . .

The process is going pretty well so far, hope to have the inner well tacked into place ( or cleco'ed ) this week, and get started on the 3" strips . . . Would like to have the whole thing welded up, by Sunday . . . that would be cool . . .

- - - Updated - - -

LMAO....turkey turds....:rolling:

Give yourself some credit, they are getting better


Thanks KB67Mopar . . . I know my welds are getting better . . . I appreciate the kind words.
 
I think i said to early that the humidity would catch up, we sure have enough tonight! Humid it is and rain, that our garden does not need right at the moment, Gabby came in all sweaty tonight and watched out her window at the garden filling up at the time ( complete down pour) and said, "Papa, the garden looks terrible!" lol, It seems to happen every year so i guess considering there isint anything we can do, i turned on the air and made it a bit more comfy in hear! What the hey, home should be comfortable! Keep it up there Mr Kahn", I hope i spelled it right and we will be taking one on one lessons on welding, I agree, give yourself some kudos!, Yo sir have very much earned them. :)
 
I think i said to early that the humidity would catch up, we sure have enough tonight! Humid it is and rain, that our garden does not need right at the moment, Gabby came in all sweaty tonight and watched out her window at the garden filling up at the time ( complete down pour) and said, "Papa, the garden looks terrible!" lol, It seems to happen every year so i guess considering there isint anything we can do, i turned on the air and made it a bit more comfy in hear! What the hey, home should be comfortable! Keep it up there Mr Kahn", I hope i spelled it right and we will be taking one on one lessons on welding, I agree, give yourself some kudos!, Yo sir have very much earned them. :)

And they laughed at me for moving north....I had a nice lake breeze, it was 64 and lower humidity at my house yesterday afternoon. My parents were complaining it was hot and humid near Chicago...haha, no regrets.. (and before you say it, I like snow)
 
I wont even say what im thinking here in June about "your snow" Kevin. But im tellin mom!!!!!
 
And they laughed at me for moving north....I had a nice lake breeze, it was 64 and lower humidity at my house yesterday afternoon. My parents were complaining it was hot and humid near Chicago...haha, no regrets.. (and before you say it, I like snow)

Sounds very tempting, it's muggy as hell here.
 
Rebuilding the well . . .

Had a little setback last night . . . cover it later, first onto the progress that was made tonight . . . back on the mini tub . . .

First . . . try and get it aligned where it needs to be . . . ( this is FUN by yourself . . . )

sm_drminitubwork08.jpg

Once it looks about right . . . then you have to try and get it cleco'd into place . . . so it'll hold . . .

sm_drminitubwork09.jpg

Then check the alignment all the way around . . . including in the back and trunk brackets ( will need to bend them back more yet )

sm_drminitubwork10.jpg

Then when it's all good, and you're happy with it . . . get it tacked into place . . . ( until you run out of gas - uh, welding gas . . . that is . . . )

sm_drminitubwork11.jpg


So, my setback . . . ordered the spring shackles from PST and they arrived yesterday - I was pumped ! ! Then I opened them up . . . they were really beefy, very much heavy duty, . . . and I told the salesman to make sure they were 3 1/2 on center bolts ( even states it on my order form ). So out comes the tape measure and . . .

hold your breath . . .

The bolts are 3 3/4" on center ! ! ! Arrrrrgh ! ! ! I was really bummed . . . sent a PM to James at PST, and he's already sent me a mailing label so that the box can be picked up and shipped back to their shop ( now that's good service - but I was "trying" to prevent them from having to do just this ! ! ! )

Sorry James . . . I really tried . . .
 
I think you have started pretty good bud, and i don't know if it will help but in regards to your "( this is FUN by yourself . . . )" OH do i know what ya mean lol.. I use self taping screws to hold things in place so nothing moves with welding, then take them out and weld the little helper holes up, I don't know if it helps with how your doing it but, its been a helpers help to me! :)

With patches i use painters take to hold them in one place until i tack weld, take the piece off and tack weld where it was and then go for it! Working alone you have to come up with a little bit of help i guess! lol...

Yup did that on my quarters...lined up the new piece over the old and screwed it on. Cut both the new and old to size at the same time. Worked great.

for small patches i used triangle magnets, holds them flush with the surface. Just don't try to weld right next to one...try it, you'll see why.
 
Weekend Update . . . so far . . .

The shackles from PST have been picked up and are on there way back so I can get my refund.

Ran at lunchtime on Friday, to exchange my welding tank, so that I'd be able to work on my car this weekend.

Got ahead of myself with the progress going so well, and forgot to remove the "hump" out of the outer wheel well . . . so that had to be resolved . . .

sm_drminitubwork12.jpg

And the back side of the hump removed . . .

sm_drminitubwork13.jpg

Working on welding up the fab work for the driver side rear leaf hanger.
 
Yard work needed attention . . . then back to the shop for round 2 . . .

Need to keep the progress on my yard work moving forward ( as much as I'd love to work only on the Belvedere ) and keep my house looking nice too. After getting a bunch of things cleaned up in the yard ( I was drenched with sweat ) I was so ready to go back to the shop and sweat working on MY CAR !

Got a couple of things going on here now . . . and trying to get them wrapped up . . . first is the rear driver side shackle hanger fab work . . .

sm_drminitubwork14.jpg

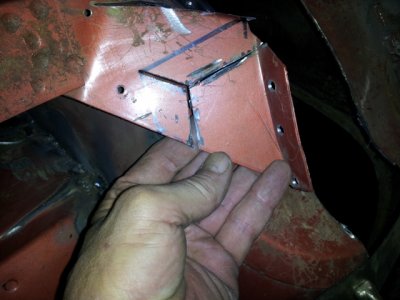
Then onto the cross member connecting the two wheel wells - and the connection to the wheel well . . .
1 - measure out the dimensions . . .
2 - transfer onto the metal bracket . . .

sm_drminitubwork15.jpg

3 - cut on the lines ( measure twice - cut once )

sm_drminitubwork16.jpg

4 - bend the tabs as needed . . .

sm_drminitubwork17.jpg

5 - fold the bracket back into place ( BFH used to help them cooperate as needed ) . . .
6 - tack the tabs into place and check alignment . . .

sm_drminitubwork18.jpg

7 - do the same thing for the back side of the bracket . . . tack in place . . .

sm_drminitubwork19.jpg

8 - move onto the rear bracket that supports the trunk hinges . . . repeat steps above . . .

sm_drminitubwork20.jpg

Good progress on the wheel wells . . . they're moving along very nicely . . .

I use self taping screws to hold things in place so nothing moves with welding, then take them out and weld the little helper holes up, I don't know if it helps with how your doing it but, its been a helpers help to me! :)


Hey Ron - I agree - the Clecos that I'm using are about the same thing as self taping screws - I've got the ones that you can screw down tight and make sure that you get a good contact between the two pieces of metal . . . Love the Clecos ! ! !
 
Last edited:
Looks like somebody is getting the hang of things, your work is looking great Kahn. Nice job
 
Yup did that on my quarters...lined up the new piece over the old and screwed it on. Cut both the new and old to size at the same time. Worked great.

for small patches i used triangle magnets, holds them flush with the surface. Just don't try to weld right next to one...try it, you'll see why.

I will, I can see how they would work, never thought of it.. and Kahn, Your welding is looking pretty darn cool with the spot welds, and im afraid here but what the heck is "Clecos" and sometimes the vice clamps just wont cut it all the way just in case thats the code word for them! LOL..
 
Had to take a day off . . .

Guess who was back at the doctors office ( again ) getting yet another piece of metal scrap out of my eye . . . YES, I always wear eye protection . . .

Just my luck . . . but things happen for a reason . . . Eye is already feeling better, hope to be bask at it again soon . . .
 
Nice progress Larry - looks like you are having fun with your welder. Metal in the eye, huh? I had to have a piece taken out of mine last week too. No fun when the drill/grinder or whatever they call it comes out in the eye doctors office lol.
 
I will, I can see how they would work, never thought of it.. and Kahn, Your welding is looking pretty darn cool with the spot welds, and im afraid here but what the heck is "Clecos" and sometimes the vice clamps just wont cut it all the way just in case thats the code word for them! LOL..


Hey Ron - Clecos are like reusable sheet metal screws - I'll get some pictures and show you how they work - they're really NEAT ! ! And just a tiny 1/8" hole too . . .

- - - Updated - - -

Looks like somebody is getting the hang of things, your work is looking great Kahn. Nice job

Yes indeed 747 Mopar - finally getting the hag of it ( sometimes ), and other times I feel like a total DWEEB with the welder - but getting to understand it more !

- - - Updated - - -

Nice progress Larry - looks like you are having fun with your welder. Metal in the eye, huh? I had to have a piece taken out of mine last week too. No fun when the drill/grinder or whatever they call it comes out in the eye doctors office lol.

Thanks H2E . . . It's fun to see the thing going back together . . . but metal in the eye, this is the 2nd time in about a month . . . just bad luck. Still got my meds though !
 
I personally feel like safety glasses welcome eye injuries at least for me. I can't count the times I've been grinding and I feel something hit my face, bounce off the inside of the glasses and then into my eye (almost all of my eye issues come with glasses on). I just try to buy ones that are more like sun glasses and hug the contour of the face better.
 
Auto Transport Service
Back
Top