• When you click on links to various merchants on this site and make a purchase, this can result in this site earning a commission. Affiliate programs and affiliations include, but are not limited to, the eBay Partner Network.

My 1967 Belvedere Convertible Plans and Restoration (aka - Mad Scientist Build)

Nice! I've been debating looking for something along these lines. One of my only concerns is the open loft space above my garage. Heat rises so I'm concerned I'd lose all my heat up and out

Hey GOON . . . My walls are insulated but the rafters are open and there are turbines on the roof . . . it may pull the heat out too . . . I'm going to find out . . .

You can direct the heat to blow down, maybe a fan moving the air around in the shop can help ? ? I'm going to see how it works out . . . hope it helps.

Maybe you could staple or tack up some hardboard foam insulation to the rafters ... the shiny type to slow down the heat loss and maybe make more light refection for working ??

transit3.jpg


silver_glo_camden_de.jpg
 
Thought I was going to say had a wrench thrown into the works . . .

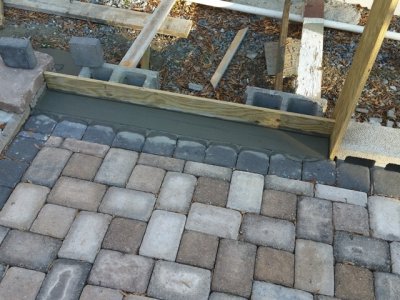
Had my neighbor ( finally ) stop over and say that he'll be able to get the other side of the carport in concrete soon . . . so he stopped over to check out my prep work, and I've got a couple things that I need to get corrected so that the concrete can get poured . . .

So I had to get started on the "corrections" so that I can get this job done ! . . . Can't wait to get this job DONE !

sm_concretework01.jpg

So while I as working on this project, I noticed that is was really nice - so I checked the temp and it was 68.5 - painting temps ! !

So now I'm scrambling from troweling out the concrete, to dragging the rear quarter outside in the sun, and getting the paint supplies ! ! !

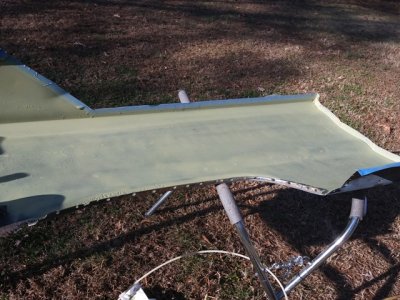
So fist I shot the inside panel with self etching primer . . .

sm_insideprimer01.jpg

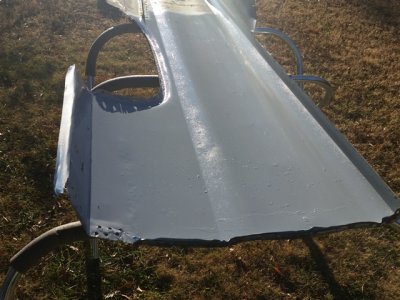
And then got the epoxy primer on the panel ( in the area that I won't be able to reach later ) and left it in the sun to help keep it warm and dry . . .

sm_insideprimer02.jpg

So, now I don't have any excuses . . . the primer will dry and then I'll be "attempting" to get this thing re-installed . . .

Now, the shoe box feels like it running on 7 cylinders, so I need to pull some plugs and find out what's going on . . . so I can drive it again ! ! !

Been a busy day

( and that included a visit to the church for a friend that lost his older brother to cancer - sad times ) . . .
 
wow 68 degrees! Thats amazing. I thought I had it made yesterday when it hit 37. Tonight its going to be 5 with a high tomorrow of 11.

Anyway glad to see the quarter is ready for reattachment.

- - - Updated - - -

To try and keep moving through the cold winter months, picked up the following . . .

View attachment 223698

To try and get the chill out of the air ( not that it's stopped me yet ) . . .

I've been keeping my eyes open for a cheap used one of these. I got lucky when we bought this house in that there is a gas line already plumbed into the garage...all I need to do is hook one up!
 
I really like the way your walkways turned out...................... I really like the fact that my wife hasn't seen them or you'd have to come up here and do some for me haha. Congrats on taking advantage of a nice day.
 
Shoe box issue resolved ? ! ? ! ?

Found a split spark plug boot and another plug that was oil fouled . . . both have bee fixed and I'm running on all 8 - not 6 or 7 like before . . . YAY ! !

Now I can have some fun and drive it to work again . . .

- - - Updated - - -

Maybe you could staple or tack up some hardboard foam insulation to the rafters ... the shiny type to slow down the heat loss and maybe make more light refection for working ??

Hey Tallhair . . . I did that in the attic of my house, I used the "radiant barrier" material - it's silver mylar on both sides and bubble wrap in the middle - my kids laugh and say my attic looks like a spaceship . . . well, on the hottest day of the summer, the attic is about 100 degrees . . . it works great in my house - haven't gotten to it in the shop yet but you're right, I'm sure it'll help out a lot ! ! !

Another thing I did . . . on all of the seams, I bought the aluminum ducting tape and taped all of the seams ( watch that tape, it'll cut you BAD in a heartbeat ) . . .
 
Bud you seem to have some irons in the fire and there all looking pretty good! It's always good to hear things are working out!!! Enjoy buddy... :)
 
Hey Larry,

Long time no talk but as usual I've been lurking in the background watching your Belvy come together, and with virtually every new post it feels like you and I could trade cars and neither of us would know the difference; the similarities, hurdles, solutions, whatever, are SO much alike it's startling.

You and I have PM'd about welding a number of times and something I've found out as time has past and my experience grows; if I can slow down the wire speed, making for a hotter weld for a given power setting, I can get a cleaner weld that requires less grinding to clean up. The only downside I've found is the chance of blowing through thin material, so quick bursts and keeping moving are a must. Since we both have lots more welding to do I just thought I'd pass on what I've been noticing.

Keep up the AMAZING work, it's truly inspiring.

Thanks CarnalSupply . . . I've been tinkering with the adjustments and from time to time I hit the perfect setup - for the metal I'm welding . . . other times, I'd think that I'm a novice ( which I am ) and I can't weld anything without blowing holes in it . . .

If I don't experiment with the settings - how can I learn ? ? ?

The slower speeds seem to help with shorter height welds . . . and less grinding . . . I'm learning . . .

I've got my Uncle's Dillon torch and I'm practicing with it for attaching the quarter panel - it's like TIG welding and can be hammer welded . . . but if I'm not very comfortable with the results, I'll stick with the MIG for attaching the quarter panel . . .

Here's a Youtube video of the torch . . .

[video=youtube;bBWy3SPFGe4]https://www.youtube.com/watch?v=bBWy3SPFGe4[/video]
 
Good luck Khan! Im in the same boat i guess with welding and hope this works good for you, sometimes a different way of doing the same thing works good for us, Maybe this is one of those times and you'll think it was made for you... Thanks for the video!!!
 
Reattachment of the body panel has begun ! ! ! !

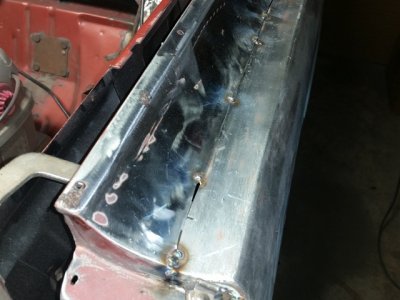
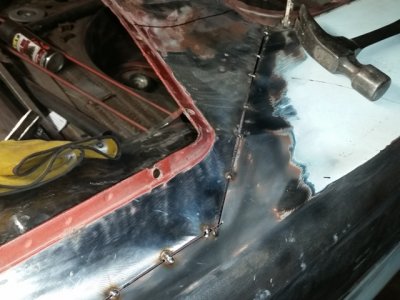
Got out to the shop and spent some time working on the re-alignment of the body panel and getting it set up in place . . . all went very well, and I really liked the way everything was looking so . . . I pulled out the welder . . . and started the process . . .

sm_reattachment01.jpg

First thing I gotta say . . . it's so much easier when you're not on your back, looking up with molten rain falling on you . . . ( LMAO )

sm_reattachment02.jpg

And I've got the top edge all tacked ( with the MIG ) in place and really like the way it's going so far . . .

And 2 . . . the shop heater seems to work pretty well - doesn't move as much air as I thought it would, but it does help out ! ! !
( by the way - the Heater retailed for $199 . . . and Northern had it as a Black Friday special for $89 ! ! ! )
 
Nice! It's all patience and welding from here on out. Are you going to install the doors and align them properly to ensure the quarter, cowl, rocker and door all line up nice?
 
Nice! It's all patience and welding from here on out. Are you going to install the doors and align them properly to ensure the quarter, cowl, rocker and door all line up nice?

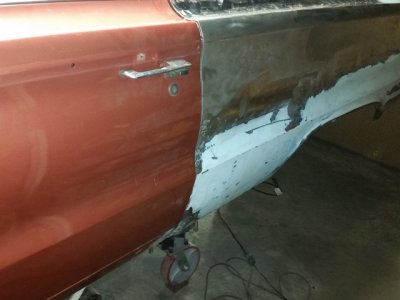
Well 747Mopar . . . with my small shop, the doors are still on the car because I've got no place to store them if I took them off . . .

So here's what they look like . . .

sm_reattachment03.jpg

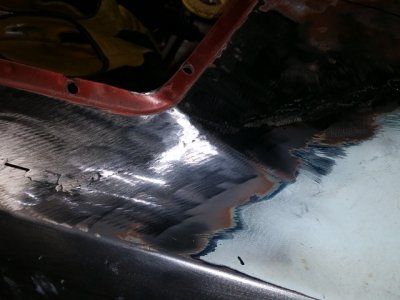
And some of the progress of the 1000 welds . . . and getting the welds ground and respectable . . . .

sm_reattachment04.jpg

Progress . . .
 
That's right! I forgot the doors were still on it..................Looks great Kahn.
 
looks like you got it line up great. Take your time on those welds and you will be ready for paint in no time!
 
Double teaming . . . welding the panel and building an engine cradle . . .

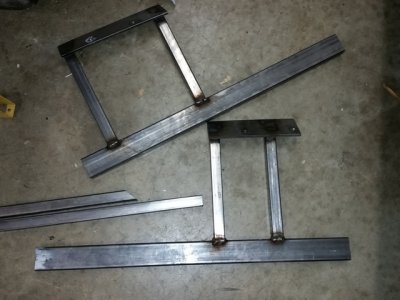
Been working on the welding and grinding of the top of the quarter panel today, and also working on building an engine cradle so that it'll hold the engine and allow me to get the bell housing dialed in . . .

Here's what I've got so far . . .

sm_hemicradle.jpg

I'll be adding casters to the stand so I can move it around and store it out of the way - and it will allow me to get the flywheel, clutch, bell housing, and transmission attached to the engine and ready for the car ( and the parts out of my living room too ) . . .
 
Auto Transport Service
Back
Top