• When you click on links to various merchants on this site and make a purchase, this can result in this site earning a commission. Affiliate programs and affiliations include, but are not limited to, the eBay Partner Network.

My 1967 Belvedere Convertible Plans and Restoration (aka - Mad Scientist Build)

Haha, just make sure you dodge the molten rain! Small spot welds stacked overlapping with a decent heat setting works really well for that. Also I can't tell what you are using for a grinding wheel but "flap disks" are amazing for getting a nice smooth finish on your work.

This is a GREAT place to get supplies: http://heleta.com/

http://heleta.com/index.php/flap-discs.html ....these are what I am referring to. If you already use them, disregard.


and when you said "not sure i know what I am doing"....THANK YOU for doing it anyway! I started doing my car the same way, without a fricking clue and its been the greatest learning experience I could have ever hoped for. My fabrication skills have gotten way better, welding, and even painting. In my opinion if you don't feel out of your element you aren't learning something or trying anything....and we only live once!

Yeah . . that hot rain hurts ! !

I love the flap-discs - but I'm using a grinding wheel for the "big" touch up, then I'll go back with the flap-discs for the final pass.

You're so right on - it's pushing yourself outside your comfort zone ( or your element ) is when you learn and advance your learning experience. I'm learning a TON of stuff with this restoration - but it helps the have friends here ( like you Kevin ) watching my back. I may mess it up, but one can always go back and re-do it to make it right. After some of the restorations I've seen on this site ( very little original metal in the car ) I guess I realized it can be fixed and it'll be better than when you started.


Progress on Passenger side frame connector

Been working on the frame connector on the passenger side this morning and I've just about got the fitment corrected so that it can be tacked in place - then let the welding begin ( along with the hot rain ). Hope to have it tacked in place today and the welding started.
 
Passenger frame connector tacked in . . .

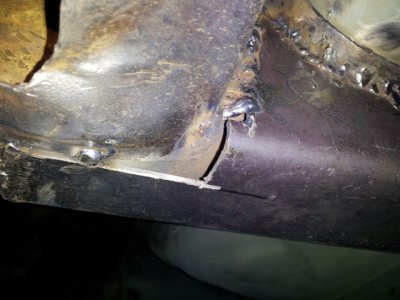
Got the last of the fitment squared away and got the passenger side frame connector tacked in to place. After getting it tacked, I had a small gap at the rear that was due to the difficulty of cutting the hole to match the exact shape of the existing frame member.

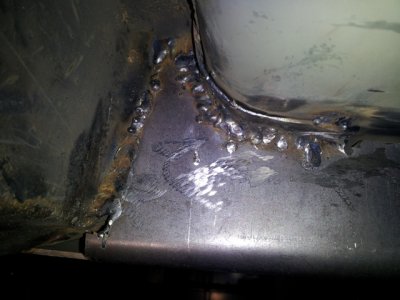
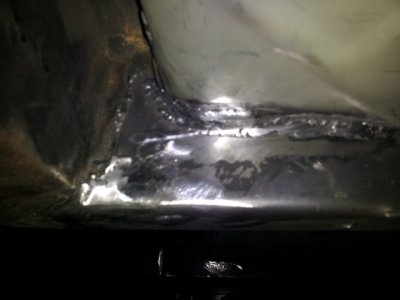
Had some fun in here, it's a pocket with a bunch of welds that were needed for securing the rear of the frame connector:
( upside down and inside a half hidden pocket . . . "can you say "fun" )

sm-passframepocket.jpg

Here's a look at the small fitting error that needed to be corrected:

sm-passframefitment.jpg

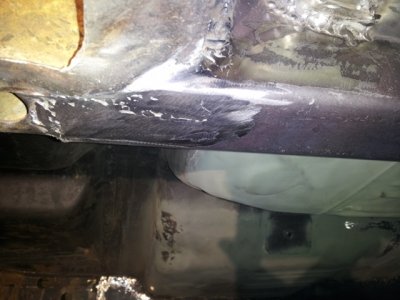
And here's the final result from making a piece to fit into the hole - all cleaned up:

sm-passframefitfixed.jpg

Now I've got about 10% of the passenger side welded in . . . now I can tackle all the welding of the remaining 90% . . .

Practice, practice, practice . . . before I get to the body panels . . . ( gulp ! )
 
Passenger frame connector - progress ( rough day )

Got out to the shop to try and get some work done. Got about 90% of the passenger frame connector welded in place, but had a hard time with the concentration.

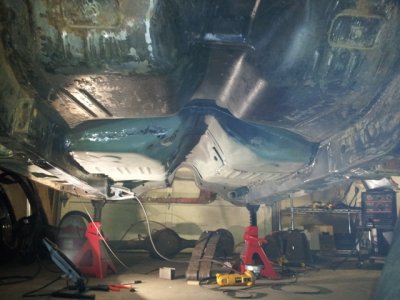
Here's a looking forward shot from under the car:

sm-bothframeconn.jpg

Tough day - all day - 1 year ago today I lost my dad . . . sure miss him.

Had to get to the shop and work on something - not the best welding I've done, but it kept my mind occupied with other thoughts.
( boy those LED lights work GREAT ! )
 
Tough day - all day - 1 year ago today I lost my dad . . . sure miss him.

Had to get to the shop and work on something - not the best welding I've done, but it kept my mind occupied with other thoughts


I have been there not too long ago myself. I lost my Dad a year ago in August. Keep yourself busy. It kind of helps. We will keep you and your family in our thoughts and prayers.

Hang in there buddy...............
 
Tough day - all day - 1 year ago today I lost my dad . . . sure miss him.

Had to get to the shop and work on something - not the best welding I've done, but it kept my mind occupied with other thoughts


I have been there not too long ago myself. I lost my Dad a year ago in August. Keep yourself busy. It kind of helps. We will keep you and your family in our thoughts and prayers.

Hang in there buddy...............

Thanks 71airgrabberRR . . . hanging in there and keeping busy . . .

Sorry for your loss too . . . Keep yourself busy too. ( grin )
 
Frame connectors install completed !

Yay . . . got out to the shop tonight and did a little welding to finish up the last of the passenger side frame connector. Got it all welded in place, including my fish plate, and even got a chance to do some grinding on some of the welds.

Had one of my torque boxes that looks like they hit something and dented it in a bit . . . so I took some time to work on getting it pulled back out and straighter. Looks a whole lot better now that it's been corrected.

After that, just a bit of tinkering, scraped a little undercoating, and took a wire wheel to some of the remaining undercoating to see how easily it cleans up. Looks like the scraping did well and the remainder cleans up pretty nicely.

Still using the .035 wire for welding - a friend suggested I try dropping to the .024/.025 wire as it would require less amps and he said it could help with the welds. Got some out in the shop, just too easy to use the wire already in the welder then to swap everything around to use the .024/.025 wire ( I know it's not hard ) . . . just too anxious to get to the welding ! Still curious how the smaller wire will work out - will test it another day.
 
I run .035 wire with no major issues there. I can turn the amps down and the wire will melt but not get enough heat into the parent metal to get good adhesion. Your welds will improve with time as it takes a while to get things looking pretty. As long as you get good heat in and get the holes filled they will be strong and that is what counts. May take some extra hours with the grinder later but don't sacrifice good weld penetration to attempt pretty welds.

When welding vertically or upside down it helps to do it in tack welds stacked on each other...prevents sagging and dripping. Also always weld down starting at the top when welding vertically. Thin metal you will never be able to lay a bead on either. (ie floor pan etc) That is best welded by tack welds as well.

I am sure there are others on here with much more welding advice since I am predominantly self taught but a few tips from a couple pro's helped me out.

Ha ha ha . . . I won't win any beauty pageants with my welds, and I'll be doing some grinding on them to clean them up . . . but I'm pretty sure they'll be holding just fine ! !

I did use the "million tack weld" method . . . see the hidden pocket a couple pictures up . . . seemed to work great ( but takes a while ) . . . the floors are sure solid now.

Thanks Kevin for all the pointers - I'm slowly getting the hang of it.
 
Weld, weld, weld, grind, grind, grind, grind, grind, grind . . .

So, you spend all this time welding the frame connectors in place, and then you get to go back and spend more time grinding, and grinding, and grinding to make it all look nice, under the car, where barely anybody is going to see it . . . whew, this is hard work . . .

Wonder how much longer I'll be grinding away at this stuff . . .

sm-frameconngrinding.jpg

It's coming along very nicely . . . lots of grinding left to go . . .
 
Frame connectors grinding done . . . now what ? ? ?

Spent some time today, since it's drizzling down here, working on cleaning up the welds on the frame connectors. Got them looking better, and they may be ready to call it "complete" . . . will go back and look again tomorrow after I've not seen it to decided.

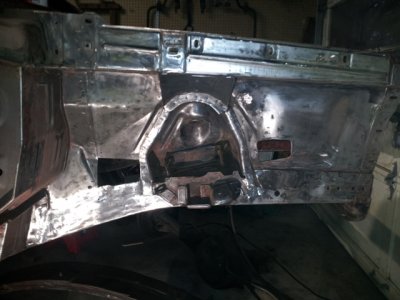
So now what to work on . . . I've been working on cleaning up the passenger side wheel well area, so I jumped on it and:

sm_passbaremetal.jpg

Got a good bit of cleaned up , , , and the tough areas still left to be tackled. Will get back on it and see if I can get this side in primer - self etching is the first plan of attack, followed by epoxy primer on top of it . . . want a good solid base for good adhesion for the paint.

Hope that plan works . . .
 
Great job so far. I did the same as you with the welding - learn as you go. I still haven't mastered it, but am a lot better than I was 2 years ago. I'm not sure what products you are using for paint, but you might want to contact someone to be sure etch can go underneath epoxy. The only reason I mention it is that with the Martin Senour I am using, I was told the 2 cannot come in contact at all. The acid in the etch primer will react with the epoxy. Epoxy is made to cover up bare metal and is the best product for this. I used etch on my k-frame, rear end, and misc. suspension parts. But that is about it.
 
I think your welds look pretty darn good. Grind smooth what you can get too if you want, then you can put undercoating over it and it will look smooth. your right that nobody will see/know, but it's peace of mind that makes us want to do the best job we know we CAN do. The passenger side inner fender cleaned up real nice. Had to be a little time consuming, but nothing worthwhile is ever quick on these cars.
 
Great job so far. I did the same as you with the welding - learn as you go. I still haven't mastered it, but am a lot better than I was 2 years ago. I'm not sure what products you are using for paint, but you might want to contact someone to be sure etch can go underneath epoxy. The only reason I mention it is that with the Martin Senour I am using, I was told the 2 cannot come in contact at all. The acid in the etch primer will react with the epoxy. Epoxy is made to cover up bare metal and is the best product for this. I used etch on my k-frame, rear end, and misc. suspension parts. But that is about it.

Definitely check the compatibility. I bet he is right.

I throw my sealer just over bare metal or previous paint that has been sanded usually. It says right on the can that for best adhesion it prefers sand blasted surfaces and bare metal. (well not in those words but if you look up sspc-sp6)

but you could eat off that inner fender...incredible job there.
 
I think your welds look pretty darn good. Grind smooth what you can get too if you want, then you can put undercoating over it and it will look smooth. your right that nobody will see/know, but it's peace of mind that makes us want to do the best job we know we CAN do. The passenger side inner fender cleaned up real nice. Had to be a little time consuming, but nothing worthwhile is ever quick on these cars.

Yeah . . I've got the fever . . . and it's this site's fault . . . I see all the fantastic rebuilds and I have to keep up with the other b-bodies ! ! ( at least try ).

Thanks roadrunnerman - figured I might as well do it right, I thinks it's worthwhile ! ! Still got a little more in the shock tower to finish up, but I'm close.

Thanks on the welds . . . I think I'm getting the hang of it ( sometimes ), and then other times I feel like a dweeb ( so I set it down and come back later ! ).

- - - Updated - - -

Definitely check the compatibility. I bet he is right.

I throw my sealer just over bare metal or previous paint that has been sanded usually. It says right on the can that for best adhesion it prefers sand blasted surfaces and bare metal. (well not in those words but if you look up sspc-sp6)

but you could eat off that inner fender...incredible job there.

Called the paint shop back, going to take the paint ( unopened ) back in and discuss it with them to make sure !

KB67 . . . you're invited to dinner . . . what night can you make it over ? ! ? ( smile ) Thanks for the compliment . . .
 
Looks like you got a good hold on the welding and its showing! Seeing all this does make us want to get busy on our cars for sure, keep up the good work and thanks for posting the work you've done, looks great!
 
Looks like you got a good hold on the welding and its showing! Seeing all this does make us want to get busy on our cars for sure, keep up the good work and thanks for posting the work you've done, looks great!

Thanks for the feedback on the welding . . . I'm much more comfortable with it now, then when I first started . . . but want to be even more comfortable with it before I attack the body panels ( since they're seen - and can show any mistakes ).

Funny how we work as a team like that, I get motivated by seeing everyone else doing this incredible work, and I want to get my car back on the road . . . and that feeds into your motivation . . . and around in a circle . . . I've never been this deep into a re-build, and I'm having a blast ! ! !
 
Engine compartment cleanup . . .

Alright . . . so I'm in the process of cleaning up the engine compartment - I'm shooting for the clean look under the hood. So I'm removing all the pieces and parts that can be removed and welding up the holes.

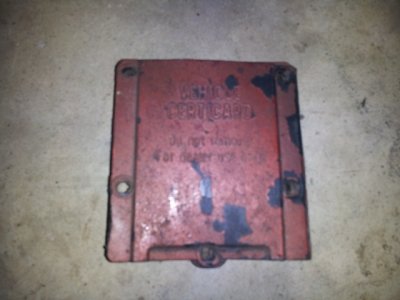
Including this part that says " do not remove " . . . ruh roh . . .

So, the certicard holder is in the engine compartment - but nothing in it . . .

sm_vehiclecerticard.jpg

I assume it's "important" for pure restorations - but if I'm aiming for a driver, then suggestions ? ? ?
 
Auto Transport Service
Back
Top