• When you click on links to various merchants on this site and make a purchase, this can result in this site earning a commission. Affiliate programs and affiliations include, but are not limited to, the eBay Partner Network.

My 69 Coronet project

See ya in Ohio! Your going to be right in my neck of the woods, I literally live right in the middle of everywhere you've mentioned and thought I should mention you'll be awful close to Summit racing while at the Football hall of fame. Have fun
Summit racing you say….hmm
Dev, I'll look you up at the Nats.

- - - Updated - - -

Your Coronet is coming along pretty well and I'm getting anxious to see it back on the road. Great work, keep it up.
Thanks BB. I'm gonna keep chugging' along.
 
So August was a great summer month, not so much for making headway on the Coronet. Attended the Nats, which was great. Got to hang with some FBBO members and also got to check out Devin's Charger. After we got back, did a couple of camping trips, BBQ's, etc. and next thing you know it's the end of September. Man time flies when you're trying to build a car. But in between summer events I was able to make some progress. The interior firewall is pretty much done. Rolled on the Fat Mat RattleTrap, factory insulation, installed the brake and E-brake assemblies, drivers side vent box, Classic Air A/C box.
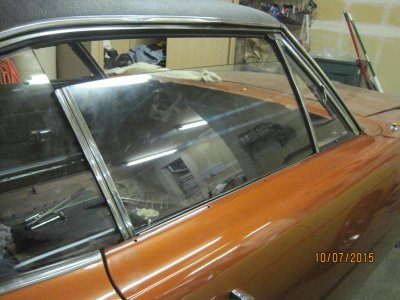
Started putting the passenger side door together. Can now open the door from inside and out, lock it. Put in the window tracks but the vent window is just mocked up for now.
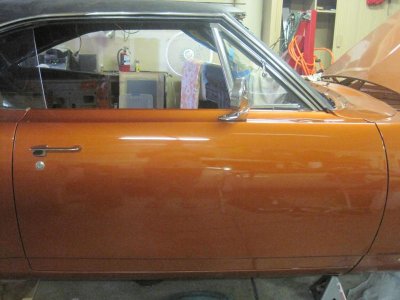
IMG_2871.jpg

Ironic that the easiest assembly to install didn't come with the car originally - the Classic Air box.
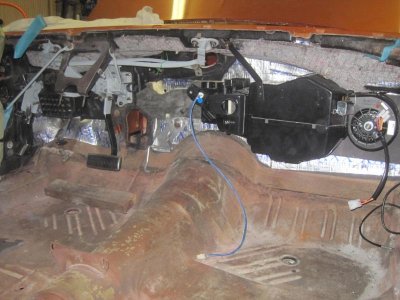
IMG_2873.jpg

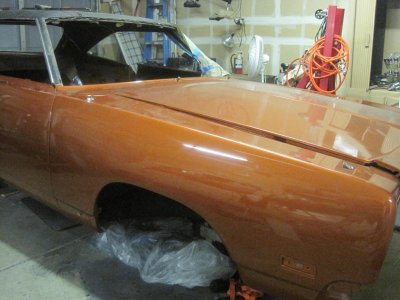
Installed a new antenna and fender turn signals.
IMG_2841.jpg

- - - Updated - - -

I'm probably digging too deep for most members, but if you're putting together the side window assemblies on your late 60's B body, you may be missing these pieces. The upper rear frame of the vent window is secured/adjusted by a allen head bolt. The bolt screws into a metal block that sits in a pocket attached to the door frame. The screw is tightened by accessing the small hole in the door garnish molding; the hole is filled with a rubber nib. BTW, the rubber nib is being rebopped; I purchased a set from Laysons at the Nats. Anyway, a lot of times the allen bolt and adjusting block wind up missing; in my case I had one but couldn't find the other. Side note: I bagged and tagged EVERYTHING; don't know how I misplaced the one set. Fortunately with the one I had I was able to fab up a second.

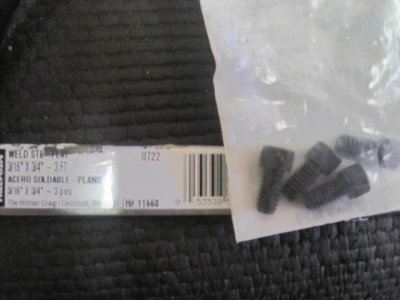
Found everything I needed at Lowes. Bought a 3' stick of 3/16"x 3/4" welding rod; more than enough but 3' was the shortest they had. They also had the allen head bolts - 1/4 x 20.
IMG_2867.jpg

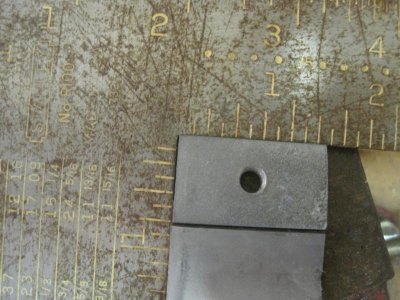
Using the original as a buck I cut the rod to size with my Dremel, 1 1/2".
IMG_2864.jpg

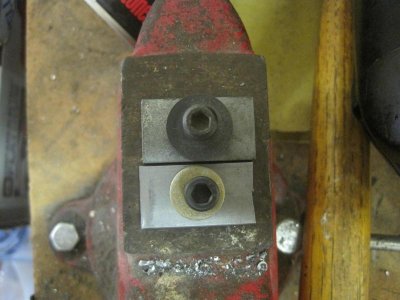
Drilled and tapped a hole. The length of the block isn't as critical as the width because it goes into the pocket vertically. I used the homemade one on the vent window above and it works perfectly.
IMG_2868.jpg
 
Last edited:
Man your car is looking great CoronetDarter! Great to see the A/C unit was an easy fit, I still don't have any heat or A/C in mine........ to busy with go fast goodies haha! Have fun with those windows, seams to take many attempts to get everything lined up and still shutting right but patience is the only way. Can't wait to see this on the road next summer. BTW love the color you went with.
 
Great progress.

Let me know how you manage adjusting the quarter glass with the roof rail seal. I had mine mocked up like you, lined up with the side window and then installed the beltline weatherstrip fuzzies which pushes the quarter window in too far no matter what I do.

If yu discover the secret to lining up the quarter window let me know.
 
Man your car is looking great CoronetDarter! Great to see the A/C unit was an easy fit, I still don't have any heat or A/C in mine........ to busy with go fast goodies haha! Have fun with those windows, seams to take many attempts to get everything lined up and still shutting right but patience is the only way. Can't wait to see this on the road next summer. BTW love the color you went with.
Thanks Devin. Figured you'd like the color! lol. I'm jonesen' to get my driveline installed. Supposed to get the engine back next weekend. And yeah, the windows are going to be a bear. Haven't even tried installing them test and I still must have at least a couple of hours into them, cleaning and installing the weatherstripping. The weatherstrip that attaches to the rear of side window to seal the gap with the front of quarter sits in a channel within a chrome bracket. It's taken me longer than I care to mention to run the weatherstrip through and I still don't think it's factory perfect, but it is 'good enough for now' . lol. This weekend I'll find out how it seals with the quarter.

- - - Updated - - -

Great progress.

Let me know how you manage adjusting the quarter glass with the roof rail seal. I had mine mocked up like you, lined up with the side window and then installed the beltline weatherstrip fuzzies which pushes the quarter window in too far no matter what I do.

If yu discover the secret to lining up the quarter window let me know.

i hear you Roger, the window adjustments are tough to get through. Even though I painted witness marks on all the adjusting bolts before removing and reinstalled the quarter window in the exact same place, it still needed adjustment. Part of the reason is what you mentioned; the new fuzzes take up more room than the beat down originals. But they sure sweep the window nice. The other issue I had was the repop roof rail weatherstrip was not the same as the factory; I was tempted to reuse the original at one point. The key is that it's a two person job, one on the inside and one on the outside. Mike who's helping me is also a body man so he's used to this. Even so we had to do a lot of adjustments to align the quarter into the weatherstrip channel. We got the front dialed in but the rear kept curling the outside of the rubber. I sprayed WD-40 on the glass and the two of us just worked it for about 1/2 hour per side. i used a channel lock plier to bend the weatherstrip channel a bit to help align. After we got it to where it seems OK, the window has been cranked up since hoping to create some rubber memory. Just checked it before posting and both windows are sealing nicely in the channels. Of course this may all change once I try to align with the side glass.
 
Have fun with those windows, seams to take many attempts to get everything lined up and still shutting right but patience is the only way.

Let me know how you manage adjusting the quarter glass with the roof rail seal. I had mine mocked up like you, lined up with the side window and then installed the beltline weatherstrip fuzzies which pushes the quarter window in too far no matter what I do.

If yu discover the secret to lining up the quarter window let me know.

I second the above statements - my doors and glass still do not fit well on my Road Runner - I simply ran out of time to get them right. I tried to follow the FSM, but I still had trouble getting them to work smoothly and to fit well.

On another note - I had the pleasure of crawling around this car and seeing it personally over the weekend. The car looks great so far and should be a real winner when done!

Thanks Hawk. It looks a lot better when parked next to yours.:icon_thumleft:
 
Thanks Hawk. It looks a lot better when parked next to yours.:icon_thumleft:

Hopefully you won't have to trip over it too long - I know when working on a car you need all the space you can use!

Hoping to build the diode piece this weekend for the dash...
 
Your car is really coming along nicely Rich, and I just love the color combo. If I rebuild another one it will be the same as yours, except maybe some M46 side scoops and a 4-speed. Can't have 2 exactly the same, right? I remember spending a lot of time on the window adjustments on my Charger. It does get frustrating, I don't know how many times I just walked away from it and started from scratch another day.
 
The cars' not in the way at all Hawk. No better view than opening the garage door and seeing 3 Mopars parked side by side…
IMG_2890.jpg

- - - Updated - - -

Your car is really coming along nicely Rich, and I just love the color combo. If I rebuild another one it will be the same as yours, except maybe some M46 side scoops and a 4-speed. Can't have 2 exactly the same, right? I remember spending a lot of time on the window adjustments on my Charger. It does get frustrating, I don't know how many times I just walked away from it and started from scratch another day.
Thanks Joel. Ironically I chose the color when I saw the pics of the Copper Sunset Charger in your build thread.
 
Speaking os side glass

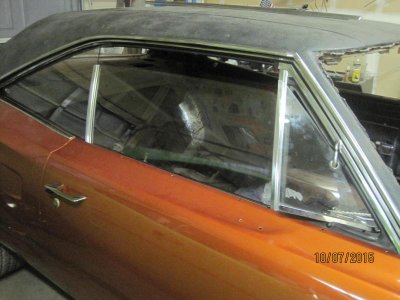
A couple of weekends ago we installed the passenger side glass. Relatively speaking it wasn't too bad. It's a two person job, but the assembly went in pretty quick. It took me at least twice as long to install the quarters. The hardest part was putting the new weather stripping on the front and rear of the glass. The rear chrome channel has flocked rubber weather strip that is an absolute PITA to install. And the front is no easier, first attaching the plastic weather strip to the glass with these plastic pins and then working the window up the vent window frame channel.

Oh yeah, during disassembly the rear window stop has to come out in order to pull the window up out of the door. Be very careful when removing them 'cause they're extremely brittle. I have a 50% success rate.

IMG_2972.jpg
Pardon the big dent in the trim.
IMG_2973.jpg

You'll notice that the side view mirror is now missing. The vent window hit the mirror when opening! I don't remember it interfering before the resto, but it must have. When Hawk was over last weekend he measured the holes compared to the driver's side, and sure enough, the passenger side holes were about 1/2" forward. The mirror was probably installed after it left the assembly line. Common theme - two steps forward, one step back…lol

- - - Updated - - -

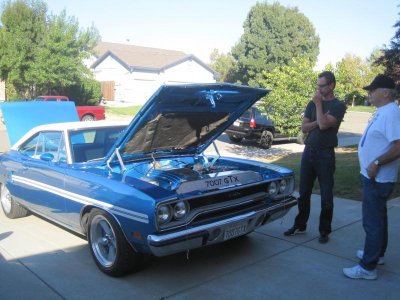
Didn't get much done on the car last weekend but it was a great weekend nonetheless. Hawk and Barry were just cruising the neighborhood and decided to stop by for a spell. And the next thing you know Darius pulls up in his rockin' GTX. With four Mopars parked on my block we finally outnumbered the Chevy guys.

IMG_2886.jpg

View attachment 280628

BTW, if there's still anybody on FBBO who hasn't read through Hawk's cross country thread, you gotta check it out. What a great adventure.
 
...No better view than opening the garage door and seeing 3 Mopars parked side by side…
Amen to that!!!

At the moment I am going through Road Runner withdrawal. My son took his 73 Road Runner up to school, and mine is being shipped back. The garage looks lonely! Your garage looks great with all three, and the Dart is really cool too. Sorry about any drool marks I left on it from the weekend! :sideways tongue:

OK, enough with the green and blue ones, let's :backontopic:

Luckily, with the passenger mirror it looked like sliding it back to where it belongs will still hide the other holes. I would still suggest making sure the all holes have some paint or rust inhibitors in them just to help against the dreaded tin worm. You guys don't get rain like we do, but still...

Also, I know you have a few weeks before you are ready to do this, but while I am thinking about it: For all holes through the firewall where wires, vacuum hoses, etc. will pass, make sure you put the grommets in them (where they not already attached to the factory wires) AND put a thin piece of stranded wire through them. Once the dash is in, these can be a real PITA to reach, and the wire can make it much easier to pull things through. The holes over the pedals aren't too bad, but the ones near the passenger side are hard...

While we are thinking about wires passing through the firewall: With your new FI system, I imagine that the user input screen wires will hook to the throttle body/ECU assembly. This means it will run from the throttle body back through the firewall. In my case, I chose to unwrap and rewrap my FI wires with the factory friction tape to "hide" them as much as possible. Either way, think about a neat way to run them back through the firewall. Maybe you can gang the wires with the ignition and alternator wires that run on the passenger side of the engine and then pass the wire through there??? I am sure you have already given some thought to this - I just figured I would brainstorm here and see if it provides any ideas...
 
Amen to that!!!


Luckily, with the passenger mirror it looked like sliding it back to where it belongs will still hide the other holes. I would still suggest making sure the all holes have some paint or rust inhibitors in them just to help against the dreaded tin worm. You guys don't get rain like we do, but still...

Also, I know you have a few weeks before you are ready to do this, but while I am thinking about it: For all holes through the firewall where wires, vacuum hoses, etc. will pass, make sure you put the grommets in them (where they not already attached to the factory wires) AND put a thin piece of stranded wire through them. Once the dash is in, these can be a real PITA to reach, and the wire can make it much easier to pull things through. The holes over the pedals aren't too bad, but the ones near the passenger side are hard...

While we are thinking about wires passing through the firewall: With your new FI system, I imagine that the user input screen wires will hook to the throttle body/ECU assembly. This means it will run from the throttle body back through the firewall. In my case, I chose to unwrap and rewrap my FI wires with the factory friction tape to "hide" them as much as possible. Either way, think about a neat way to run them back through the firewall. Maybe you can gang the wires with the ignition and alternator wires that run on the passenger side of the engine and then pass the wire through there??? I am sure you have already given some thought to this - I just figured I would brainstorm here and see if it provides any ideas...

You got it Hawk, I plan on spending all weekend on the car. I have some POR-15 I'm going to brush inside the existing holes.
After checking our your firewall it hit me that I wasn't planning far enough ahead on the grommets. On the same note, the two heater hose connectors from the CA unit are much to close to the edge of the hole; they're not touching but they will rub when the cars' running and vibrating. So out comes the box to work the holes and then install the grommets. (In the back of my mind I knew the box was going to come out because it went in too easy. For me anyway, when a component installs the first time with no hassle, it means it has to come out again at some point, lol).

As for passing the FI wires through the firewall, one option I was thinking was the unused clutch pedal opening. Again, I noticed on your car you had a grommeted hole next to the bulkhead connector that was passing wires through; was that a new hole or did you re-purpose an existing one?
And great idea on the stranded wire to fish the other wires through - going to use that one. Thanks a million for the time and interest helping to get the Coronet back on the road.
 
For me anyway, when a component installs the first time with no hassle, it means it has to come out again at some point, lol).

Haha, I can't tell you how many times I installed, then de-installed stuff. I guess it is just part of the drill...

As for passing the FI wires through the firewall, one option I was thinking was the unused clutch pedal opening. Again, I noticed on your car you had a grommeted hole next to the bulkhead connector that was passing wires through; was that a new hole or did you re-purpose an existing one?

It was not a new hole. I was crazy **** about NOT drilling new holes in my firewall - not really sure why... The only holes I drilled were for the A/C unit; all other holes were factory. I think the hole you are talking about above was a hole that previously mounted my original heater box. I just repurposed it for wires. You should have the same hole in your car.

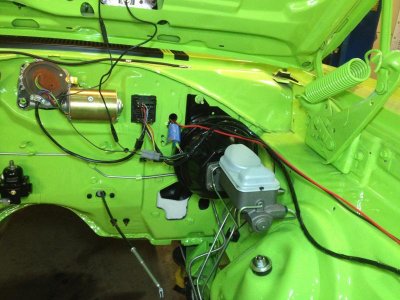
In the picture below, look where two wires cross. One is from my hood mounted turn signals, and the other is also from the hood mounted turn signals, although it looks like it is coming from the wiper motor. They cross in front of a hole. This is the one I am talking about. Is this the one you mean?
IMG_3784.jpg
 
Hawk, I was thinking the hole between the bulkhead and brake power booster. Looks factory. My firewall doesn't have that hole punched out.
 
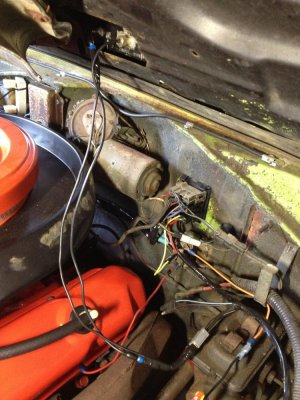
Yes indeed - Super Ron is correct. I had kind of forgotten how little that hole was used for, especially since I have stuffed it full of wires now! Here is a picture of my car prior to restoration:

IMG_1024.jpg

Maybe this is a case to drill it out since you have added a tach?
 
Makes sense. My car originally came with a clock so the firewall would not have been drilled. A PO had added an aftermarket tach and mechanical oil pressure gauge; I'll have to leaf through my original pictures to see where the wires were threaded through.
Hawk - what wires you using the tach hole for? (Besides the tach) :toothy10:

Update - this was a somewhat frustrating weekend because Maria's cousin, Duke, and I spent several hours on Saturday working on the car and could not install the drivers side window. The front fork on the vent window post would not line up with the bracket inside the door. Wonder if it has something to do with the impact when the wheel came off. Nothing seems bent though. I think I'm going to unbolt the bracket, install the glass/vent window and install the bracket afterwards, forcing the fork to align. At the same time the window regulator gave up the ghost - will not stay in the down position without weight on it.
By comparo, the passenger side window and mechanism dropped in with no drama. I'm still circling back to the initial impact, because it was fairly violent, that is tweaking the drivers side.
On a positive note, reinstalled the passenger side view mirror; doesn't make contact with the vent window. As you measured Hawk, just a 1/2" was all it took.
And lastly, the heater and a/c tubes are now centered and wrapped with refrigerant tape.
 
Hawk - what wires you using the tach hole for? (Besides the tach) :toothy10:

Funny thing is, I am NOT using it for the tach! My MSD box is mounted under the dash, and the tach gets its signal from the MSD box. I am passing the following wires through that hole:
  • Power and ground wire for my FAST FI system ECU - attaches directly to battery
  • Power wire only for my MSD box - attaches to my starter solenoid
  • A/C pressure switch wires - both the request to turn the A/C on, as well as the return that confirms I have pressure. Under the dash, this connects to the FAST ECU so it can adjust engine speed and then routes back out of another hole (where my air grabber hoses are) and goes to the A/C compressor.
  • I think that's it, but I reserve the right to have a senior moment and forget about something

Update - this was a somewhat frustrating weekend because Maria's cousin, Duke, and I spent several hours on Saturday working on the car and could not install the drivers side window. The front fork on the vent window post would not line up with the bracket inside the door. Wonder if it has something to do with the impact when the wheel came off. Nothing seems bent though. I think I'm going to unbolt the bracket, install the glass/vent window and install the bracket afterwards, forcing the fork to align.
That's the way I installed my window - I loosened that bracket and then tightened it up when the window was installed in the channel and loosely on the bracket. But don't look at how I did it, my windows do NOT work well enough - this is something I need to spend some more time on to fix. :iamwithstupid:

At the same time the window regulator gave up the ghost - will not stay in the down position without weight on it.
Rich, I think that simply means that it is well lubed up and working well. Remember that when rolling the window down there is the weight of the window on the regulator. When rolling it UP the window is heavy, so Chrysler put a spring on it to help the window go up easier and with less effort. I think you are OK!

On a positive note, reinstalled the passenger side view mirror; doesn't make contact with the vent window. As you measured Hawk, just a 1/2" was all it took.
And lastly, the heater and a/c tubes are now centered and wrapped with refrigerant tape.
Nice! Check a couple of items off the list!
 
[*]I think that's it, but I reserve the right to have a senior moment and forget about something
You just described my......darn! forgot what I was going to say.

That's the way I installed my window - I loosened that bracket and then tightened it up when the window was installed in the channel and loosely on the bracket. But don't look at how I did it, my windows do NOT work well enough - this is something I need to spend some more time on to fix. :iamwithstupid:
Cool, full steam ahead.


Rich, I think that simply means that it is well lubed up and working well. Remember that when rolling the window down there is the weight of the window on the regulator. When rolling it UP the window is heavy, so Chrysler put a spring on it to help the window go up easier and with less effort. I think you are OK!
In the interest of brevity I chose to omit other characteristics - like the heavy grinding noises, and how it skips teeth in the middle of the arc. I remember now that this was why originally I had planned on going with electric windows. Maria talked me out of them 'cause she didn't want the car too heavily modded.

Nice! Check a couple of items off the list!
Yes sir!
 
Auto Transport Service
Back
Top