• When you click on links to various merchants on this site and make a purchase, this can result in this site earning a commission. Affiliate programs and affiliations include, but are not limited to, the eBay Partner Network.

My 69 Coronet project

Yeah I will be going down two days early with Dennis for willow springs track day as well as Malibu cruise. When you are ready I can send the info for lodging. Congrats on the engagement too. I can confirm that you two are a great couple and she is a very cool girl. She's into the cars as much as you which is rare!
Thanks Dwayne. By all means, send me the lodging info.

- - - Updated - - -

Thanks Rich, looks like a simple enough setup. My biggest concern is my alternator belt slipping. I really want 2 belts on it but should get an amp clamp on it first.... might not need the 100 amp alternator which would likely fix that problem.

That engine compartment is looking sweet, keep it up!
Thanks Dev. A larger alternator is in my future too.
 
Great progress Rich - you'll be firing it up in no time!
 
Great progress Rich - you'll be firing it up in no time!

As you pointed out, a million little things to do. As soon as I cross off one item, two more take its place. I was running out some milestones last night - fire up the engine w/e of Feb 20th, roadworthy by March 4th. Expect a few phone calls between now and then.:sSig_thanks:
 
As you pointed out, a million little things to do. As soon as I cross off one item, two more take its place. I was running out some milestones last night - fire up the engine w/e of Feb 20th, roadworthy by March 4th. Expect a few phone calls between now and then.:sSig_thanks:

Trust me, I know how it goes. All the little projects add up quickly, so keep on that stuff. I found it helpful if I cleaned and painted a few small parts most work sessions. Even if I didn't have an immediate need, this REALLY helped me later when I needed to assemble stuff.

If you get into trouble, I can always jump on a plane - just need enough advanced notice!

Hawk
 
I know you would Hawk. I'm knocking little things off piece by piece - tonight it was radiator hoses, p/s hoses, and tranny lines.
 
Been busy the last couple of weeks knocking the To Do list down. The brakes lines are all hooked up, brakes are bled. Fuel system is in, Derale trans cooler is installed in front of the a/c condenser. Got the w/w motor back from Passion4Mopars; it's a work of art.
Bought the tires and wheels from Coker Tire. Tried giving a couple of local tire shops a shot at the business, including the Les Schwab. When I told them I wanted Magnum 500's all I got was a blank stare. Coker has a good reputation and their prices are competitive. The fronts are 245/60-15 and the rears are 295/50-15.

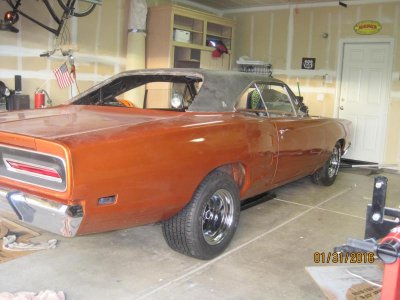
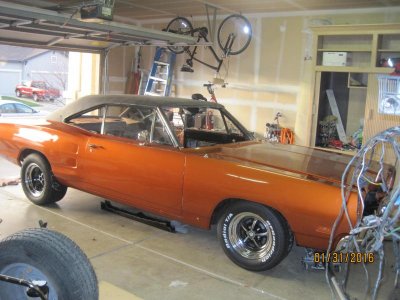
So here's the Coronet riding on 4 matching tires for the first time in almost 2 years - but do you notice anything unusual in the photos?
IMG_3253.jpg
IMG_3254.jpg
The rears are RBL and the fronts are RWL. :angryfire: Ordered them at the same time; they got 50% of the order right. How does that happen? I don't even want to start listing the number of times service providers have let me down during this build. To their credit they make good in the end, but it costs them money to fix their mistakes - just like its going to cost Coker to have a shop flip two tires around. BTW, I'm going with RBL.

IMG_3255.jpg
Still a lot to do, the engine and forward light harnesses are next. And the valve covers need to be changed out. But the new Mopar covers need a couple of holes punched out for the PCV and breather cap - what's the best way?

Figure a couple more days on the mechanicals then its on to the dash and interior.
 
Wow - looks great!

I like the Magnum 500s, but as you know, I am a fan of those wheels! It's a shame though that you have to get the tires flipped around - just an extra PITA and something else to deal with. Like you say, many things take extra effort to get them right. It just seems to be the way it is...

I've never had to punch holes out of valve covers before, so I can't help there. I'd assume just a simple hole saw?? :shruggy:

Either way, don't forget to add a baffle if needed.
 
Thanks Hawk. Gotta give Maria credit for the wheel selection - she likes the old school look. The HD leaf springs really jack up the back of the car; I figure they'll calm down a bit over time but right now it looks like I'm running air shocks.
And I didn't look recently but I believe the valve covers come with mounting holes to install baffles.
 
Your really knocking that list out, looks great sitting on matching tires too. I'm sure I've mentioned it before but I love that color!!!
 
Your really knocking that list out, looks great sitting on matching tires too. I'm sure I've mentioned it before but I love that color!!!

Thanks Devin. Yeah, I like the black rims contrasted against the orange.
 
I see a frame connector on the floor, is that next?
 
I see a frame connector on the floor, is that next?
Good eye. Yes, I was mocking up the sfc's for welding. Up until now the interior has taken a back seat (pun intended) to the rest of the build because the headliner and sfc aren't in. Turns out a co-worker of Maria's used to fab and build race cars and he offered to weld 'em up. Might be done by this weekend.
 
The worst part of that job is getting the undercoating off and clean for welding. Make sure you have a weld jacket to save you some burns from welding over head. Also spend the extra time to trim the sfc's for a real good fit. Your welder will thank you!
 
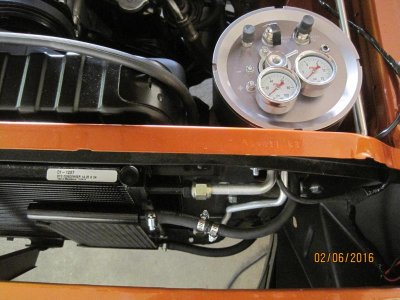
Knocking out the last several items in the engine compartment. Installed a Derale plate & fin trans cooler and plumbed it in series with the radiator cooler. It came out OK with the flex lines but eventually I want to try my hand at fabbing hard lines for a cleaner look. As it is the flex line goes through the upper access hole and snakes down the side of the radiator, paralleling the overflow line.

The bottom hose from the radiator to the cooler goes through a hole in the frame rail and exits a hole in the rad support. The cooler lines are barely noticeable from the engine side.
IMG_3262.jpg
IMG_3266.jpg

Had to make a small detour to tune up the front suspension. I clocked the LCA socket with the adjuster arm too high so the front end height wouldn't adjust. It was fixed in a couple of nights and I'll remember for when I rebuild the Dart front-end. Started a new thread - thanks again to FBBO members for getting me back on track.
http://www.forbbodiesonly.com/moparforum/showthread.php?105945-Need-help-with-LCA

Finished off the valve covers - wound up using a step drill to drill out the hole for the breather. And BTW, when installing the Mopar Performance valve covers, ignore the "book" when ordering the PCV valve and grommet. The MP valve covers have a thicker mounting flange so you're better off bringing them into the auto parts / hardware store and finding a grommet that fits. Not a big deal, but after my second trip to O'Reillys it finally sunk home.
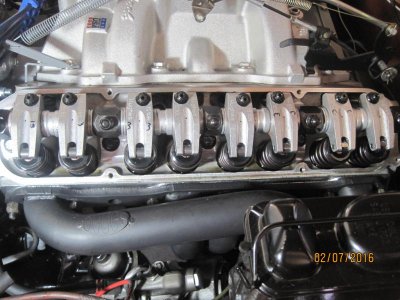
While the old covers were off, snapped a pic of the Hughes Engines roller rockers.
 

Attachments

  • IMG_3267.jpg
    IMG_3267.jpg
    77 KB · Views: 303
Last edited:
I found the same issue with the thick valve covers but they sure do look cool on there. Looks like you got everything nice and tidy up front, looking good!
 
Looks good - making progress! Everything looks nice and neat - it's a pain and takes extra time, but it'll pay off in the long run...
 
I can see the finish line up in the distance. Crossing more things off the list.

The sfc are welded in; doors still open and close :grin: Suspension is done except for alignment - greased the Zerks and added cotter pins where I had run out of before. MP valve covers are in - another note to self, next time put 'em on before the engine is in. After the valve covers in went the new Taylor 8 mm plug wires. Kind of a disappointment - they were model/engine specific but are way too long. The #8 wire can be wrapped around the hood hinge and still have enough slack. After everything's done I'm going to go back and shorten several of the wires.

The steering column is in! Surprisingly it dropped in with no drama - Duke worked the engine compartment while I was inside. Even the roll pin slammed in rather easily. Used a 3/4" drive, 8" extension with tape shoved in the female end. The tape held the roll pin in place while guiding it into the hole, then used a hammer on the other end. Dabbed some grease on the end of the pin. Once started, turned the extension around and hammered it in. Hooked up the shifter linkage and now have a functional drive train.

The steering wheel is a place marker; a Grant wheel is on order
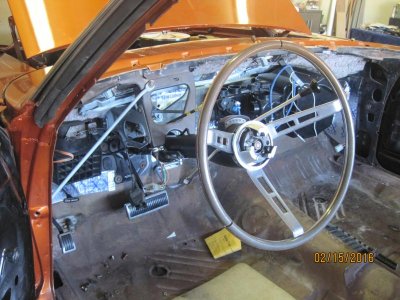
IMG_3275.jpg

What happened to the engine compartment? It's completely filled in now.
IMG_3276.jpg

Installed a coupler rebuild kit a few weeks ago. Replaced the original, tar like grease and the shoes and spring even though the originals seemed in good shape. Not sure if it's worth the time and effort - it's hard to dimple the cover tangs back onto the coupler body. It will never be the same as the factory.
And Hawk, check out the shock tower. After taking all precautions, covering the entire drivers side with towels, checking all connections, some brake fluid still dribbled down the inner fender. :angryfire:
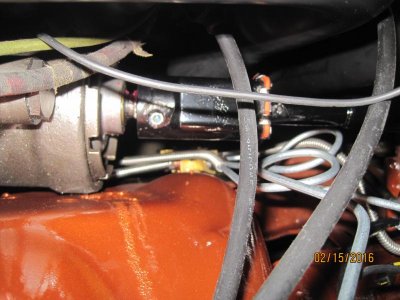
IMG_3280.jpg
 
Last edited:
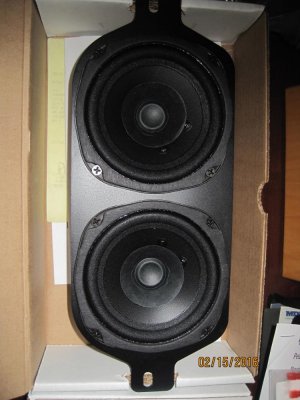
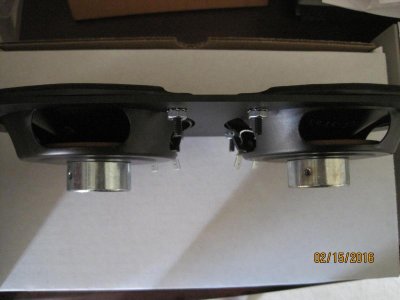
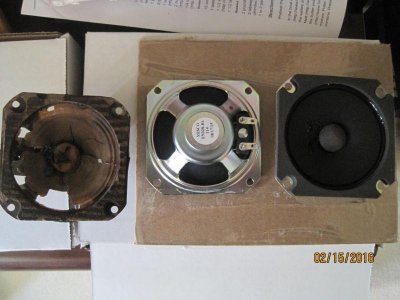
Moving on to the interior. The Coronet came with the 5 speaker option: two 3.5 and a 4 x 10 in the dash and two more in the package tray. All the speakers were shot so I found dash replacements at Electro-Tech, www.turnswitch.com.

A dual 4 x 10 for the middle. Only 2" deep.
IMG_3278.jpg
IMG_3279.jpg

The originals needed a little work. I'm splicing the new speakers into the original harness and will eventually go with the RetroSound Redondo head unit.
IMG_3277.jpg

BTW, why in the world did Chrysler install a 6x9 and 5x7 in the rear package tray? Pick one size and go with it. Nobody sells just one speaker.

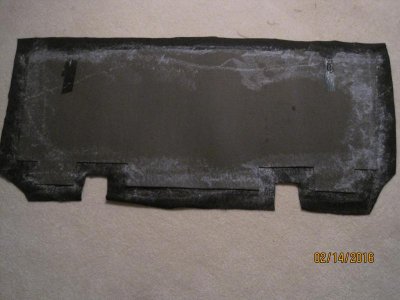
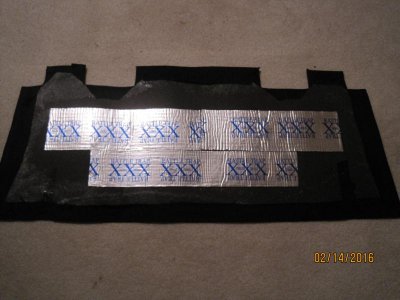
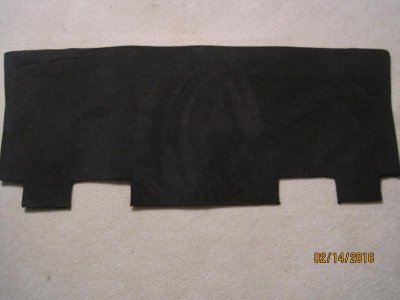
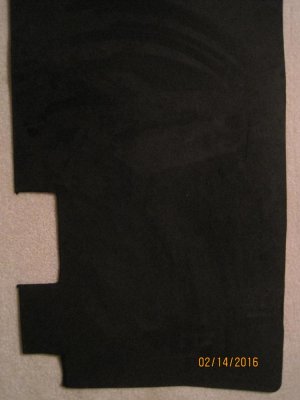
So last night we had some time so Maria and I worked on the rear seat divider. What else you gonna do on Valentine's Day?
Bought some black micro-fiber on Amazon. Goning to use it on the package tray too

Glued the fabric down with headliner spray adhesive. Turned the divider over and glued down the edges
IMG_3268.jpg
Stuck on some Rattle Trap remnants. This side faces the interior
IMG_3269.jpg
Trunk side view.
IMG_3270.jpg
IMG_3271.jpg
 
Now that's an update! Still haven't seen a valve cover that looks cooler on a BB Mopar than those, motor is looking great. For me universal plug wires are the only way to go, most steer clear for fear of screwing them up but if you invest in a good W crimper you can't tell it's not a factory crimp and a can of silicone lube will ensure the boots go on easily.
 
Totally agree on the valve covers. The crinkle black goes perfect with the black headers. And ironically i have a good crimper, which I will now be using on this wire set.
 
Auto Transport Service
Back
Top