• When you click on links to various merchants on this site and make a purchase, this can result in this site earning a commission. Affiliate programs and affiliations include, but are not limited to, the eBay Partner Network.

My 69 Coronet project

Hi Rich,

Sorry I have been out of touch a bit but I have been getting killed at work. :angry1:

Great to see the progress, and I am sure you are looking forward to getting the engine back in the car. Keep up the good work and all the small projects too. It all comes together in the end.

Damn, maybe I need to drive out again!

Hawk

Or, Maria and I will head due East and meet you half way. This weekend will be spent hooking the trans up to the motor and then on to the K frame. BTW, did you bolt the engine to the K first, and then the trans, or install them together as a unit? Don't know if it makes much of a difference either way.
 
Or, Maria and I will head due East and meet you half way. This weekend will be spent hooking the trans up to the motor and then on to the K frame. BTW, did you bolt the engine to the K first, and then the trans, or install them together as a unit? Don't know if it makes much of a difference either way.

In my case, I had the engine on a hoist. I had the tranny on a work table and then guided the two together. Once they were together then I set them in the K frame.

Of course, like an idiot I then dropped the tail shaft of my tranny and had to fix the bell housing bolt holes with Helicoils, so I removed and installed the transmission again with the engine in the K frame. Works either way.

The main thing I would caution you about is the support of the K frame. The location of the motor mounts and weight of the engine will try to drive the front of the K frame up. Be careful how you support it. In the end, I ended up putting a block of wood between the front of the oil pan and the K frame, but a better K frame support design may not require this.

IMG_2683.jpg
 
I remember the tailshaft incident; we had some minor setbacks yesterday that will be documented in this thread as I get more time. Maria and I have to finish Christmas shopping today.

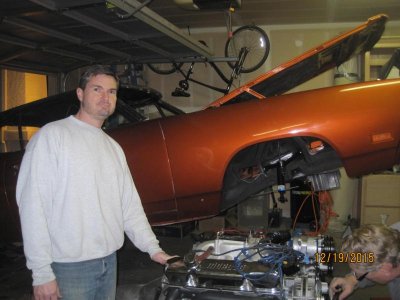
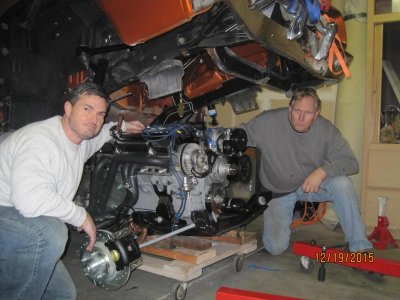
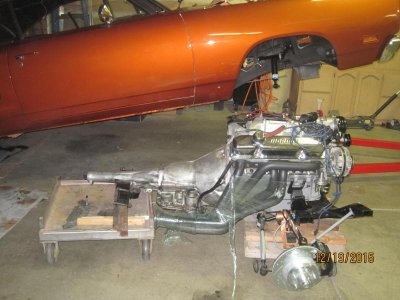
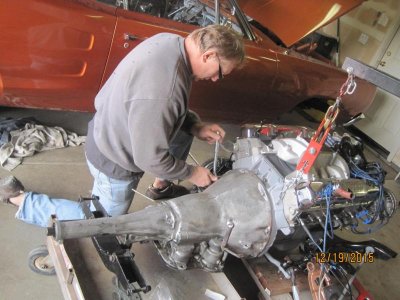
We also had the engine on a cherry picker and lowered it onto the K. The K was sitting on a HD moving cart. We dropped the front of the car on jack stands and used the metal cart that the front end had been resting on the past 8 months for the transmission. As it turned out, resting the tranny on the cart got it to within less than an inch of the height of the engine. Duke and I lifted the tranny onto the guide dowels and supported the tail shaft with wood blocks. Only took minutes to mount the tranny to the engine. it was sheer luck that the two carts lined up so close.

Spoiler Alert: We got the engine installed last night

IMG_3167.jpg
 
Engine is in

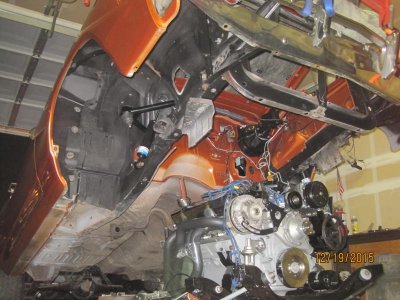
We started about 8:30 a.m. and torqued down the last K member bolt around 10:00 p.m., long day but the drivetrain is in. Installing by dropping the car is probably the best way to go, especially with headers, but for us at least, it was still a lot of work. The install would have gone smoother with three people instead of two; one on each side of the car watching for pinch points, while the 3rd worked the cherry picker. With just the two of us I was jumping back from side to side and missed a couple of areas.

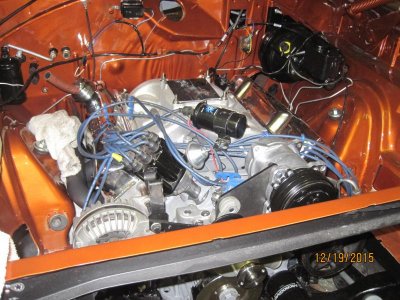
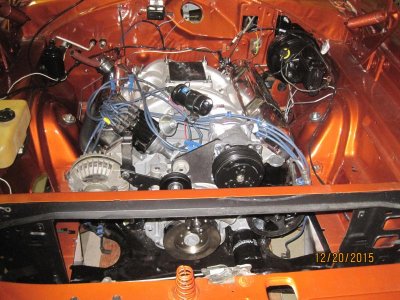
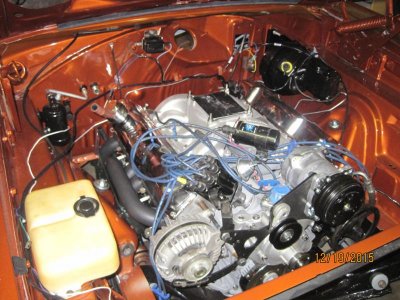
Last week in preparation for the install I bolted on all engine accessories: alternator, p/s pump, a/c compressor. If you're installing an aftermarket a/c compressor, install it first because it overlaps the OEM brackets. The engine block is painted battleship gray and accessory brackets are painted Trim Black which leaves a matte finish. The headers were ceramic coated matte black too.

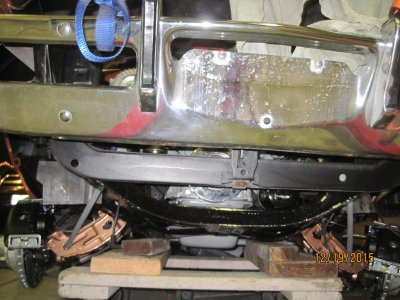
Saturday morning the first thing we did was raise the front of the car to level the front frame rails and measure the distance from the bottom of the frame rails to the floor. Since we were raising only the front of the car it was coming down at an angle so we wanted the four mounting tabs on the K frame to be the same height as the bottom of the frame rails so when the car was lowered they're parallel to each other. We added wood blocks to the K frame cart to bring it to the correct height. The engine dropped down on the K frame with no issues.

We got lucky that the metal cart the tranny was on was almost the same height as the K. We wheeled it up to the engine and had the tranny bolted up in minutes.

IMG_3152.jpg
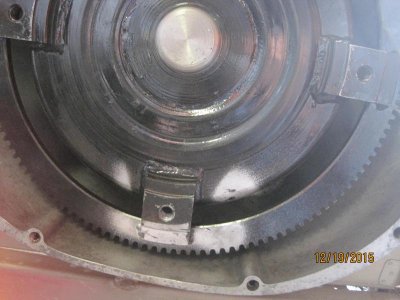
If you changed torque converters, mark one of the mounting tabs and the corresponding flex plate tab because they only go on one way.
IMG_3151.jpg

IMG_3150.jpg

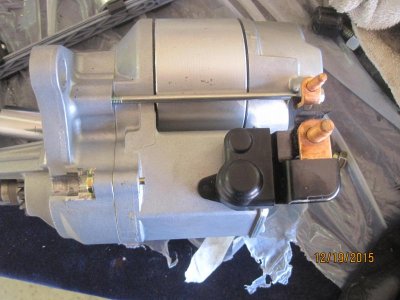
If you're planning on running headers you have to use a mini-starter. There are plenty to choose from, I got the Denso unit from Mancini Racing. They come with terminal extenders that will hit the block preventing installation; just pop off the plastic cap and unbolt the extensions.

Sorry for the abrupt ending - internet connection went down last night.
 
Last edited:
VERY COOL! Congratulations. That is a major milestone and it will be even more fun when you can mount up the suspension and have it rolling on its own wheels! Even cooler still when you can actually move it under it's own power.

Keep up the good work!

Hawk
 
I know what your going thru , the deeper into dug into my 69 the more I replaced , but in the long run it will be well worth it , it will turn out great
 
VERY COOL! Congratulations. That is a major milestone and it will be even more fun when you can mount up the suspension and have it rolling on its own wheels! Even cooler still when you can actually move it under it's own power.

Keep up the good work!

Hawk

It's getting there. I'm looking from underneath and I don't see how the torsion bars will clear the headers, but they must somehow. We'll come to that bridge this weekend...

- - - Updated - - -

Looks like you'll be on the road in 2016.

Goal is March 1st. Maria and I are getting hitched March 25th and want to take the car so I need a couple of weeks of drive time to dial it in.

- - - Updated - - -

I know what your going thru , the deeper into dug into my 69 the more I replaced , but in the long run it will be well worth it , it will turn out great

Oh yeah, I've dug deep. But as you say it will be worthwhile after it's done.
 
Goal is March 1st. Maria and I are getting hitched March 25th and want to take the car so I need a couple of weeks of drive time to dial it in.

Dang, that threw me for a loop. For some reason I thought the 2 of you had been married for awhile. Congrats to both of you, should be a blast taking the Coronet on the honeymoon. By the way, the car is looking awesome.

Thanks. We've been referring to each other as man and wife for a while - it just sounds weird calling her my girlfriend. I actually proposed to her at the Mopar Nats this year. I figure any woman who can vacation at a car show, Rock n Roll HOF and Football HOF, and have a great time is a keeper.
 
Thanks. We've been referring to each other as man and wife for a while - it just sounds weird calling her my girlfriend. I actually proposed to her at the Mopar Nats this year. I figure any woman who can vacation at a car show, Rock n Roll HOF and Football HOF, and have a great time is a keeper.

It's at least a good place to start. Congratulations on your engagement and your progress on the Mopar.
 
Made it through another Christmas

but just barely. This restoration consumes a lot of time, so after we spent all last Saturday installing the engine I had to take the next 4 - 5 days catching up on shopping. Got it all done on the 23rd.
I wound up receiving some cool car gifts - a couple of Mopar hats, a T shirt, mechanics gloves, an LED trouble light, another fender shield and more wall art for the garage. It was a great Christmas all around, but back to last Saturday…

Here's pics of the mini-starter and the post extenders that need to be removed:
IMG_3157.jpg
IMG_3156.jpg

Used nylon tie straps wrapped around the bumper.
IMG_3170.jpg

IMG_3171.jpg
There was plenty of room to raise the car.
IMG_3178.jpg

IMG_3179.jpg

IMG_3177.jpg
IMG_3190.jpg

IMG_3191.jpg
Oh yeah, lets not forget about the transmission mount. DUH!
IMG_3189.jpg

It's in!
IMG_3193.jpg

IMG_3195.jpg

IMG_3194.jpg

Take aways:
Could have used a 3rd person; one on each side to guide while one person works the hoist.
We spent so much time worrying about the headers and motor mounts we didn't spend enough time on the tranny. As a result one of the tranny mount ears got bent as the body was lowered and it got caught on the crossmember. We wound up taking out the mount and straightening it in a vice.
Also bent the stainless steel kick down linkage where it attaches to the transmission. Haven't determined yet how bad the damage is.
The whole operation took about 4 hours with two guys, so we didn't save much time from going in from the top. Dropping the body is easier if headers are installed; they took an hour to bolt up while the engine was still out of the car. Starter has to be loose, resting on the collector, then bolted in after the header flange is bolted to the head. Would not have wanted to install the headers after the engine was in.
Another reason to go in from the bottom is to save engine compartment paint. Mission accomplished; but we put a gouge in the front fender moving the hoist around. :angryfire:

If the plan is to restore your ride, rebuild the front suspension, disc brake swap, new torsion bars, etc. then it makes sense to drop the K member and reinstall from the bottom. But if everything on the front end is good and all that's needed is an engine rebuild, I would drop it in from the top.

Next step is hooking up the front suspension, installing the torsion bars and having a roller again.
 
Last edited:
Had no idea you proposed at the Nats or I would have congratulated you in person but congratulation's, that's awesome and I think you found a keeper!

Way to go on the milestone, next is getting it all hooked up and running which will add a ton of motivation to push you threw the rest of the build. I know I installed my motor and tranny at the same time from the top and it only took a few hours so it's not bad at all but like you said the headers are the biggest pain. Keep after it!
 
Devin, when you met Maria on Saturday she was my girlfriend; on Sunday she was my fiancé.
I'll be hitting it hard now, only got 10 weeks.
 
Auto Transport Service
Back
Top