• When you click on links to various merchants on this site and make a purchase, this can result in this site earning a commission. Affiliate programs and affiliations include, but are not limited to, the eBay Partner Network.

Restomod charger pics

Man, regardless of the audio quality she sounds mean as hell and I can't get over how cool that exhaust is :icon_thumleft:

And re: the plug wires, I got a set of custom-cut firecores from a guy over on the dodgecharger forum that everyone talks about being the best set you can get. Priced decent, silicone boots, and cut to lengths that are supposed to be perfect for keeping them away from headers. I can get you his info if you end up wanting to switch

I'm definitely switching, they're good wires but are the type where you can bend the boot to the angle you want. Unfortunately when you push the boot on the plug the connector slides up in the boot instead of connecting "aggrevating". I was going to get Taylors, always liked and had good luck with them but will have to check the fit. I'll be looking into studs for the headers too but know at least two or three will be a problem. How much were they if you don't mind me asking?

- - - Updated - - -

Thanks guys, can't wait to get a better audio for you "by then it will likely be painted":blob1:
 
Last edited:
You're Charger sounds badass! I can't wait to hear it when it's running on all eight cylinders. Keep up the great work 7.
 
When I did the studs for my headers I had to cut the second one back on each side down by probably about a half inch to clear the front primaries, but otherwise it made things pretty easy. If you post a pic of a "top" view of your header flange with them bolted up that'd be helpful seeing where the issues are at

And the wire set was about $120 including shipping if I remember right (he's up in Canada). The guy's name is Ron and has the screen name firefighter3931 if you have an account over there :icon_thumleft:
Sound like the same place "second one back on both sides" I'll get a set of studs and see what happens but it's good knowing it worked for you.
 
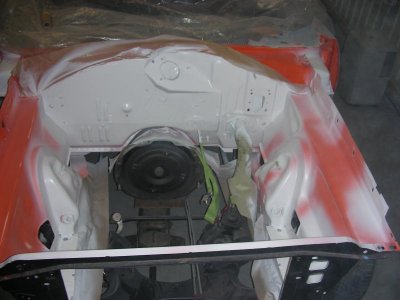
Progress really slowed down tonight "my hopes and wishes didn't pan out", after blowing all the clear off the inner fenders I hoped for the same on the firewall "nope". It was stubborn, not good enough to leave but hard enough to require a bit of effort resulting in a firewall that will need another shot of primer and sanding. I've been trying to think of a name for her, I'm thinking "evil bit#&" she sure is giving me hell every step of the way. At least all of the clear is off so I can at least start working towards painting again. All in all a good weekend, the kids have been gone all weekend camping with grandpa so I got to spend some time with the wife "forgot what it was like" but can't wait to get them back (longest they've ever been gone).
 
Yep I just cut them the shortest they would go and still have enough thread for the nut to fully thread on. I just have to hang the headers on the edge of that (short) stud, barely catch the threads on it, tighten that one up first then the rest of em are a breeze. I posted pics of it on my thread a couple pages back :icon_thumleft:

Glad to hear that clear is all dealt with and ready to start making ground back up on the paint
 
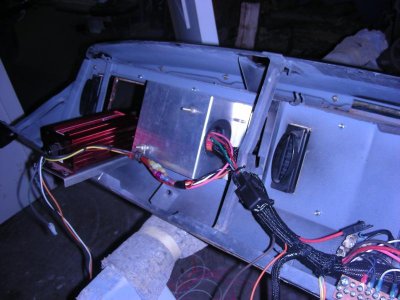
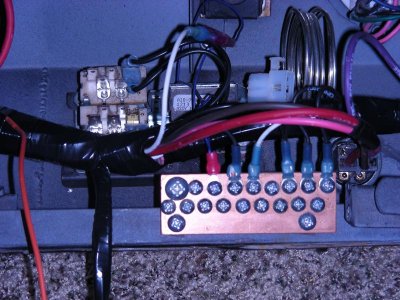
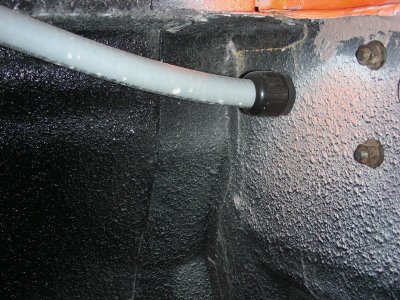
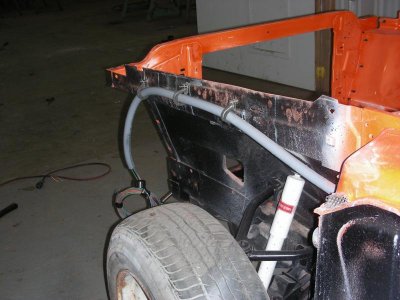
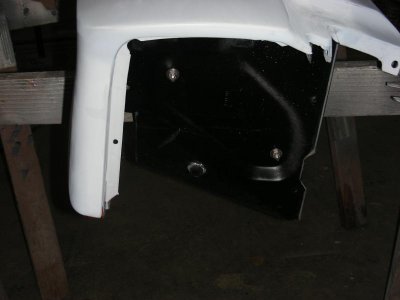
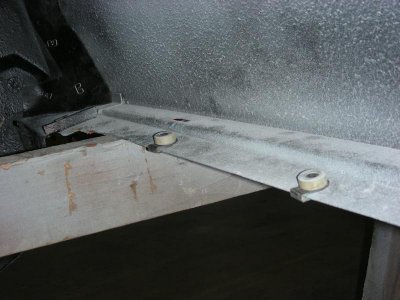
Hears the pics someone asked for. Forgive the mess, I've been doing allot of sanding and everything is pretty filthy. The fuse box is mounted right beside the 6AL ign box. The fender is sitting on it's side in the pic but you can see the coupler for the seal tight conduit, I used small pieces of pvc pipe to fit over the fender nut clips so that you have something to torque the hangers to. You can see in the engine bay pic the boot I used for my harness. Knowing allot of electrical issues come from bad grounds I made a central grounding bar out of copper drilled and tapped and grounded directly to the main ground, everything on the dash is grounded to it. DSCN6509.jpgDSCN7671.jpgDSCN7675.jpgDSCN8435.jpgDSCN8436.jpgDSCN8437.jpgDSCN8439.jpghttp://www.mcmaster.com/#standard-electrical-conduit/=omgsx3

- - - Updated - - -

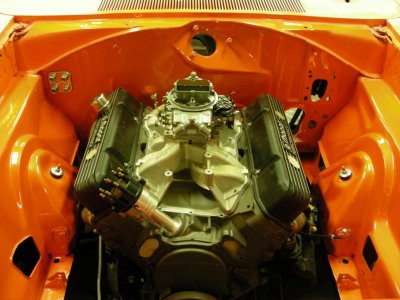
Here's a pic with motor installed, can't see the wires. O.K it appears there is no wires yet but you can see the boot isn't visible.engine bay.jpg

- - - Updated - - -

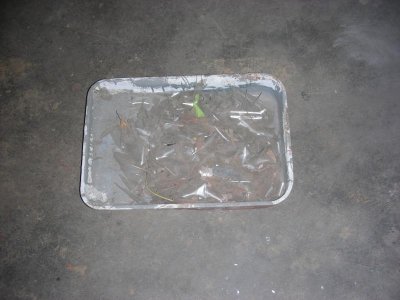
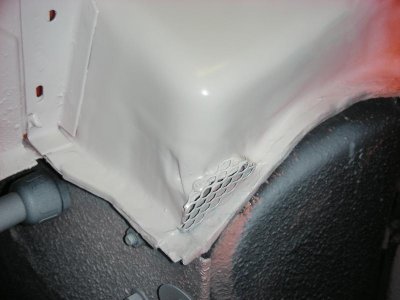
Not what I wanted to get accomplished but after the PITA that the firewall turned out to be "I'm just glad to have a clean slate again". Since the fenders are off I took a pic of my idea for mouse protection "hate those critters". Here's a pic of the clear off of the firewall in a bucket "lovely". I ended up using a razor to get it off but it came off easily "kinda" which meant nicks and scratches so it all got sanded with 400 grit them re primed in white. Hoping to paint it during the week so it will be done before next weekend and free up time to work on something else.DSCN8440.jpgDSCN8441.jpgDSCN8442.jpg
 
Anybody have a rear quarter glass for sale, I have one "airtemp" tinted glass and one clear, I want clear glass (I'll have to look to see which side I need). If anyone needs a good original quarter window with the factory logo for a restoration "I don't need it". I'll be needing a windshield as well but I'm sure most used ones will be bluish like mine.
 
Hey 747Mopar . . . Love the clean panels that you did in your car, and was considering doing the same thing in my car - really like the way that it looks. Curious if the (4) larger access holes in the engine compartment could be closed up as well ? ? Or do they really need to stay there for alignment access ? Wanted to get you opinion and insights on the matter since you're so much further along than myself. Great job on your car . . . I enjoy following along on the process . . . I'm learning from a bunch of people on this site about how to (hopefully) do it the right way myself ! !

Thanks for posting your progress.
 
Thanks glad you like it, I'm sure you could smooth them over but the guy that aligns it will probably have a few choice words. I'm sure they could do it seeing how they no longer have to look at bubbles on a level "hell I did a half a$$ alignment on mine and didn't even use the holes" but that was with the motor removed. Can you put the bolts in backwards where the bolt head is outside making it adjustable from the outside? I didn't worry to much about them just because they are so far down and not to noticeable, I am considering making a few nice covers painted body color. If you smooth the shock towers like I did weld the seam completely all the way around, this will seal out moisture and eliminate flexing from cracking the filler. I also welded every screw hole and any hole I wasn't using shut. I think the number one thing that cleans them up is getting all of the wires out of sight, battery too. Good luck
 
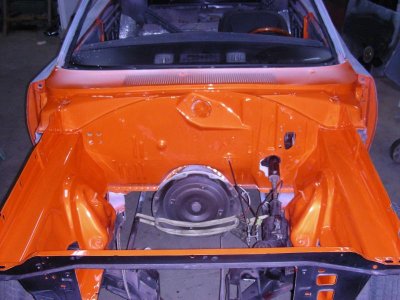
I've had a few asking about the hidden wiring so as soon as I get it back together I'll post some more detailed pics for anyone interested. As for progress, I'll likely re shoot the engine compartment tomorrow. Loving the House of Colors sealer-primer, I did a little 120 grit sanding while removing the clear and expected to have a bunch of scratches to fill "where did they go" this crap is like magic. I even guide coated it and only could find minor unevenness where I sanded a little deeper "good stuff".
 
What can I say "I'm a gluten for punishment". It's become a lifestyle (go to the garage every Fri & Sat night) and it just doesn't feel right unless I do "that and the fact that I know every missed night sets me back further". Hopefully I'll have something worth posting tomorrow, didn't get enough time to paint yet but have everything prepped, masked and ready to rock for tomorrow (not the whole car, just the re do work) . I took advantage of the situation to fix and change a few things "now I have another hole in my firewall for the windshield wiper wiring to keep it short and not so noticeable". Now the one problem, tomorrow is the first day of bow season and I never miss that "hopefully my post will include a deer haha". Adios, gotta get up early and in the woods before daylight.
 
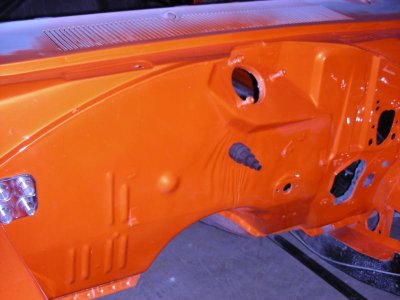
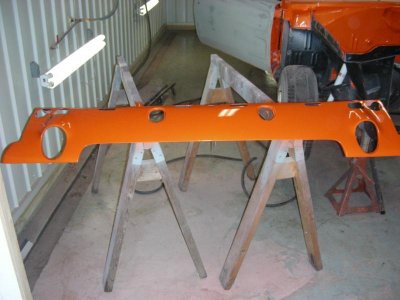
Hunting was a bust, my morning hunt was a new spot that showed allot of sign but produced nothing. My afternoon hunt was a failure as well, I took my daughter and it only took an hour for her to start asking "can we go yet" over and over until I said to heck with it. Good news, after things weren't looking so good hunting I high tailed it to the garage and got paint back on the engine compartment "I'll take that over a deer any day". I also painted the valence as well because I didn't want to many parts in the booth when I paint the car. It really shines but for some reason this camera doesn't take glossy pictures. Tomorrow I'll head back into the woods in the morning for another stab at it "my brother in law nailed a buck today so now it's on".DSCN8449.jpgDSCN8456.jpg
 
Sorry about the hunt but looks like you did well in the paint department! That valance panel shines pretty good to me, the engine bay looks shiny to, my camera doesn't do things justice either but yours looks good to me.. great work, and get that larger buck in the AM ;)
 
Auto Transport Service
Back
Top