• When you click on links to various merchants on this site and make a purchase, this can result in this site earning a commission. Affiliate programs and affiliations include, but are not limited to, the eBay Partner Network.

Restomod charger pics

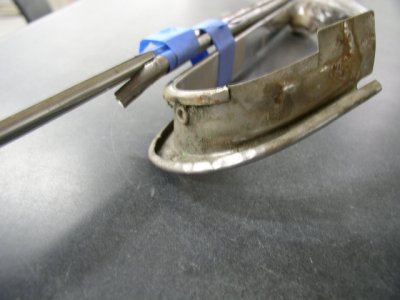
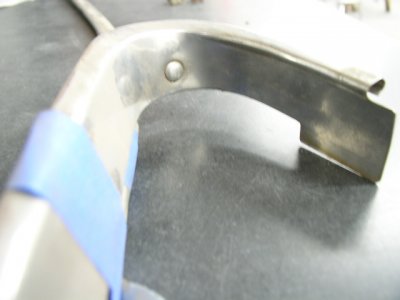
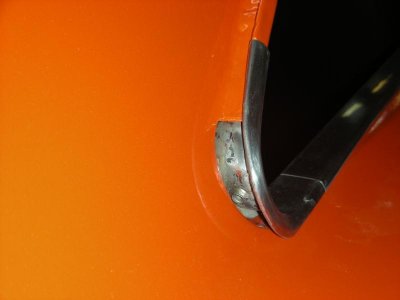
Well all of my polishing excitement is gone, I started on it tonight and quickly realized "I don't like shiney" so I'm going with a brushed look. I do have some questions, what in the hell is that rivet in the rear quarter corner trim for "say that 10 times real fast". I also can't find any info on whether it gets a seal, sealant or what. More bad news, none of the chrome trim like the wing window or door handle are salvageable "all junk".View attachment 151704

The brushed look looks really cool actually
 
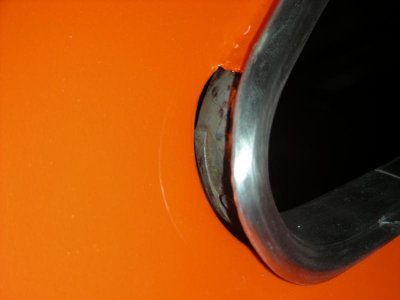
Dug out my chrome pieces to start shining them up too. Here is a pic of the piece you are questioning. Mine is the same as yours - not exactly sure what the purpose of the rivot is. PB160041.JPGPB160043.JPG

- - - Updated - - -

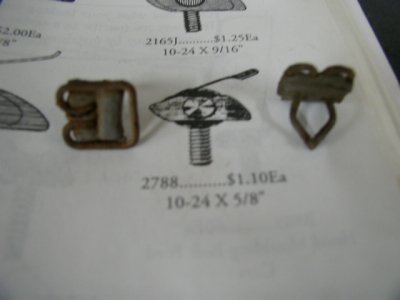
While we are on the subject of chrome, what kind of clips do you have holding on the vinyl top molding? These are for the long straight piece that is held on with 5 fasteners on each side of the sailpanel area. These were in boxes when I bought the car with one side having wire clips attached and the other with the stud style as shown in the picture.

PB160044.JPG
 
Thanks for the pics, seeing how they seam to serve no purpose I wonder if it was just a locator pin in the form used to hold them in place while being formed then just plugged with a rivet?????? My car had the holes all welded up for the vinyl trim when I got it and I can't remember if I got the trim or not "I'll look tonight". I didn't drill them when I replaced the quarters "vinyl ruined this car once already" so it's a hardtop now, I've always preferred them anyhow.
 
Mine is the same way 7. The rivet is there but does not attach to anything. Strange
 
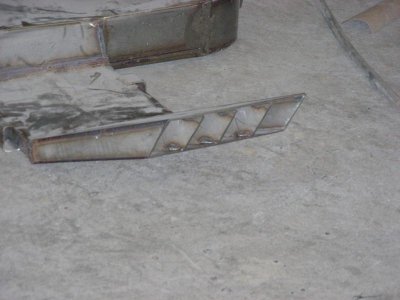
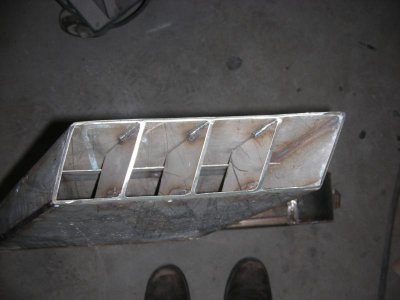
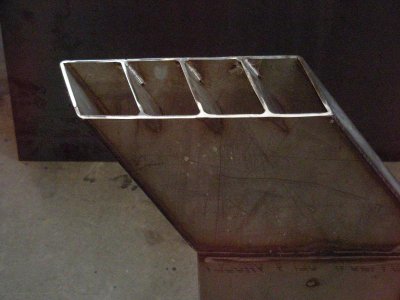
I know you guys probably don't want to see more muffler pics but I made a few changes you might like to see. Like I mentioned before the condensation from the exhaust had no way to drain so it got splashed up the side of the car "no good". I drilled a hole in the bottom of the tip before the upward angle for a drain then bent a piece of stainless to deflect the gases away from the side of the car and tucked it back in the tip out of sight. The next thing I decided to do really made them look cool, I split the tip into four making it look like eight outlets "I like it". Other than that I finished cleaning up the bottom of the car, got the rockers looking good with some chip guard (under the car) and painted the weld lip that hangs down with black bedliner "I hate seeing that lip hanging down". A good night, now if you don't mind I have to get to bed so I can get up at the crack of *** and get into the woods for some Bowe Hunting.DSCN8624.jpgDSCN8630.jpgDSCN8631.jpgDSCN8637.jpg
 
I know you guys probably don't want to see more muffler pics but I made a few changes you might like to see. Like I mentioned before the condensation from the exhaust had no way to drain so it got splashed up the side of the car "no good". I drilled a hole in the bottom of the tip before the upward angle for a drain then bent a piece of stainless to deflect the gases away from the side of the car and tucked it back in the tip out of sight. The next thing I decided to do really made them look cool, I split the tip into four making it look like eight outlets "I like it". Other than that I finished cleaning up the bottom of the car, got the rockers looking good with some chip guard (under the car) and painted the weld lip that hangs down with black bedliner "I hate seeing that lip hanging down". A good night, now if you don't mind I have to get to bed so I can get up at the crack of *** and get into the woods for some Bowe Hunting.
View attachment 151919

Hey 747Mopar . . . I gotta say one thing . . . I thought they were cool before, but splitting them looks AWESOME ! ! !

That is way too COOL ! ! !
 
AGREED with conv67bdere! They already looked great but that was an awesome change! I can NOT wait to see this car in finished form!!
 
Hey 747Mopar . . . I gotta say one thing . . . I thought they were cool before, but splitting them looks AWESOME ! ! !

That is way too COOL ! ! !

Hell yeah - you are the exhaust God. :eek:ccasion14:
 
Going to throw out an idea to you 747Mopar . . .

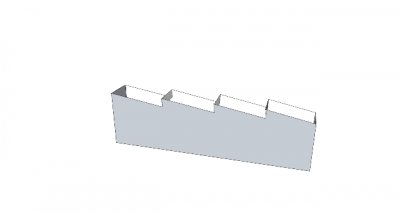
747Mopar . . . just a suggestion . . . I'll let you decide what you want to do . . . I thought the same thing when you built it, that it needed to be split up into "pieces" just like you did . . . but what about if you went just a little bit further to accent the separations . . .

Here's a drawing I threw together to illustrate my idea . . .

muffleridea.jpg

The drops in the sections could be as little an 1/4 inch, but it would set them off as individual in appearance.

Just a thought . . . my $0.02 . . . it's your AWESOME design ! ! !
 
I think your new design looks great, not that the other one was bad in any way except maybe BADASS!!!!!!!!!1
 
747Mopar . . . just a suggestion . . . I'll let you decide what you want to do . . . I thought the same thing when you built it, that it needed to be split up into "pieces" just like you did . . . but what about if you went just a little bit further to accent the separations . . .

Here's a drawing I threw together to illustrate my idea . . .

View attachment 151948

The drops in the sections could be as little an 1/4 inch, but it would set them off as individual in appearance.

Just a thought . . . my $0.02 . . . it's your AWESOME design ! ! !
That's really cool, how do you do those sketches on the computer? I think I'm going to leave them as is because they run along the edge of the rockers and I'm not sure how a notched look would look against the straight rockers. Very Cool thou

- - - Updated - - -

Hell yeah - you are the exhaust God. :eek:ccasion14:
Haha "exhaust god", if I'm the exhaust god then your the god of perfection "everything on your build looks so clean and perfect, no overspray or anything".

- - - Updated - - -

Thanks allot guys glad you liked the change, the only other change being made is paint "I know they're stainless". These cars have really high asses making everything under them very visible from the rear and a set of stainless mufflers stick out like a sore thumb so I painted all but the tips flat black. I'll get them in next week and get some pics but for now I have to make some doe before I can move forward anyone need a set of really nice a arms for 69-70 b bodies or the strut rods "I'm broke again".
 
OH GREAT GOD OF MUFFINS,,,, I MEAN mufflers , you are very talented MR 747, i REALLY like what you did.
 
That's really cool, how do you do those sketches on the computer? I think I'm going to leave them as is because they run along the edge of the rockers and I'm not sure how a notched look would look against the straight rockers. Very Cool thou

Thanks 747Mopar . . . glad you liked the design, and sorry it didn't fit into your car . . . but it didn't hurt to share the idea.

I drew the design on the computer with a program called SketchUp - it's a free CAD-CAM program that you can design in 3-D and you can rotate your work around to see it from different angles. Pretty cool program, but it takes a little getting use to in the beginning.

You could always do a mock up it in cardboard to see how it looks - set it in place to get a feel of how it's going to look first . . .

just a thought.
 
Last edited:
your project is coming along nicely, and looks great. I will be working on my charger this winter ,it caught fire from wiring to alternator in garage.caught it in time and got it out but caused paint on hood to blister and under hood wiring and plastic parts to burn. keep up good work. jetmech
 
your project is coming along nicely, and looks great. I will be working on my charger this winter ,it caught fire from wiring to alternator in garage.caught it in time and got it out but caused paint on hood to blister and under hood wiring and plastic parts to burn. keep up good work. jetmech
That really sucks, part of my plans are to have a battery disconnect so there will be no juice until you actually want to drive it. I've seen electrical ones that can be turned on and off remotely. Hope you get it all sorted out, good luck.
 
Exhaust pipes in pictures . . . examples . . .

747Mopar . . . thought I'd try and draw them up for you to show you how they might look:

First the current way you got them ( yeah, even added orange for the rockers )

pipesexample1.jpg

Then added another possible look with the shapes added into the ends:

pipesexample2.jpg

Had yet another idea where the tops are cut out less and the bottoms even more.
( could not get the thing rotated the right way, but needed to show you the difference in depths of cut on top and bottom )

pipesexample3.jpg

Once again . . . just some random thoughts for you to investigate . . . and think about.

After all, it's your awesome design in the first place ! ! !
 
I know you guys probably don't want to see more muffler pics but I made a few changes you might like to see. Like I mentioned before the condensation from the exhaust had no way to drain so it got splashed up the side of the car "no good". I drilled a hole in the bottom of the tip before the upward angle for a drain then bent a piece of stainless to deflect the gases away from the side of the car and tucked it back in the tip out of sight. The next thing I decided to do really made them look cool, I split the tip into four making it look like eight outlets "I like it". Other than that I finished cleaning up the bottom of the car, got the rockers looking good with some chip guard (under the car) and painted the weld lip that hangs down with black bedliner "I hate seeing that lip hanging down". A good night, now if you don't mind I have to get to bed so I can get up at the crack of *** and get into the woods for some Bowe Hunting.View attachment 151916View attachment 151917View attachment 151918View attachment 151919

Looks good, nice fab skills
 
Surely this isn't correct, what goes in the gap?DSCN8662.jpgDSCN8663.jpg

- - - Updated - - -

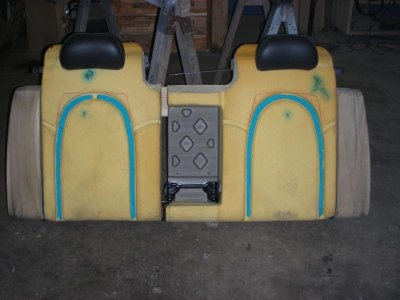
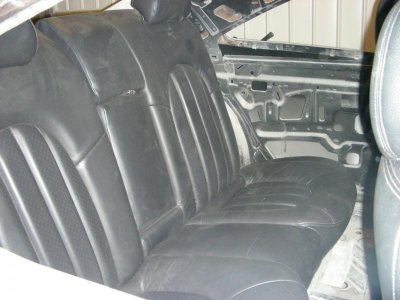
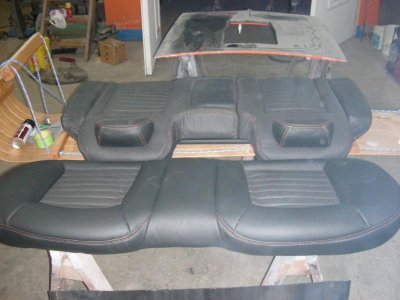
Seats done "kinda". BeforeDSCN6834.jpgDSCN6900.jpg AfterDSCN8664.jpg Sorry crappy picture, I'll get a better one this weekend if he gets the one fixed by then (felcro didn't hold).

- - - Updated - - -

I ended up breaking down and buying the roller kit to replace all of the rollers in the rear quarter windows so if they come in by this weekend I'll post how it goes and show those who are concerned about how to install it all.
 
Auto Transport Service
Back
Top