• When you click on links to various merchants on this site and make a purchase, this can result in this site earning a commission. Affiliate programs and affiliations include, but are not limited to, the eBay Partner Network.

Restomod charger pics

Can't say for sure not looking at my car and trim at the moment, but are they maybe upside down and on the wrong side of the car?

The upholstery looks great and holy hell those exhaust tips are nothing short of completely awesome! Can't wait to see everything together on the car!
 
Thanks Speedy. No you can't put them on wrong, one end fits onto the drip rail and the other attaches to the quarter window trim.
 
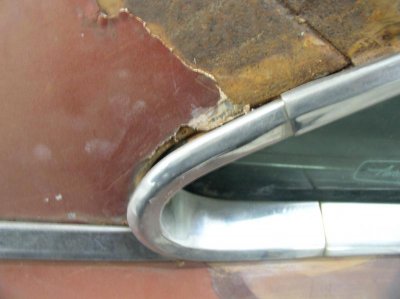
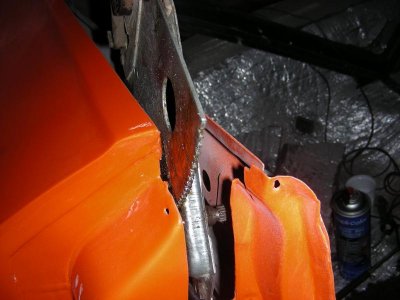
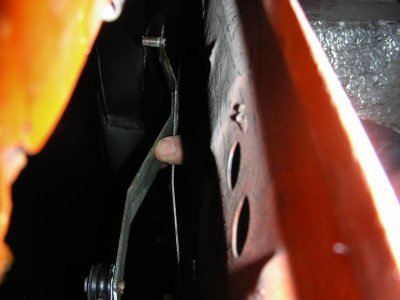
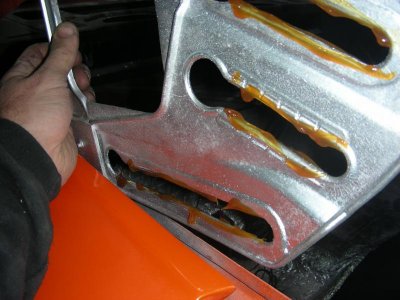
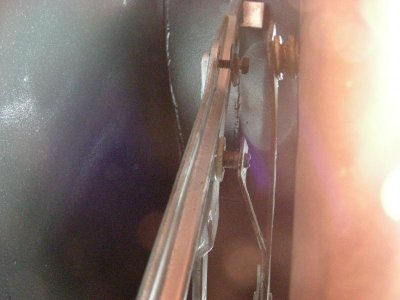
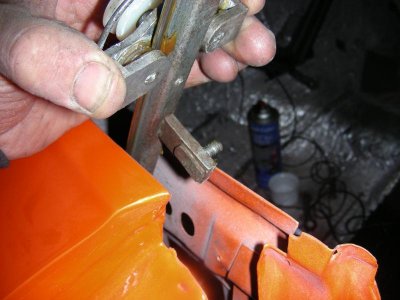
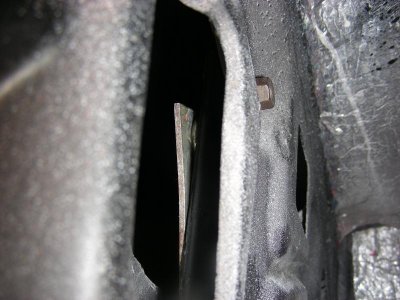
Here are some pics from my other 69 Charger showing the trim you are questioning. This is a vinyl top car, so I suppose that would fill in the gap. It is not nearly as big of gap as yours though. Maybe there is another piece for non vinyl top cars? Regardless, it looks like a area just inviting water to enter. Curious as to what you find out about this.

P1010058.jpgP1010059.jpgP1010060.jpgP1010061.jpg
 
Huh that's interesting.. suppose that could be a possibility of vinyl vs non vinyl top cars like elk said. I'm deleting my vinyl top too, so I'm guessing I'll have the same problem
 
that is the way that trim is, i am going to put black seam sealer on mine after the install .
thats why there are plastic water shields right behind that area.i have heard the factory put a little putty in that area ?
 
Thanks allot Hunt, that pic is what I needed to see. Now don't everyone freak out about the big gap "the quarter trim isn't screwed down yet", you can push the trim back as you screw it down and close the gap. I didn't want to go any farther because it looked like there should be a seal in there, I'm just going to take some butyl rope (whatever it's called) and smoosh it in there before I install it "crazy they leave it like that". Good news of the day "my quarter windows showed up today" I came across a set for fifty bucks so I bought them even thou I only needed one "anybody need one"? I'll be having to take a break on the car soon to build a table and chair for "you guessed it" more Charger parts, $600.00 will buy all of the window felts, weatherstripping kit, windshield, windshield gasket and hopefully with a few more bucks the grill trim. That should bring me close to just needing wheels and tires but I know something will go wrong and screw it all up. Thanks guys

- - - Updated - - -

Huh that's interesting.. suppose that could be a possibility of vinyl vs non vinyl top cars like elk said. I'm deleting my vinyl top too, so I'm guessing I'll have the same problem
I doubt it seeing how they are probably all stamped with the same dyes. Like I said in the first post there is a little wiggle room when screwing the trim down.

- - - Updated - - -

that is the way that trim is, i am going to put black seam sealer on mine after the install .
thats why there are plastic water shields right behind that area.i have heard the factory put a little putty in that area ?
I looked at those plastic pieces a million times in the last 10 years and could never remember where they came from until I started putting the windows in "my memory isn't that good". I'll be sealing them as well.
 
that is the way that trim is, i am going to put black seam sealer on mine after the install .
thats why there are plastic water shields right behind that area.i have heard the factory put a little putty in that area ?

What are these plastic water shields you are talking about? Do you mean the plastic sheets that go behind the interior panels?
 
that is the way that trim is, i am going to put black seam sealer on mine after the install .
thats why there are plastic water shields right behind that area.i have heard the factory put a little putty in that area ?

X3 . . . I'n intrigued with the way the things line up / don't line up . . . and I'e got a convertible so I don't even have this area on my car ! ! !

( doesn't mean that I might not get myself another Mopar someday - a hardtop ! )
 
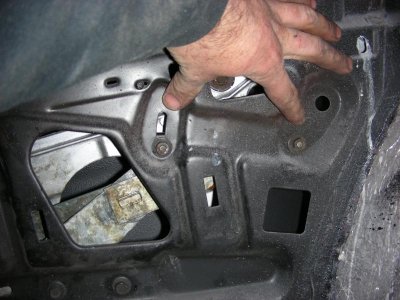
see the black plastic at the top of inner panel
index.php

Thanks for the pic. I surely didn't find that piece in the boxes of parts that came with my car. Has anybody ever seen these for sale anyplace?
 
I haven't seen any that could be bought "new" but seeing how they are inside and plastic they should be really easy to find off of a parts car. If you have any trouble they could be easily made "not much to them" here's a pic of what they look like out of the car.DSCN8671.jpg

- - - Updated - - -

I'll finally get the quarter window assemblies done tonight and post it as promised "the roller kit came today".
 
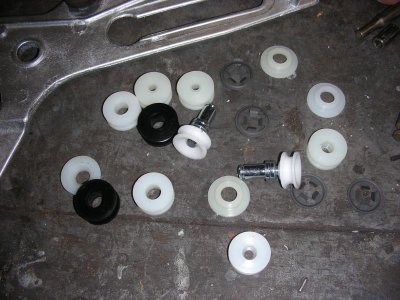
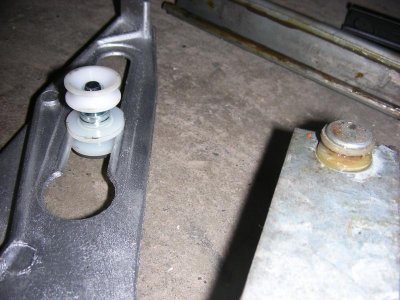
Here's the kit, it replaces all but the small regulator roller and the small buggy rollers (I call the aluminum pieces with the three rollers that go on the long rails buggies).DSCN8687.jpgDSCN8688.jpgDSCN8690.jpg

- - - Updated - - -

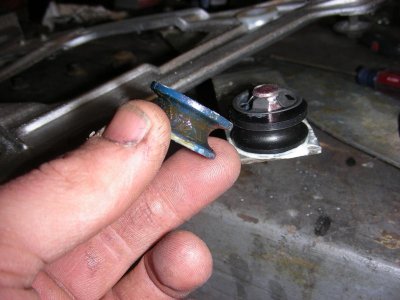
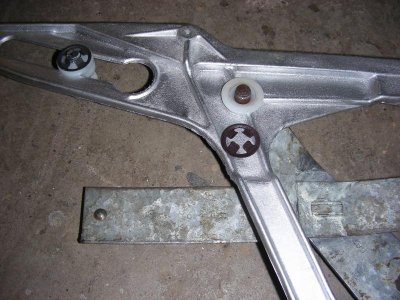
To replace the rollers on the buggies you have to split them (I used a pneumatic saw) and then press the new ones on. I used a small socket to put the force directly on the stud and installed it using a vice.DSCN8691.jpgDSCN8696.jpg

- - - Updated - - -

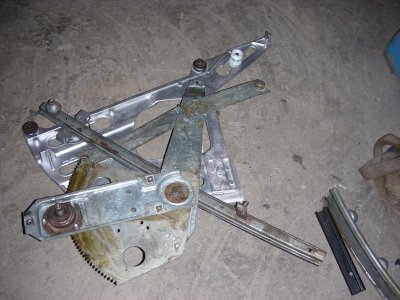
Here is the assembly and some pics of what goes where. Notice the retainer that is left off, this is because I'll be installing them in pieces and will install the retainer after it's all together.DSCN8699.jpgDSCN8700.jpgDSCN8701.jpgDSCN8702.jpgDSCN8703.jpg

- - - Updated - - -

O.K first I install the regulator and bolt it in, the big roller goes forward and the small one to the rear.DSCN8704.jpgDSCN8705.jpg

- - - Updated - - -

Next I bolt the lower rail bracket in.DSCN8706.jpg

- - - Updated - - -

Then it's the frame "all lubed up". The center slot in the front is where the big regulator roller goes then you put the stud (remember the retainer we left off) threw the bushing and install the retainer.DSCN8707.jpgDSCN8709.jpgDSCN8711.jpg

- - - Updated - - -

Now the rail and buggies "biggest pain of it all" go in. The rollers go in the top and bottom front slots of the frame and then it's bolted in.DSCN8713.jpgDSCN8712.jpg

- - - Updated - - -

Next I put the small straight rail in, this is where the small rear regulator roller goes.DSCN8719.jpgDSCN8717.jpgDSCN8716.jpg

- - - Updated - - -

Finally the curved rear rail and the double roller (according to my manual the long end of the rail goes down).DSCN8724.jpgDSCN8723.jpgDSCN8720.jpgDSCN8725.jpgDSCN8726.jpg

- - - Updated - - -

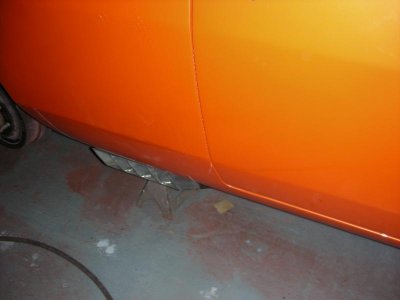
Great night in the garage, quarter window assemblies done and allot of loose ends finished up. I'm starting to make a dent in the huge pile of parts I've got and the car keeps looking better. :headbang:Here is a pic of the installed exhaust.DSCN8727.jpg
 
- - - Updated - - -


Here is a pic of the installed exhaust.View attachment 153082

Thanks 747Mopar for the detailed HOW-TO on the windows . . . I pulled mine out 5 years ago and I doubt that I'll ever remember how to put them back in.

I'll be noting this in my notes and coming back to it when it's time to re-install all my windows . . . I know that.

and . . . WOW . . . the exhaust tips look incredible ! ! ! That has go to be the coolest I've ever seen ! ! ! WELL DONE ! ! !
 
Great write-up on the window regulators. I got frustrated just taking mine out and figured I would deal with them at a later date. Well, the later date is coming up and your pics. will help tremendously. I will have to check mine out to see if new rollers are in order also.
 
Super job there 747. Thanks for taking time to do that. The new "Tips" look great too
 
Great write-up on the window regulators. I got frustrated just taking mine out and figured I would deal with them at a later date. Well, the later date is coming up and your pics. will help tremendously. I will have to check mine out to see if new rollers are in order also.
I know exactly what your talking about "they were a real PITA to get out" but in all honesty they go back in very easily (15 minutes ea). I think the most important thing to do is assemble it first out of the car so you can see it all together then you fly threw it.
 
very well documented install,& them tail pipes would look a lot better on MY car lol.
 
I can't sat any more than what has already been said' other than when you are done with everything, your car will be one of the coolest on the road.
 
Great write up on the windows, where did you order the kit from and does it include everything to rebuild them. Thanks
 
Auto Transport Service
Back
Top