What did you do to your Mopar today?
- Thread starter MustangAndy
- Start date
- Local time
- 5:51 AM
- Joined
- Dec 14, 2008
- Messages
- 13,085
- Reaction score
- 18,718
- Location
- Long Island,New York
Quick coupla test hits on my local 3 lane concrete road,she was hittin the notes!!!

khryslerkid
Well-Known Member
- Local time
- 5:51 AM
- Joined
- Mar 10, 2010
- Messages
- 31,633
- Reaction score
- 57,222
- Location
- Hanover, Pennslyvania
That looked self incriminating!
- Local time
- 5:51 AM
- Joined
- Dec 14, 2008
- Messages
- 13,085
- Reaction score
- 18,718
- Location
- Long Island,New York
Well,the road remains un named and can you positively identify that car????????
Cornpatch MO
Well-Known Member
7 year project , and today we finished the custom interior on my 64 Dodge 2 dr hdtp.. I am very pleased with it. The rest is 95% done, and now just a few weeks till possible snow !!!... 8-( ........................................MO
- Local time
- 5:51 AM
- Joined
- Oct 16, 2014
- Messages
- 29,607
- Reaction score
- 73,201
- Location
- Salisbury, Vermont
- Local time
- 5:51 AM
- Joined
- Oct 16, 2014
- Messages
- 29,607
- Reaction score
- 73,201
- Location
- Salisbury, Vermont
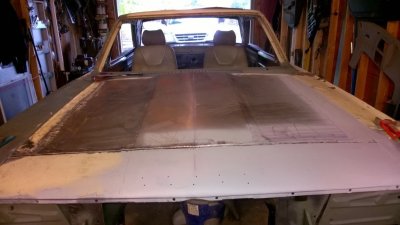
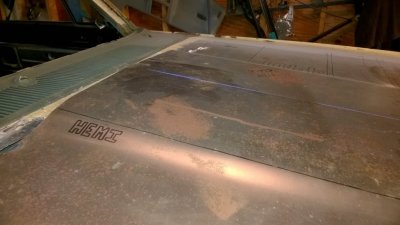
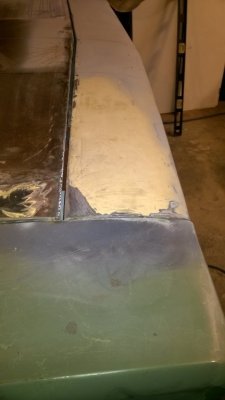
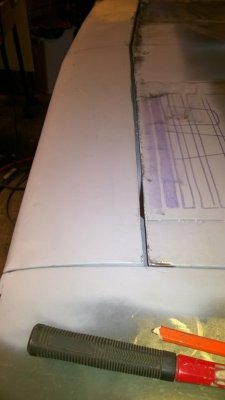
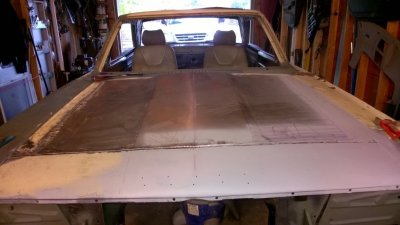
Got the right side sewed up and both sides at the rear. Fabbing a panel to slide into the inside of the cowl that will meet the back edge of the center cutout in the hood frame. Need to pick up some expanding foam to get the hood skin smoothed out and quiet. Moved the right hood bumper plate to the rear too. A few touch ups and a coat of primer to hold it till I start bodywork phase. Then on to the left spring relocation bracket and left tub.


67440chrg
Well-Known Member
Received my new master cylinder, X pipe, mufflers and band clamps in the mail. Now I have a even better reason to spend more time in the out bldg away from every one in the house.
sawdoff
Well-Known Member
- Local time
- 5:51 AM
- Joined
- Oct 16, 2014
- Messages
- 29,607
- Reaction score
- 73,201
- Location
- Salisbury, Vermont
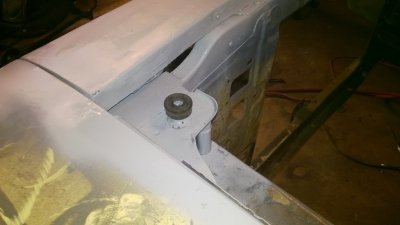
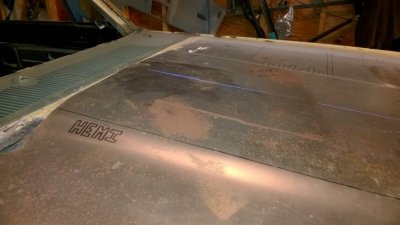
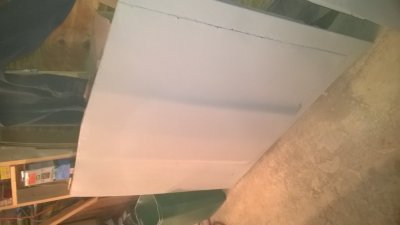
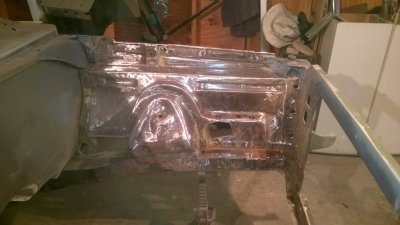
The hood is in primer and waiting on filler, and also the nose section. I removed the left fender and went to work on the cleanup of the inner fender and frame and the radiator frame on that side. This car was hit in the front, maybe a rear end collision, and it crumpled the inner fenders in the first 5 inches or so and wrinkled the top flat shelf above the shock mount on each side. I have to decide how much I want to fix on that issue. You can see the holes some idiot cut out where the fender bolts to it just behind the radiator frame. That whole section that's about 5 inches wide and runs from the frame rail to the top of the radiator frame really needs to be cut out and replaced. I'll have to weld some nuts on the inside for the fender to bolt to though. The wrinkles on the top rail can be covered with filler. Anyway, it was a satisfying day in the garage to get the hood put together and off of the car and out of my mind so I can move on.


mmissile
Well-Known Member
Went to a parking lot show. Got there, and the place had gone outta business, since posting in the Cruze news. On the way home, my left-rear shock absorber came off on the bottom end. Been thru the whole car, and stuff keeps coming loose. I also cant keep the TTI exhaust tight. I keep tightening it more and more. It's looking like I'll have to haul it over to Motofab. Ernie will build a whole new system. Now, I have to decide if I put headers on it.....hmmmmm??? Might be time for the day-2 stuff.
- Local time
- 5:51 AM
- Joined
- Oct 16, 2014
- Messages
- 29,607
- Reaction score
- 73,201
- Location
- Salisbury, Vermont
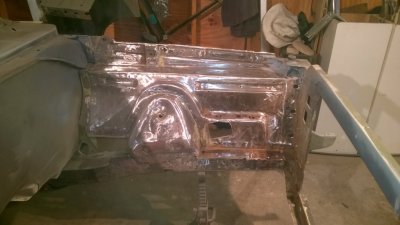
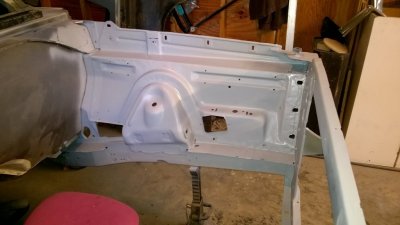
Finished bumping and hammering the left inner fender and took measurements to see how bad it's out of whack. The space from the edge of the flat shelve across to the other edge and above the shock towers is short by 3/16ths. Not worth pushing it out IMO. Got some primer on it and on to the next thing. I also discovered that the lower radiator cross member had cracks on two of the holes so I welded it up.


PlagueOfBadgers
Well-Known Member
Chipping away at it bit by bit. What I find weird is we are having a great time tearing the car down. I thought for sure this was just going to be a pain. I think we both can see what this will be in the end and knowing we are saving this car makes it all worth it.
Things we have found in or on the car so far, a snap-on tool, wood, piece of plastic gutter and home insulation foam. I think the previous owner was torn between being an auto mechanic and a home remodeling contractor.

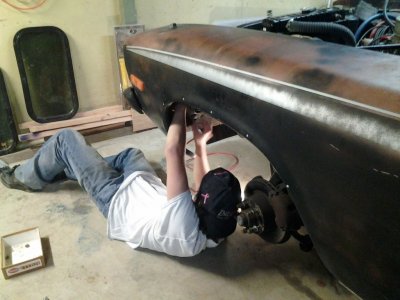
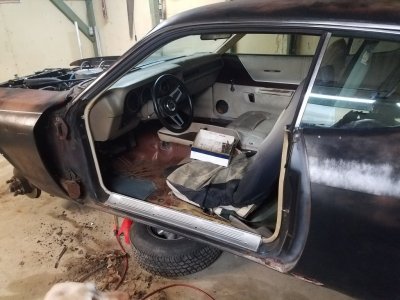
What is becoming the norm is 2 out of every 5 bolts breaking off.
Things we have found in or on the car so far, a snap-on tool, wood, piece of plastic gutter and home insulation foam. I think the previous owner was torn between being an auto mechanic and a home remodeling contractor.


What is becoming the norm is 2 out of every 5 bolts breaking off.
Last edited:
- Local time
- 5:51 AM
- Joined
- Oct 16, 2014
- Messages
- 29,607
- Reaction score
- 73,201
- Location
- Salisbury, Vermont
I know, right? Save those bolts and pieces so that when it goes back together you will have the correct type of bolt to reference. Take pictures...THEN, take it apart, every time. You will thank yourself later...trust me. I always think the dismantling is fun and interesting, seeing how everything goes together and mulling over changes and mods as I go. I take notice of spaces that can be filled with something..such as the M/C and wiper motor going under the dash. Have fun and it's great to see a young fella getting into it like that, lucky guys.Chipping away at it bit by bit. What I find weird is we are having a great time tearing the car down. I thought for sure this was just going to be a pain. I think we both can see what this will be in the end and knowing we are saving this car makes it all worth it.
Things we have found in or on the car so far, a snap-on tool, wood, piece of plastic gutter and home insulation foam. I think the previous owner was torn between being an auto mechanic and a home remodeling contractor.
View attachment 366422
View attachment 366419 View attachment 366426
What is becoming the norm is 2 out of every 5 bolts breaking off.
PlagueOfBadgers
Well-Known Member
I know, right? Save those bolts and pieces so that when it goes back together you will have the correct type of bolt to reference. Take pictures...THEN, take it apart, every time. You will thank yourself later...trust me. I always think the dismantling is fun and interesting, seeing how everything goes together and mulling over changes and mods as I go. I take notice of spaces that can be filled with something..such as the M/C and wiper motor going under the dash. Have fun and it's great to see a young fella getting into it like that, lucky guys.
Thank you. We were given great advice earlier from another member and it was sound advice. Lots of pictures, bag and tag everything. We are keeping everything that comes off the car, broken or not. We have a second floor to the garage so everything is getting set up in that space. It will definitely help us remember what is needed when we start reassemble, nothing has been put into the trash. This is my son's car so I am more or less a quick reference, extra hand when needed. I am letting him do as much as possible by himself. In the end he will be thankful for the learning experience he has gain. I am very lucky to have had a son that loves old cars and will pickup a wrench before a controller.

PlagueOfBadgers
Well-Known Member
I forgot I started a thread in " Members projects and restorations". I updated that post and will keep posting our progress there. Chris and Chris 73 Plymouth pic.
- Local time
- 5:51 AM
- Joined
- Oct 16, 2014
- Messages
- 29,607
- Reaction score
- 73,201
- Location
- Salisbury, Vermont
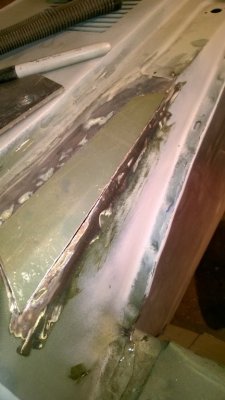
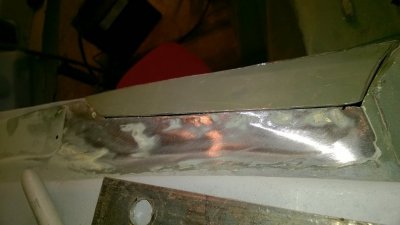
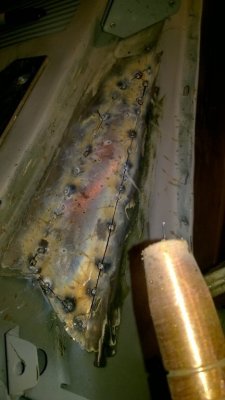
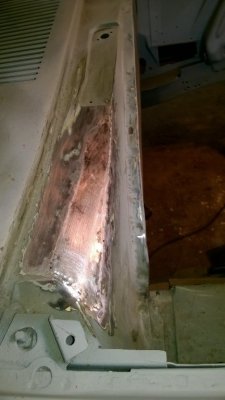
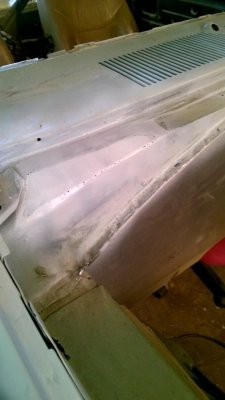
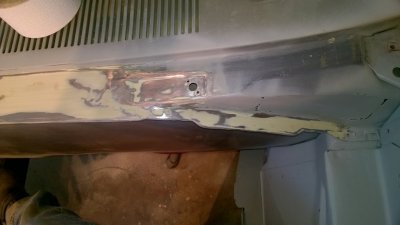
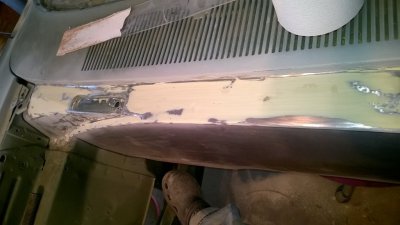
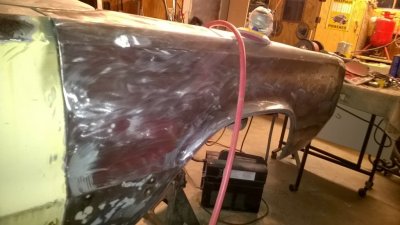
Just staggered out of the garage. Had it for the day. Sanded the right fender down to bare metal, welded a couple of spots up, cut out a bumpy chunk of cowl that needed to be flattened out and vacuumed out the inside of the cowl. Cut to fit a new hunk and welded it back together. Applied Filler to the whole shebang. Tired.
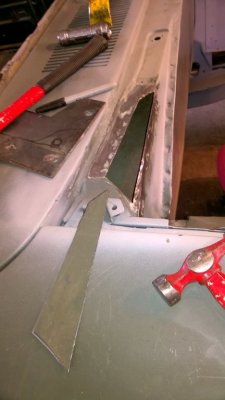
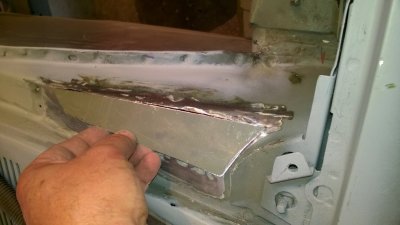


Installed my $25 Sunpro super tach (got at Carlisle hehe). Works perfect!
 then a road test to watch the needle go up and down......then saw this coming up the driveway- beautiful, but what comes after it isn't.

Similar threads
- Replies
- 56
- Views
- 7K
- Replies
- 2
- Views
- 1K
- Replies
- 26
- Views
- 2K

