You are using an out of date browser. It may not display this or other websites correctly.
You should upgrade or use an alternative browser.
You should upgrade or use an alternative browser.
1969 Dodge Super Bee Coupe Restoration
- Thread starter dadsbee
- Start date
moparjohnny
Well-Known Member
my center section seal is much thinner than the one you show,Also.. @moparjohnny .. don't forget to trim your center section to hood seal out to match the OE or you'll crack your box riveting it on!!
View attachment 739960
thanks i understand it now,my center section seal is thinner than the one you show,i ordered from loretta fillmore looks thinner. but i will trim a little off anyway.thanksAlso.. @moparjohnny .. don't forget to trim your center section to hood seal out to match the OE or you'll crack your box riveting it on!!
View attachment 739960
Last edited:
- Local time
- 1:35 PM
- Joined
- Jan 29, 2018
- Messages
- 22,865
- Reaction score
- 82,616
- Location
- Midland Ontario, Canada
I think mine came from the same place.. she is also Detroit Muscle if I'm not mistaken. The OE is formed to about 1/2 thickness to clear the hood web detail. If you don't trim it you put extra stress on that side and may break your rivet tabs off the box. Here's another shot of the OE and the new.my center section seal is much thinner than the one you show,
thanks i understand it now,my center section seal is thinner than the one you show,i ordered from loretta fillmore looks thinner. thanks
- Local time
- 1:35 PM
- Joined
- Jan 29, 2018
- Messages
- 22,865
- Reaction score
- 82,616
- Location
- Midland Ontario, Canada
Well as soon as I finish this yearly BS to appease the government that I made no money....

....I can get back to spending money over here. My NOS turn switch arrived today so hopefully I can get my steering column back together by weeks end.


....I can get back to spending money over here. My NOS turn switch arrived today so hopefully I can get my steering column back together by weeks end.
- Local time
- 1:35 PM
- Joined
- Jan 29, 2018
- Messages
- 22,865
- Reaction score
- 82,616
- Location
- Midland Ontario, Canada
Well $430 CDN and 2 hours later.... THANKS Jeff @oldbee for saving me the misery later when the seats would have been in! Wayne
Last edited:
- Local time
- 1:35 PM
- Joined
- Jan 29, 2018
- Messages
- 22,865
- Reaction score
- 82,616
- Location
- Midland Ontario, Canada
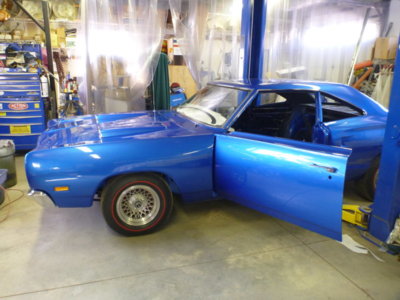
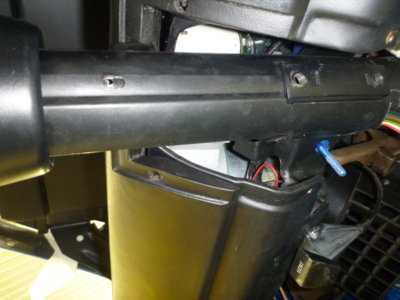
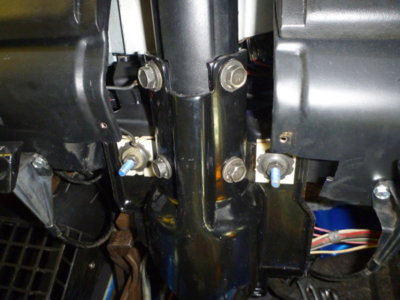
Car rolled forward so I can fully open the door and get to work putting my turn signal, wheel and column supports back together.
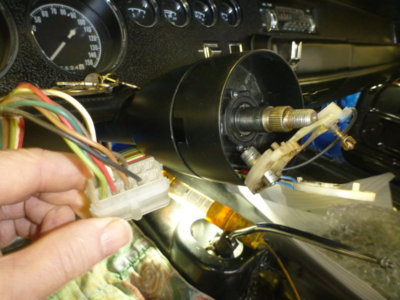
Old turn signal assembly, ready to pop the wires out of the connector so that I can get the ribbon cable up through the collars.
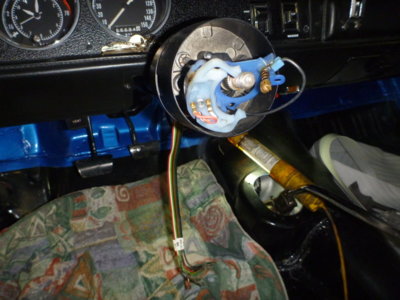
NOS turn signal switch assembly slid into place. Don't ever want to have to buy another of these.. $430CDN and the border police missed me for tax!!
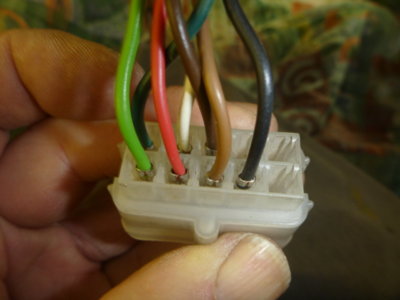
New wires snapped into the OE connector. Note the orientation as they only go one way so they mate with the dash harness plug that also has male pins that angle up against each other.. man that doesn't sound right...
Bit of white grease in the turn lever shaft hole.
New switch plate screwed down. Pic shows metal plate + 3 screws to do so.
Turn actuator lever going into place and showing the correct bolt it mates to.
Lever tightened in.
Joining the switch plug to the dash harness plug and then testing the signal lights before reinstalling the steering wheel.
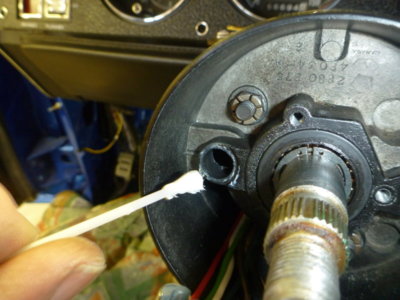
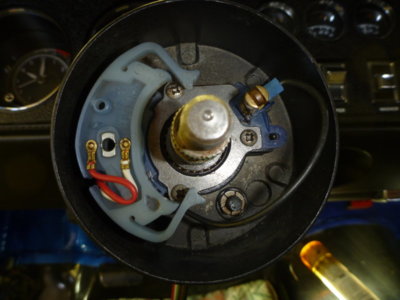
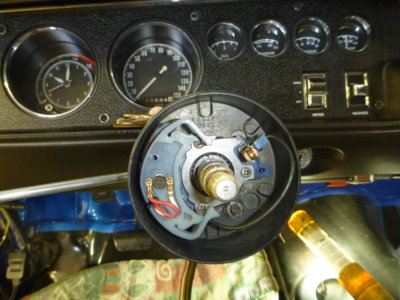
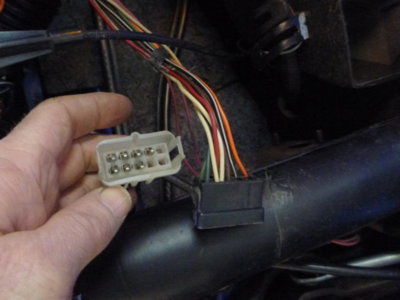


- Local time
- 1:35 PM
- Joined
- Jan 29, 2018
- Messages
- 22,865
- Reaction score
- 82,616
- Location
- Midland Ontario, Canada
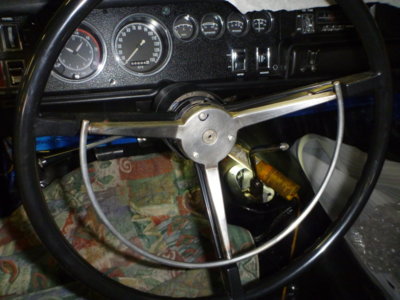
Figure I may as well show how it all buttons up for those that have a box of parts. Ribbon cable is hidden with the metal plate shown.
Then the column support plate is put into place with plastic sliders, funky washers, nuts and don't forget your ground strap wire. 4 bolts from the plate to the column, tighten those first.
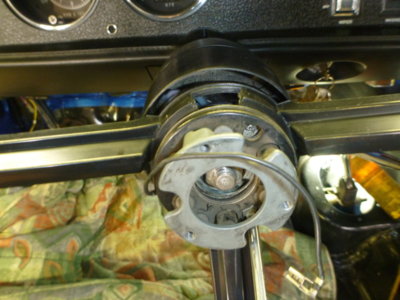
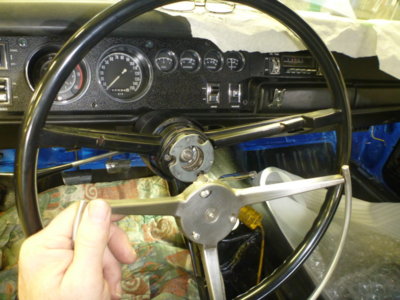
Wheel goes on lightly first and test your turn signal auto cancel to make sure they work before going any further. Then put the washer and nut on and tighten the wheel down into place. Horn actuator switch is next with 3 x 6-32 screws and then hook up the output wire to the tab. This sends a ground signal to the horn relay when you hit the horn pad.
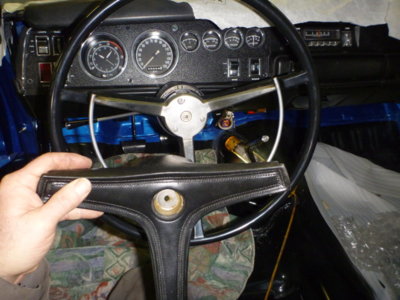
Next the horn pad frame goes into place with it's three 8-32 screws.
Horn ring in place.
Then the horn pad goes on with it's single washer and bolt.
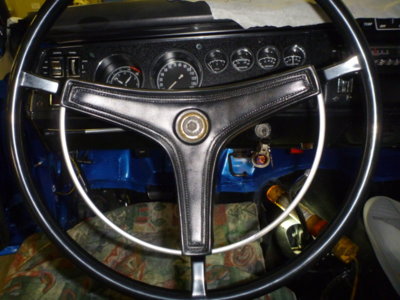
Pad installed.
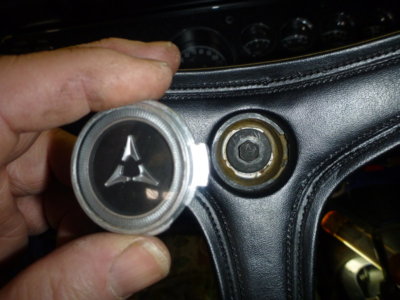
Center cover has a tab on the right side, that goes into a pocket and then it pops into place. Remember where this tab is for when you are removing it. Pry it out from the left side!
Wheel all back together and I can get back to glass...
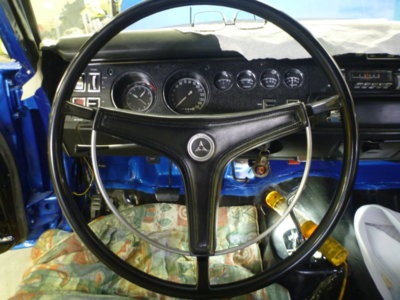
- Local time
- 1:35 PM
- Joined
- Jan 29, 2018
- Messages
- 22,865
- Reaction score
- 82,616
- Location
- Midland Ontario, Canada
Can't believe the chrome and polish shop actually polished these and never removed the weatherstripping gooo.
Goo all off and I repolished the hinge channel with green and then rouge on the softer wheel.
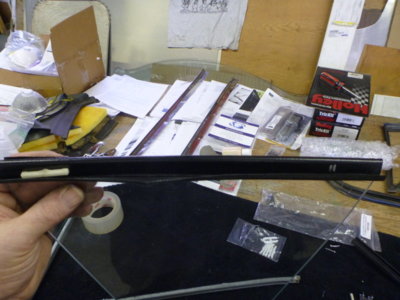
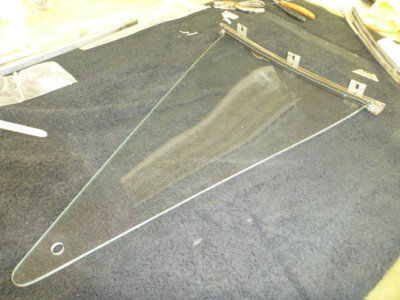
Repro "slider" material cut to length of the glass.
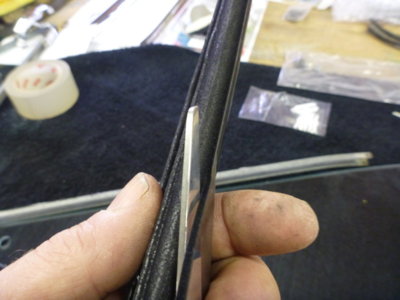
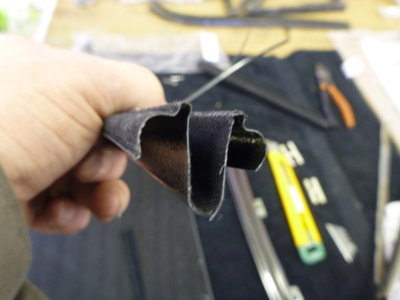
I trimmed off the incorrect "turn up" on the edge of the curls.
Right side trimmed, left to do yet.
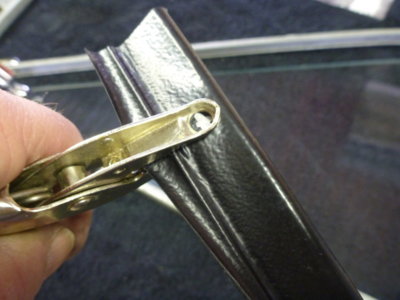
Used a hole punch to make the holes.
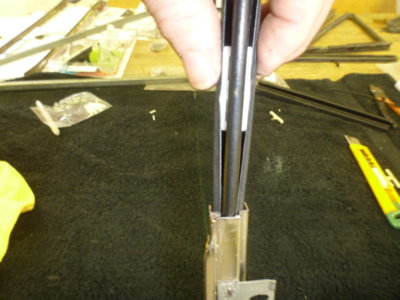
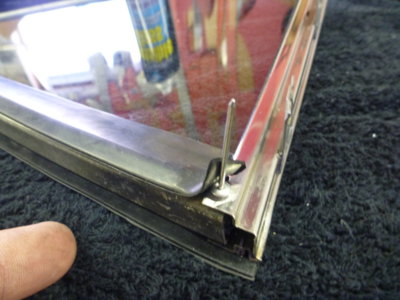
One end pegged and the other marked for a slot to duplicate the OE.
I can't caution enough how EASY these things will rip on the sharp edge of the channel going in. Go SLOW and work them in carefully.
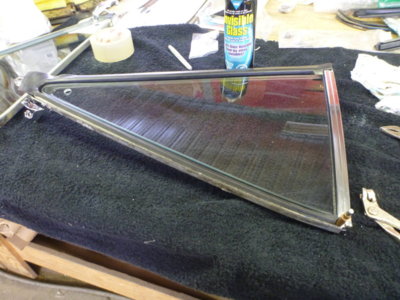
Glass, hinge channel together and ready for mating to the frame.
OE had a single long semi-tubular rivet, but I'm using some Avex I have on each side to put them back together.
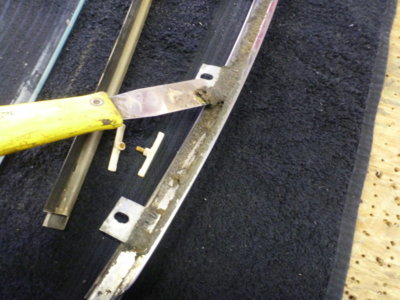
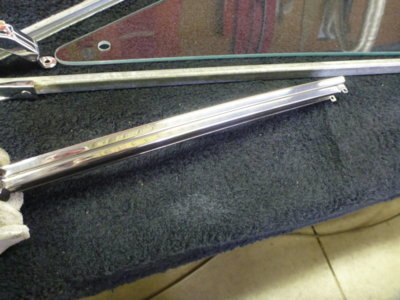
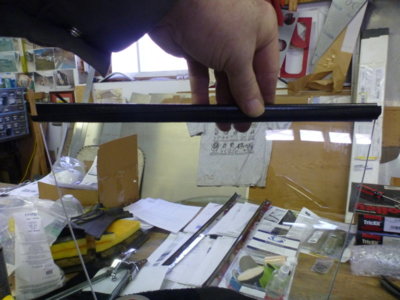


- Local time
- 1:35 PM
- Joined
- Jan 29, 2018
- Messages
- 22,865
- Reaction score
- 82,616
- Location
- Midland Ontario, Canada
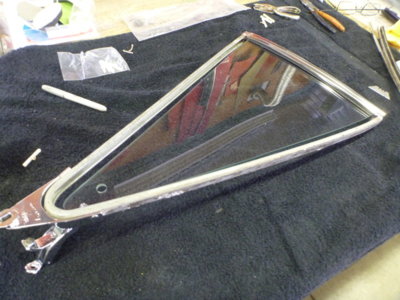
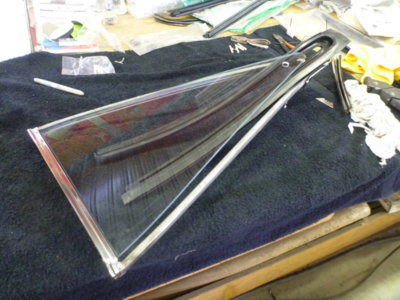
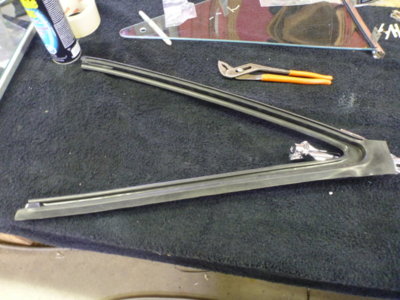
Assembly all together, time for a new rubber seal.
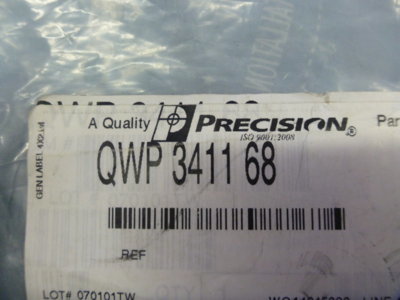
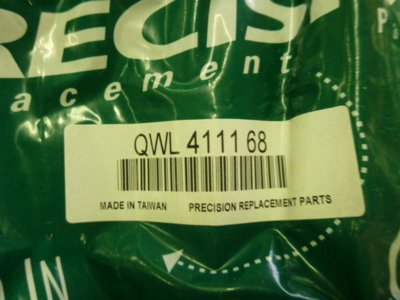
Precision QWP 3411 68 seal kit. This is the part number for both left and right gaskets.
QWL 4111 68 is the left seal and QWR3411 68 is the right side.
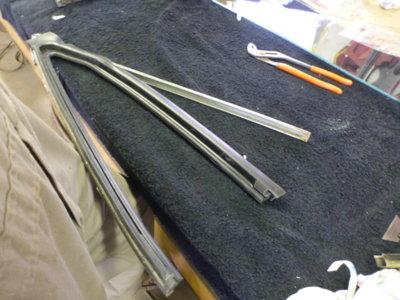
At about this point I was glad I used some of my Avex rivets to put the hinge channel back on. No way I was fighting the seal into place assembled and I drilled the hinge channel rivets back out.
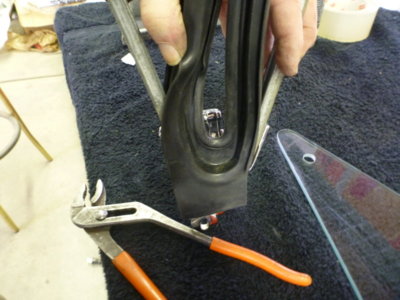
Seal pressed down tight into the latch end first.
Seal then worked into the channel from the latch out to the ends.
Seal perfectly in place. You will see the relief in the rubber where the joiner rivet would pass though, so you can make sure you have it in the correct place.
Glass in place and hinge channel cleco'd into place.
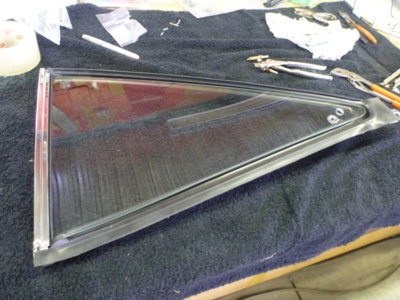
Lets rivet this bugger again.
All riveted together and seal sits perfect still.


- Local time
- 1:35 PM
- Joined
- Jan 29, 2018
- Messages
- 22,865
- Reaction score
- 82,616
- Location
- Midland Ontario, Canada
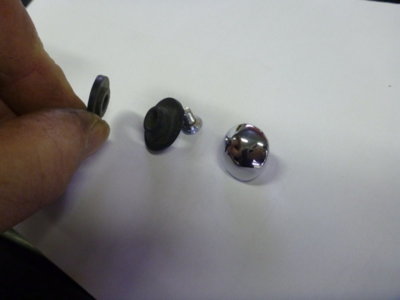
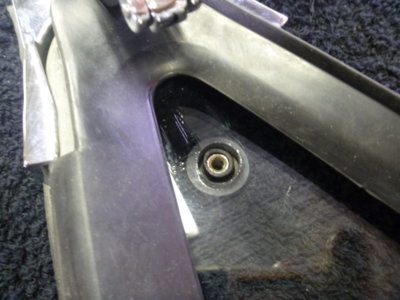
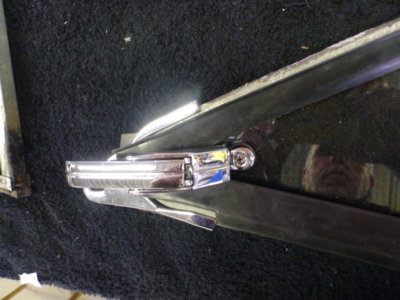
Latch hardware. Outside chrome "nut", long wall rubber washer, thin rubber and screw.
Outer "nut" and rubber washer in place.
Rubber, latch and screw from the inside.
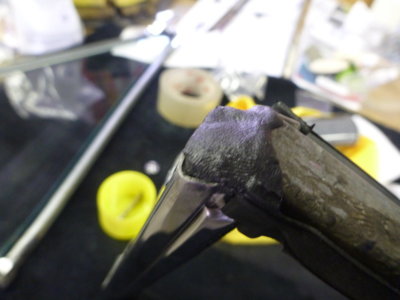
Top of the hinge channel sealed with some Butyl.
Couldn't find a spec but I grabbed this foam a while back as it looked similar in size to pictures of the OE I had when I was taking my interior out. Unfortunately the paint shop toasted all that foam and I never got to see it to be 100% sure.
Foam is 7/16 thick x 3/4 wide. It goes from the bottom of the hinge channel, over the top and around to just past the latch plate. Ready to install to car. EDIT >>>DO NOT USE THIS FOAM<<< it won't compact enough to install window. Think 1969 and find some crap open cell foam instead.
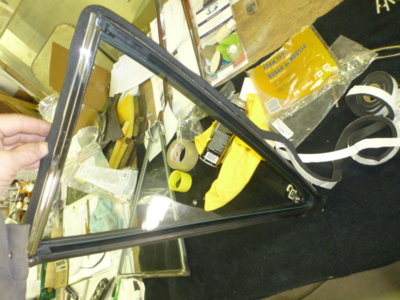
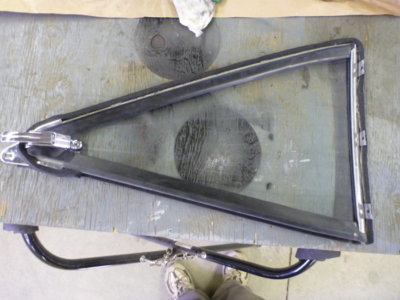
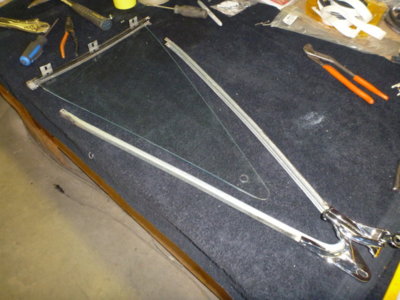
Passenger side coming apart ready to rebuild.
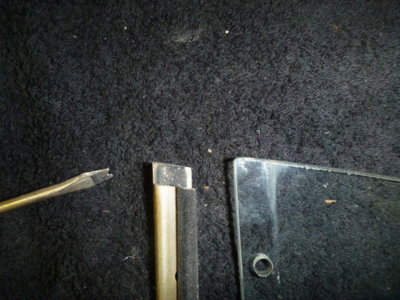
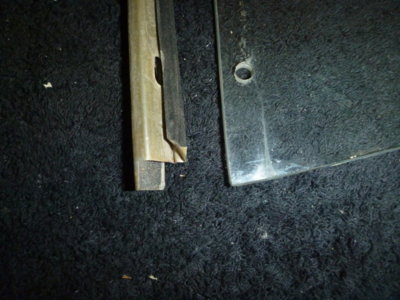
This side the hinge material wasn't as busted up and I noted that on the inside it is trimmed back to about the same width as the rubber seal for a better mating I presume. This shot is the top.
This is the bottom end showing how it is trimmed back.


Last edited:
Well $430 CDN and 2 hours later.... THANKS Jeff @oldbee for saving me the misery later when the seats would have been in! Wayne
Wayne,you lazy b——-, you didn’t even walk to the rear to make sure the rears were working! Well done,Jeff.
Had a real “pucker” when tightening that screw on the glass I bet?Latch hardware. Outside chrome "nut", long wall rubber washer, thin rubber and screw.
Outer "nut" and rubber washer in place.
Rubber, latch and screw from the inside.
Top of the hinge channel sealed with some Butyl.
Couldn't find a spec but I grabbed this foam a while back as it looked similar in size to pictures of the OE I had when I was taking my interior out. Unfortunately the paint shop toasted all that foam and I never got to see it to be 100% sure.
Foam is 7/16 thick x 3/4 wide. It goes from the bottom of the hinge channel, over the top and around to just past the latch plate. Ready to install to car.
Passenger side coming apart ready to rebuild.
This side the hinge material wasn't as busted up and I noted that on the inside it is trimmed back to about the same width as the rubber seal for a better mating I presume. This shot is the top.
This is the bottom end showing how it is trimmed back.
View attachment 741486 View attachment 741487 View attachment 741488 View attachment 741489 View attachment 741490 View attachment 741491 View attachment 741492 View attachment 741493 View attachment 741494
- Local time
- 1:35 PM
- Joined
- Jan 29, 2018
- Messages
- 22,865
- Reaction score
- 82,616
- Location
- Midland Ontario, Canada
I could see them reflecting off the garage door!!! This switch is so much smoother than the repair plate I'd put in there that failed. Brake lights work correctly tooooo !!Wayne,you lazy b——-, you didn’t even walk to the rear to make sure the rears were working! Well done,Jeff.
Last edited:
- Local time
- 1:35 PM
- Joined
- Jan 29, 2018
- Messages
- 22,865
- Reaction score
- 82,616
- Location
- Midland Ontario, Canada
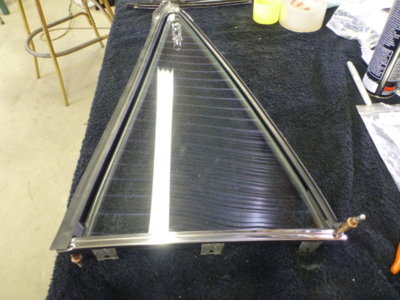
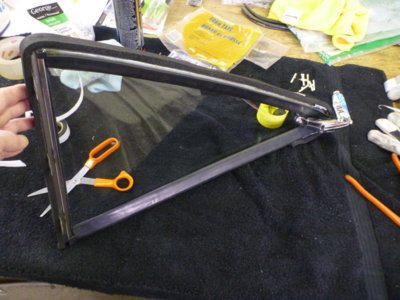
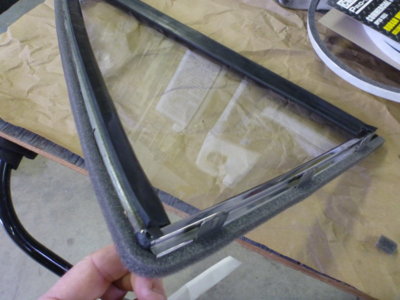
Passenger side rear window assembly with new rubber seal, hinge material, etc and ready to rivet the hinge channel in place.
All together and foam on. DO NOT use this weatherstripping foam as I found it won't compact enough to install the window. Needs to be cheap open cell foam from the days of old...
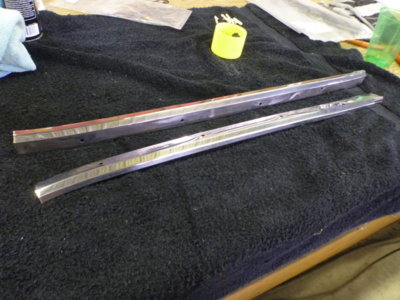
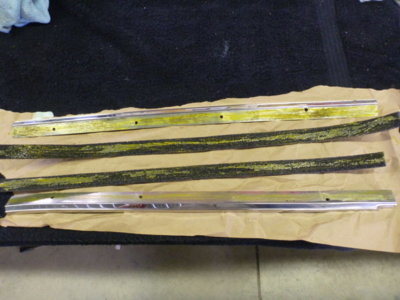
Rear window "roof rail" trim with show side all polished up.
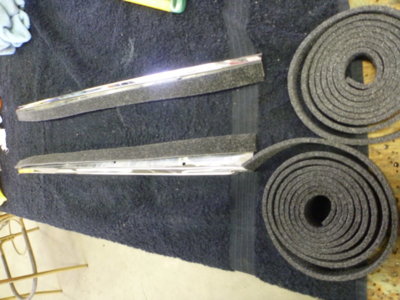
Roof rail foam seal. Make sure you cut a piece from each roll or you won't have a continuous piece left for one of the front doors.
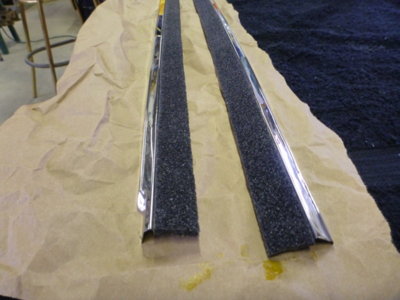
Weatherstrip adhesive applied to both parts and "flashing off".
Foam seals in place.
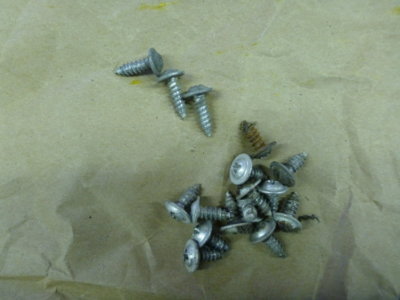
Correct #10 screws to install. I believe the three longer ones are for the "B post" where there is a deco trim and the weatherstrip holder overtop of each other.
Installing the roof rail trim. Make sure you install the rear most screw first as it's a fixed hole for postioning. The other three are slots.
Both rear roof rail trim pieces in place.
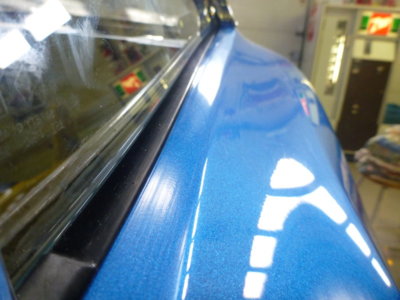
Fighting to try and get the window to go high enough to clear the quarter panel. Appears I can't compress the foam enough to do so, so need to remove and replace the foam with some cheap open cell style foam. The stuff I used is beyond "1969" standards apparently.


- Local time
- 1:35 PM
- Joined
- Jan 29, 2018
- Messages
- 22,865
- Reaction score
- 82,616
- Location
- Midland Ontario, Canada
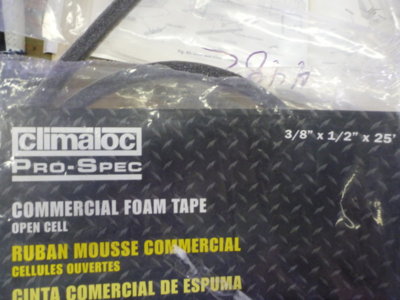
Wasted the entire morning trying to find some open cell foam. Nobody sells it anymore.. not even in White. I went to EVERY hardware and lumber yard in town as well as CTC. Thankfully I had a package buried in my stash, but a size smaller than I really wanted. I would have prefered 1/2" thick x 5/8" wide but the 3/8 x 1/2 I had seemed to do the trick.
"New age" weatherstrip removed and open cell installed, ready to hopefully put the windows in.
I've had the windows in and out more times than my favourite hobby by this point. Still can't get the rear end to come in against the quarter panel so I'll do the other side and see what happens there.
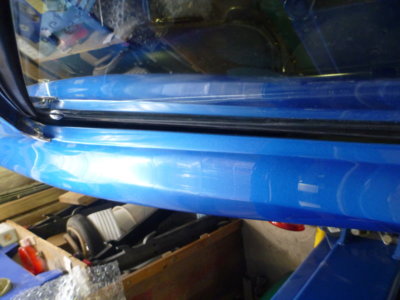
Upper seal lip sits inside on it's own most of the way and the rear is sitting out. I presume, as the FSM detail pictures suck, that it's supposed to be tucked up inside.
All tucked in pretty...
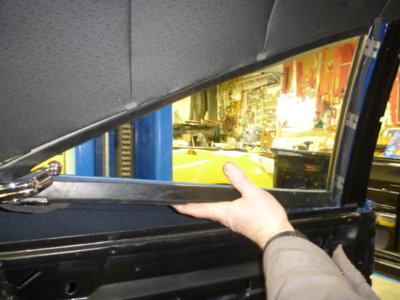
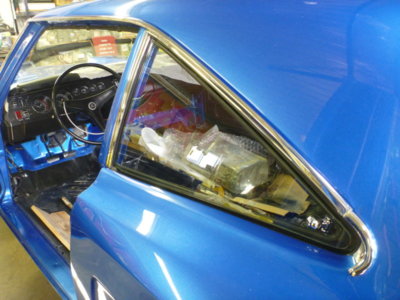
Drivers side window went in fairly nice. The lower seal is not quite touching the quarter panel, but I'm thinking they probably never did and just leaked into the quarter panel like window whiskers would have with roll downs. That said I am going to take some 1/8" or so cord material and jam it up under the the seal into the V between the frame and flap, which should force the seal out tight to the quarter panel.
Finally some glass in the sides...
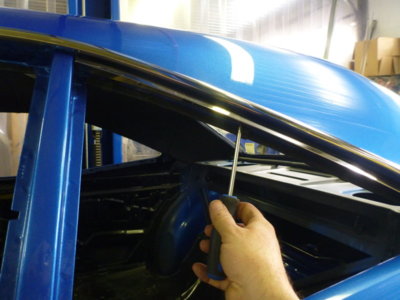
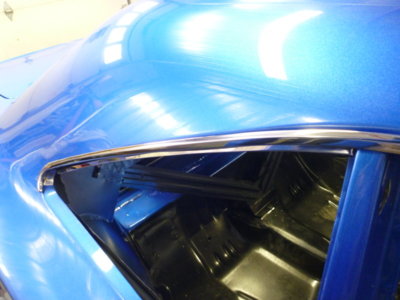
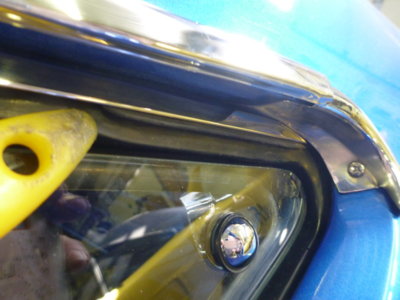
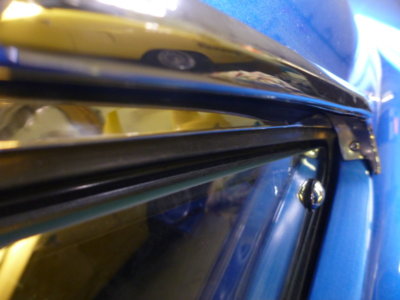
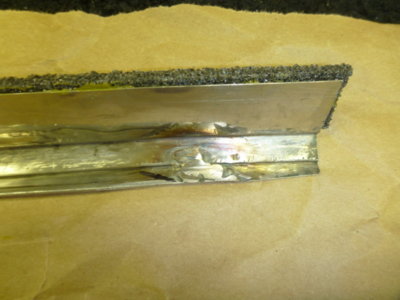
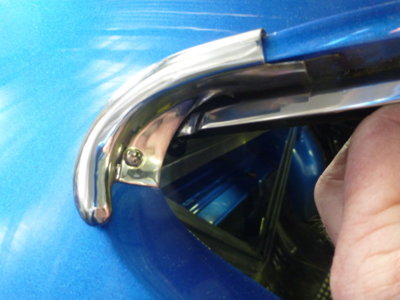
Mind boggling why the trim polishing place took it upon themselves to remove the joggle in the roof rail trim (pass side only), cracked it and welded it straight. Part of the reason my passenger window won't sit out against the quarter panel.
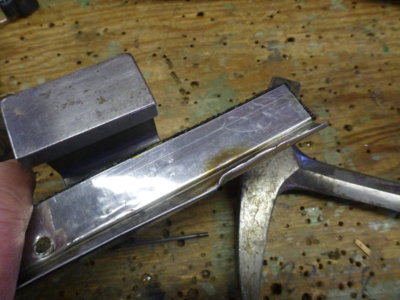
So I put the joggle back!
Now the roof rail trim can come out to where I think it belongs and hopefully the window assembly agrees. Saving that swearing for tomorrow..


khryslerkid
Well-Known Member
- Local time
- 1:35 PM
- Joined
- Mar 10, 2010
- Messages
- 31,679
- Reaction score
- 57,414
- Location
- Hanover, Pennslyvania
Wasted the entire morning trying to find some open cell foam. Nobody sells it anymore.. not even in White. I went to EVERY hardware and lumber yard in town as well as CTC. Thankfully I had a package buried in my stash, but a size smaller than I really wanted. I would have prefered 1/2" thick x 5/8" wide but the 3/8 x 1/2 I had seemed to do the trick.
"New age" weatherstrip removed and open cell installed, ready to hopefully put the windows in.
I've had the windows in and out more times than my favourite hobby by this point. Still can't get the rear end to come in against the quarter panel so I'll do the other side and see what happens there.
Upper seal lip sits inside on it's own most of the way and the rear is sitting out. I presume, as the FSM detail pictures suck, that it's supposed to be tucked up inside.
All tucked in pretty...
Drivers side window went in fairly nice. The lower seal is not quite touching the quarter panel, but I'm thinking they probably never did and just leaked into the quarter panel like window whiskers would have with roll downs. That said I am going to take some 1/8" or so cord material and jam it up under the the seal into the V between the frame and flap, which should force the seal out tight to the quarter panel.
Finally some glass in the sides...
Mind boggling why the trim polishing place took it upon themselves to remove the joggle in the roof rail trim (pass side only), cracked it and welded it straight. Part of the reason my passenger window won't sit out against the quarter panel.
So I put the joggle back!
Now the roof rail trim can come out to where I think it belongs and hopefully the window assembly agrees. Saving that swearing for tomorrow..
View attachment 743357 View attachment 743358 View attachment 743359 View attachment 743360 View attachment 743361 View attachment 743362 View attachment 743363 View attachment 743364 View attachment 743365 View attachment 743366
I wonder if a fabric / craft store would have had your foam?
- Local time
- 1:35 PM
- Joined
- Jan 29, 2018
- Messages
- 22,865
- Reaction score
- 82,616
- Location
- Midland Ontario, Canada
After almost 4 hours I gave up knowing that I had that roll at home. If not, my next stop was the SEVEN Dollar Stores that we have in this 2 horse town! Our fabric shop is long gone...
That said, the window assembly is jammed up so tight and is tight against the B post that I bet even 1/4" foam would do the job. I found a dissassembly picture and scaled it with known objects in the shot and concluded Ma Mopar used 1/2" x 5/8 or 3/4 wide.

That said, the window assembly is jammed up so tight and is tight against the B post that I bet even 1/4" foam would do the job. I found a dissassembly picture and scaled it with known objects in the shot and concluded Ma Mopar used 1/2" x 5/8 or 3/4 wide.
- Local time
- 1:35 PM
- Joined
- Jan 29, 2018
- Messages
- 22,865
- Reaction score
- 82,616
- Location
- Midland Ontario, Canada
It crossed my mind while I was fighting with getting the window seal tight to the quarter panel that maybe the seal is supposed to be flipped out onto the quarter panel and then I just found this picture! Can someone confirm this is in fact the correct OE flip window seal installation????

And then I found this picture showing it the same way I'm doing mine right now..seal inside against quarter.

And then I found this picture showing it the same way I'm doing mine right now..seal inside against quarter.
Last edited:
Wayne, what pictures would you need as above to document the seal? I can snap a picture of a 68 Road Runner that has never been apart. Very good details on the quarter window installation. Keep up the good work. It is progressing nicely.
- Local time
- 1:35 PM
- Joined
- Jan 29, 2018
- Messages
- 22,865
- Reaction score
- 82,616
- Location
- Midland Ontario, Canada
Thanks Richard... just confirmation of which way is correct as per the above two pictures. Seal flipped out onto the top of the quarter panel, or inside against the back side of same.Wayne, what pictures would you need as above to document the seal? I can snap a picture of a 68 Road Runner that has never been apart. Very good details on the quarter window installation. Keep up the good work. It is progressing nicely.
Similar threads
- Replies
- 68
- Views
- 4K
- Replies
- 4
- Views
- 562
- Replies
- 183
- Views
- 15K
- Replies
- 9
- Views
- 883


