• When you click on links to various merchants on this site and make a purchase, this can result in this site earning a commission. Affiliate programs and affiliations include, but are not limited to, the eBay Partner Network.

'64 Fury Pro-Touring

By the way a technique that we use in the shop I work in to weld sheet metal would be to stagger banjo weld the seams instead of a continuous bead. This would be for example to mark off every 1 or 2 inches and tack those spots all along the seam then return to the first tack and put one right next to it and then next to the the second tack and so on repeating the process until the seam is closed. Tacking this way helps the metal to keep its shape as it is secured all along the seam and each area gets a chance to cool a little before you add another tack. When you continuous weld along a seam of thin sheet metal the heat continuously fans out across the metal shrinking and distorting it. If done right they look like small coins laid on top of each other along the seam. If you have a self darkening helmet and you choose this method you should really close your eyes just before you pull the trigger to spark the tack. The light travels much faster than any self darkening helmet can change shade levels.
 
Dang Bob...Looking good! From here on out, I'll be using LED rope christmas tree lights to brighten things up on the interior as well. Pop in a little Bing Crosby, a bit of Nog and whistle some jingle bell's.

Hey Prop,

The LED's are awesome, and inexpenive to boot! I pulled the car off the chassis plate today and mounted it on the rotisserie so I brought the LED's from the chassis plate home; gonna mount them on top of the kitchen cabinets for a bit of ambiance lighting. Later on I'll mount some under the cabinets as well.

As for XMAS lights, Bing, and some Nog, I'm coming to your pad for the holidays!

- - - Updated - - -

By the way a technique that we use in the shop I work in to weld sheet metal would be to stagger banjo weld the seams instead of a continuous bead. This would be for example to mark off every 1 or 2 inches and tack those spots all along the seam then return to the first tack and put one right next to it and then next to the the second tack and so on repeating the process until the seam is closed. Tacking this way helps the metal to keep its shape as it is secured all along the seam and each area gets a chance to cool a little before you add another tack. When you continuous weld along a seam of thin sheet metal the heat continuously fans out across the metal shrinking and distorting it. If done right they look like small coins laid on top of each other along the seam. If you have a self darkening helmet and you choose this method you should really close your eyes just before you pull the trigger to spark the tack. The light travels much faster than any self darkening helmet can change shade levels.

Hey Steve,

I've used that technique quite a bit and it works great. Where you see me running an actual bead are places where the sheet metal is doubled up with a flange so there's plenty of material to work with.

Never thought about shutting my eyes as you suggest; I'll be giving it a try.

Thanks much for all the terrific advice.
 
Hey guys,

Yep, I'm still here, just been taking a couple weeks for a tradeshow but I have been busy with the car; let me get caught up at work and I'll post a bunch of updates.
 
Hey fellas, I've got a few minutes of downtime so let me get some updates taken care of.

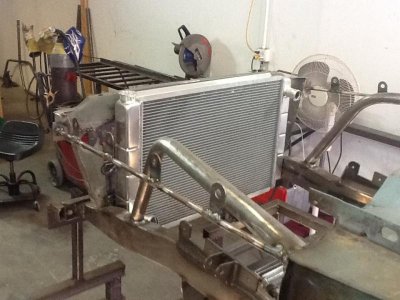
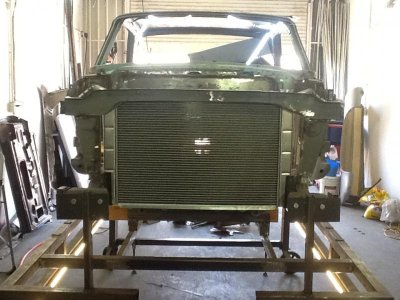
Before pulling the car off the chassis plate I decided to install the lower rad mounts; I figured it would be easier to get them level if the car was still solidly mounted as well as give me a real good idea of how high/low I needed to mount the rad. The rad itself is a Summit piece made to fit between the frame rails with only about 1/2" clearance on each side so there should be plenty of surface area to keep the car cool:

IMG_0230.jpg

IMG_0231.jpg

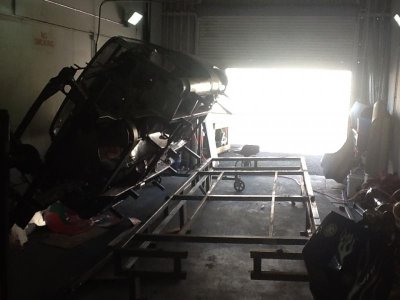
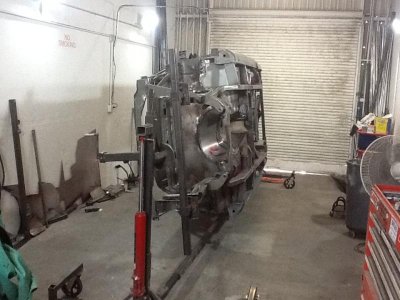
With the rad mounts out of the way I spent the next couple days getting the car off the chassis plate and mounted on the rotisserie (which I made from some AWESOME plans). Taking the car off the plate was far more time consuming than I'd have hoped but in the end it worked out real well.

IMG_0239.jpg

IMG_0240.jpg

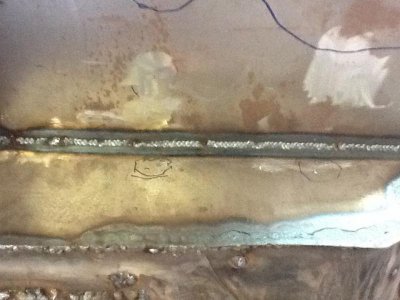
Once the car was on the rotisserie it gave me clear access so I could finish weld virtually the entire car; there were LOTS of areas that were only tacked or at best insufficiently welded into place so I've spent the past 20 hours or so running bead after bead after bead. If you know from my earlier posts the problems I was having with welding, luckily enough my buddy Ed got my electrical figured out and I'm back to running some respectable beads:

IMG_0252.jpg

IMG_0253.jpg

IMG_0255.jpg

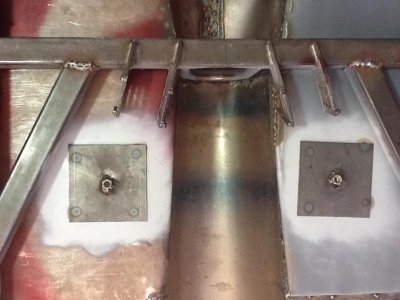
These shots show the four square covers I fabbed for the seat mounts. Fancy? Nope, but they are completely sealed and will do the job.

IMG_0256.jpg

IMG_0257.jpg

This shot shows the two bolt-down points for the seats (1 per seat). I used 6" x 6" square roll-bar mounting stock to spread the load. Just above (in the picture) the mounts is the cross-member for the truck arms and the integrated driveshaft hoop.

IMG_0258.jpg

That's it for now but these few pix account for HOURS of work so I'm really happy with the progress.

Next I'll be finish welding the firewall and trans hump, then its on to working out the plumbing, wiring, and all kinds of stuff associated with fuel and spark.

IMG_0230.jpg IMG_0231.jpg IMG_0239.jpg IMG_0240.jpg IMG_0252.jpg IMG_0253.jpg IMG_0255.jpg IMG_0256.jpg IMG_0257.jpg IMG_0258.jpg
 
O-K folks, pay attention to this car build. This guy is a true "Hot Rodder" and is building a great ride. He fabs, cuts, grinds, and if his own work is not up to his own standards, he redoes it himself . He doesn't pay a frame shop or a body shop stupid money for work to be done. I supplied the fiberglass for his project a couple of years ago and he , like any good "Hot Rodder" would do, cut and modified my parts too! That's what Hot Rodding is all about. Keep it up Carnalsupply, you"re doing a great job!
 
Great looking progress there Carnalsupply . . . thanks for the updates and keep us posted ! ! ! LOVE your work . . . I'm envious ! ! ( smile )
 
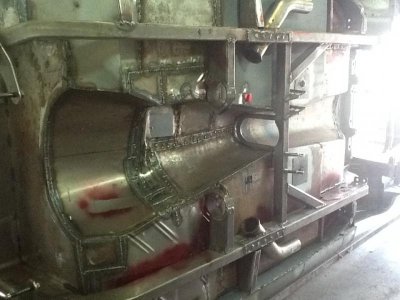
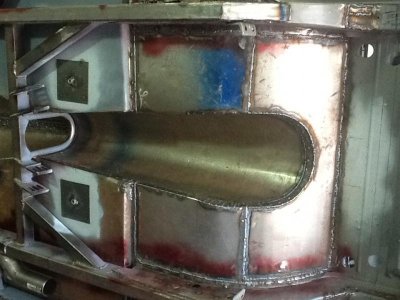
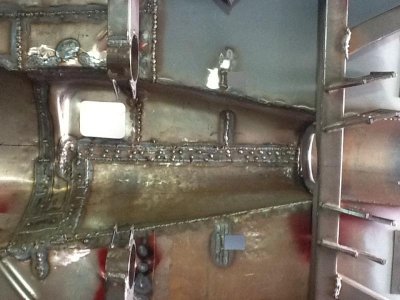
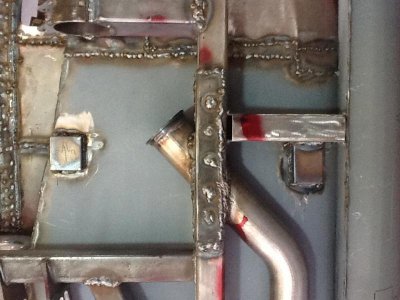
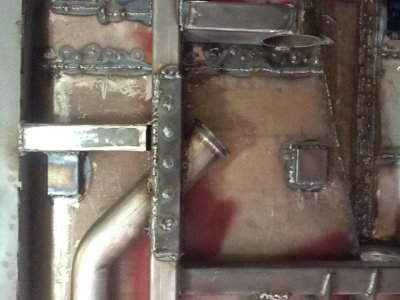
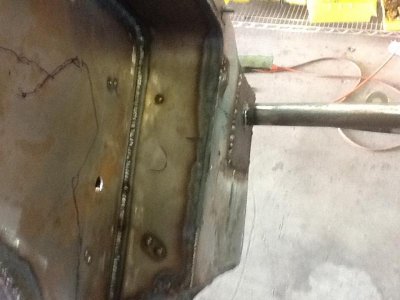
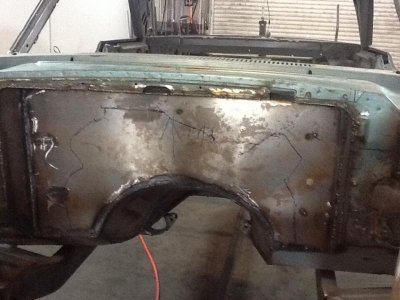
I got a couple hours of shop time in yesterday and finished all of the exterior welding around the firewall. Instead of trying to run continuous beads I used hundreads of individual welds, each overlapping the previous one. I'd wait just a second between welds to allow the atea to cool just a tiny bit yet still have the previous weld hot and malleable enough that the new weld could blend in easily. I know the common practice is to place the individual welds far apart and fill in the spaces between but I didn't like the results when laying a hot weld onto a cold one.

Here are some pix:

image.jpg

image.jpg

image.jpg

image.jpg image.jpg image.jpg
 
dude great work . boy your wife must miss you!!

LOL, I doubt that, but if I wasn't working on my car I'd probably be hanging out in bars and she KNOWS that is never a good thing (never met a bottle of Grey Goose I didn't like).
 
your welding and fabricating skills are still off the chart in my book.
 
Hey fellas,

Sorry for the downtime; I had some traveling to take care of and then caught the damn flu when I got back, but I'm back at work and will have some pix soon.
 
Hey fellas,

Sorry for the downtime; I had some traveling to take care of and then caught the damn flu when I got back, but I'm back at work and will have some pix soon.

My suggestion Carnalsupply . . . next time you catch it, throw it back ! ( smile ) . . .

Hope you get well soon ! ! ! I want to see more updates . . .
 
Auto Transport Service
Back
Top