You are using an out of date browser. It may not display this or other websites correctly.
You should upgrade or use an alternative browser.
You should upgrade or use an alternative browser.
'64 Fury Pro-Touring
- Thread starter carnalsupply
- Start date
Satans Fury
Well-Known Member
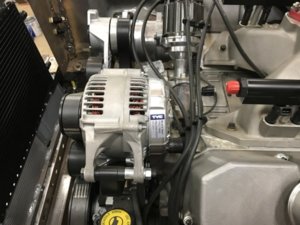
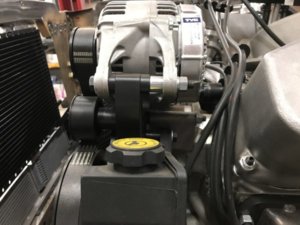
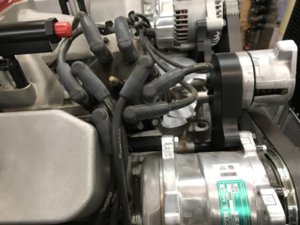
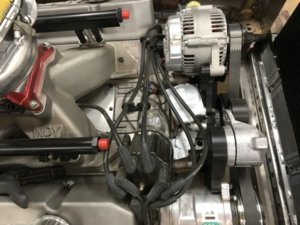
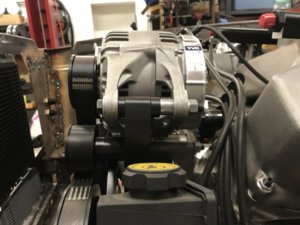
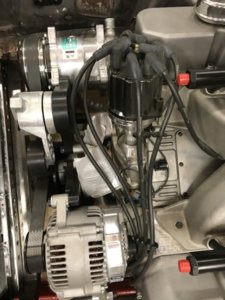
Here are some shots of the SDC setup from side and top. Hope these help you out. Good seeing you again, hope you had a good time at the show.
View attachment 535994 View attachment 535995 View attachment 535996 View attachment 535997 View attachment 535998 View attachment 535999
Hey Carl,
Thanks for the pix and the passes; had a terrific time at the show and I think I found some useful new items there.
These pix help a great deal, and by the looks of it there will be no issues/interference with my cross ram, so the SDC setup may just be the way to go.
Thanks again and I hope to see you again soon,
BW
Satans Fury
Well-Known Member
OK, so now I'm officially pissed about the Sled City fiberglass trunk lid. Before I left on my biz trip I tried to play down the quality issues but I got home, went to the shop, did some comparisons of the fiberglass piece to my factory steel trunk and DAMN, wait until you see the differences between the two.
These first shots show shows how I made the comparison of the two pieces; I Cleco'd the glass lid to the factory lid so they were a mirror image of each other, using the center body-line and the front edge as guides:
![IMG_1533[1].JPG IMG_1533[1].JPG](https://www.forbbodiesonly.com/moparforum/attachments/img_1533-1-jpg.539118/)
![IMG_1535[1].JPG IMG_1535[1].JPG](https://www.forbbodiesonly.com/moparforum/attachments/img_1535-1-jpg.539119/)
![IMG_1537[1].JPG IMG_1537[1].JPG](https://www.forbbodiesonly.com/moparforum/attachments/img_1537-1-jpg.539120/)
![IMG_1540[1].JPG IMG_1540[1].JPG](https://www.forbbodiesonly.com/moparforum/attachments/img_1540-1-jpg.539123/)
Once the lids were pinned together, here is what I was left with on one side:
![IMG_1538[1].JPG IMG_1538[1].JPG](https://www.forbbodiesonly.com/moparforum/attachments/img_1538-1-jpg.539121/)
![IMG_1539[1].JPG IMG_1539[1].JPG](https://www.forbbodiesonly.com/moparforum/attachments/img_1539-1-jpg.539122/)
Knowing I had a 1/2" of glass to add to the Sled City lid I roughed up the bottom side of the Sled City lid, got out the hot glue gun, some cardboard, and the parchment paper, and began making a base for the glass cloth and resin to rest on.
![IMG_1542[1].JPG IMG_1542[1].JPG](https://www.forbbodiesonly.com/moparforum/attachments/img_1542-1-jpg.539125/)
Once the cardboard and parchment were in place I mixed up a couple ounces of resin and laid down 2 layers of glass cloth, overlapping the glass cloth about 1" onto the Sled City lid and extending about 1" onto the cardboard.
![IMG_1543[1].JPG IMG_1543[1].JPG](https://www.forbbodiesonly.com/moparforum/attachments/img_1543-1-jpg.539126/)
That was yesterday (Sunday) so I'll be heading back to the shop in the next day or so to remove the cardboard and begin filling in more glass cloth/resin from the top side of the lid. Once all the filling is done I'll block it smooth (like the rest of the wavy *** lid) then cut it to the correct shape, using the original lid as a guide.
This is definitely NOT what I expected from a manufacturer, and as much as I like Carl I just don't see me ever recommending their glass parts to anyone; the quality of these pieces is so far below what I consider acceptable. Had I not purchased them 6 - 7 years ago I would be bitching to Carl like crazy, but after all this time I would never have any expectation of Sled City doing anything about it.
ignore this shot, I can't get it to delete.
![IMG_1541[1].JPG IMG_1541[1].JPG](https://www.forbbodiesonly.com/moparforum/data/attachments/467/467277-6d9589f520b34a699061975d4717ae1d.jpg)
These first shots show shows how I made the comparison of the two pieces; I Cleco'd the glass lid to the factory lid so they were a mirror image of each other, using the center body-line and the front edge as guides:
This is definitely NOT what I expected from a manufacturer, and as much as I like Carl I just don't see me ever recommending their glass parts to anyone; the quality of these pieces is so far below what I consider acceptable. Had I not purchased them 6 - 7 years ago I would be bitching to Carl like crazy, but after all this time I would never have any expectation of Sled City doing anything about it.
ignore this shot, I can't get it to delete.
![IMG_1541[1].JPG IMG_1541[1].JPG](https://www.forbbodiesonly.com/moparforum/data/attachments/467/467277-6d9589f520b34a699061975d4717ae1d.jpg)
ckessel
Well-Known Member
Maybe it was supposed to be called Sludge City? in reference to what is found in pumper trucks.
Haven't checked in for awhile, lot's of progress  . Seeing all of the fiberglass work makes me itch just looking at it!
Didn't know if you saw it but I did a thread on the SDC serpentine kit incase you wanted to check it out, I'm very happy with mine... looks like they hiked the price up though.
 . Seeing all of the fiberglass work makes me itch just looking at it!
Didn't know if you saw it but I did a thread on the SDC serpentine kit incase you wanted to check it out, I'm very happy with mine... looks like they hiked the price up though.
Satans Fury
Well-Known Member
Haven't checked in for awhile, lot's of progress. Seeing all of the fiberglass work makes me itch just looking at it!
Didn't know if you saw it but I did a thread on the SDC serpentine kit incase you wanted to check it out, I'm very happy with mine... looks like they hiked the price up though.
Hey 747, it has been a long time; hope all is well and how's that bad-boy Charger?
Yep, saw the thread and am seriously considering the SDC setup if I can get it to mount everything down low; I just do not want an A/C compressor sitting there in front of the cross-ram, it just won't look right, so if SDC can't come up with something I'll probably get back to more fabbing

Satans Fury
Well-Known Member
It's been over a month since I last posted but I have been getting some time in the shop, all of it spent working on this F'ing trunk lid, so here's where I am...
Knowing the lid was so skewed I decided to pull my original steel lid apart, removing the inner support and using it as a template, but not even that was without trouble...the trailing edge of the support was rotted (one of the reasons I chose not to use the factory lid in the first place) and I had to spend a day fabbing up new metal.

The old skin, which I'll now use as filler material if I need it.

Here's the inner support, placed on top of the glass lid, after I've fabbed in the new metal:


Once I got those shinanigans finished up I used Cleco's to secure the frame to the lid solidly, which would allow me to mount it on the car, so drill, cleco, drill, cleco, repeat...

So about this time it's becoming really apparent the lid skin has a twist to it as well as being skewed (am I surprised?), so when I placed the lid on the car the fitment was, well, for ****.

Oh yea, I want the rear corner of my trunk lid raised 1/4" past the body line!

Aside from the the skew and the warp I still had some sizing issues in terms of gross size (including thickness), hell, just about every conceivable issue, so I took a different approach, which actually worked: I took the skin off the frame, mounted the frame back on the car, drilled the hinges/frame mount so I could use a 1/8" drill bit to re-align them, then cut the frame in half (from side to side). I did this so I could more easily manipulate the frame and lid as individual pieces, pulling out the warp as I went while still having perfect alignment based on having previously aligning the frame without the lid.

 I know, it seems like a strange process, and I have to agree, but it actually worked! Above, you can see the pie cuts I made in the frame to help align it, which seems counter-intuitive, but like I said, it actually worked (I'll get pix of it mounted later, I ran out of time).
Once I had the lid and frame working together as a single, good piece, I took the frame off and started the rust prevention steps as well as removing a bunch of steel to help take some of the weight out of it. Once the weather warms up a bit (been in the low 50's here in Vegas) I'll bond the skin to the frame then finish off the glass work so it fits the opening like a glove.
Here's the frame after removing some steel to lighten it:

Knowing the lid was so skewed I decided to pull my original steel lid apart, removing the inner support and using it as a template, but not even that was without trouble...the trailing edge of the support was rotted (one of the reasons I chose not to use the factory lid in the first place) and I had to spend a day fabbing up new metal.
Once I had the lid and frame working together as a single, good piece, I took the frame off and started the rust prevention steps as well as removing a bunch of steel to help take some of the weight out of it. Once the weather warms up a bit (been in the low 50's here in Vegas) I'll bond the skin to the frame then finish off the glass work so it fits the opening like a glove.
Here's the frame after removing some steel to lighten it:
Hey Bob. Lots of work. I’m curious if by change you weighed that inner structure. The stock deck lid is darned heavy when complete. Wondering how much just that inner structure might be.
Satans Fury
Well-Known Member
Hey Mal,Hey Bob. Lots of work. I’m curious if by change you weighed that inner structure. The stock deck lid is darned heavy when complete. Wondering how much just that inner structure might be.
Yea, the factory lid is a beast, and the inner support definitely makes up a serious portion of that weight, though the outer skin isn't without its need for Weight Watchers.
I don't have a scale readily available at the shop but I'll see what I can do about weighing the support before I bond it onto the fiberglass skin; no promises but I'll see what I can do.
Satans Fury
Well-Known Member
Hi Mal,Hey Bob. Lots of work. I’m curious if by change you weighed that inner structure. The stock deck lid is darned heavy when complete. Wondering how much just that inner structure might be.
Went to the shop yesterday to mount the inner structure to the skin but the scale I thought was in the shop was nowhere to be found; sorry about that.
Satans Fury
Well-Known Member
So it FINALLY warmed up enough yesterday (61 outside) to mount the inner frame structure to the fiberglass trunk skin, so here's a shot of the frame mounted and the adhesive I used to mount it. Thank goodness for Clecos!!!!


Man, let me tell you, this SB-12 MUST be warmed up before you try and use it; it is some of the thickest stuff I've ever tried to squeeze out of a caulking gun, I mean, it took both hands squeezing as hard as I could until I got the bright idea to let it heat soak in the afternoon sun.
Did the "install" yesterday around 1 - 2pm and went back to the shop this morning at 7am to check on it and while the adhesive was definitely curing it certainly isn't ready to have the clecos removed, so I'll just let it sit until
Did the "install" yesterday around 1 - 2pm and went back to the shop this morning at 7am to check on it and while the adhesive was definitely curing it certainly isn't ready to have the clecos removed, so I'll just let it sit until
Satans Fury
Well-Known Member
I spent the entire New Years weekend at the shop working on the trunk lid, but it was time well spent; the lid now fits wonderfully.
Was it worth the time and effort it took when compared to what quality glass pieces would have cost? Nope, not a chance.
Here's what I did and where I'm at:
First I got the inner support frame bonded to the glass skin (see previous post):


I was really happy with the SB-12 adhesive I used, but once I test fit the lid on the car I found the replacement piece I'd made (to replace the rotted area) was welded in place 1/16 - 1/8" too low, so the trunk lid wouldn't close. Not sure how I screwed that up but I "fixed" the problem by cutting the piece back out. In the picture above you can see the long rectangular hole along the lids trailing edge. Now the trunk can close and I can get back to getting the gaps, etc. correct, so here are some pix of the initial fit:

The picture above doesn't look too bad, but trust me, it's just the angle I took the picture from; the gaps are still screwed and the lid still has a tremendous warp in it with a high spot running from one side to the other.
The two shots below show the warp much better.


Was it worth the time and effort it took when compared to what quality glass pieces would have cost? Nope, not a chance.
Here's what I did and where I'm at:
First I got the inner support frame bonded to the glass skin (see previous post):
The picture above doesn't look too bad, but trust me, it's just the angle I took the picture from; the gaps are still screwed and the lid still has a tremendous warp in it with a high spot running from one side to the other.
The two shots below show the warp much better.
Satans Fury
Well-Known Member
Like I had done before, I used some more glass cloth, resin, and kitty hair and took care of the gaps. The first couple shots are pretty rough looking but the steel framework is under the glass I've added so there is lots of strength and stability.


The red line on the 4 pix below show just how much material I had to add to the Sled City lid to get it to fit, that's just how much too small the lid was when I received it.


Now the trunk is in place after being trimmed and cleaned, and if fits awesome! I got the warp out, the gaps are even and I'm really happy with the results. Hell, I even got the springs reinstalled and working, so no having to use a prop-stick when I open the trunk!

Now that it fits I'll go back and clean up the inner frame, get it looking good, then move back to the hood and get it finished up.
Excellent job Bob! The hood will turn out just as nice, you have proven that you won't quit until it is!
On another note, I saw a fellow selling a hood with Hemi scoop online the other day. One look and I knew who the manufacturer was.... LOL.
On another note, I saw a fellow selling a hood with Hemi scoop online the other day. One look and I knew who the manufacturer was.... LOL.
carnalsupply
Well-Known Member
Excellent job Bob! The hood will turn out just as nice, you have proven that you won't quit until it is!
On another note, I saw a fellow selling a hood with Hemi scoop online the other day. One look and I knew who the manufacturer was.... LOL.
Thanks Mal, always appreciate the support.
LOL, you have to know you and I aren’t the only ones with SC’s whacky glass.
Satans Fury
Well-Known Member
Last round the trunk got finished up and this weekend I finished up the hood, so here's the pix:
I set the hood in place with the pins holding it steady, then ran a string line from the front to the rear of the fender along the top edge (the fender line is perfectly straight). Once I was sure I had the string lined up correctly I snapped a line (on the blue tape) giving me the absolute widest possible hood that would actually fit in the opening.


Once I had the hood where it would sit down in the opening I began to lightly trim and sand to get even gaps. Below are a couple shots taken during the process:


The rear of the hood needed shaping as well so before finishing the sides I went to work on the rear. To ensure I got the curve at the rear correct I cut off the skin of my original hood so I could use it as a template (also worked well for finishing the sides of the hood).
Instead of drilling plug welds and bending back the folded metal I simply cut the folded skin near the outer edge; this would reduce any warping or damage that may have occurred had I tried to pry back the folded metal.

Here's the skin after removal; even after 54 years most of the adhesive was holding the skin tightly to the frame.

Lining up the skin with the glass hood was easy, just overlay the character lines and it lines up perfectly. You can see the overhanging additional glass I had to add to the rear edge of the glass hood to make the glass hood long enough.

Finished pix to follow.
I set the hood in place with the pins holding it steady, then ran a string line from the front to the rear of the fender along the top edge (the fender line is perfectly straight). Once I was sure I had the string lined up correctly I snapped a line (on the blue tape) giving me the absolute widest possible hood that would actually fit in the opening.
Instead of drilling plug welds and bending back the folded metal I simply cut the folded skin near the outer edge; this would reduce any warping or damage that may have occurred had I tried to pry back the folded metal.
Finished pix to follow.
Satans Fury
Well-Known Member
Once the hood width and rear curvature were roughly in place I took a couple hours to slowly massage the gaps and shape, so here are pix of the finished hood:


In the next picture you'll see something odd: there are two recessed areas, one on each side of center on the cowl, which makes my rear gap look ragged. I had never noticed these recesses before and I'm curious if they are present on a '64 cowl (my cowl is a '65). Regardless, I'm not re-glassing the hood or cutting into the cowl to alter it, the cost/reward ratio just isn't there.

And just for shits and giggles I decided to set the Hemi scoop in place. I'll probably have to go to a taller version but that's down the road, and for now, I love the way it looks!


I'm wondering how far to the rear does the rear edge of the scoop go? Does it line up evenly with the rear of the hood or is the scoop pushed forward an inch or two? If anyone knows please post the measurement for me.
Sorry for this "extra" pic, I just can't get it to delete.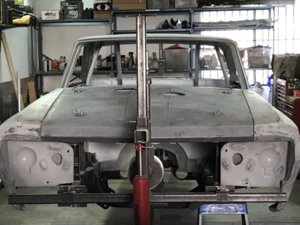
Sorry for this "extra" pic, I just can't get it to delete.

Once the hood width and rear curvature were roughly in place I took a couple hours to slowly massage the gaps and shape, so here are pix of the finished hood:
In the next picture you'll see something odd: there are two recessed areas, one on each side of center on the cowl, which makes my rear gap look ragged. I had never noticed these recesses before and I'm curious if they are present on a '64 cowl (my cowl is a '65). Regardless, I'm not re-glassing the hood or cutting into the cowl to alter it, the cost/reward ratio just isn't there.
And just for shits and giggles I decided to set the Hemi scoop in place. I'll probably have to go to a taller version but that's down the road, and for now, I love the way it looks!
I'm wondering how far to the rear does the rear edge of the scoop go? Does it line up evenly with the rear of the hood or is the scoop pushed forward an inch or two? If anyone knows please post the measurement for me.
Sorry for this "extra" pic, I just can't get it to delete. View attachment 560921
Bob, you're really making headway and the gaps look excellent. I knew you would get it. The scoop is supposed to go far back, mine is 1/4" ahead from the very back. Somebody may chime in to say it even goes right to the back edge but regardless, bank on it being way back on the hood.
Satans Fury
Well-Known Member
Bob, you're really making headway and the gaps look excellent. I knew you would get it. The scoop is supposed to go far back, mine is 1/4" ahead from the very back. Somebody may chime in to say it even goes right to the back edge but regardless, bank on it being way back on the hood.
Thanks Mal, I really appreciate it. I'm excited to move on to the finish bodywork (light skim coat on the entire car) but that will have to wait until I get back from a 2 week biz trip.
Be back soon!!!
Similar threads
- Replies
- 17
- Views
- 1K
- Replies
- 49
- Views
- 4K
- Replies
- 7
- Views
- 2K

