• When you click on links to various merchants on this site and make a purchase, this can result in this site earning a commission. Affiliate programs and affiliations include, but are not limited to, the eBay Partner Network.

'69 charger r/t-se: Building my dream car

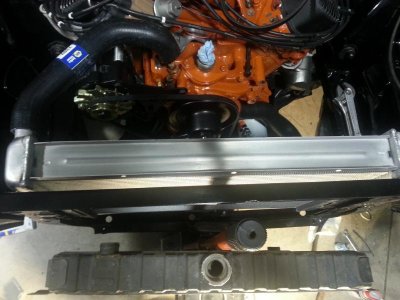
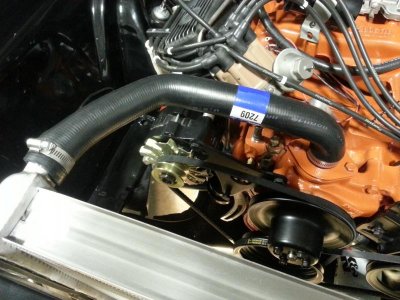
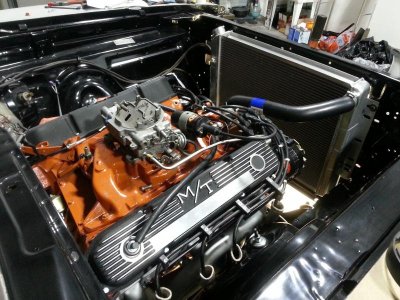
Alright guys, with fuel lines out of the way I got on with the power steering. But the way the pump sits I figured I should get the lower radiator hose on the water pump housing first, which led to test fitting my radiator and both hoses which naturally turned out to be interesting.

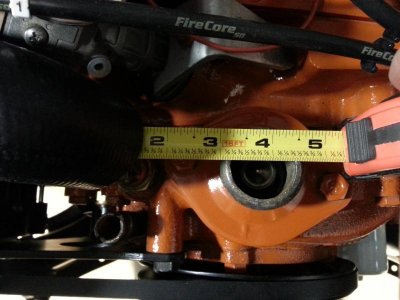
First thing I noticed was an issue I'd think is pretty common, the upper inlet on my radiator (Northern brand 26" aluminum) was about 3" to the left of the stock 26" inlet, so my upper hose wouldn't work. The stock lower hose fit fine with just a little trimming on one end.
20140202_105718.jpg

20140202_105819.jpg

20140202_110035.jpg

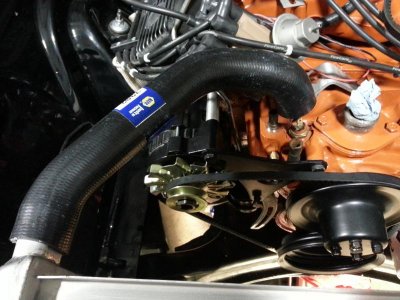
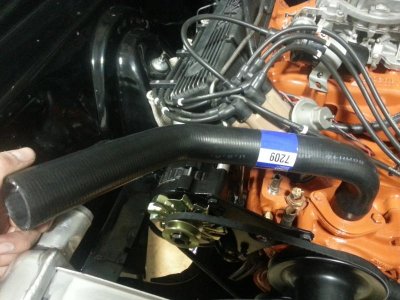
I did some digging online and found a thread on moparts that had a Dayco part number I took to Napa and got cross referenced, the Napa part number ended up being 7209. Not sure what car the hose was used on, but test fit looked close
20140202_142031.jpg

Just trimmed about an inch off the thermostat side and was set!
20140202_153606.jpg

20140202_154246.jpg
Hope that helps some people out! :icon_thumleft:

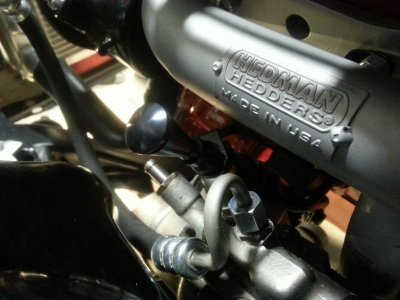
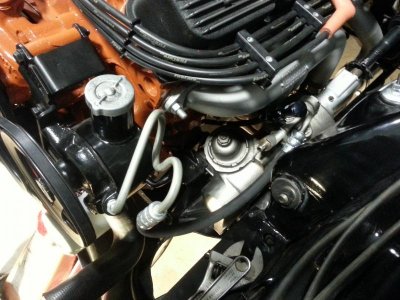
So with everything finally test fit ok, I ran my high pressure PS line before I took off to my girlfriend's for superbowl pizza and ribs haha. Pretty sure Napa gave me a hose for the wrong pump style, but these pics show what I was talking about how the hard line runs right around the dipstick almost like I knew what I was doing lol!

20140202_153156.jpg

20140202_153627.jpg

- - - Updated - - -

looking good speedy, by the way i will be putting in a cage in mine also. what kind is the one you putting in. thanks
Thanks usa, it's just going to be a 6 point rollbar/cage, doorbars to the front subframe and downbars from the main hoop down through the package tray to the rear. I'm going to widen the main bar by a few inches I think, hopefully to where you can still get into the back seat, bend my own doorbars so they tuck in close to the seats instead of straight diagonals, and bend my own rear bars to keep them up close to the roofline. Probably be a few weeks til I get around to all that haha
Nicely done Speedy.

PS saw this earlier and thought of you .. not the *** part though

attachment.php
Thanks tallhair, for some reason the pic won't show up though :shruggy:

And thanks bigblock! :icon_thumleft:
 
Looks great, that dipstick did turn out cool... it dose almost look like you know what your doing lol.
I really like your plug wire management, very nice I may copy that in one of my cars soon.
 
Looks very close to firing, I'll be expecting a video soon.:happy1: Your engine compartment looks great too.
 
Thanks guys! Im gonna bust my @as this week and hopefully get all the last little things done to fire it off this weekend, really getting excited the closer I get

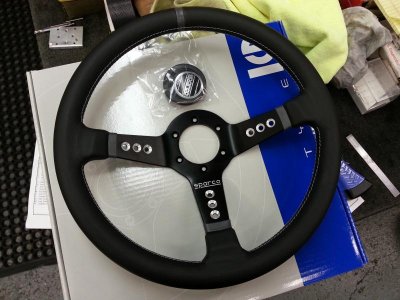
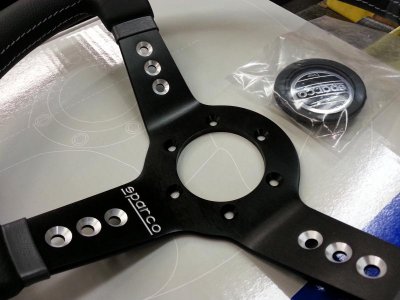
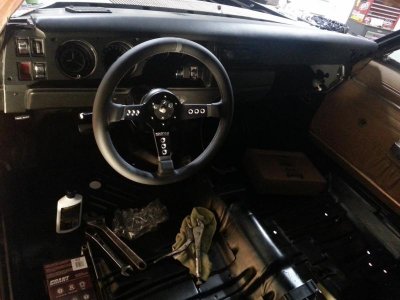
Oh and my steering wheel showed up today! Took 3 weeks and was a little expensive but I guess they're made in Italy and the quality shows. Now that I see this one in person I think it's safe to say I'm never buying a foam grip wheel again haha can't wait to get it on the car
20140203_144211.jpg

20140203_144303.jpg
 
Thanks guys! Im gonna bust my @as this week and hopefully get all the last little things done to fire it off this weekend, really getting excited the closer I get

Oh and my steering wheel showed up today! Took 3 weeks and was a little expensive but I guess they're made in Italy and the quality shows. Now that I see this one in person I think it's safe to say I'm never buying a foam grip wheel again haha can't wait to get it on the car


WOW Speedy . . . The wheel looks great, the fuel lines are done and spot on, you've got a bunch of stuff done lately and it all looks FANTASTIC ! ! !

Looks like you're giving a huge push for the finish here . . . keep it up . . . you'll be driving it in no time ! ! !

Man have you come a long way . . . ( smile )
 
Thanks guys! I'm pretty excited to see it in the car, gonna hit Napa today for a couple things and see if I can buy or borrow a wheel puller. Then I'll be able to get a better look at how I'm going to modify the Grant hub adapter to the 6 hole pattern.

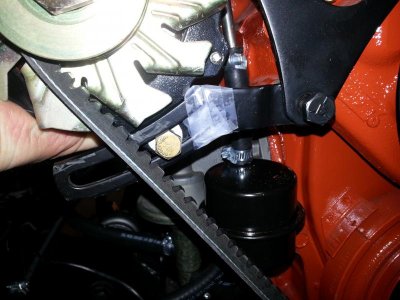
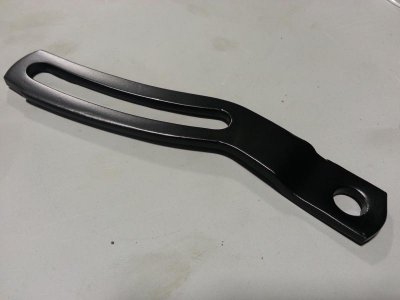
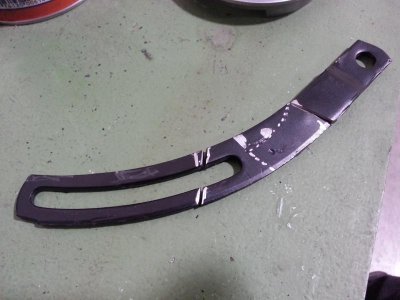
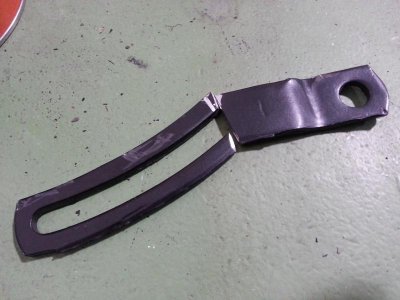
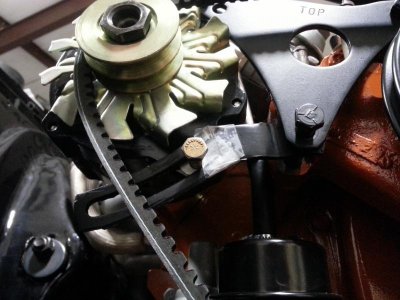
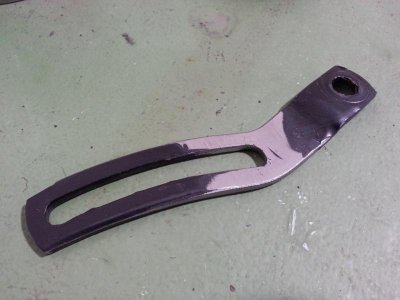
Speaking of modifying, broke out the cutoff wheel again last night and started hacking up my alternator swing bracket haha. Used a silver sharpie to mark where everything needed to be, and made some sparks fly
20140204_005139.jpg

20140204_005044.jpg

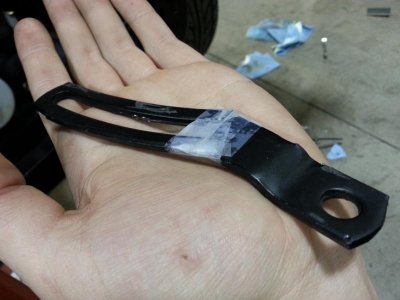
A little tape and we're good to go! Haha, just taping it to mock everything up and check the fit.
20140204_004731.jpg

And as if by magic, the test fit is spot on :icon_thumleft: So today I'll fire up the mig, zap it back together and hopefully make it look like it's a factory piece.
20140204_004426.jpg

Alternatorbracket1.jpg

Got a couple other odds and ends done last night too, took the steering wheel apart as much as I could til I needed a puller, bench-bled my master cylinder, sleeved the driver's side plug wires, tightened the power steering belt and locked the pump down. Just little stuff but the punch list is shrinking every day
:eek:ccasion14:
 
Nice steering wheel Speedy !!

Thanks guys! Im gonna bust my @as this week and hopefully get all the last little things done to fire it off this weekend, really getting excited the closer I get

Oh and my steering wheel showed up today! Took 3 weeks and was a little expensive but I guess they're made in Italy and the quality shows. Now that I see this one in person I think it's safe to say I'm never buying a foam grip wheel again haha can't wait to get it on the car
View attachment 167180

Nice choice, is it leather?
:steering:

Mike..

:thumbsup:
 
That new steering wheel looks like it has some.... uggghhhhh Defects!! ya that's it! Send it to me and I'll have a closer look! :p
 
Alright guys, with fuel lines out of the way I got on with the power steering. But the way the pump sits I figured I should get the lower radiator hose on the water pump housing first, which led to test fitting my radiator and both hoses which naturally turned out to be interesting.

First thing I noticed was an issue I'd think is pretty common, the upper inlet on my radiator (Northern brand 26" aluminum) was about 3" to the left of the stock 26" inlet, so my upper hose wouldn't work. The stock lower hose fit fine with just a little trimming on one end.
View attachment 167012

View attachment 167013

View attachment 167014

I did some digging online and found a thread on moparts that had a Dayco part number I took to Napa and got cross referenced, the Napa part number ended up being 7209. Not sure what car the hose was used on, but test fit looked close
View attachment 167015

Just trimmed about an inch off the thermostat side and was set!
View attachment 167016

View attachment 167017
Hope that helps some people out! :icon_thumleft:

So with everything finally test fit ok, I ran my high pressure PS line before I took off to my girlfriend's for superbowl pizza and ribs haha. Pretty sure Napa gave me a hose for the wrong pump style, but these pics show what I was talking about how the hard line runs right around the dipstick almost like I knew what I was doing lol!

View attachment 167018

View attachment 167019

- - - Updated - - -


Thanks usa, it's just going to be a 6 point rollbar/cage, doorbars to the front subframe and downbars from the main hoop down through the package tray to the rear. I'm going to widen the main bar by a few inches I think, hopefully to where you can still get into the back seat, bend my own doorbars so they tuck in close to the seats instead of straight diagonals, and bend my own rear bars to keep them up close to the roofline. Probably be a few weeks til I get around to all that haha

Thanks tallhair, for some reason the pic won't show up though :shruggy:

And thanks bigblock! :icon_thumleft:


sounds nice cant wait to see it, the wheel looks awesome also. keep busting a$$, speedy!!!!!
 
Speaking of modifying, broke out the cutoff wheel again last night and started hacking up my alternator swing bracket haha. Used a silver sharpie to mark where everything needed to be, and made some sparks fly

View attachment 167292

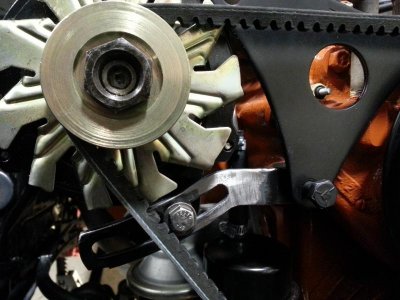
Holy Cow Speedy - that must be some VERY STRONG scotch tape you're using to hold those parts together ! ! !

Hope it holds up for you ! ! ! ( GRIN )
 
Holy Cow Speedy - that must be some VERY STRONG scotch tape you're using to hold those parts together ! ! !

Hope it holds up for you ! ! ! ( GRIN )
Lol the best scotch tape money can buy! :icon_thumleft:

Well as strong as the tape looked, I got the bracket all welded up and ground down. Actually came out nicer than I expected!
20140204_215010.jpg

One more final test-fit, works just like the factory put it there! :icon_pray:
20140204_224410.jpg

Then I sanded it a bit smoother, hit it with etch primer, and topcoated with Martin Senour "Underhood Black" from Napa. I love that stuff, never gives me any issues and the satin finish matched the rest of my powdercoated accessory stuff perfect.
20140206_010357.jpg

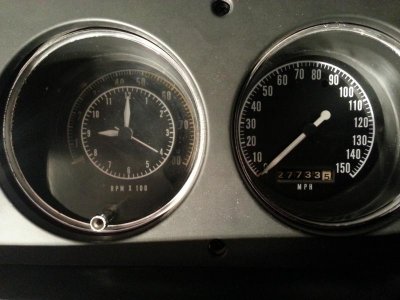
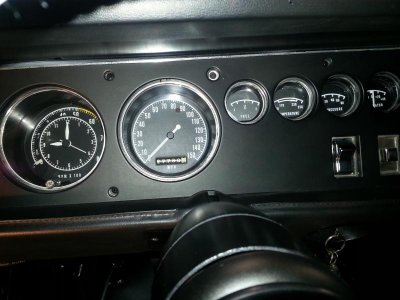
I also got my old steering wheel pulled, and finally got around to something I've been meaning to do for a while. When I took my instrument cluster apart, I had a "doh!" moment and used chrome polish to try and clean the outer part of the lenses, which must have been too coarse cause it left a light hazy swirl over the gauges. I saw a post recently by Kiwigtx about Meguiar's Plast-x polish and thought I'd give it a try, this stuff is awesome! Here's a side-by-side before and after, tach is still swirled and the speedo has been polished with Plast-x

20140205_215802.jpg

Really cleaned up the gauge lenses nice!
20140206_004004.jpg

Then I started figuring out how I'm going to modify my hub adapter, and checked out the look of the steering wheel. Think it looks pretty clean! :icon_cool:
20140206_003812.jpg

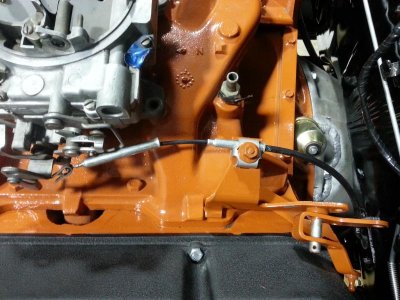
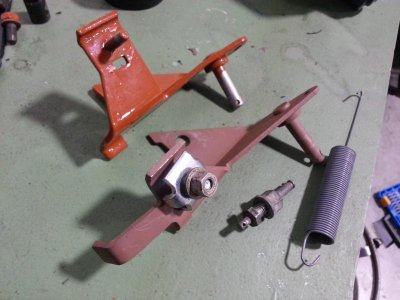
Also picked up my correct throttle bracket (the red primered one), stud, and return spring. Not sure where the first one I had came from, but it put the cable way too far towards the center of the engine. Hopefully the last of the wrong parts I'll have to replace before I can hear this thing run haha
20140202_154209.jpg

20140206_004628.jpg

Just a couple more little odds and ends then I'll be on to the shifter and kickdown linkages and running the engine bay wiring
:eek:ccasion14:
 
very nice I see your moving along very good thanks for the updates :headbang:
 
" Martin Senour "Underhood Black" from Napa "
Sounds like a great product to me!! LMAO!!

Sounds dangerous in your hands Goon lol

hey Speed, did you do those lenses in dash like that? Or did you have the bezel off cluster out? By hand or foam pad on drill? They look great, Mine need a freshening too.
 
Auto Transport Service
Back
Top