• When you click on links to various merchants on this site and make a purchase, this can result in this site earning a commission. Affiliate programs and affiliations include, but are not limited to, the eBay Partner Network.

'69 charger r/t-se: Building my dream car

Dude, all I can say is WOW. Simply awesome. I read almost your entire thread today, incredible man! A very talented fellow you are. Keep up all the great work!
 
It's going to turn out great ... like everything else you do. Just be sure to show plenty of photo's for the how too :)
 
headliners arent bad. take your time and stretch like hell! judging by the beautiful work that you've done so far, i wouldnt worry to much. and oh yeah, measure 6 times, cut once!
 
Agreed, with you behind the wheel it will come out great. Good luck Speedy
 
Everything is looking great Speedy. I like your new Scat Pack sticker - how big is it? Good luck on the headliner install, I chickened out on doing that and the vinyl top in my garage.
 
Hey thanks for all the encouragement guys and sorry I went MIA again, the grille pieces decided to put up a fight, I ended up getting sick with a sinus infection for 4 or 5 days, and just finally got back in gear with everything last weekend so here's an overdue progress report haha

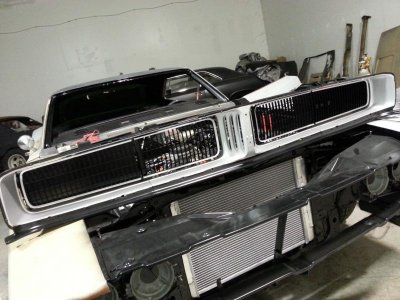
I ended up having the same issues with painting the grille pieces as I had with the first headlight door and think I figured out what the deal was. When I was prepping the pieces for the inner silver trim line, I would sand through the black paint to bare plastic in a few places. So trying to be safe, I then tried to use adhesion promoter, which reacted differently on the paint than the bare plastic and gave weird edges of wrinkles all over the place..

20140331_105050.jpg

So after 3 attempts and re-sanding while trying not to mess up the back-masking, I got everything sanded and smoothed out and just went with a bunch of light coats of silver. I was worried all the sanding and messing with stuff had messed up the tape lines but surprisingly it all came out perfect with no overspray at all, finally success!

20140405_181505.jpg

20140405_181444.jpg

So the grille is all finally ready to go back together but I got sidetracked for the moment on another project. Just when I thought I'd seen the last of the metal surgery, I found more braze to dig out of the driver's quarter and a weak quarter/rocker seam. And since it goes up into the lower part of the doorjamb, it needed to be taken care of before I paint the doorjambs, which I've been planning to do before the headliner install. :frustrated: Enough to make my head spin.. haha

20140405_163042.jpg

So once again I broke out the trusty cutoff wheel and went to town lol

20140406_145518.jpg

Inner rocker thankfully looks great
20140406_145543.jpg

20140406_145609.jpg

Started off with a small patch which I didn't end up happy with, so I carved this nice chunk out of the rocker just so I'd know for sure that the whole area would be good and solid afterwards

20140407_180012.jpg

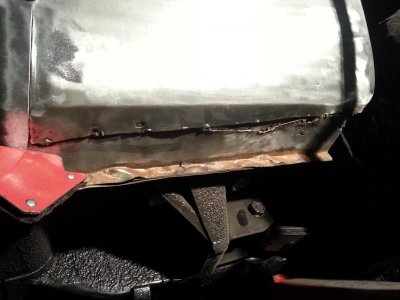
Formed the patch up with a low spot in the middle to try and copy the way the factory seam is, fired up the mig and zapped it in

20140408_014512(0).jpg

Went over everything with a stripping wheel and gave the surrounding area (that will get covered with the quarter) a good coat of Chassis Saver to seal it up

20140408_020827.jpg

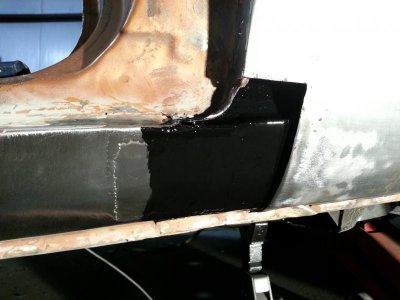
Then Phase 2 went into action last night welding in the quarter patch. I actually cut it out of what's left of an AMD trunk pan my buddy Mike used on a customer's Superbird, and formed it by hand to match the quarter contour and lower edge. Now that it's in I'll have to shape the doorjamb corner to match the door gap, then some more fun cutting out braze along the very bottom edge of the quarter :banghead: more progress on all that soon

20140408_015538.jpg

20140409_014823.jpg

Oh yeah and I got one of the brake calipers painted and cleared finally, I ended up liking the duplicolor clear a lot better. Naturally when I went to paint the other caliper, the paint decided to react differently over the red paint and lifted it in areas. I'll get around to fixing that eventually but the first one came out pretty cool

20140329_130934.jpg

20140330_012142.jpg

And last weekend Mike made it over to help figure out what's up with the idle issue. Well it turned out it's now a "won't fire at all" issue. We pulled the coil wire to check spark against one of the mounting bolts, and it's barely making any at all. He said he had the same exact issue on his hemi Roadrunner I posted the picture of the other day, and turned out the Pertronix ignition just crapped out somehow. He dropped in a points distributor and it fired right up, and he's now running an orange box setup which he recommended I do. So now he dropped off a points dizzy for me to try just to double check, that's currently next on the punch list after all the welding fun is over. Anyways I'm glad to be back at it, more updates soon
:eek:ccasion14:

Hey Speedy quick question for ya? How much Dynamat did you end up using on your car? And where all did you apply it? Looking to order some for my car and really not sure how much I'll need. Pretty sure Im gonna do roof, floor, truck and doors.
Hey rebootej, I bought the kit with 9 sheets of 18"-32" and I think I used a little under 4 on the headliner. I'm not going too crazy with it, just headliner, a few sections of the floor, doors, and package tray, still not sure if I'll do the trunk or not. But to do as much as you want you'll probably want to get two kits of 9 sheets each, I'll probably end up having to get another kit myself. Hope that helps!
Hey speedy, I'm sure you have mentioned it before but what paint did you use for your grill? Was it SEM? Also what color codes etc for the black and silver?
cheers mate
Hey Jase yeah I think it's somewhere back in the archives but the silver I used is Krylon 1403 "dull aluminum" and the black is the rustoleum "x2 Coverage" satin black, I really like both of em. For the first coats of paint on the plastic I used Duplicolor adhesion promotor first (but keep in mind what happened when I tried to use it with any amount of paint already on the plastic) cheers man!
Dude, all I can say is WOW. Simply awesome. I read almost your entire thread today, incredible man! A very talented fellow you are. Keep up all the great work!
Hey thanks Nick, really cool to hear you like the build! Still plenty of work left so welcome aboard and glad to have you along for the ride haha :icon_thumleft:
Everything is looking great Speedy. I like your new Scat Pack sticker - how big is it? Good luck on the headliner install, I chickened out on doing that and the vinyl top in my garage.
Thanks elk I really liked the stickers too, they're actually pretty big (I think like 6" across) so I slapped one on my mini-fridge and still trying to think of a good spot for the other one, maybe toolbox I guess. And thanks I'm sure I'll be needing it haha
 
Nice job on the patch panels Speedy. The area behind that could have been much worse.
 
Nice patch work Speedy, glad to see your back at it and giving that Charger some lovin.:love4:
 
Fantastic work and updates Speedy and you did a great job with the patch panels and grill. The grill just looks superb too.

Question .. what's up with the different colors on the calipers? You checking to see which you like best or what?
 
Hey thanks speedy that helps! I just ordered the 9 sheets of 24"x48". Sounds like it will be a good start but may still need more. Glad to hear your feeling better. Patch and grill looks great man!
 
Thanks guys! It's pretty cool thinking before this car my welding experience basically amounted to tacking a couple 1/8" plates together with the arc welder in high school shop class one time lol. Safe to say I won't be submitting my pictures to any "welding ****" pages, but still feels good to see how far I've come anyway. Frankenstein gave me plenty of practice I guess haha

More surgery on that quarter, the absolute hackjob someone did attaching the lower seam to the rocker. "Just hack the old quarter off at a weird mis-matched angle and throw a couple tacks on there with some seam sealer, she'll be good!" Pretty disgusting.. :angryfire:
20140408_015112.jpg

So of course more fun with the cutoff wheel :chain saw: that pile of dirt and broken glass came out when I sliced it open, instant weight reduction lol
20140410_175830.jpg

All cut out ready to fit the patch panel, gave the rocker the same treatment as before with the stripping wheel and chassis saver before welding the patch in
20140411_231624.jpg

All zapped in and cleaned up (still had to cut off and stitch weld the far end by the wheel well in this pic)

20140412_170042.jpg

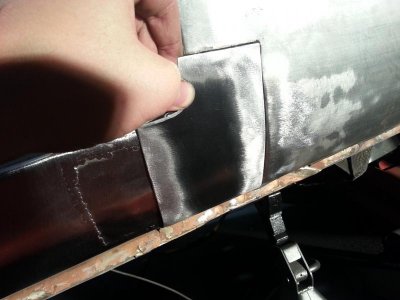
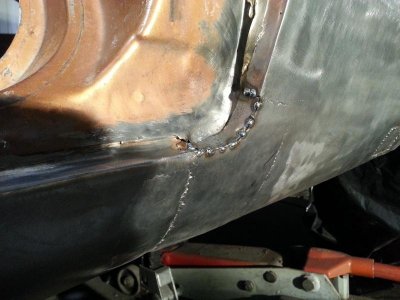
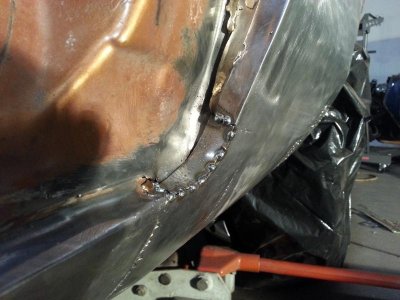
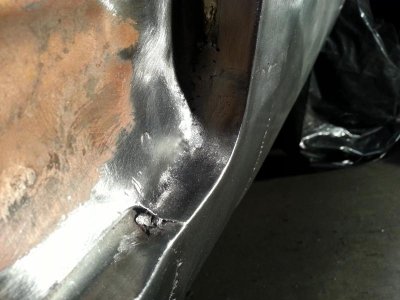
So with that taken care of, last night I took a shot at the corner of the doorjamb. I got the door latch installed to hold the proper door gap, and you could see in my last post's pictures where I marked the line I needed to cut in my quarter patch. Got that cut out, and shaped up a strip to fill out the doorjamb corner itself. When fitting it, I left a tiny 90° wedge space between the two panels so I can finish grind the edge slightly rounded off (like the rest of the quarter/doorjamb edge) while still leaving a good amount of the weld in place. Here's where I'm at:

20140414_193645.jpg

20140414_193553.jpg

If I knew this quarter needed so much work in the first place, it probably would've been a lot easier to just replace it with a whole new one from AMD. But I got some more fabrication practice and everything's coming together nicely so "all's well that ends well" haha. More pics to come when I get it finished and all cleaned up
:eek:ccasion14:

Nice job on the patch panels Speedy. The area behind that could have been much worse.
Thanks elk, the inner rockers were spotless when I stripped/painted the underside of the car but yeah I was still a little worried about what I was gonna find inside there. Lucked out for sure!
Glad to see your back at it and feeling better Mr. SF. !! Good you caught that rocker!
Thanks goon! Yep that would have been a nasty surprise down the road, just another prime example of why getting down to bare metal is so important with these old cars. Never leave that big ol' glob of lead alone without knowing what's under it lol
Fantastic work and updates Speedy and you did a great job with the patch panels and grill. The grill just looks superb too.

Question .. what's up with the different colors on the calipers? You checking to see which you like best or what?
Thanks man! And the pictures are actually the same caliper with the same paint, the second one (next to the red caliper) just had weird lighting for some reason. The first picture is more how it looks in person haha
Hey thanks speedy that helps! I just ordered the 9 sheets of 24"x48". Sounds like it will be a good start but may still need more. Glad to hear your feeling better. Patch and grill looks great man!
Cool deal reebotej, glad I could help! That should be a good start since you bought the larger sheets. Pretty crazy how big of a difference that stuff makes
 
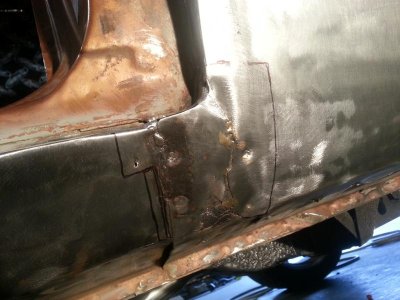
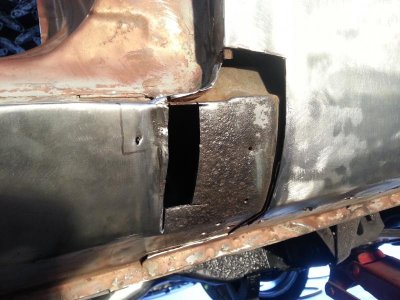
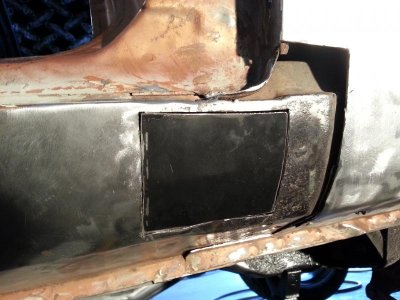
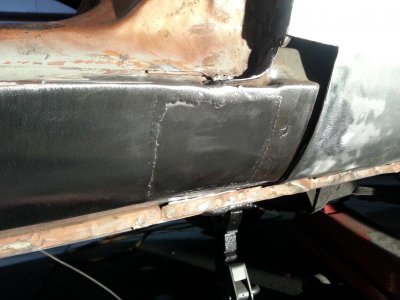
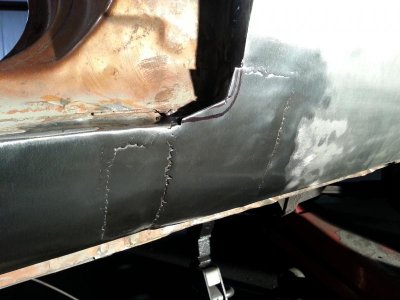
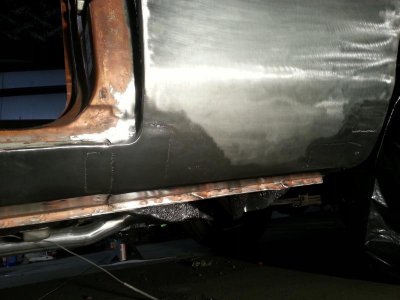
Thanks fellas! Finally got a solid night of work in yesterday and knocked the rest of the metalwork out on that quarter. This thing gave me a bit of a challenge but I gotta say I'm pretty excited with how it came out

20140416_222527.jpg

20140416_221852.jpg

20140416_222557.jpg

Kind of a cool before-and-after of this whole surgery.

View attachment 181874

I still have a lower quarter patch to do on the passenger side just forward of the wheelwell, but I might have a hookup for a free section of original sheet metal off another Charger here locally so that bit of fun will be coming up later. But for now I can finally give the neighbor's welder back, get the ignition issue figured out, and lay some paint on the doorjambs. Trucking right along gentlemen!

Guess I've been slacking on the weekly tunes lately, so here's a mid-week selection for everyone's listening pleasure
:eek:ccasion14:
[video=youtube;cN3ABDzdLls]https://www.youtube.com/watch?v=cN3ABDzdLls&feature=youtube_gdata_player[/video]
 
Last edited:
very nice work speedy, its awesome seeing all the metal work done on her. keep posting the pics. cant wait til the day i can start mine.
 
You are rockin' and rollin' on the car and tunes, nice patchwork.
 
Auto Transport Service
Back
Top