• When you click on links to various merchants on this site and make a purchase, this can result in this site earning a commission. Affiliate programs and affiliations include, but are not limited to, the eBay Partner Network.

69 Coronet 440 project

Awesome, bet your just chomping at the bit to start putting it together again. I feel for you guys without heat, Spring is coming and you should be all fresh and full of motivation.


Yea 7 you have no idea how much I want to get back out to the garage. No pictures but I did get another piece to my Coronet puzzle today. I was leaving for school and the FedEx truck arives to deliver my passenger seat. It's not in great shape but it's more than what I began with. I'll need to get it stripped down, cleaned up and reapolstered. Now I just need a drivers seat when I can afford it. I figure that I'll take pics as I tear it down so I can remember how it goes back together. Any body know what the springs are made of and can they be purchaced? I ask this because I don't know what the frames look like right now. I'm at school right now and the seat is at home still in the open box being guarded by the cat. When I left for school he was sitting in the box like it was a new toy.

- - - Updated - - -

Hey BB61, your doing a great job. I read through your build and I know your not there yet but when you are make sure your inner cowl is rust free and CLEAN. I thought my 69 charger was good till I blew out about a 5 gallon buckets worth of debris. It was amazing what was in there, but I got lucky rust wise and only needed to replace one inner vent collar. It's actually pretty easy to remove, but like everything spot welds are everywhere, I know how much fun they are. But keep up the great work I've enjoyed your build.

Thanks CalCharger I'm almost afraid to see what's under there from the horror stories I've heared.

- - - Updated - - -

Wow 61, start calling you "The Tin Man!" Kick the tires, light the fires....

Mission accomplished Tin man is 100 over 100! LOL
 
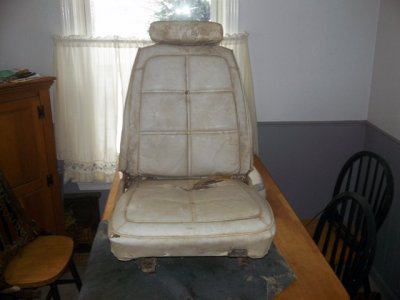
Here are some pics of the seat I bought. It's the passenger side seat and the drivers side seat back. It was an Ebay purchase and I was able to make a deal with the seller. Moparmindy was really good to deal with and my seat got here within days of me ordering it. I was originally going to put a bench seat in the Coronet because that's what it came with. Finding a bench seat for a 2 door car is rough and this seat was on Ebay forever so, bucket seats it is.

PassengerSeat01.jpg

DriversSeatBack01.jpg

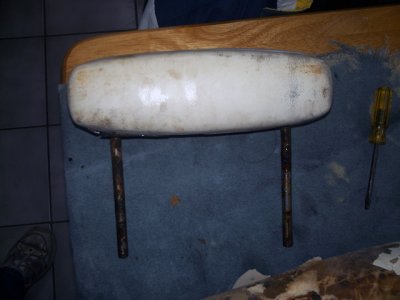
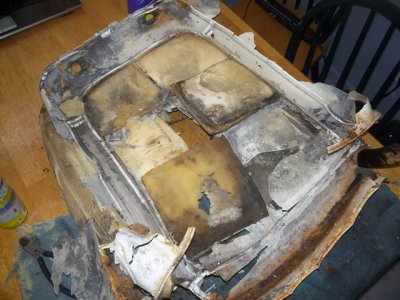
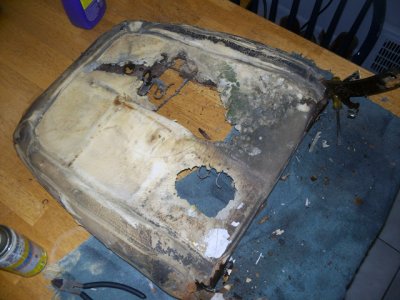
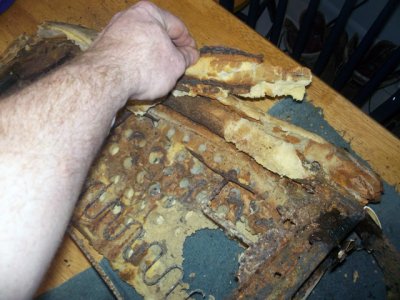
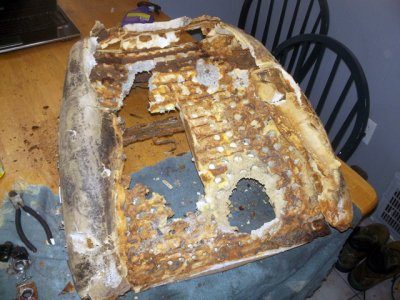
I ended up taking the drivers seat back apart today just to get a feel for what I'm going to have to do for the rest of the seats. I documented it all for anyone else that may be considering doing the same thing later on. The first thing to do is to get the headrest out of the seat. It was completely rusted into the seat and would not budge. Out came the Break Away and I sprayed it all over the headrest posts. With that and a lot of cussing it finally came free.

DriversSeatBack02.jpg

DriversSeatBack07.jpg

After that I removed all the headrest hardware

DriversSeatBack08.jpg

DriversSeatBack09.jpg

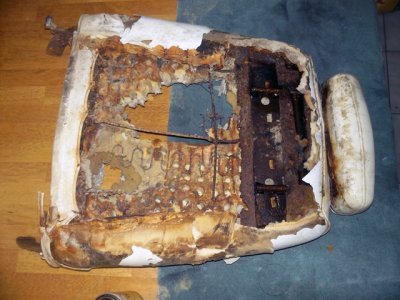
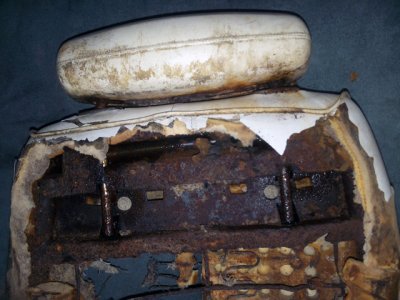
From there I removed what was left of the seat cover. There were two screws on the bottom of the seat as well as hog rings holding the cover on the seat.

DriversSeatBack10.jpg

I believe these two screws go to the seat back cover that was missing on this seat back.

DriversSeatBack11.jpg

It peeled off mostly intact and outside to the trashcan it went. :)

DriversSeatBack12.jpg

Next it was time to remove the seat foam

DriversSeatBack13.jpg

It looks like it might have been glued to the frame

DriversSeatBack14.jpg

And outside to the trashcan with this as well.

DriversSeatBack15.jpg

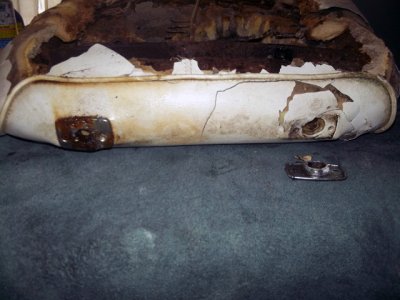
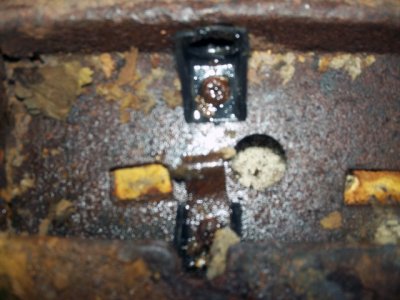
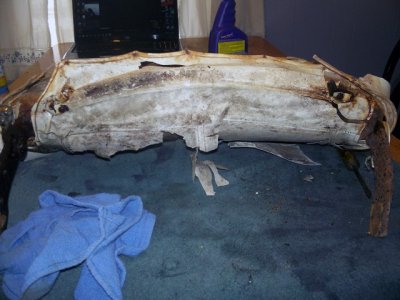
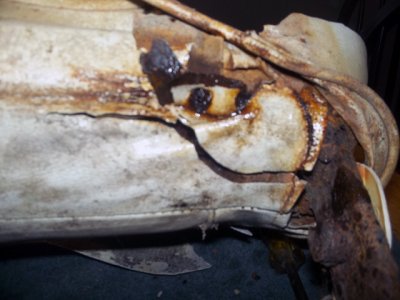
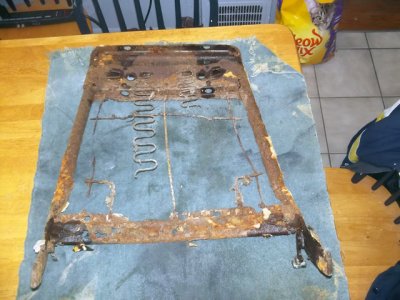
This seat back is worse than rough and it's making me think I still payed too much for it. The funny thing is; I want to try and rebuild it. I'm thinking that if I make a jig out of plywood and set the back on it I could possibly replace each rusted part on it. The really hard part looks like it would be where the tubular frame squeezes together and curves to meet the seat bottom. The next hardest thing I think would be making the springs. Other than that it's all stamped steel and steel rod bent into shape. That I know I can fix. Call me crazy but I think I'm going to try it. What do I have to loose, it's only one piece at a time, right.

DriversSeatBack16.jpg

- - - Updated - - -

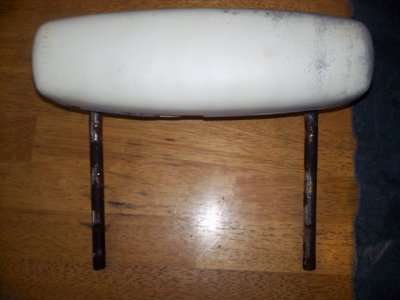
After taking some soap and water to the headrest it cleaned up rather well. It still needs to be rechromed.

DriversSeatHeadrest01.jpg
 
you have some unbelievable enthusiasm bb61, all the snow has got to be altering your mind LOL......... that seat back would have been in my trash can after discovering what was left?? more power to ya , go get'er man......
 
you have some unbelievable enthusiasm bb61, all the snow has got to be altering your mind LOL.........

You may be right 505 LOL. (Sings) I may be crazy.
But it just may be a lunatic you're lookin for.
Turn out the lights, don't try and save me.
You may be wrong for all I know but you may be right. (/Sings)
 
Billy Joel?

Ding, ding, ding, ding, We have a winner!!!!!!! After typing "you may be right 505", poof! there's the song in my head and the rest was history. It was either Billy Joel or Snowblind by Styx, and I figure Billy Joel would be easier to get
 
Ha..Haaaaaaaaaaaaa!!! Winna Winna Chicken Dinna!

I'm not sure if anyone got this one "Mission accomplished Tin man is 100 over 100!" but it's from the movie Stealth. When you called me Tin Man which made me look at who sent it. Propwash an obvious reference to airplanes which led to the movie Stealth, about a warplane that doesn't have a pilot. Yea I really need spring to get here lol.
 
Never caught that movie '61. Heck, I just thought you went half nuts with cabin fever, but was enjoying your crazy posts..lol
 
Valkin mind meld.. or

[video=youtube;IkbMd3Bygzs]https://www.youtube.com/watch?v=IkbMd3Bygzs[/video]
 
Lol I think you guys are all going a little stir crazy but as long as no one goes all "the shining" on us I'm cool with it haha
the_shining_2.jpg

And nice documenting the teardown on that seat bigblock, wish you found some nicer metal under the rat nest but it'll be cool to watch you bring it back from the dead. Just a note, not sure if you were talking about the two wavy rods going down the middle of the seat when you mentioned "steel rod bent into shape", but if I remember right those are actually sprung steel and you won't be able to use just regular rod bent into shape. I know you can buy rolls of that stuff somewhere though, there was a really good seat repair how-to on Musclecar TV that talked about it. I'll have to dig around the interwebs and see if I can find it
 
And nice documenting the teardown on that seat bigblock, wish you found some nicer metal under the rat nest but it'll be cool to watch you bring it back from the dead. Just a note, not sure if you were talking about the two wavy rods going down the middle of the seat when you mentioned "steel rod bent into shape", but if I remember right those are actually sprung steel and you won't be able to use just regular rod bent into shape. I know you can buy rolls of that stuff somewhere though, there was a really good seat repair how-to on Musclecar TV that talked about it. I'll have to dig around the interwebs and see if I can find it

Thanks Speedy I do know that the springs are made of spring steel and I have found a few places that sell it. There are maybe 10 to 15 rods that are part of the framework that I would have to replace. Those would have to be bent into shape. I'm going to have to check out Musclecar TV for that seat repair. This is one of those things that I'm not even sure if I can make it happen but why not give it a try. If it doesn't work it's no big deal, I'll still be in the same place I'm in now, needing a seat. Then again if I can make it work I'll still be in the same place because it's only a seat back lol.

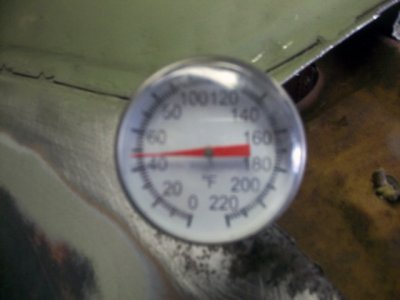
I'm now done with my homework for the week and it's 40* outside. I'm going to go play with the Coronet cause I need my vitamin D from the sun and my iron from the rust. :toothy10:
 
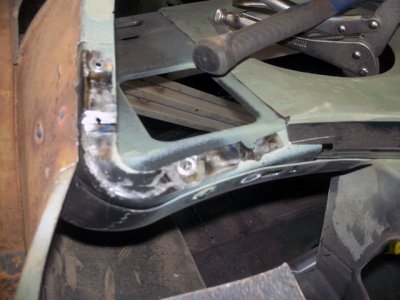
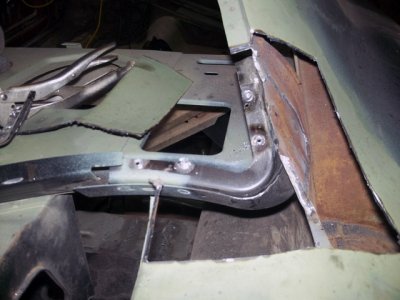
Well that felt good! I was able to remove the rear window corners that I had installed in the fall. Thank god I didn't screw up the corners too badly, it looks like a little cleanup work and I'll be able to put them back in.

Temp01.jpg

RearWindowCorner_L_05.jpg

RearWindowCorner_R_09.jpg
 
Oh ok cool, I could be wrong I just thought I remembered them saying something about it on tje musclecar tv how-to cause they showed how to replace em. I'll see if I can find it for ya later on

Hahaha man I think we've all gotten more than our daily recommended supply of rust dust after saving these cars. And keep the faith brotha, I'm sure you can save that seat :icon_thumleft:

- - - Updated - - -

Glad to see you got those corners sorted too, nice job!
 
And in my quest for power and glory I forgot one small detail........

YOU FORGOT TO HOOK UP THE DOLL!

Knew it soon as I saw it. Looking great! Haven't been online in a while but have been doing a lot of little parts. Going backwards is a part of learning and an unfortunate reality when on a budget, been there. It's all weird science anyway.


We have another winner! "Going backwards is part of the learning" Aint that the truth. Glad to see ya back hope you stick around for awhile.
 
Auto Transport Service
Back
Top