You are using an out of date browser. It may not display this or other websites correctly.
You should upgrade or use an alternative browser.
You should upgrade or use an alternative browser.
69 Coronet 440 project
- Thread starter BigBlock61
- Start date
It is one dirty messy job lol... I now know why Donny looked like a alien in one of his avatars, ive had to do some awful dirty jobs in the past but i just cant imagine doing that every day, all day!
BigBlock61
Well-Known Member
Whatever it takes bud! It sure does look like it worked to perfection! Looks like new...
Whatever it takes! Aint that the truth.
- - - Updated - - -
Nice work, I don't envy the blasting one bit but it sure makes it all look allot better.
And the blasting revels pinhole rust thru. Wondering if I should just weld up the pits, graft in a new piece, or just replace that section of rocker. What's the gauge of the metal for the rockers?
I know my floor boards had little holes that you could see were just a small pit rusted threw and welded right shut. If it's rusted over a bigger area then they like to just keep getting bigger, only one thing to do "TRY IT OUT".
chargin'
Well-Known Member
If you can access the back side of the pin hole,hold a piece of brass on the other side of the hole when you zap it with the stinger. It will help prevent blowing a big hole. Give it a try,if you haven't already tried this.
Welding pin holes is tough being 99% of the time you'll just make a larger hole.. I hate to be the bad news guy but more often then not that's what happens, I would cut it out and graft in new metal if at all possible!
It wouldn't hurt to try what chargin is saying, you never know and if the metal is not rusted up all the way to a mess, it could work, its hard to tell without actually seeing it. Maybe if you post a couple pictures someone here may have the answer that is the best for you and the car, You've done a great job with your work and i do hope im not throwing a stumbling stone in!
It wouldn't hurt to try what chargin is saying, you never know and if the metal is not rusted up all the way to a mess, it could work, its hard to tell without actually seeing it. Maybe if you post a couple pictures someone here may have the answer that is the best for you and the car, You've done a great job with your work and i do hope im not throwing a stumbling stone in!
BigBlock61
Well-Known Member
It wouldn't hurt to try what chargin is saying, you never know and if the metal is not rusted up all the way to a mess, it could work, its hard to tell without actually seeing it. Maybe if you post a couple pictures someone here may have the answer that is the best for you and the car, You've done a great job with your work and i do hope im not throwing a stumbling stone in!
Ok Here are some pics of what I'm talking about. I'm even considering just covering it in Por15. On closer inspection it looks like it's just pits and no rust through. What would you guys do? Replace, Repair, or Por15 and forget it.
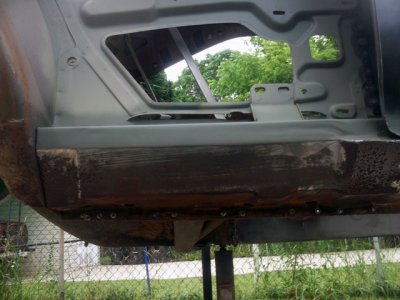
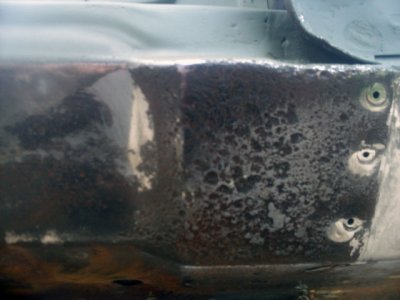

I'd at least blast it and give it the hammer test to make sure it's still structurally sound. Im sure the Por 15 will likely work fine and I'd prefer something like it for those spots you'll never get to again and want to seal up.
I would do the same, That part your showing i believe is a bit stronger then the normal metal surrounding it, Its worth a good try and then the Por 15!
BigBlock61
Well-Known Member
After closer inspection the rocker looks solid so blast and paint it is. Today I ended up bracing, measuring, and removing the inner and outer wheel well on the passenger side. I figure tomorrow I'll spend the day blasting, priming, and fitting the new wheel wells. So all that work I did on the wheel wells last year is getting replaced. I didn't like the way they turned out.
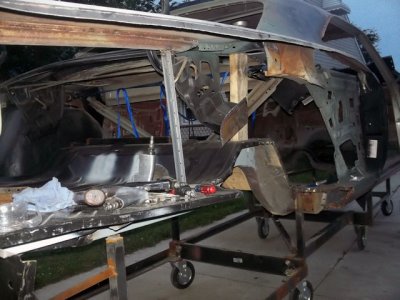
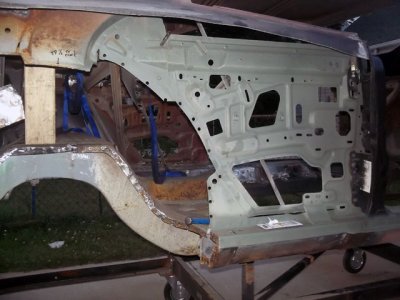
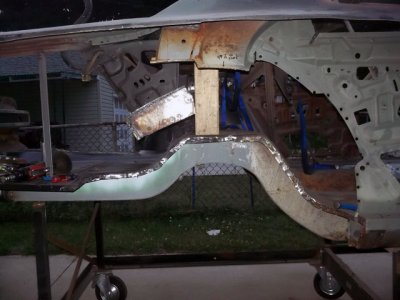


It's better to bight the bullet then leave something that you won't be happy with in the end. Hopefully your getting close to welding instead of drilling, good luck.
BigBlock61
Well-Known Member
It's better to bight the bullet then leave something that you won't be happy with in the end. Hopefully your getting close to welding instead of drilling, good luck.
That's what I figured too, I'd rather spend the money and be happy than build something I don't like. I'm never far from welding. Anymore it's drill, blast, and weld.
Propwash
Well-Known Member
- Local time
- 10:33 PM
- Joined
- Oct 29, 2009
- Messages
- 9,695
- Reaction score
- 4,338
- Location
- Island of Misfit Toys
Looking good man! Sounds like these fella's got you going on the right patch. Sure as heck wouldn't want that puppy rotting from the inside out after all that hard work! Roll on!
You are showing quality for sure, everything like this stuff i do im using that Eastwoods rust enpsulator and now POR-15, I already bought a gallon, which im not wasting.. Thought id mention what i use in case it may help, If these cars rust out in another 30-40 years, Well, i guess someone else can have the fun huh! rofl... Your work truly does look great!! 
BigBlock61
Well-Known Member
Sure as heck wouldn't want that puppy rotting from the inside out after all that hard work! Roll on!
With that in mind it's the frame rails and rockers that scare me because, for the most part you can't see whats inside without tearing it all apart. Once I got the wheel house out of the way I was able to see the inside of the rocker and there was still paint on the inside.
- - - Updated - - -
You are showing quality for sure, everything like this stuff i do im using that Eastwoods rust enpsulator and now POR-15, I already bought a gallon, which im not wasting.. Thought id mention what i use in case it may help, If these cars rust out in another 30-40 years, Well, i guess someone else can have the fun huh! rofl... Your work truly does look great!!
I ended up blasting the rocker clean so I etch primed it. Por15 doesn't stick well to clean metal it wants the rust, or at least that's what I was told. Thanks for the complement Ron.
- - - Updated - - -
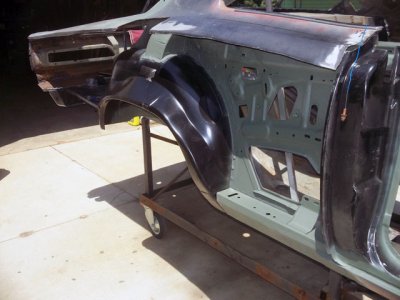
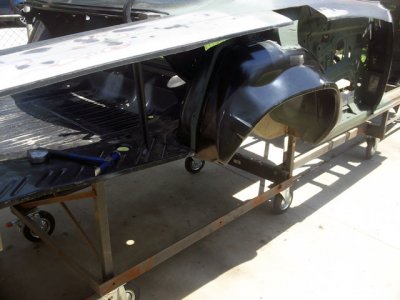
I got the inner and outer wheel wells installed. What a difference it makes, it's looking more and more like a real car everyday. Who knows the last time my Coronet was this solid.
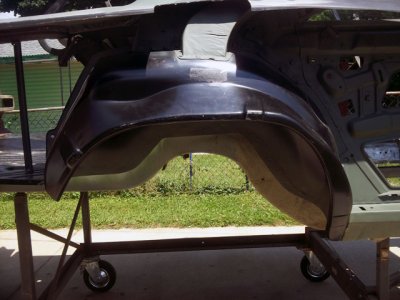
I figured out that it's easier to install the wheel house as an assembly. The inner and outer wells interlock, so I pre drilled where they go together then when I put the halves together, I did it with vise grips. I mounted the new quarter and moved everything around till it all lined up. This was not as hard as I was imagining. Once it was all lined up I tacked the inner and outer together and marked it's location. When I took it all back apart I welded the two halves together. After that it was just a matter of aligning up the marks and welding it all together, Easy peasy. Now I want to dehump the wheel house.
NZ 70 RR
Well-Known Member
Excellent work, glad to hear it was an easy re-assemble. My rockers looked the same with the deep pitting. They were blasted clean and epoxyed. Had to cut and weld 1 small patch but otherwise the metal is nice and thick from factory. That internal rust is always on my mind, will get cavity wax in there when all painting is done.
Looks like summer weather is treating you well. Sorry to here about your job.
Looks like summer weather is treating you well. Sorry to here about your job.
That etch will work out good for you and ive heard of the POR-15 and it seems a lot don't like it, I am just going to continue with the Eastwood stuff and when its done, and im out of it, ill need to make a decision on what to do, But it all works out, Looking good John!

BigBlock61
Well-Known Member
Getting ready to weld in the trunk extension on the right side but it didn't quite fit right. I ended up pie cutting out a piece where it meets the wheel house. Now it's good to go. I still need to drill the holes for the spot welds and then get to welding.
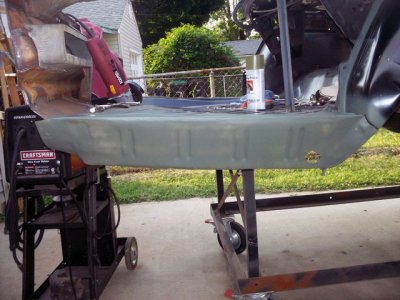
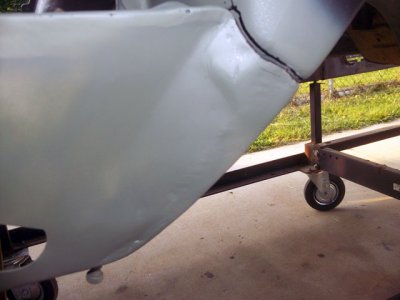
Oh yea, the rear brace doesn't reach the extension so I have to fix that too. It's off by about 1/4 inch. The trunk floor is off by 1/16 inch on both sides. Its 11 1/16 on the right and 10 15/16 on the left so I don't think that's a problem. I'll probably end up removing the ends of the brace and reweld them where I need them.

After that I did another test fit of the quarter.
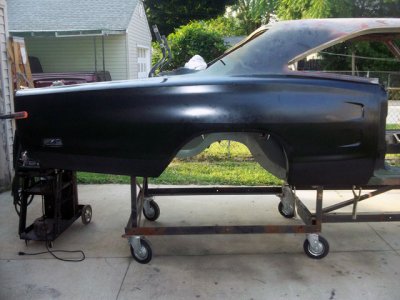
I'm going to have to add some metal to the front rocker area. The skin doesn't come with that part.
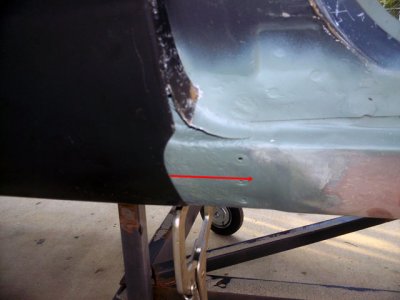
I'm also going to have to figure out how to attach it to the tail light panel. Add metal and tweak to fit, this should be fun. :idea1:
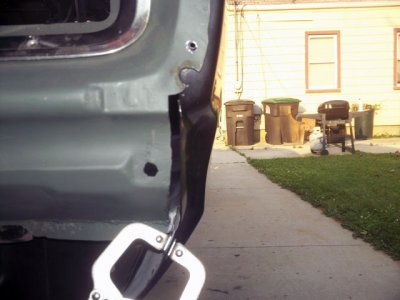


Oh yea, the rear brace doesn't reach the extension so I have to fix that too. It's off by about 1/4 inch. The trunk floor is off by 1/16 inch on both sides. Its 11 1/16 on the right and 10 15/16 on the left so I don't think that's a problem. I'll probably end up removing the ends of the brace and reweld them where I need them.

After that I did another test fit of the quarter.

I'm going to have to add some metal to the front rocker area. The skin doesn't come with that part.

I'm also going to have to figure out how to attach it to the tail light panel. Add metal and tweak to fit, this should be fun. :idea1:

roadrunnerman
Well-Known Member
John, good to see all the great progress going on here. Wish I could say the same. Really starting to look like a car again.
Similar threads
- Replies
- 7
- Views
- 457
- Replies
- 7
- Views
- 473
- Replies
- 26
- Views
- 3K


