• When you click on links to various merchants on this site and make a purchase, this can result in this site earning a commission. Affiliate programs and affiliations include, but are not limited to, the eBay Partner Network.

69 Coronet 440 project

I've been saying "what a difference" a lot lately. It seems like the Coronet is at a tipping point where it's going from parts car to something salvageable. It's a good feeling.


Pretty good feeling to be over the hump eh? You're doing a hell of a job! Keep swinging away amigo.
 
Pretty good feeling to be over the hump eh? You're doing a hell of a job! Keep swinging away amigo.

Thanks Prop, the past couple of days have been eating sand! I've been blasting the rear seat floor and the rear side panels trying to get them cleaned up. Once that's done I'll weld in the rear footwells and the floor will be done, then on to the next. :)
 
That new floor looks great BigBlock61. I don't like the taste of sand either, but i do like the results you get and the money you save by giving it ago yourself. Look forward to next round of photos.
 
Thanks Prop, the past couple of days have been eating sand! I've been blasting the rear seat floor and the rear side panels trying to get them cleaned up. Once that's done I'll weld in the rear footwells and the floor will be done, then on to the next. :)

ONWARD!!!!


lolbrary.com_37516_1386350733.gif
 
I wonder sometimes just how much sand gos down the drain in the shower after a day like that, last weekend for me, lol, I try to wear a hood and the head shield and do it right but, its hard to keep that head dress right so you can see!! lol :eek:fftheair: What can i say, im a novice with some things :eusa_doh:
 
Where's the water cause I've got the beach. This is almost as much fun as scraping off undercoating. :violent1:

UnderSeat01.jpg

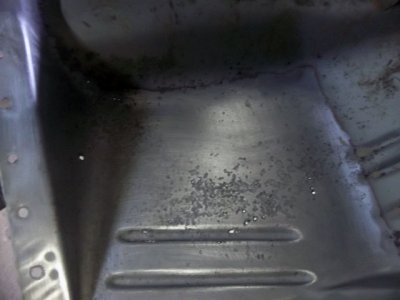
Blasting really does a good job of finding the week metal. To look at my floor before I started blasting, it looked rusty but solid. After blasting a bunch of pin holes showed up. So it looks like I've got some repair work to do.

UnderSeat02.jpg

I've been doing most of this work outside because the weather has been beautiful this year. Unfortunately my neighbor plants a garden along our fence line every year and it looks like all the blasting that I've been doing has killed his tomato plants. From now on I'll be doing everything inside my garage. I feel really bad about this because he's such a great neighbor. Gene and his wife are both in their mid 80's but you'd think they were in their 60's by the way they get around. You can see in the pic that he pulled up the dead ones, but the plants shielded by the garage and the ones forward from where I was doing all my work survived. It had to be what I was doing on the Coronet that killed them. I guess that's a mistake I won't be doing again.

Oops03.jpg
 
buy'm some new plants and i'm sure all will be fine.
 
buy'm some new plants and i'm sure all will be fine.

Yea I've already considered that, but it's too late for this season. I'm hoping he'll let me buy his plants for next year. He tells me not to worry about it but I'd feel better if I did something to make it right.
 
You must be using something other then im using, Im just using sand outside being its toxic i guess, outside im not breathing it in(as much and i use a respirator) and filling the the shop with it.. You could always make a break of some kind on that side so as none of it could fly over there! I know its a pain in the back side with this, i just finished leaf springs and rear end BUT i aint killed any grass or plants yet! :).. Not trying to be a SA John, Your one of the good guys and im sure you want to help in any way with the neighbors, I do hate to see you have to do that blasting in your shop though, mine is very small to and the air fills quickly with everything! Good luck... :)
 
I have a complete 4 door 69 Coronet. I would make a perfect parts car for your 2 door. Hood, fenders, grill, headlight bezels, bumpers, trunk lid, emblems, tail lights, all will interchange. Entire car $2500.00. (Bakersfield, CA.)
 
I have a complete 4 door 69 Coronet. I would make a perfect parts car for your 2 door. Hood, fenders, grill, headlight bezels, bumpers, trunk lid, emblems, tail lights, all will interchange. Entire car $2500.00. (Bakersfield, CA.)

Welcome to the board Dan. Go ahead and list that Coronet in the for sale forums, I'm sure someone could use it.

- - - Updated - - -

You must be using something other then im using, Im just using sand outside being its toxic i guess, outside im not breathing it in(as much and i use a respirator) and filling the the shop with it.. You could always make a break of some kind on that side so as none of it could fly over there! I know its a pain in the back side with this, i just finished leaf springs and rear end BUT i aint killed any grass or plants yet! :).. Not trying to be a SA John, Your one of the good guys and im sure you want to help in any way with the neighbors, I do hate to see you have to do that blasting in your shop though, mine is very small to and the air fills quickly with everything! Good luck... :)

I'm just using sand as well and haven't killed anything on my side of the fence. Oh well, I've brought up replacing his plants a few times now and I get the same results, "don't worry about it, it's ok". We still talk across the fence like nothings happened so I may take him up on it and not worry about it.
 
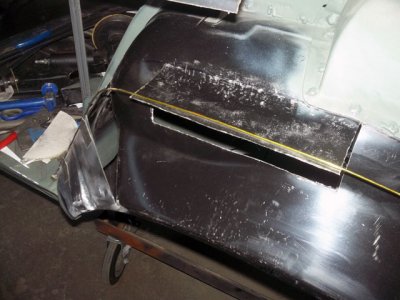
Today was a good day, all I did was work on the Coronet. No worrying about a job or bills, or money, just me, tunes, a welder, and grinder. That was my birthday present to myself and it doesn't get any better than that. I gave the sand blaster a rest and decided to tackle dehumping the wheelhouse. I got a couple sheets of poster board and gave making a template a try. After about an hour and a half I threw all that out the window. Just too many compound curves to figure out, There has to be an easier way. I sit down under my shade tree with a beer and considered my options. After 3 beers and a rock block of 38 Special on WCSX I got an idea.

Dehump04.jpg

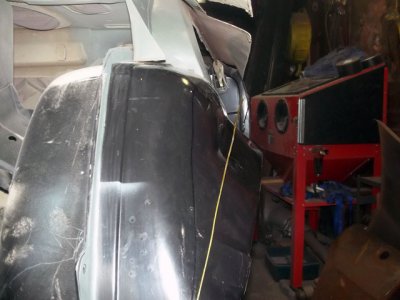
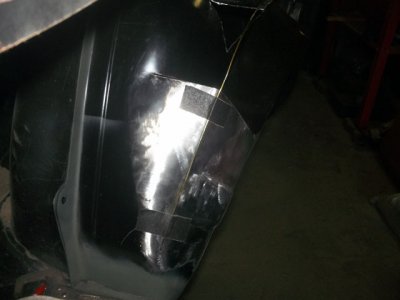
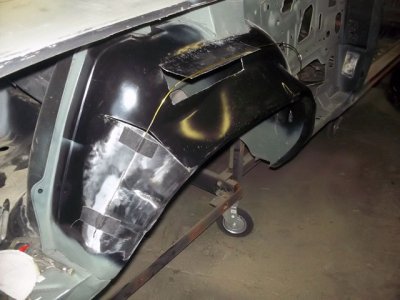
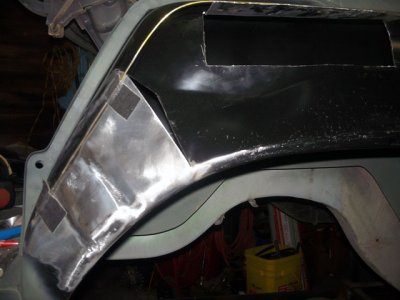
I took a couple of metal coat hangers, straightened them out and braised them together. Now I have one long straight wire that I bend to the contour of the wheelhouse. I thought about tacking them to each end of the housing but after giving that a try, it wouldn't let me move the wire out of the way when I needed to. I figured that the gaffers tape would do just as well and it lets me move the wire when I need to.

Dehump03.jpg

I traced around the wire with a sharpie so I knew where the original line was and rotated the wire until the top of it was 3 inches from the starting point. That's my new corner for the larger opening.

Dehump06.jpg

I decided to do this in sections so the original top and wheel opening doesn't move. Also I decided to use as much of the wheel house as possible by cutting out he sections that I'm working on and bending them into place. The vertical front sections are all new metal and follow the contour of the wheel opening.

Dehump05.jpg

I cut the horizontal pieces a little larger so I can trim to fit next to the wire.

Dehump07.jpg

Now I'll just work my way around till it's done.

Dehump08.jpg
 
Last edited:
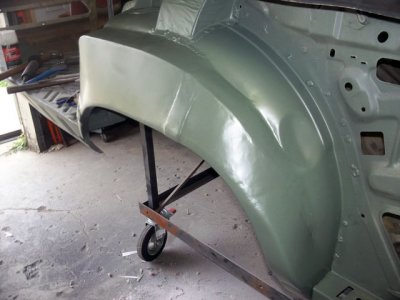
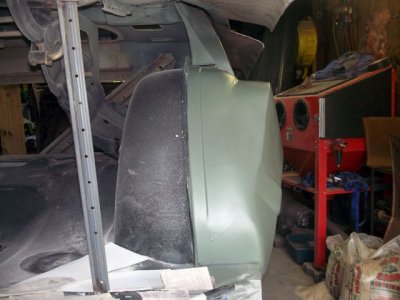
Got the wheelhouse dehumped and I think it came out pretty good. I still have to buy the outer wheel well for the other side but now if I want, I can mount the quarter skin on the passenger side. I think I'm going to go back to working on the floor for now.

Dehump09.jpg

Dehump10.jpg

Dehump11.jpg
 
This kind of project is how we get the young studs to follow in our footsteps to keep the muscle car era alive and enjoyed. Good for you and your son. What a great legacy.
 
Very impressive work 61, a little different approach but it sure came out super clean and unless you knew what it was supposed to look like you'd never know.
 
This kind of project is how we get the young studs to follow in our footsteps to keep the muscle car era alive and enjoyed. Good for you and your son. What a great legacy.

He's not as committed as I am on this project but he does help out when he's not hanging out with his friends. Ah to be young and care free. :eusa_dance: :rolleyes:

- - - Updated - - -

Very impressive work 61, a little different approach but it sure came out super clean and unless you knew what it was supposed to look like you'd never know.

Thanks 7, I wasn't real sure on how to do this and after trying a few approaches, this seemed to work best. For now it's just one more piece of the puzzle and a little closer to this. :3gears:
 
My curse of the compressor struck again. I had just started sand blasting the rear seat floor today when my compressor started making strange sounds. I shut it off and took it apart to find the piston seal broken. I swear to the man upstairs that if I ever buy another Craftsman compressor you guys can run me over with a Chevy. At least it won't be too expensive to fix but I have to buy the piston and cylinder as an assembly and it's a $70.00 part. So until I get my compressor fixed I'll have to do things the old way again, all electric.

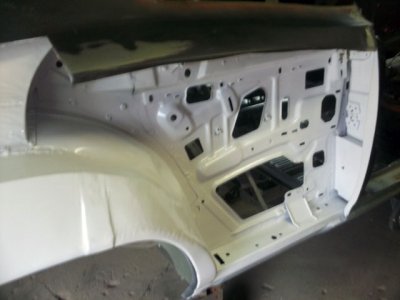
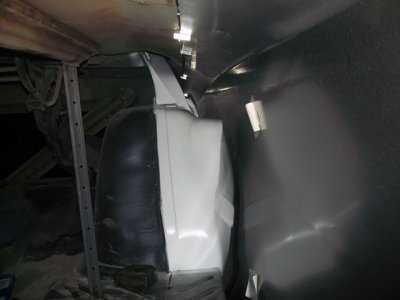
Now that the wheel house is done I covered everything that I won't be able to get to in rustoleum and I did some more fitting of the quarter skin.

QuarterFront_R_06.jpg

QuarterTrialFit_R_04.jpg

The last thing I'm going to do is let a broken compressor slow me down!!!!! :toothy5:
 
I'm going to add my vote to the lime green color too. I was hoping that's what you'd choose. That or the orange.

You're really doing an incredible restore my friend. I had a brand new car to start with compared to what you're doing. You're going to be one proud papa when it's done!
 
Auto Transport Service
Back
Top