• When you click on links to various merchants on this site and make a purchase, this can result in this site earning a commission. Affiliate programs and affiliations include, but are not limited to, the eBay Partner Network.

69 Coronet 440 project

That's awesome! Maybe place the charger sheet metal more level i.e. split the difference between the lowest points on either side of the body line, then have the body line merge into the gas cap sheet metal right down the middle ? If that makes much sense lol
 
That's awesome! Maybe place the charger sheet metal more level i.e. split the difference between the lowest points on either side of the body line, then have the body line merge into the gas cap sheet metal right down the middle ? If that makes much sense lol

Ok, I can finally picture what you're saying. That could work I'll have to see how far over the lip the gas cap ring sits. those parts should be coming on Monday.I'll try it.
 
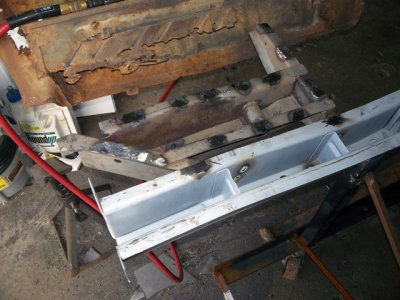
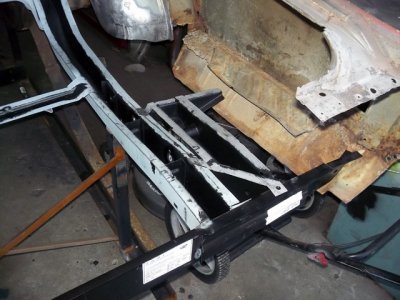
Ok back to the main work on the Coronet. I spent this weekend cutting the left shackle mount off of the old frame rail and cleaning it up. I had to weld up all the holes I drilled into it removing the trunk floor and fixing the spot where someone welded a trailer hitch to it. Once all that was done I got it welded to the new frame rail. Since its a used part and I already bought a pint, I'm going to Por 15 the inside of it. The fun part was measuring from the front spring hanger to the shackle mount pivot hole. Its 57 1/8" not 57" or 57 1/2" but 57 1/8" so it was measure, remeasure, and reremeasure. Now I get to do all of this to the right side.

ShackleMount_L_2.jpg

ShackleMount_L_1.jpg
 
Ok, I can finally picture what you're saying. That could work I'll have to see how far over the lip the gas cap ring sits. those parts should be coming on Monday.I'll try it.

Yeah that'd be the best way I can think of to fit it, then use some all-metal to smooth out the contours on either side of the bodyline where it meets the lip of the ring. If I remember right the bezel doesn't extend beyond that lip at all so it should work, I'll check on that tonight.

LOL at the trailer hitch, some guy was probably pulling his boat to the river sometime in the mid-80's :rofl: if these cars could talk..
 
LOL at the trailer hitch, some guy was probably pulling his boat to the river sometime in the mid-80's :rofl: if these cars could talk..

Yea I think you're right my frame rails were full of sand when I first took them apart.
 
Where is the son in the father and son project?
When you are pulling everything apart you should put in some bracing to maintain the original dimensions, things move a lot when you cut them loose.
Nothing wrong with a clone Bee and yes you will keep realizing what a money pit these car projects are. Keep at her.
 
Where is the son in the father and son project?

I keep asking myself this same question everyday. It seems he's more interested in building the engine than doing the body work. I guess I can't blame him I was the same way when I was 18. My daughter on the other hand seems to be getting interested in helping out. Now she wants to help paint it. As for the bracing, the car is on a frame jig and it's level so the frame is not going anywhere. I do think I'm going to have to brace the roof and door openings soon. I don't want them moving. Do you think I need to brace the rear frame right now even though its on the jig? If so I guess my next question would be from what to what? This is the first time doing anything like this so it is a learning process.
 
Yeah, I get what your saying but I think it's really cool when the daughter get's involved "mines a daddies girl" but the son is a little young to know. As far as the bracing "I'm new to it as well" but I just stand back and envision where the weight is and what it's trying to do and brace it. I had to replace the whole rear of my car, full quarters, trunk floor, tail light panel and rear valence, I replaced the trunk floor first then tacked X bracing to it holding the trunk gutters positively in place so I had them as a anchor point.
 
Agreed with 747, haven't had to tear anything apart enough to require bracing but I know you do a lot of "X" braces and take measurements in an x pattern to make sure everythings square. Propwash Will or hunt2elk would be good guys to send a pm and get learned up from :icon_thumleft:
 
As far as the bracing "I'm new to it as well" but I just stand back and envision where the weight is and what it's trying to do and brace it. I had to replace the whole rear of my car, full quarters, trunk floor, tail light panel and rear valence, I replaced the trunk floor first then tacked X bracing to it holding the trunk gutters positively in place so I had them as a anchor point.

That's my thought as well so I'm trying to get the floor welded in then brace everything. Until then I have all the measurements that I took of the parts I removed.
 
I think your doing a great job on this beast to be, This is one of many great inspiring resto,s here!
 
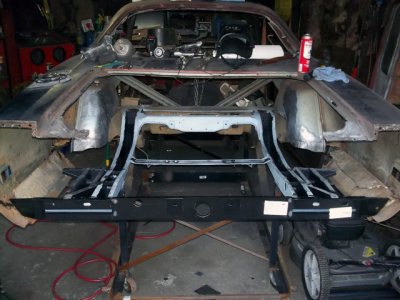
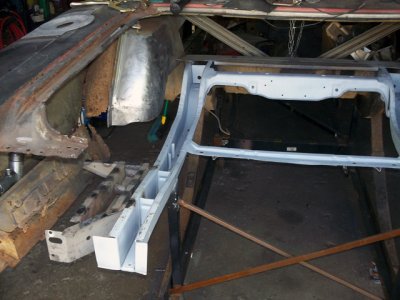
Well I got the right shackle mount welded in today as well as the rear cross rail. I also Por15ed the inside of my frame rails. I think I'm about ready for the trunk floor. :hello2:

ShackleMount_R_1.jpg

CrossrailInstalled.jpg
 
View attachment 123697


Really cool resto pic!

Work is looking great. Bracing would have helped you keep a bit more square and saved you some work/time on lining it all up, but being you have the nice jig and hopefully a ton of measurements you should be able to get back to where you need to be. Sometimes the calculating of measurements and playing with fit can be a lot tougher the removing/replacing the tin. But hey, if it was easy...everyone would be doing it. She's coming back to life nicely!
 
Live has been getting in the way in the worst ways possible but I was able to get out to the garage and do a test fit of the floor and the tail light panel. Everything lines up perfectly so I guess I did something right. I 'll start bracing once I get the floor welded in. I think I'm going to try to fix my tail light panel. I figure that if it doesn't work or I don't like it when its finished, I'll be right where I started with having to buy a new one. I'll post some pics when I get the chance.
 
Sometimes the calculating of measurements and playing with fit can be a lot tougher the removing/replacing the tin. But hey, if it was easy...everyone would be doing it. She's coming back to life nicely!

That's the fun of doing this. You're right if it was easy everybody would be doing it. I will be bracing things from here on out. The problem with the ton of measurements I had, was that they all went out the window the moment I put her on the jig. So I'm starting over from scratch with the measurements.
 
I'm sure you get it right BB61... The jig is a great addition to your restoration. I bet you're getting stoked to put that trunk pan in there..
 
Auto Transport Service
Back
Top