• When you click on links to various merchants on this site and make a purchase, this can result in this site earning a commission. Affiliate programs and affiliations include, but are not limited to, the eBay Partner Network.

69 Coronet 440 project

the tabs were cut off my roadrunner as well if fact i didn't know that were any.could you post the measurements of the tab and location this would be greatly appreciated
 
Sure no problem. I measured on the other rail that was original, 4 inches from the end of the back seat floor. The tab itself is 3 3/4 inches long and 3/4 inches wide. I made mine a little wider just to be on the safe side. I hope this helps.

Tab Measurements.jpg
 
Look what I found on my fridge today. This was drawn freehand by my daughter. I think she's hooked on this project. Maybe it will become a family thing. Too soon to tell though. Now I just have to teach her Adobe Illustrator so I can make it a paint mask. :) Maybe have it say Super Net instead of Bee.

Super_Bee_Logo.jpg
 
WOW! That's some talent. Nice little piece of insperation to have in the garage. If your project is anything like mine it should say Super Money Pit.LOL.
 
thanks a lot man, they had cut the whole shock mount cross member out of the car and welded in c channel. ( i don't know why)THANKS AGAIN YOU ROCK! AND YOUR DAUGHTER ROCKS TOO!:headbang:
 
Yes sir, Your daughter is good at drawing, your doing a fantastic job on your car for sure!
 
WOW! That's some talent. Nice little piece of insperation to have in the garage. If your project is anything like mine it should say Super Money Pit.LOL.

She really does have a talent for drawing. I hear ya on the money pit. I'm about to shell out some cash to this downriver guy for a frame jig. :)

- - - Updated - - -

thanks a lot man, they had cut the whole shock mount cross member out of the car and welded in c channel. ( i don't know why)THANKS AGAIN YOU ROCK! AND YOUR DAUGHTER ROCKS TOO!:headbang:

Hey no problem I'm glad I can help out a fellow Mopar guy. c channel...really! Some peoples kids!

- - - Updated - - -

Yes sir, Your daughter is good at drawing, your doing a fantastic job on your car for sure!

Thanks for the words of inspiration, it's just one piece at a time right.
 
Man that's cool....Not only because she did such a good job, but she's into Dad's Mopar addiction as well. Yes sir, that's gotta put a grin on your face. Can't wait to see what the future brings when it's time for her to have a car.
 
No need to replace the quarter corner moulding. When we did my fathers bee we broke off studs too. We drilled out the old stud, cut some all thread and jb welded it back into the hole. I didn't believe it would work till my father showed me, we did it to my 69 bee as well. Just a cost saver rather than replacing the whole piece.
 
Man that's cool....Not only because she did such a good job, but she's into Dad's Mopar addiction as well. Yes sir, that's gotta put a grin on your face. Can't wait to see what the future brings when it's time for her to have a car.

Without a doubt it put a grin on my face. The car she's driving....... I bought her a Hyundai (Hides under table). She really likes the 72 Satellite though. When she has the money to buy it I'll help out.

- - - Updated - - -

No need to replace the quarter corner moulding. When we did my fathers bee we broke off studs too. We drilled out the old stud, cut some all thread and jb welded it back into the hole. I didn't believe it would work till my father showed me, we did it to my 69 bee as well. Just a cost saver rather than replacing the whole piece.

I guess it can't hurt to try it. They're already broke, I can't break them again. The ones I saw on Ebay were $100.00 a piece. Thanks for the tip.
 
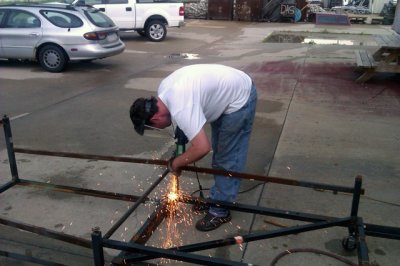
Well today I paid a visit to Smyythe68 to buy his Frame Jig. What a great guy and always cool to put a face with the name. He gave me the tour of his Charger build. It's one thing to see pics on this site but to then see it in person is off the hook cool!

Ryan I do have a question for you about the jig. Which holes do you align it up with? On the rear frame rails, the front of the frame just under the door there is a front hole and a back hole. Which hole do I stick it in!!!? LOL I'm guessing it's the front hole. (could this be why I'm divorced).

Smyythe68 disassembling the jig for transport in my Taurus.
Frame Jig.jpg
His 68 Charger His work looks better in person than it does in pictures.
Smyythe68_Charger_2.jpg

Smyythe68_Charger_1.jpg
 
I see you got my good side,LOL! It should go in the hole in the front before the spring mount. If you look on your page three on your diagram it should be measurement "A".
 
Heck of a jig.. If it has the same quality of work that smyythe68 has been putting into his Charger, you got yourself one heck of a good jig Bigblock61. Really cool seeing FBBO members get together and buy/trade/use ideas and equipment from each other to bring these cars back to life. Amazing how much this site and its members have grown just over the past few years. Good stuff!
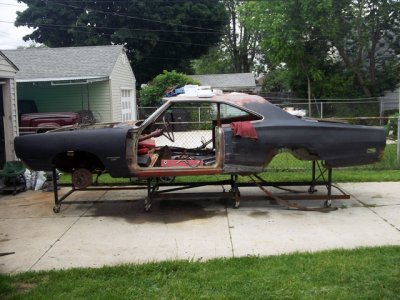
 
Heck of a jig.. If it has the same quality of work that smyythe68 has been putting into his Charger, you got yourself one heck of a good jig Bigblock61. Really cool seeing FBBO members get together and buy/trade/use ideas and equipment from each other to bring these cars back to life. Amazing how much this site and its members have grown just over the past few years. Good stuff!

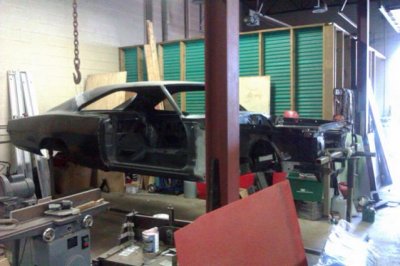
It really is a quality jig. I finally finished placing the jig under the Coronet today. I guess I did a good job of aligning my frame rails when I replaced them because The frame alignment holes dropped right into place.

It really was cool meeting Smyythe68 and getting the jig from him. He is a very talented fabricator as witnessed by his work. I can't wait to see his radio that he's working on for the Charger, come to life. Come on Ryan get that faceplate working! LOL

This just makes me want to meet more people from this board. :) Maybe a get together at a Dennys or something.

FrameJigMounted.jpg

- - - Updated - - -

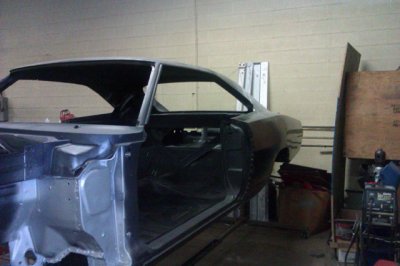
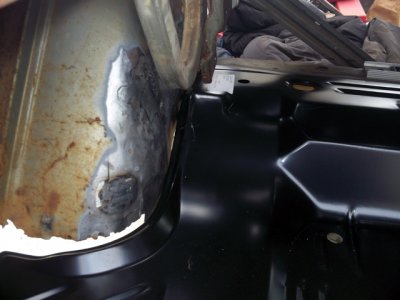
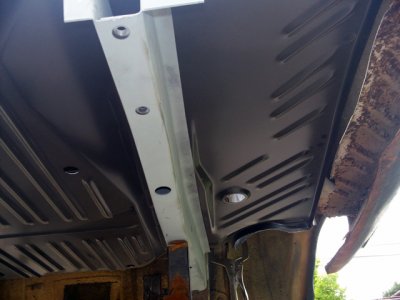
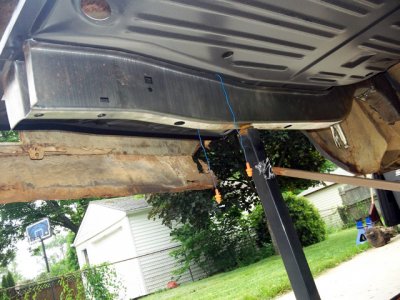
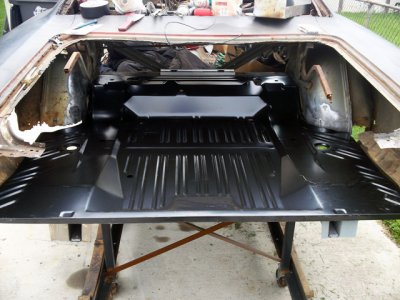
Here are some pictures for Moparjohnny. He wanted to see how my Trunk Floor from Shermans fit into the Coronet. It looks like it will fit real nice when I'm ready to weld it in.

TrunkFitment_1.jpg

TrunkFitment_2.jpg

TrunkFitment_3.jpg

TrunkFitment_4.jpg
 
Looks Great man. Great fit on that trunk and rails butt up real nice as well. Keep'er rolling!!
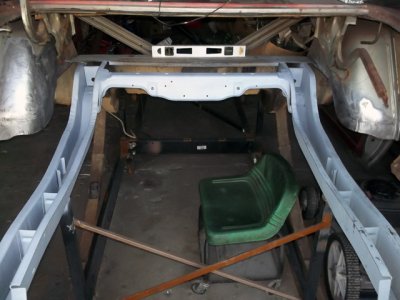
 
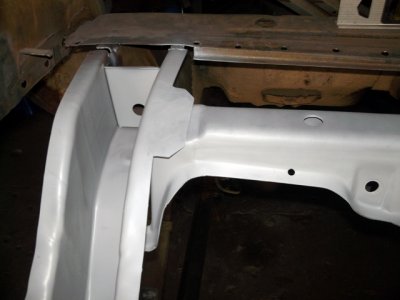
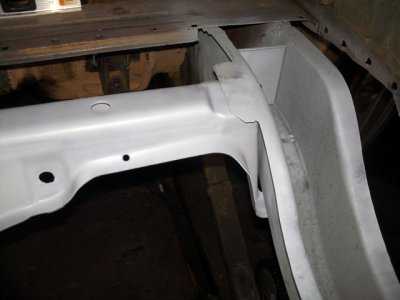
The work continues! I got the left inner wheel well patched. I got some trunk hinge braces coming from moparmarks. I can't wait till they get here. once they arrive I'll be able to weld them in place and finish the inner wheel wells. I got the shock cross member cleaned up and welded back into place. Then I sprayed the frame rails and cross member with etching primer. Not bad for a few hours work.

ShockCrossmember.jpg

ShockCrossmember_L.jpg

ShockCrossmember_R.jpg
 
Auto Transport Service
Back
Top