• When you click on links to various merchants on this site and make a purchase, this can result in this site earning a commission. Affiliate programs and affiliations include, but are not limited to, the eBay Partner Network.

71 Road Runner Restoration Started

Life's little speed bumps....

Looking forward to it .. btw I think your next project should be a 70 Road Runner or 68 Coronet R/T convert


Sounds like a good plan to me!!!! :) Shoot me a PM

Sorry but I didn't get a chance to do the comparison of the consoles like I wanted to last night.

A thing called "life" intervened. My 36 year old step son is going through a divorce and is moving in with us. So we spent a good part of the afternoon and evening moving some of his stuff to a storage unit.

Who knows?? This could be a good thing. I could use a good helper in the shop. He's pretty mechanically inclined.

One other thing happened that was very good. Earlier in this thread, I posted a picture of the pistol grip shifter that was for my 70 Challenger. It is year specific and has a push in style shifter handle.

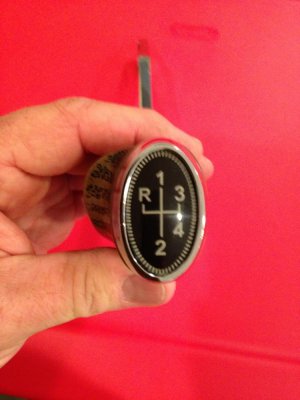
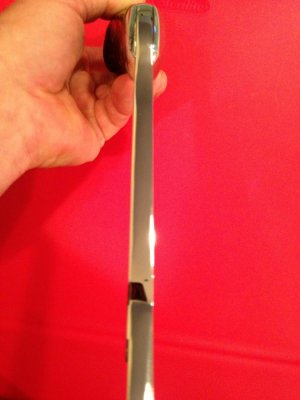
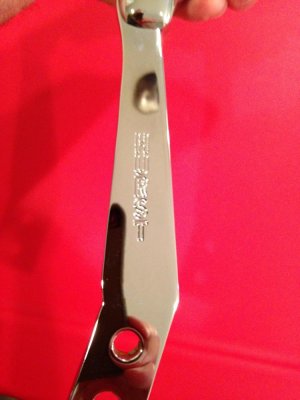
I was able to score a new licensed Hurst OEM shifter that was made on the original dies from eBay. This one has a bolt on shifter handle and is correct for the RR. Then I was lucky enough to win a very nice prototype for the current reproduction pistol grip shifter handle. This one is more like the original ones were as far as lettering and handle thickness.

Now I can keep the correct shifter for my Challenger.

When these parts come in I will post some photos for you all.
 
Console Comparison Old VS New

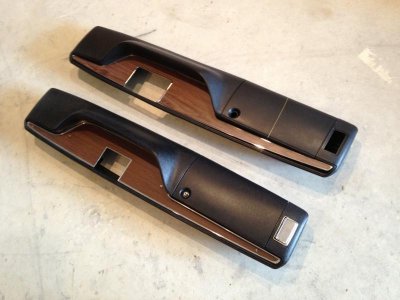
image.jpgHere is the side by side comparison I promised a while ago. The console on the top right is the new reproduction. It is also a 4 speed console so I will show the differences between automatic and 4 speed as well.
Follow along and I will explain the small differences in each picture.

- - - Updated - - -

image.jpgimage.jpgimage.jpg

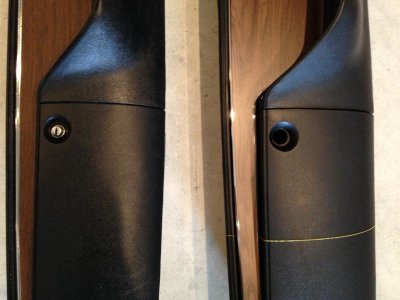
These pics show just how nice the reproduction console is.

The original is on the left in each photo. These are close ups of the ash tray area and console door. You can also see the slight difference between the wood grain in old versus new.

- - - Updated - - -

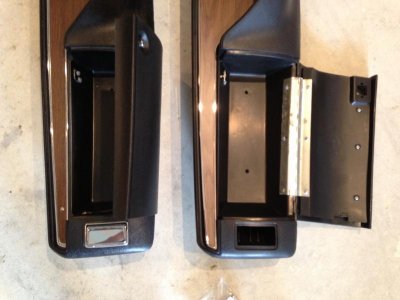
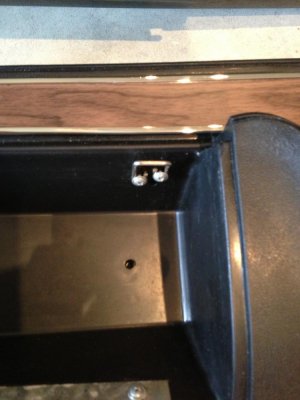
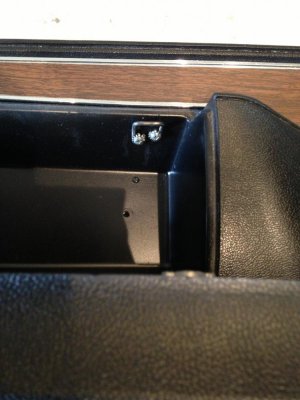
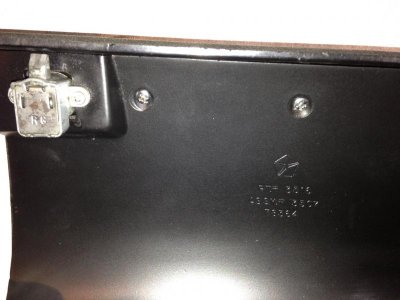
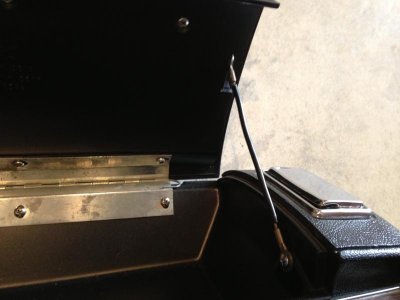
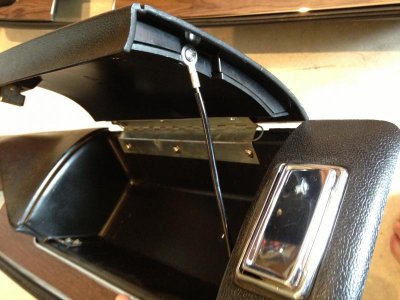
image.jpgimage.jpgThe new console did not come with the strap that limits how far the console door will open. It does not have the ash tray or ash tray trim bezel. The console door does not have the push button lock either. However, it does have the latch that the lock engages when the door is closed. I'm pretty sure the ash tray and trim bezel is now available aftermarket. You will probably have to find an original, or fabricate a strap though.
The original is in the second photo.

- - - Updated - - -

image.jpgimage.jpgThese pictures show the difference with the lettering inside the console door.

The original has the "Mopar" Pentastar above the numbers, where the new one does not. There is a slight difference in the numbering too. The numbers are correct, the positioning is just slightly off.

- - - Updated - - -

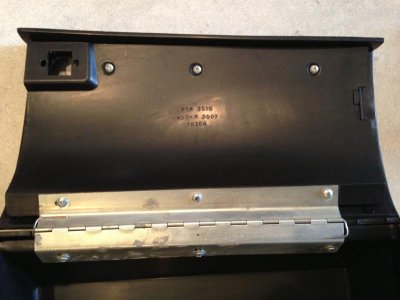
image.jpg

This is a picture of the door limiting strap. The new console does not have this part. There are provisions to install it . The new door hinge looks to be pretty good.

- - - Updated - - -

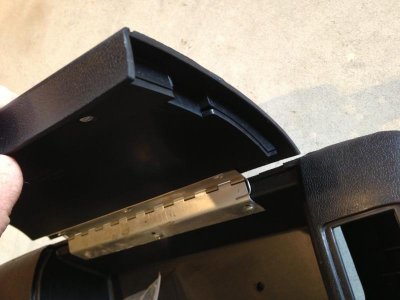
image.jpgimage.jpg

The original has the door strap. The new one does not. Other than that, it is very hard to tell them apart from this angle.

- - - Updated - - -

image.jpg

This shows the differences between the original which is an automatic, and the new which is a 4 speed.

Here you can also see the slight difference in the wood grain.

- - - Updated - - -

image.jpgimage.jpg

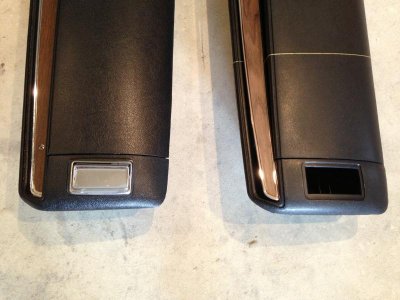
This shows the end of the console. The one with the ash tray is the original.

- - - Updated - - -

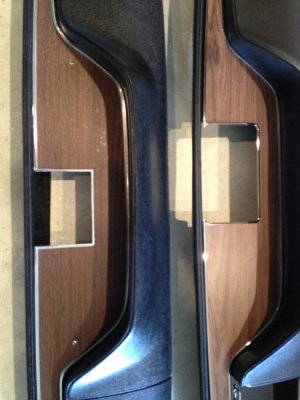
image.jpgimage.jpg

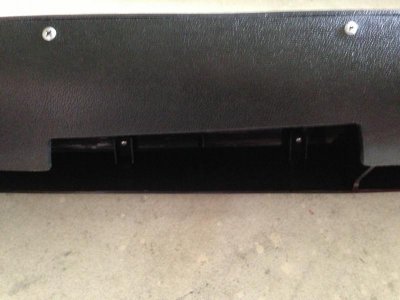
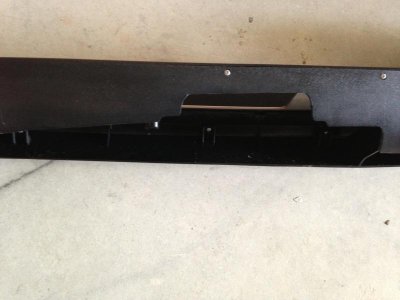
Here is a view from the driver side lower edge where the new one has a much larger cut out because it is a 4 speed. This looks to be the only difference between an automatic VS a 4 speed console. Everything else appears identical.

There you have it.

I am very pleased with the quality of the new console. I had to purchase the top plate from a different vendor, but they fit together nicely.

For everything but a 100 point concourse car, I think the new one will be just fine.

I'm expecting some shifter and grill parts to arrive later today.

If they do, and I have the time, I will post up some photos for you.
 
Last edited:
Great job on the comparison !! Really shows the differences and similarities off well.
 
More parts came in over the last few days.......

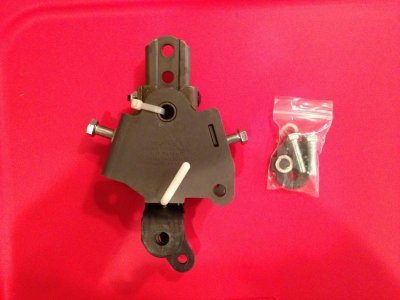
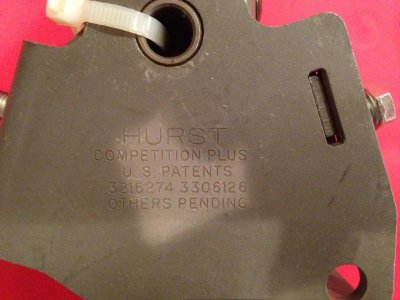
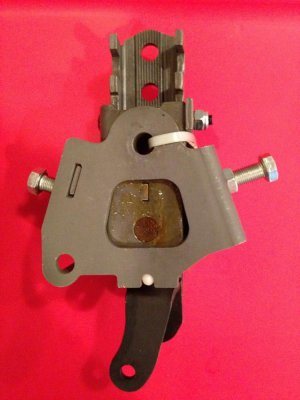
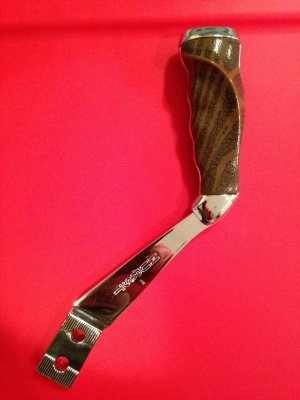
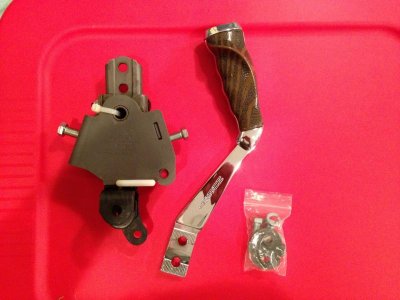
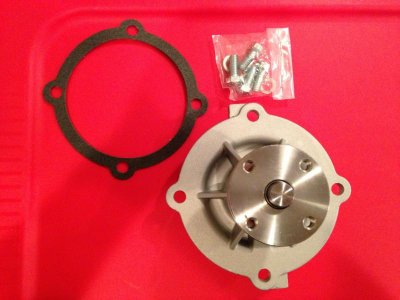
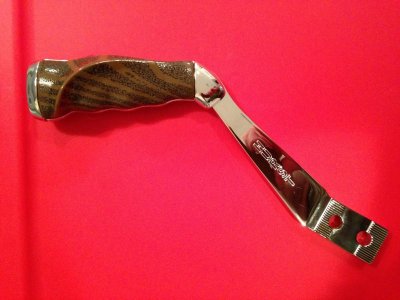
image.jpgimage.jpgSeveral items came in that I have been anxious to get. The Hurst Competition Plus shifter mechanism arrived as well as the prototype pistol grip shifter handle, aluminum high volume water pump, more head light adjuster screws / springs, and the grill mounting hardware kit.

Here are some pictures for you guys...

- - - Updated - - -

image.jpg

This is the shifter mechanism. It was built using the same tooling as the originals. The shifter levers have the same numbers as the original did.

- - - Updated - - -

image.jpgimage.jpgimage.jpgimage.jpgimage.jpg

These photos show the shifter mechanism and the new pistol grip. This pistol grip was supposed to be a limited run prototype for Hurst when they started making the new reproduction ones. When I bought it, the seller had photos of this handle next to a current reproduction one. You could see that the lettering was different and the shifter stock was thicker and tapered down at the handle end. The seller claimed that Hurst declined to use this one for production because of the additional costs involved with making the handle taper slightly.

I don't know if the story is true, but it made sense and you could see the difference with the handles side by side. Anyhow I got it a little cheaper than the current ones sell for and it's a nice handle.

Now I can keep the slip in pistol grip shifter set up for my 70 Lime Green Challenger.

- - - Updated - - -

image.jpgimage.jpgimage.jpgimage.jpg

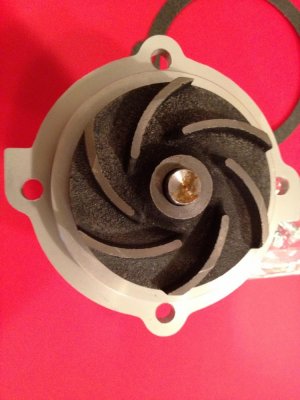
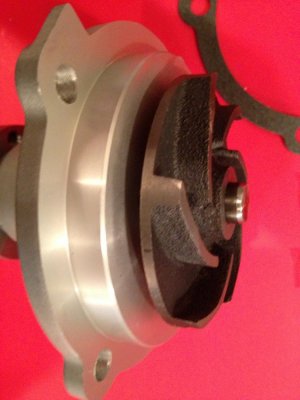
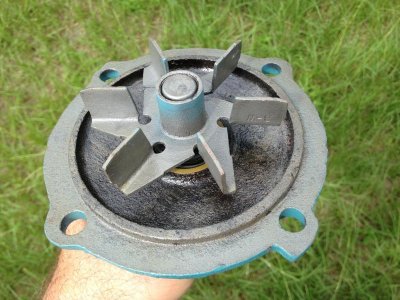
These pictures show the new high volume aluminum water pump and a comparison showing the impeller on a stock unit.

The impeller on the high volume pump looks like the impellers used on the pumps in our Fire Engines.

I now have aluminum 440 source Stealth heads, an aluminum water pump housing and a high volume water pump for the Bird. I'm still debating down the road what route to take for the radiator.

Do I go with an aluminum one or do I get a 3 or 4 row Brass / copper one that looks stock?????

My car had a 22 inch radiator from the factory but I will be changing over to a 26 inch unit.

I want the car to look "stock" but be a sleeper. Only the sound of the engine will give it away....

The water pump pulley will hide most of the aluminum water pump.

- - - Updated - - -

image.jpg

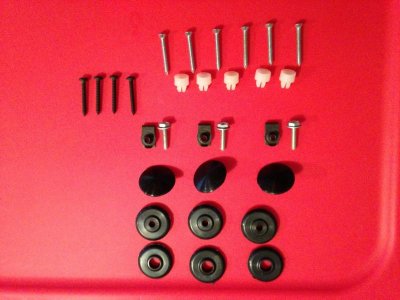
This is the new grill mounting hardware. It includes everything needed to properly mount the grill. On my car the grill was laying in the back seat and trunk when we picked it up. All of this stuff was missing.

- - - Updated - - -

image.jpg

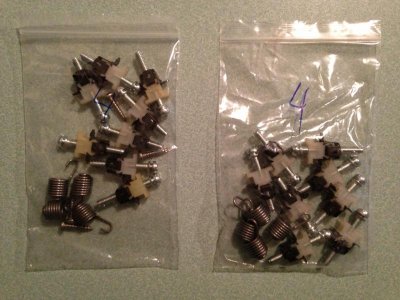
A complete head light adjuster screw and spring kits arrived today as well. I glass beaded the original spring, but I wasn't happy with how they turned out.

Now I have found a supplier and I bought a bunch of the original style clips and springs. I have enough on hand for quite a few cars. If you need any, shoot me a PM.

I don't have any excuses now, so I need to finish up the head light buckets from before.

- - - Updated - - -

image.jpgimage.jpgimage.jpg

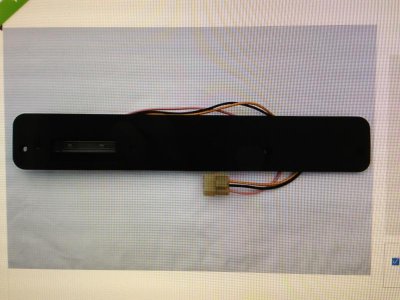
Finally, I've been watching this item for a while now and it's on sale at 10% off with free shipping.

It a new map light assembly that is a drop in bolt on type deal. It comes complete with a new switch, map lite lens and factory wiring.

Basically plug and play.

My original had a burned lens and was drooping in the middle.

I hate when that happens........

Anyhow that's all for tonight. I've been busy with yard work and trying to get the Duster finished. That's another reason I haven't had much posted with actual work on the RR. I've made up the final "punch list" on it and have a few more weeks of work to do on it. It's sold now and I want the new owner happy.

Hopefully soon I can start the complete tear down on the Bird, and get into some metal work.

Stay safe and have a great weekend.
 

Attachments

  • image.jpg
    image.jpg
    53.3 KB · Views: 718
Last edited:
image.jpg

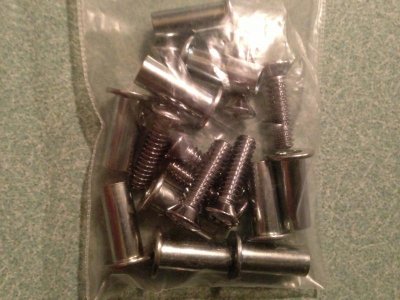
One more thing came in. These are the threaded inserts that the door mirrors are held in place with. I ordered enough for 3 cars.

I always replace these when I restore a car. Plus if you end up using a door that never had a rear view mirror, you can use these to install a rally mirror. This is pretty common occurrence on a passenger side door.
 
Keep on rockin and thanks for the updates. I hope you get that Duster done soon so we can check out your work on the RR
 
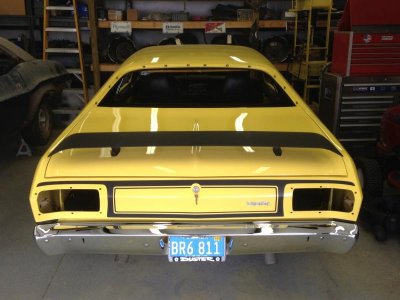
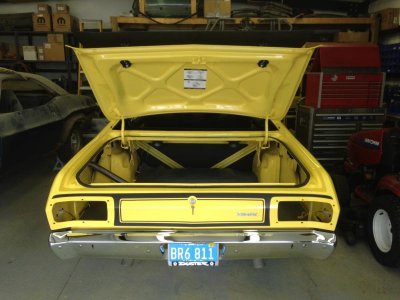
Duster rear view photos

image.jpgimage.jpgimage.jpg
Keep on rockin and thanks for the updates. I hope you get that Duster done soon so we can check out your work on the RR


Me too!!! Im sure it would make the new owner happy as well. He is a very nice gentleman who loves his cars.

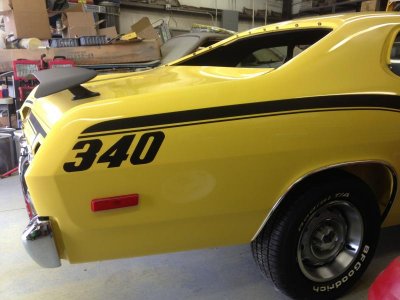
Here are a few pictures of the Duster from the rear. Hope you guys don't mind because its an A Body car.....

If you look close in the background you can see my 73 Challenger which serves as a storage table......
 
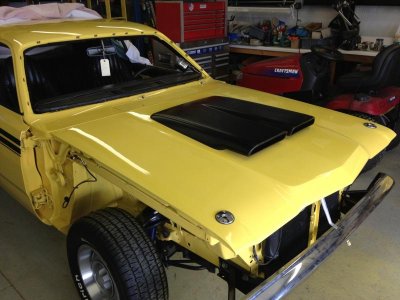
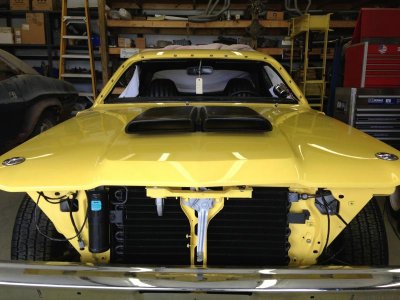
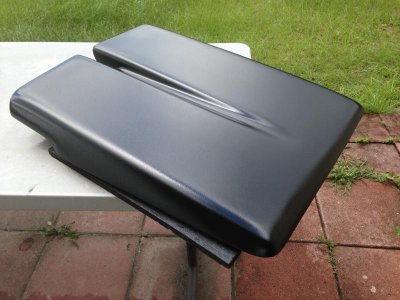
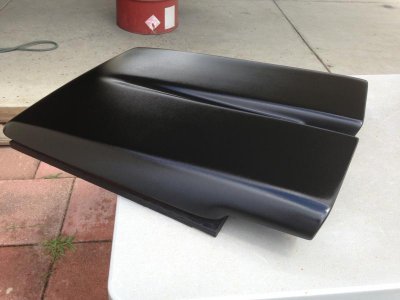
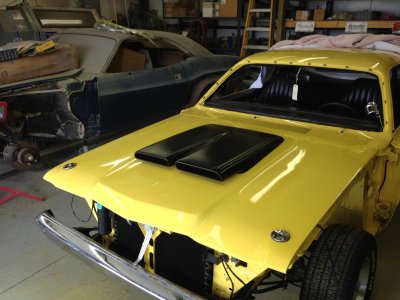
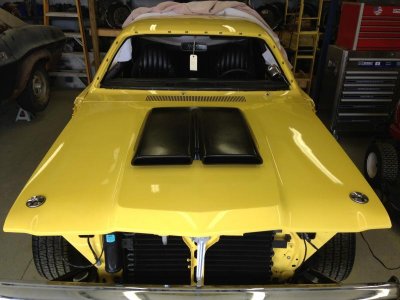
Sprayed & Installed the Factory Hood scoop today.

image.jpgimage.jpgimage.jpgimage.jpgimage.jpgimage.jpgToday I was able to spray the factory hood scoop and install it.

That means I'm one step closer to going all out on the Bird!!!!!!!
 
You go man. I have never had one of these Duster / Demon body styles with a 340 or 360. Wish I had over the years.
 
View attachment 128029Here is the side by side comparison I promised a while ago. The console on the top right is the new reproduction. It is also a 4 speed console so I will show the differences between automatic and 4 speed as well.

Follow along and I will explain the small differences in each picture.

- - - Updated - - -

View attachment 128030View attachment 128031View attachment 128032

These pics show just how nice the reproduction console is.

The original is on the left in each photo. These are close ups of the ash tray area and console door. You can also see the slight difference between the wood grain in old versus new.

- - - Updated - - -

View attachment 128034View attachment 128033The new console did not come with the strap that limits how far the console door will open. It does not have the ash tray or ash tray trim bezel. The console door does not have the push button lock either. However, it does have the latch that the lock engages when the door is closed. I'm pretty sure the ash tray and trim bezel is now available aftermarket. You will probably have to find an original, or fabricate a strap though.

The original is in the second photo.

- - - Updated - - -

View attachment 128035View attachment 128036These pictures show the difference with the lettering inside the console door.

The original has the "Mopar" Pentastar above the numbers, where the new one does not. There is a slight difference in the numbering too. The numbers are correct, the positioning is just slightly off.

- - - Updated - - -

View attachment 128037

This is a picture of the door limiting strap. The new console does not have this part. There are provisions to install it . The new door hinge looks to be pretty good.

- - - Updated - - -

View attachment 128038View attachment 128039

The original has the door strap. The new one does not. Other than that, it is very hard to tell them apart from this angle.

- - - Updated - - -

View attachment 128040

This shows the differences between the original which is an automatic, and the new which is a 4 speed.

Here you can also see the slight difference in the wood grain.

- - - Updated - - -

View attachment 128041View attachment 128042

This shows the end of the console. The one with the ash tray is the original.

- - - Updated - - -

View attachment 128043View attachment 128044

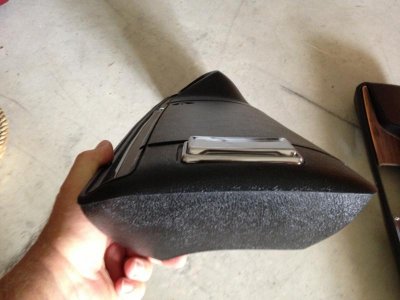
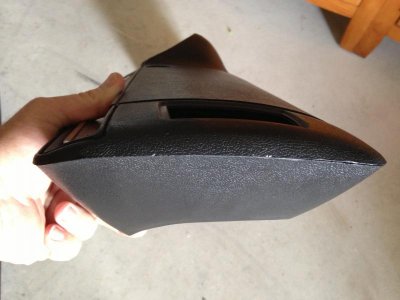
Here is a view from the driver side lower edge where the new one has a much larger cut out because it is a 4 speed. This looks to be the only difference between an automatic VS a 4 speed console. Everything else appears identical.

There you have it.

I am very pleased with the quality of the new console. I had to purchase the top plate from a different vendor, but they fit together nicely.

For everything but a 100 point concourse car, I think the new one will be just fine.

I'm expecting some shifter and grill parts to arrive later today.

If they do, and I have the time, I will post up some photos for you.

Cool shots & detailed description of the console differences, good to know How much for the full reproduction & is the old one for sale & how long is it, I don't know the 71's like the 66-70's...

- - - Updated - - -

Both cars are coming along nicely... keep up the good work

- - - Updated - - -

Christmas in July :icon_santa:

yeah it is...
 
Back in the day my wifes brother bought a new Duster, i cant remember the year though and thinking it was 73, My wife (girlfriend then) and i would go and pick his girl friend up and at the time i drove a 69 RR, so we would take his Duster, save my gas and drive a brand new car lol it had a slant 6 but seemed pretty peppy, it was a nice car.. That scoop looks good on that one.. I always liked the Dusters, my favorite of the A-Body cars.
 
My younger brother's Demon

I've always liked the Duster's too. Years ago my younger brother had a 71 Demon that started out with a slant six and a 3 speed on the floor. That lasted all of about a week before we pulled the 6 out and dropped in a nice little 318. The car had a set of 3.91 gears in the tiny 7 1/4 rear.

Dad told us "Be careful now since you dropped in that V-8. The car will move out a lot better now than it used to. Remember it has a small rear end in it.... If you go hammering on it you're gonna break something."

So with my brother riding shotgun, before we even hooked the headers up, I had to take it for a quick spin around the block (of course).

Dad was sitting in a lawn chair watching me very close as I idled the car out of our yard.

First thing I did was wave at Dad and then I dumped the clutch at about 4,000 RPM with the car sitting still. The skinny tires just started hopping like crazy and the back of the car disappeared in smoke!!!!

Dad just shook his head........... He probably expected it coming from me..... He called me an @#*hole when I returned, and then we all laughed like crazy. I'm sure our neighbors loved us !!!!!

Later we ended up pulling the 318 and dropped in a sweet 440 with a tunnel ram, that had a Mr. Gasket street scoop and 2 big Holleys sitting on top of it. My brother tubbed it out and we put in a narrowed 8 3/4 with a set of 4.56 gears.

He added a set of polished Weld Wheels with Mickey Thompson steam rollers out back and pizza cutters up front so they could clear the Hooker fender well headers. The car looked very intimidating. I'll see if I can find any old photos for you guys.

The Demon and this Duster are the only 2 A body cars we ever owned. Everything else was either a B, E, or C body Mopar. Unless you count our old Power Wagons......
 
Cool shots & detailed description of the console differences, good to know How much for the full reproduction & is the old one for sale & how long is it, I don't know the 71's like the 66-70's...

- - - Updated - - -

Both cars are coming along nicely... keep up the good work

- - - Updated - - -


yeah it is...

The console measures about 44 1/2 inches long, and is about 9 inches wide.

Brewers Performance sells the complete console assembly for a 71 -74 B or E body car for $499.95 plus shipping. I wish I would have known that before I ordered mine, it would have been cheaper in the long run rather than buy it part by part like I'm doing. The 70 E body console is by itself and has no ash tray in the back. The automatics used a different shifter too. The 70 had a round wood grained ball while the 71 and newer had a T handled shifter.

Brewers sells pretty much everything for the earlier consoles like you need for your car. The bare console is $259.95 and then you have to add everything to it like the top plate, door, key assembly etc. It adds up pretty quickly. I don't know of anyone who sells the assembly complete for your car just yet. Maybe someone on here can direct us, because I have a friend with a 69 Charger that is looking to put one in his car too.

I don't want to sell my used console. It belongs to the blue 73 Challenger you can see in the background of the last Duster pictures. I've been thinking about selling the Challenger with the new parts, a 440 with new trans and everything that goes with it to fund the restoration of the Bird. The man I'll be using to install the windows in the Duster seems to be interested in it. If he doesn't buy it I may list it here on FBBO. Not sure if I want to sell it yet, just thinking about it for now.


Thanks for the compliments on the post and the cars.

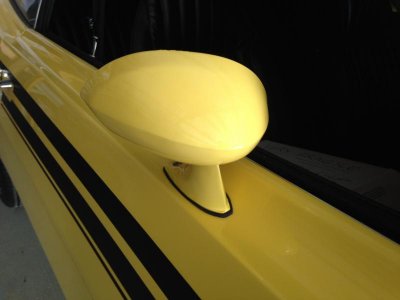
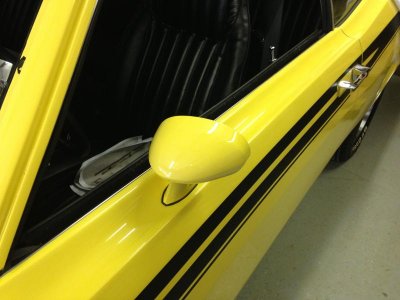
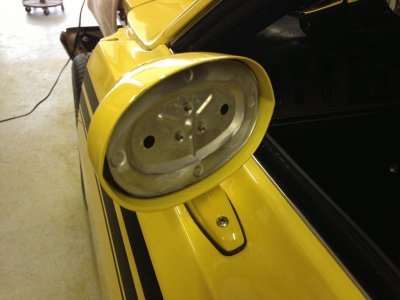
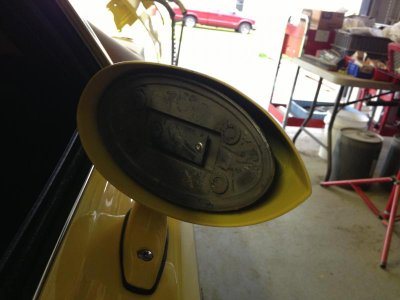
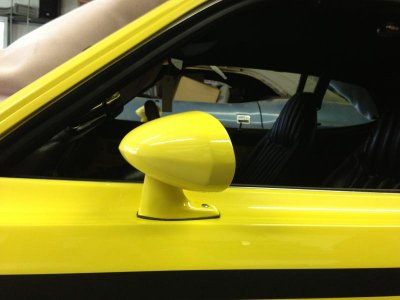
I was able to mount the Rally Mirrors on the Duster after the hood scoop was done. It was a very productive day. Need more days like today......

- - - Updated - - -

image.jpgimage.jpgimage.jpgimage.jpgimage.jpg

If I would have thought about it earlier I could have taken some pictures of how the mirrors go back together. I had them completely disassembled for painting. They go back together just like any other B or E body rally mirror from 70 through 74.

It would probably be best to start with disassembly first though. I did that several months ago. It's something I can post later when I restore the mirrors on the Bird.

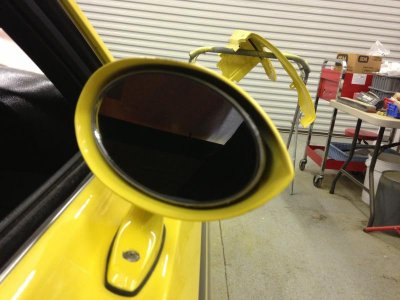
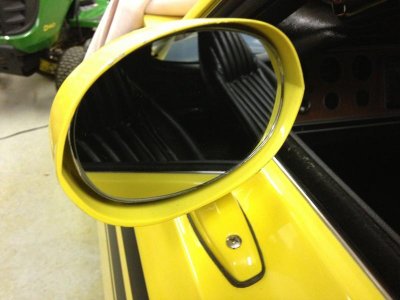
I always put in new mirror glass so that's why it's missing in these pictures. Right now the urethane should be through drying.

I will head out back and take a few more pictures that show the new mirror glass. They always look best if you can install new glass.

- - - Updated - - -

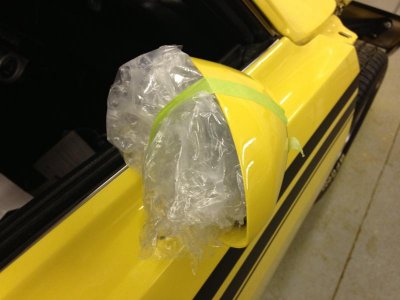
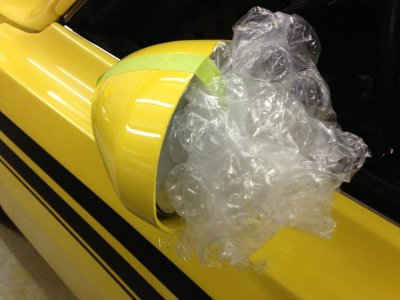
I use bubble wrap to hold the new mirror glass in position while the urethane sets up. I tape the bubble wrap in position so that it holds firm pressure against the glass. That way it sets up nice and tight against the mirror head. When the urethane has set up, I simply remove the tape and bubble wrap.

- - - Updated - - -

image.jpgimage.jpgimage.jpgimage.jpgHere are a few before and after shots showing how the bubble wrap is used.

Just be careful with the application of the urethane. A little dab goes a long way and is a real PITA to remove from freshly painted surfaces.

I always worry that I will mess it up.
 
Cool tips on the mirrors .. what kind / brand of urethane?

How do you get the old mirrors out of the housing?
 
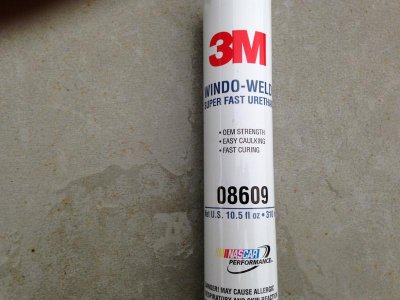
3M Window Weld 08609

image.jpg
Cool tips on the mirrors .. what kind / brand of urethane?

How do you get the old mirrors out of the housing?


This is what I use. Stuff works great.

I'm taking apart another B Body Rally mirror and snapping some photos for you all along the way. One particular spot is pretty trick and if your not careful you can break a piece off.

As far as glass removal..... First I order new mirror glass and place it on top of the original to make sure it will fit properly. Then it's just a matter of breaking the old stuff out using a small hammer and screwdriver. Clean off all of the original adhesive from the mirror backing plate.

- - - Updated - - -

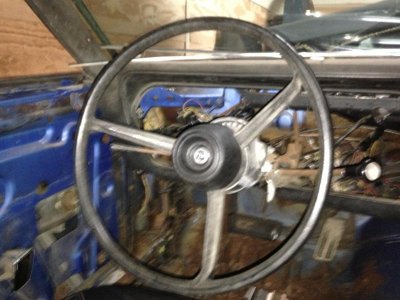
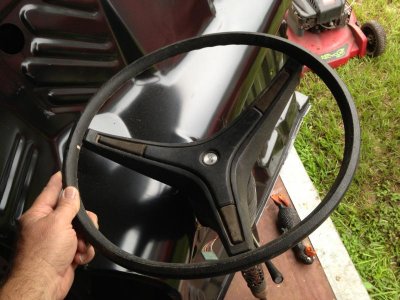
I pulled a steering column out of storage today because I needed parts from it to convert my original column shift automatic steering column over to a floor shift version. To my pleasant surprise it has a deluxe 3 spoke steering wheel.

Im looking for some feedback.

Here is my question for you guys.

Do I keep the original steering wheel or upgrade to the one I forgot that I had???

Here are the pictures. Please let me know what you think.
 

Attachments

  • image.jpg
    image.jpg
    66.3 KB · Views: 659
  • image.jpg
    image.jpg
    73.3 KB · Views: 657
Auto Transport Service
Back
Top