• When you click on links to various merchants on this site and make a purchase, this can result in this site earning a commission. Affiliate programs and affiliations include, but are not limited to, the eBay Partner Network.

Finally Started My Restoration of my 68 GTX

great project. glad to hear the boy is interested.
 
Thanks, and yes he is very interested he spends most of his time just jumping into every part of it. I have to tell him to sloooww down most of time and start 1 thing and complete it. I am very happy he is so interested, with my work schedule jumping around so much right now it is hard for me to really get some stuff done. We will have more pics by the weekend and you will see how much he really is into this project.

Thank You Josh (my son)


great project. glad to hear the boy is interested.
 
with my work schedule jumping around so much right now it is hard for me to really get some stuff done.


I feel your pain! I work 21 turn. I've been doing a V6 5 speed to V8 auto swap on my truck, and instead of a couple days, it's going on a month.
 
Very cool! Great to hear you're grabbing the bull by the horns and bringing her back. Best of luck on your Plymouth and I look forward to watching your '68 come back to life.
 
Thanks, and yes he is very interested he spends most of his time just jumping into every part of it. I have to tell him to sloooww down most of time and start 1 thing and complete it. I am very happy he is so interested, with my work schedule jumping around so much right now it is hard for me to really get some stuff done. We will have more pics by the weekend and you will see how much he really is into this project.

Thank You Josh (my son)

Cool you son is helping. Looking forward to reading you updates.
 
Very cool thread! I'll be following this one with interest. :D Before you know it, YOU'll be inspiring others to do the same. Sometimes it takes awhile ...

April 9, 1991.jpg

... but the results are worth everything.

August 19, 2010 - 1000 x 768.jpg
 
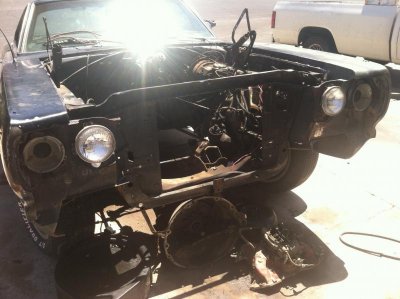
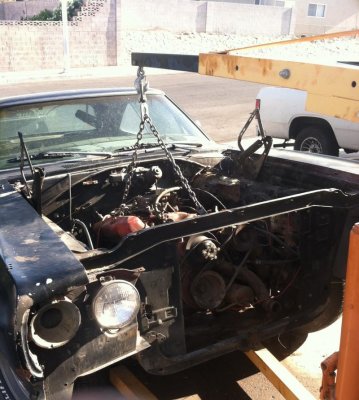
Time for a couple of updates before I head to work. Josh (my son) got the motor out


IMG_0760.jpg IMG_0761.jpg
IMG_0764.jpg IMG_0781.jpg


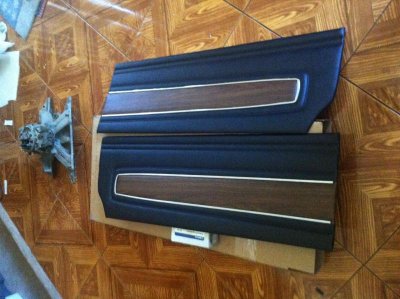
Got a few more parts in last week, here are the PUI front door panels, chrome polished and installed on the panels.

IMG_0779.jpg

The rear panels will be here next week a shipping bleep was made and they should have all been sent at the same time.
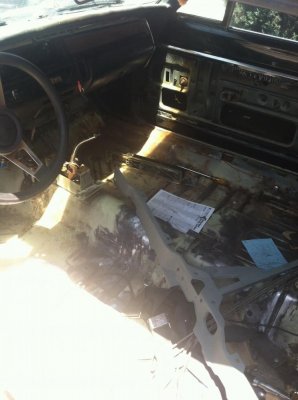
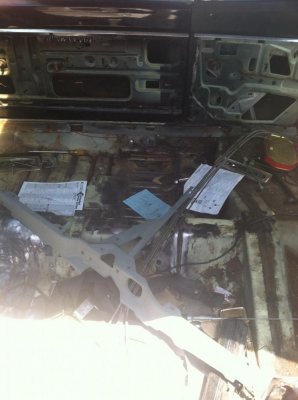
Interior is almost complete just need seat covers and detail everything else.

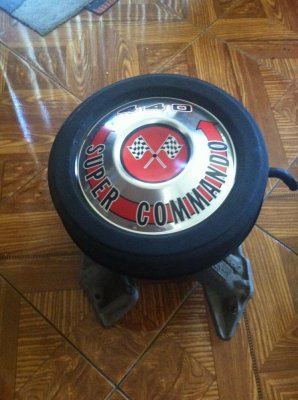
Factory air cleaner (used) and the pie tin is NOS from a Chrysler dealer back east.

IMG_0780.jpg

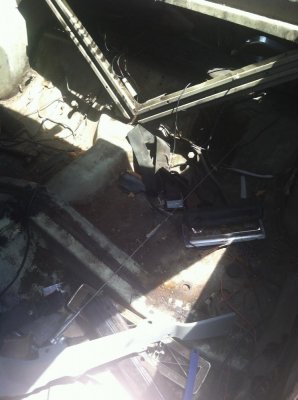
More inside pic's
IMG_0783.jpg IMG_0784.jpg IMG_0785.jpg

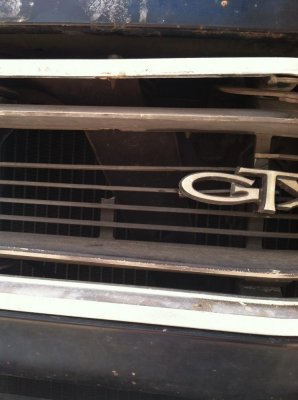
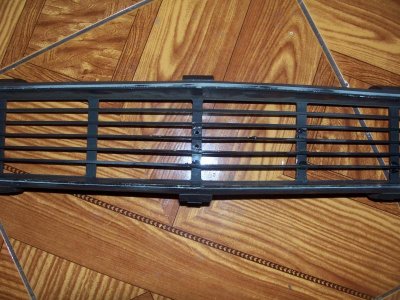
Grill.
It does have 2 broken pieces I still have 1 and the other piece came from Jay (wannadrag) Thank You jay.
IMG_0786.jpg

More soon......


Ed

- - - Updated - - -

That is one sweet cuda. and yes I believe the results will be well worth the wait.

Thanks CudaChick


Very cool thread! I'll be following this one with interest. :D Before you know it, YOU'll be inspiring others to do the same. Sometimes it takes awhile ...

View attachment 117297

... but the results are worth everything.

View attachment 117298
 
What a great project, love the part of your son being interested. My 15 year old grandson helps me every weekend and now he is asking if he is going to be able to drive my cars, I left him drive my diesel pickup instead.
 
Good progression of work. It's nice when your son is excited and anxious to work on the car.
 
Yeah, I think he will be asking to drive my 68 also. He MIGHT only get to drive it with adult supervision ONLY!! at this point but who knows when it is completed I might change my mind. Especially with all the heart and soul he is putting into it. He has been a real getter er done kinda kid.
What a great project, love the part of your son being interested. My 15 year old grandson helps me every weekend and now he is asking if he is going to be able to drive my cars, I left him drive my diesel pickup instead.
 
Yeah, I think he will be asking to drive my 68 also. He MIGHT only get to drive it with adult supervision ONLY!! at this point but who knows when it is completed I might change my mind. Especially with all the heart and soul he is putting into it. He has been a real getter er done kinda kid.

68GTX440, "you got to let him drive it", that's part of the deal isn't it, especially between fathers & sons, my step father Bob let me drive his race cars even, but with "ADULT Supervision ONLY" of course, or at-least until they can prove, they can be truly responsible & not like the A-typical LEAD FOOTED teenage boy...
 
What do you guys recommend for gluing my grill back together? I am starting the resto on the grill.
Grill.jpg

I actually found all the original missing pieces and ready to fix it.

Thanks

- - - Updated - - -

My son Josh says thanks for supporting him!! He will more than likely get to drive it with adult supervision only at first..... We will see how it goes <LOL>

68GTX440, "you got to let him drive it", that's part of the deal isn't it, especially between fathers & sons, my step father Bob let me drive his race cars even, but with "ADULT Supervision ONLY" of course, or at-least until they can prove, they can be truly responsible & not like the A-typical LEAD FOOTED teenage boy...
 
This may sound weird but there's some great epoxy for fixing Golf clubs, called Golfsmith Van Epoxy it's strong & quick drying {30 minutes}, or you can use the 12 or 24 hrs epoxies too, can get it from Golfsmith, in the "club making" dept. under tools, works great on different metals, pot metals, aluminum, titanium, plastic, even fiberglass or carbon fiber too, you may want to buy the syringe dispenser gun too.... www.golfsmith.com

- - - Updated - - -

as long as it's not exposed to 250*-300* heat for an extended period of time, it works great, I've used it for many different repairs...
 
You could check out 747's resto thread as well. He just posted a "how to" on fixing a grill. The stuff budnicks is posting looks pretty decent too.
 
This may sound weird but there's some great epoxy for fixing Golf clubs, called Golfsmith Van Epoxy ...

- - - Updated - - -

as long as it's not exposed to 250*-300* heat for an extended period of time, it works great, I've used it for many different repairs...

Dang it ...... sounded good until that last part. Guess I continue to be happy with my High Temp Metal Filler. :D
 
Went to Wal Mart, Autozone and Oreilly and none to be had, So I did find some Gorilla epoxy glue. I have had good luck with the Gorilla brand so I figured what the heck I'll give it a try. Thanks Propwash and Budnicks for the suggestions. You know here in Las Vegas it does seem like it does get to 300 degrees so maybe I should go with Cudachicks High Temp filler.......
 
I knew that we could find other uses for these...

IMG_0907.jpg


The usual place for crack. I am also repairing this along with the Grill

IMG_0908.jpg

Josh is polishing this to see how well it comes out to see if it needs re-chromed.

IMG_0910.jpg

We will post pics when these are done (hopefully tomorrow)
 
Finally a 1 piece grill. Still have to do finishing touch up but we are very happy with it so far.

Grill 1 .jpg


Copied this from somewhere on the net (forgot where) Is this correct for the paint on the grill? 1 of our local auto parts store (Charleston Auto Parts) does paint mixing and said they can do this. Just want to make sure before I have them mix it.

c/p
Chrysler used two shades of this highly textured Argent paint-light and medium-and they were the only manufacturer that used them at all. The Light Textured Argent, part number DX 8555, is obsolete. The Medium Textured Argent, part number DNA 8933, can sometimes be found at larger, older Ditzler dealers. Last used in the mid 1970's, it is now all but obsolete. Older Ditzler dealers that have remaining stock can mix this paint for you, but it can also be mixed from currently available paints. Here's how.

LIGHT ARGENT TEXTURED

Ingredients for 1 pint (double for quart)
1/2 ounce DX 204- Radiance Silver
1/2 ounce DDL 8568- Non Smudge Aluminum/aluminum base
3 1/2 ounces DCA 468 High Performance Clear

Add 4 ounces of top grade lacquer thinner with drying time according to temperature. Mix thoroughly and pour in 1 pint touch up gun. Use 10 clean 1/4" ball bearings in paint cup to keep the paint mixed. Use three light coats over an existing finish or four to six coats over unfinished parts. This paint runs VERY easily, allow 5-10 minutes between coats.

MEDIUM ARGENT TEXTURED

The steps are exactly as above, but add black lacquer to darken. Start with six drops per pint and stir thoroughly, then spray a sample to compare to the original finish. Add a drop at a time until you achieve the correct tint.
end c/p
 
Great work! Stepping right into your restoration in style.


Thanks for the argent formula info. Bookmarked for future reference.
 
Auto Transport Service
Back
Top