• When you click on links to various merchants on this site and make a purchase, this can result in this site earning a commission. Affiliate programs and affiliations include, but are not limited to, the eBay Partner Network.

My 1967 Belvedere Convertible Plans and Restoration (aka - Mad Scientist Build)

Getting it right . . . a slow process . . .

Spent the night working on the level and squareness of the brackets . . .

Dropped a plumb bob from the bottom hole in the bracket to the ground, and from the stop hole on the front suspension.
( will test with the strut rod holes tomorrow - after I clean the grease out of them )

Measured diagonally across to the points and the measurement was dead on - GREAT NEWS ! !
Had level yesterday with a square tube in the bottom holes of the bracket last night ( BUT ) the tub would not go through the outside DR hole . . . NOT GOOD.
If I run the tube, passenger side to driver side - it lines up pretty well with the hole on the driver side . . .
BUT - if I run the tube through the driver side, the tube is UNDER the passenger side ( so my driver bracket is high left, low right )

FOUND where it was hitting and not allowing movement up on the inside edge . . . removed bracket - ground down bad area . . . good to go . . .

NOW I can get the square tube to pass through all 4 holes in the brackets . . . YEAH . . . but the level show 3 degrees low on passenger side . . .

Trying to work through the details and figure out how to make it all "RIGHT" . . . I'll get there . . . no welding done yet . . .
 
Judging from what I'm hearing your probably being pickier than they ever were at the factory so I'm sure it will come out great. Now let's see some sparks fly.
 
I respect that you're taking the time to "make it right" even if considered a bit overkill or unnecessary to be "dead on perfect" the fact that that's what you are striving for is going to be a testament to what you get as a finished product with this car! May seem like a pain in the *** now but when that thing is gleaming in your driveway and flying down the road straight as an arrow you'll be able to look back at the pages in this thread and know you did right by yourself!!

Cheers to you brother!
 
Progress . . . like the way it's going . . .

Got another 2 hours in the shop on the spring relocation . . .

And the work went very well tonight. I found the (2) areas on the passenger side bracket that were causing the bracket to not sit quite right, and was able to get them cleaned up. After removal, grinding, bolt back on, removal, grinding, bolt back on . . . yadda yadda yadda . . . sounds like a broken record . . . think I got it about right . . .

Two more steps . . . run the rod through all (4) holes and see how they align . . . went through very smoothly . . .
then throw the level on the rod . . . 0.0 ! ! !

It's late, but I think I've got it where it needs to be - Tomorrow,
tack it in place,
check the level,
attach the springs,
check the alignment on the rear frames ( make sure they're even and square )

If all that checks out . . . then it'll be time to weld these bad boys in ! ! !

Then move on to the rear shackle fabrication ! ! !
 
Nice job! You have some patients.....that car will probably be the only 1967 that has suspension that is square and level! ahahahaha
 
Nice job! You have some patients.....that car will probably be the only 1967 that has suspension that is square and level! ahahahaha


Never thought of it that way KB67Mopar ! ! ! LMAO . . . Thanks for the kind words !
 
One step back . . . Two steps forward . . .

Anxious to get these front spring relocation brackets installed, I got everything in place, trued up, level, and ready to be tacked . . . then I remembered . . .

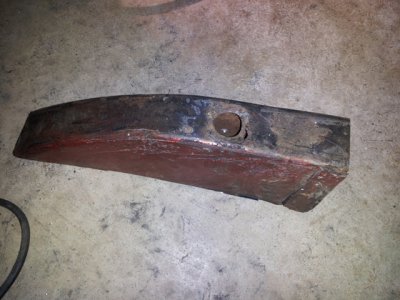
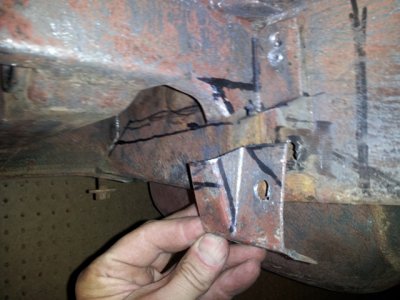
Here's the piece that was cut out of the frame . . . what you see . . . a weep hole ( drain hole )

sm_srinstall1.jpg

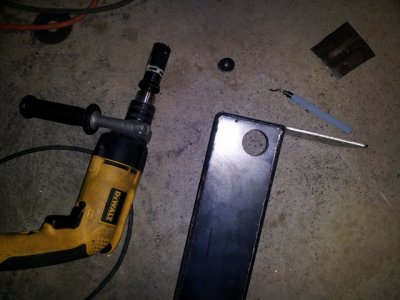
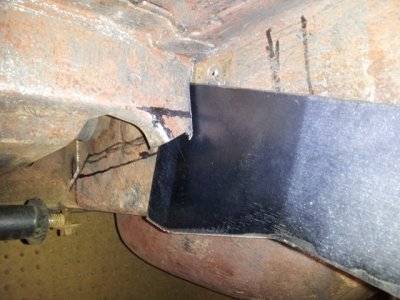
Needed to remove both brackets and add the weep hole . . .

sm_srinstall2.jpg

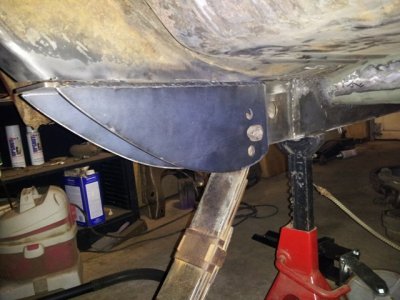
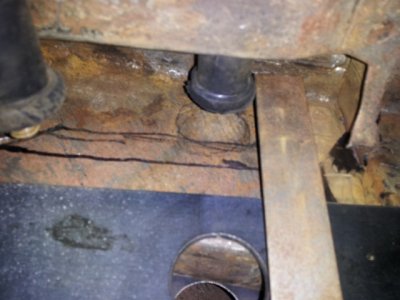
Got the driver side tacked in place . . .

sm_srinstall3.jpg

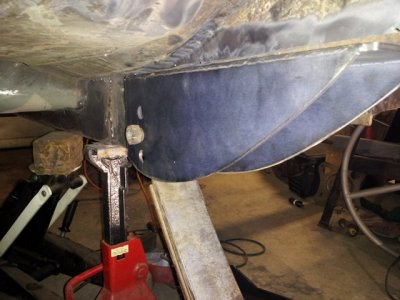
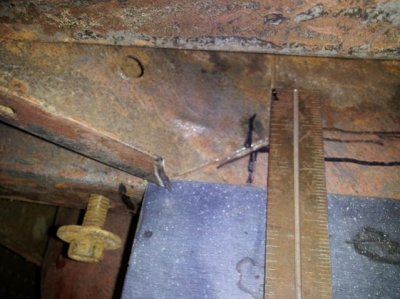
and the passenger side tacked in place too . . .

sm_srinstall4.jpg

Was a good night - that's my two steps forward ! ! ! YAY ! ! !


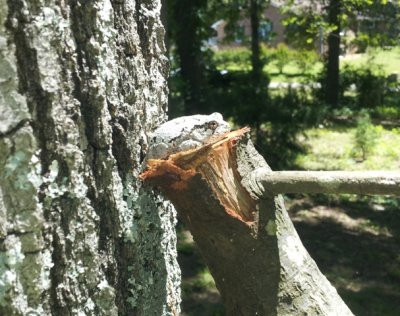
Found this little guy, tree frog, found an interesting place to rest . . . his perch is about 6 feet off the ground on a pruned branch top . . .

sm_treefrog.jpg

Just a neat place to find him . . . thought I'd share it with you . . .
 
I'm going to start calling you BEASTMASTER haha, you seem to like your critters. Looks good Kahn
 
Dang Kahn...You're like Marty Stouffer from "Wild America". Not gonna start getting chased up tree's by bears are ya?...lol
 
Front Spring Relocation brackets all welded in place . . . YAY . . .

Let's that a break from Mutual of Concord starring Khan-vertible and get back to the real thing . . . the Belvedere . . .

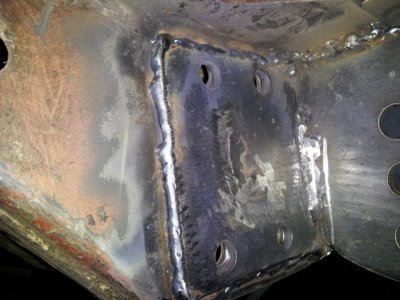
Got the driver bracket welded in place last night, and got the remainder of the passenger bracket welded up today . . .

Alright . . . who did this weld because it sure don't look like one of my welds ! ! !

sm_srweldeddone1.jpg

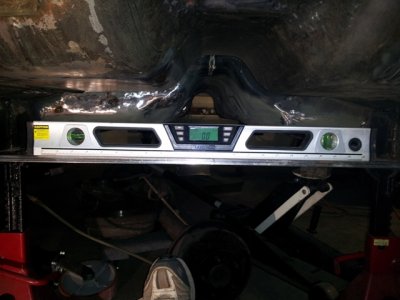
Then I tossed the level on the brackets to see how they ended up . . .

sm_srweldeddone2.jpg

ALRIGHT ! ! ! Can't get much closer than that ! ! !

Now to get the rear ones installed - these are going to be fun ! !

sm_srweldeddone1.jpg sm_srweldeddone2.jpg
 
Last edited:
Plans for the rear brackets . . . thanks to Chris at US Cartools . . .

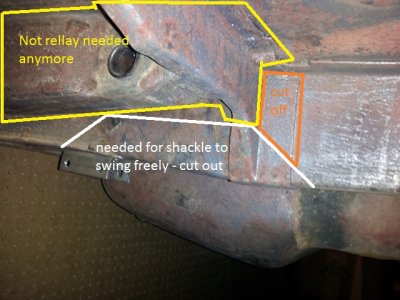
Here's the plan for the rear frame relocation brackets . . .

sm_rearbracketplan.jpg

As you ca see in the picture, the white area will need to be cut away to allow the shackle to swing properly.
ALL of the brackets that are surrounded in yellow are really no longer needed - and could be removed ( after I transfer the hole location to the other frame )

1) Transfer the hole for the sleeve to the new frame rail using a wooden dowel
2) Think I'm going to try and drill the holes out to allow the sleeve to be installed
3) Cut and remove out the are shaded in orange from the top of the frame rail ( you'll see why later )
4) Cut out the white area to allow the proper shackle movement
5) Test fit the new bracket from US Cartools ( it's a "cap" that goes on top the frame rail )
6) install the sleeve through the holes - position with the wooden dowel to keep position
7) Of course - modify, grind, get fitment correctly ( provide Chris feedback on new bracket )
8) Weld back into place ( area in orange will also be re-welded when attached )
9) hang springs ! !

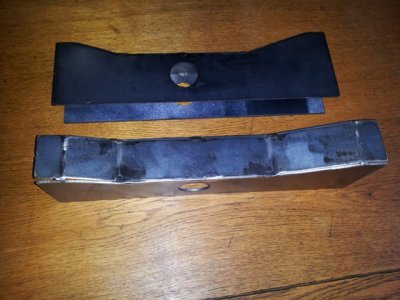
Here's what the "cap" looks like . . .

uscartools7.jpg

should re-locate my rear shackle attachments just fine ! !
 
Those are some nice pieces they put together for you, should do the job nicely just remember (cut 5 times measure once or something like that).
 
I finished doing what you're about to do a couple months ago...virtually the exact same steps. I didn't cap mine though - just cut the frame rail for movement and reinforced it w/ some thicker mat'l.

I had my spare tire well out when I drilled my holes, though...how are you planning on doing that?

What shackles are you planning on running? Note how you plan to install them since there's not much room that high. There's def a reason why most you see are simply drilled lower on the rail where it's easily accessible...
 
Back in the shop to work on the back relocation brackets . . .

Now that the fronts are done . . . time to move to the back brackets.

I called Chris last week and asked about the rear brackets, and the fact that it moves the mounting hole down ( and the car back end up ) and we talked about the amount of fabrication work that would be needed to get it the same level on this deeper frame rail. Then I drove up to Durham to meet Chris and discuss the rear brackets and he had ALREADY designed and built a prototype of this bracket as an option. This is all new - and I'm working my way through the install process to see what needs to be done.

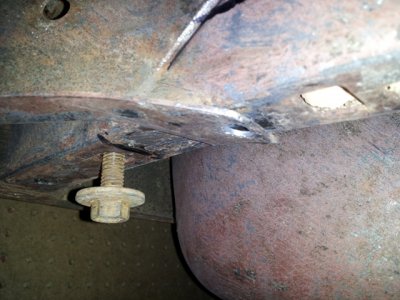
Here's what I've come up with so far . . . need to remove the spot weld on this bracket . . .

sm_rearsrbracket1.jpg

Then the end of it will be in the way . . . so I cut it off . . .

sm_rearsrbracket2.jpg

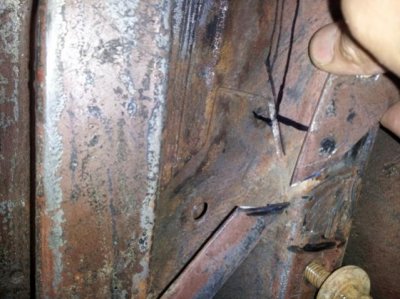
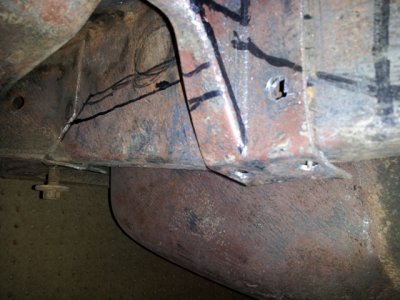
Then remove the spot welds on this additional bracket . . . Yeah. I got to doodling all over the frames trying to make sense of this

sm_rearsrbracket3.jpg

And the bottom of it will be in the way . . . so it got cut off as well . . .

sm_rearsrbracket4.jpg

The remaining top part needs the spot welds removed, and the bracket removed - it'll be in the way . . .
The end result - the new bracket "cap" will slide in behind the cut bracket ( I'll weld it back in after the cap is installed )

sm_rearsrbracket5.jpg

Now to position the bracket and line up the holes to mark cuttings . . . used the outside edge of the bushings still in the holes . . .

sm_rearsrbracket6.jpg

This part of the rear bracket will be in the way - need to trim the "cap" to accommodate the bracket . . .

sm_rearsrbracket7.jpg

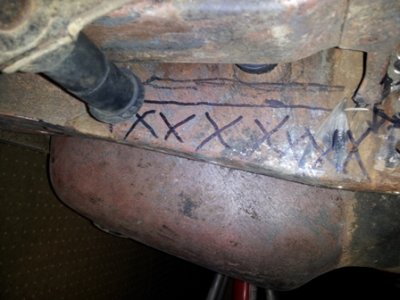
The plan is to cut away all the frame rail ( marked with X's ) to allow the shackle to move as on the original ( shorter ) frame rail . . .

sm_rearsrbracket8.jpg

Now, picture the X-outs cut out, and this slipped up into place . . . this should give the same movement for the shackle on this frame rail . . .

sm_rearsrbracket9.jpg

NOTE: I'm slowly trying to work my way through this process and figure out how to do it . . . this is really a new "thought" and "design" . . . I don't have all the kinks worked out yet, and I'll report back to Chris at US Cartools with my findings . . . maybe we can figure out the best way to make this all work . . .

- - - Updated - - -

I finished doing what you're about to do a couple months ago...virtually the exact same steps. I didn't cap mine though - just cut the frame rail for movement and reinforced it w/ some thicker mat'l.

I had my spare tire well out when I drilled my holes, though...how are you planning on doing that?

What shackles are you planning on running? Note how you plan to install them since there's not much room that high. There's def a reason why most you see are simply drilled lower on the rail where it's easily accessible...

Good question . . . Drilling is probably not going to work, I may just cut it out since the holes are already in the "caps" . . . then I can slide it up in place and weld it in . . . I'm still working my way through the thought process and how to make it all work . . .

- - - Updated - - -

Those are some nice pieces they put together for you, should do the job nicely just remember (cut 5 times measure once or something like that).


That made me laugh 747 Mopar . . . my pop would always say "darn it, I've cut this thing 4 times and it's still too short" . . . brings back good memories of my pop.
 
You're definitely doing some work here that makes ya think twice before you start marking the "x". I would never be able to do what you're doing here. I think i'm going to start calling you Professor Kahn.
 
You're definitely doing some work here that makes ya think twice before you start marking the "x". I would never be able to do what you're doing here. I think i'm going to start calling you Professor Kahn.

Mr. Dr. Prof. Kahn V. Trble - Master of all things Metallic and Mopar or M.M.M.

(Mr. Dr. Prof. K.V. Trble M.M.M.)
 
LOL, I think I may have that same recessive doodling gene in my DNA, which is ok except my Sharpies keep clogging and drying up (instantly) when they hit rust. Dammit!

Angle grinder with a cut-off wheel; Was a better tool EVER invented?

Great work!
 
Everything's looking great man!! Very cool to be blazing a trail pioneering some new parts with US Cartool too, maybe we should start calling you Lewis and Kahn haha
 
First you see the X's . . . Now you don't . . .

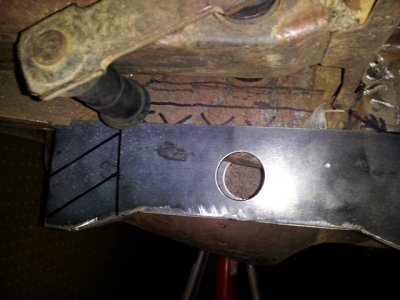
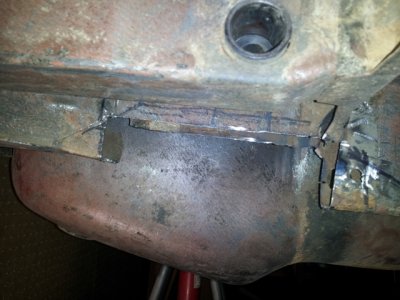
Well . . . the task for tonight was to simply cut out the X's . . . YEAH RIGHT . . .

Got it done . . . but it was not easy, and it did take a bit of time . . .

sm_rearsrbracket10.jpg

Cutting out the area is not that hard, yes, 4 1/2 in angle grinders with cutoff wheels are great . . . unless they don't want to fit into the areas that you need them to in order to be able to cut the metal . . . with the original frame member on one side, and the spare tire well on the other side . . . there's NOT much room to be able to get the cutoff wheel in place and cut what you need to cut - and not a whole bunch of what you don't want to cut.

But I got this section out . . . so I can try and figure out how to get these pieces in place . . .

- - - Updated - - -

You're definitely doing some work here that makes ya think twice before you start marking the "x". I would never be able to do what you're doing here. I think i'm going to start calling you Professor Kahn.


LMAO . . . roadrunnerman . . . yet another nickname ! ! !

- - - Updated - - -

Mr. Dr. Prof. Kahn V. Trble - Master of all things Metallic and Mopar or M.M.M.

(Mr. Dr. Prof. K.V. Trble M.M.M.)

Alright KB67 . . . yet another nickname . . . is Triple "M" an upgrade or downgrade from triple "X" . . . If you make the name any longer you'll forget them all ! ! !

Or I will . . .

- - - Updated - - -

LOL, I think I may have that same recessive doodling gene in my DNA, which is ok except my Sharpies keep clogging and drying up (instantly) when they hit rust. Dammit!

Angle grinder with a cut-off wheel; Was a better tool EVER invented?

Great work!


Doodle gene . . . I like that carnalsupply . . . it's fun when you need to figure things out . . . thanks for the support !

- - - Updated - - -

Everything's looking great man!! Very cool to be blazing a trail pioneering some new parts with US Cartool too, maybe we should start calling you Lewis and Kahn haha


LMAO Speedy . . . did I just get yet another nickname ? ? ?

You guys are all great - thanks for all the support !
 
haha well that wasn't a nickname. Thats your new formal name you should have on your mail box. Or maybe just the suffix. Either way you lend yourself to so many nicknames and this thread has a life of its own...its just too much fun for all of us. Either way we obviously are glued to it for your updates like our favorite tv show.

:icon_jook::happy1:
 
Auto Transport Service
Back
Top