• When you click on links to various merchants on this site and make a purchase, this can result in this site earning a commission. Affiliate programs and affiliations include, but are not limited to, the eBay Partner Network.

My $300 a month budget 69 RR project (AKA, Wholly crap, what did I get myself into)

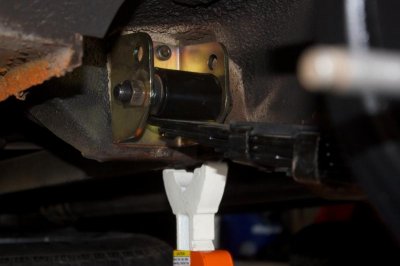
Got the front hangers and pinion snubber in from Mancini. The hangers look like good quality pieces.

I bolted everything up yesterday and it looks great.

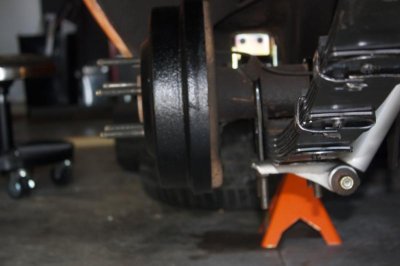
I am working on painting the rear drums as they were painted orange by the previous owned, rusted out and look like hell. I had some high temp engine paint and primer so I used that considering how hot the breaks can get.

I'll post finished pics tomorrow and will finally be starting on the front end.

- - - Updated - - -

I started this over in another thread, but since it applies to this project I will post the links here as well.

I am just starting my library, but here are a few I can recommend and a few I have on my wish list. Since I'm working on a Roadrunner, some are model/year specific.

Please post your favorites.

Mopar B-Body Performance Upgrades 1962-1979
by Andrew Finkbeiner
http://www.barnesandnoble.com/w/mopa...=9781934709306

How to Build Max-Performance Mopar Big-Blocks
by Andy Finkbeiner
http://www.amazon.com/How-Build-Max-.../dp/1613250924

Mopar Performance Engine Speed Secrets Manual, 9th Edition
http://chucker54.stores.yahoo.net/mo9thedensps1.html

Plymouth Service Manual (link is for 1969)
http://www.faxonautoliterature.com/1...ls-P16320.aspx


1969 Belvedere Satellite Road Runner and GTX Wiring Diagram Manual
http://www.faxonautoliterature.com/1...al-P12753.aspx

A couple that I have not purchased yet..

1969 Plymouth Chassis Assembly Manual Satellite GTX Road Runner Belvedere
http://www.faxonautoliterature.com/1...re-P20330.aspx

1969 Plymouth Engine Assembly Manual Reprint Satellite GTX Road Runner Belvedere
http://www.faxonautoliterature.com/1...re-P20348.aspx

1969 Mopar Parts book.
http://www.faxonautoliterature.com/1...et-P19011.aspx

Provided by PlumCrazy
Invaluable information here. Service manuals, parts books, wiring diagrams, too much to list.

http://www.mymopar.com/index.php?pid=31

Here's another good one with tons of literature.

http://www.hamtramck-historical.com/library-2.shtml
 
Finally got the rear suspension done! Man if it could go wrong, it did, nothing major, just small annoyances that caused delays... Delayed parts, broken hanger, wrong U-Bolts shipped from Mancini... what was clearly a 4-6 hour job turned into 4 weeks...most just waiting around for parts.

Anyway, glad it's done... only piece left is to mount the new adjustable pinion snubber, but the bolt holes are completely filled with crud...need to find some bore brushes or go buy a tap and try to clean them out.

Time to move on to the front suspension and disc brake conversion.

IMG_8761 - 2014-04-26 at 11-02-39.jpgIMG_8760 - 2014-04-26 at 11-02-32.jpgIMG_8759 - 2014-04-26 at 11-02-25.jpgIMG_8735 - 2014-04-18 at 13-28-47.jpg
 
Finally got the rear suspension done! Man if it could go wrong, it did, nothing major, just small annoyances that caused delays... Delayed parts, broken hanger, wrong U-Bolts shipped from Mancini... what was clearly a 4-6 hour job turned into 4 weeks...most just waiting around for parts.

Anyway, glad it's done... only piece left is to mount the new adjustable pinion snubber, but the bolt holes are completely filled with crud...need to find some bore brushes or go buy a tap and try to clean them out.

Time to move on to the front suspension and disc brake conversion.

Looking great GearAddict! I will be watching your thread for stuff I will be getting to with my car as well. I spent part of my weekend working on my K member, but my time was limited by problems with my mower (would you believe it lost a pushrod?) and some parent health issues.

Nice progress on your car. I hope to be starting to assemble some of my parts on my K member by next weekend, so maybe some of my front disk conversion parts and lessons might be able to be shared in time for you. Otherwise, I will learn from you!

Hawk
 
Thanks Hawk, I'll try to post good pics and learnings as I go. I wish I could drop the K member but I'm not pulling the motor, so that will have to wait for another day.
 
The drums are red,,orange from the factory

- - - Updated - - -

progress looks great

- - - Updated - - -

i dropped my k member & put a jack under the engine.

- - - Updated - - -

check this out
http://www.forbbodiesonly.com/moparforum/showthread.php?24672-68-charger&p=909906203&viewfull=1#post909906203

Thanks CDR, I think my drums were the original color then. you can see it in one of the earlier posts, however they just looked like crap with the Torque Thrusts on there with the reddish/orange peeking through. I'm happy with the black although I did only do one side, because I couldn't get the other one off for some reason (bad angle to get a tool in there to loosen the adjuster). I'll get to the other one later.

I checked out your project and the K-Member removal.... is it as simple as it looks? prop the engine up on the oil pan with a wide flat jacking plate, pull the steering coupler, spindles, Torsion bars and steering components and the whole thing drops out with 4 bolts?

Any guess how much it weighs? It's just me pushing it around in a tight garage.

Looks like an advantage to doing this aside from being able to clean and repaint might be that you can set-up the LCA's, Sway bar and Strut rods before re-installing.

- - - Updated - - -

Hey, can anyone point me in the right direction for locating the bucket seat floor hole locations? I was thinking of drilling them from the bottom up while I have the car up on stands to do the front end.... The car had buckets from some unknown vehicle when I bought it. I thought the floorboards were original but I can't find any other holes than the ones drilled for the seats that are in it and they are not the same bolt pattern.
 
I checked out your project and the K-Member removal.... is it as simple as it looks? prop the engine up on the oil pan with a wide flat jacking plate, pull the steering coupler, spindles, Torsion bars and steering components and the whole thing drops out with 4 bolts?

Any guess how much it weighs? It's just me pushing it around in a tight garage.

Looks like an advantage to doing this aside from being able to clean and repaint might be that you can set-up the LCA's, Sway bar and Strut rods before re-installing.

I did the same thing with my car. The only difference was the body of my car was on a lift, and I lifted the body off of the engine and transmission. Either way, it is the same principle. Besides the above items, you also need to disconnect the transmission cross member, and of course any connections to the engine: Accelerator, engine wiring harness, radiator, etc.

As far as the front suspension, you only need to disconnect the upper control arms from the body. That's it. Everything else comes with the K Member. In my opinion, it is the way to go!

Finally, I put my entire K member, front suspension, engine and transmission on car skates used under each wheel. I used three of them and it worked OK. Only key lesson learned is the main support point is the BACK K member bolt area, not the front. If you use the front (like I did at first) the K member twists up and damages your oil filter. No big deal, except if your engine has all its oil (like mine did), it makes a mess...

Hope this helps...
 
its not major bad heavy,but you really need an extra person to help drop it down.if you do this dont forget the rubber brake hoses.
 
When you get back to the instrument panel..

Check out my dash mod.

http://www.forbbodiesonly.com/moparforum/showthread.php?60682-A-while-back

The first pic is how to get the larger gauges to look better. Remove the lower pad on the drivers side and have an upholstery shop cut the top edge off and recover the pad.
It doesn't eliminate coverage of the lower edge of the gauge, but it does look better.


Jeff

Thanks Jeff. That looks great, I will definitely look into it.

- - - Updated - - -

She should ride like a dream now!

That is the plan... now if I can just get it so that when I turn the steering wheel, the car goes in that direction, I'll be set!

On that note, I had my hopes elevated and then crushed yesterday in a span of 40 mins.... I called a local Napa on a whim and asked if they has a Manual steering gearbox and the guy said "Yes we do, we have 1 left in stock it's $149.99 witha $39 core" ... I was shocked and told the guy I would be there in 5 mins (it's 15 mins away) I sped over there thinking I had found the last one in the country at a reasonable price.... got there and they busted out a beautiful, black, shiny, remanufactured... Power Steering gear....Drat! foiled again.
 
Finally got started on the front suspension today. I am only in the process of disassembly at the moment, but felt good about how far I got considering I worked a full day at the office as well and took my time being patient on the disassembly.

Sorry to all for the 5th grade instructional notes on tools...it's for my own notes, I like to have all the right tools laid out for a job in advance if I know what needs to be done so I'm not running around the garage.

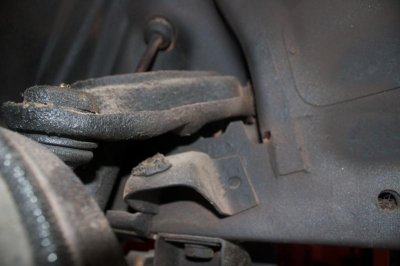
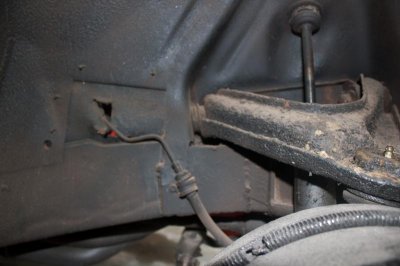
Here's what I started with...first observation...passenger side brake line bracket missing.... otherwise nothing shocking at first look.

IMG_8787 - 2014-05-01 at 13-46-10.jpgIMG_8792 - 2014-05-01 at 13-46-58.jpgIMG_8794 - 2014-05-01 at 13-47-28.jpgIMG_8785 - 2014-05-01 at 13-45-43.jpg


Step 1: Remove tension from Torsion bars. Adjuster bolt is 3/4" head, used impact. Drivers side came free easy...passenger side bolt came loose easy as well but had to change socket to thinner wall, looks like it is not centered in the LCA... I'm a little worried the LCA might be twisted?

IMG_8798 - 2014-05-01 at 14-02-12.jpg

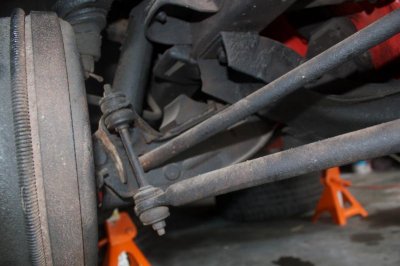
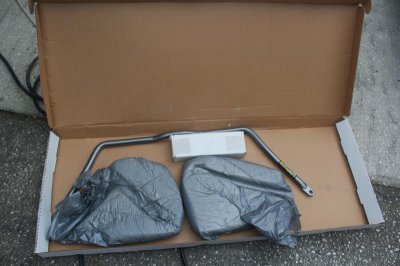
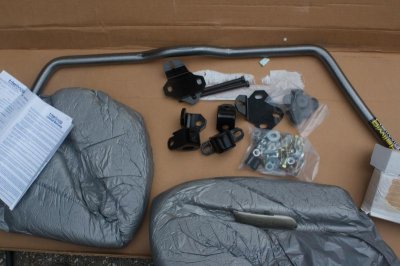
Step 2: Remove factory Sway Bar end links from LCA and brackets from K Member...I'll be replacing it with a new Hellwig bar.... used 1/2" socket and 1/2" open end with air ratchet...no problems

I was able to twist the old one out with a little work.

IMG_8786 - 2014-05-01 at 13-45-51.jpgIMG_8804 - 2014-05-01 at 14-34-40.jpgIMG_8815 - 2014-05-01 at 14-49-45.jpgIMG_8808 - 2014-05-01 at 14-37-28.jpg

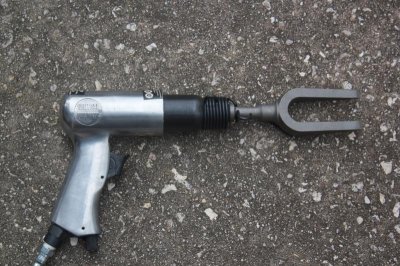
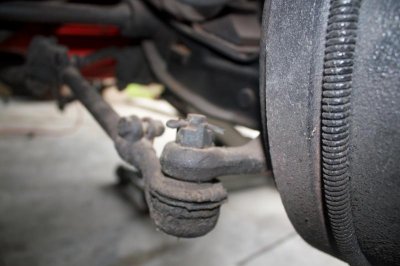
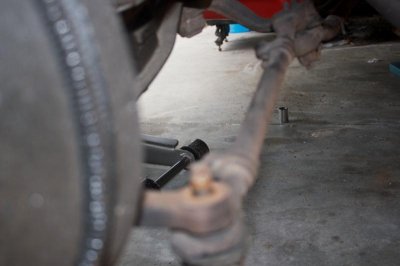
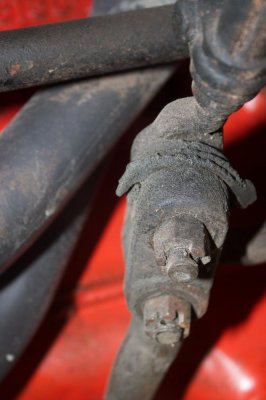
Step 3: Removed Steering arm from Tie Rods by removing cotter pins, 3/4" socket with impact (probably overkill) and then separating with air hammer pickle fork.... on each side, I was 1 second from giving up with the air hammer and then POP! the came off. Not hard at all, but it seems like it's doing nothing and then suddenly it's free.

IMG_8823 - 2014-05-01 at 15-03-59.jpgIMG_8810 - 2014-05-01 at 14-38-00.jpgIMG_8814 - 2014-05-01 at 14-38-29.jpgIMG_8816 - 2014-05-01 at 14-58-20.jpg

Step 4: Removed drums by using flat head screw driver to take off dust caps, then cotter pin, star thingy, then 1-1/6" socket on ratchet to remove wheel nut from stud.

Then drum brake tool to loosen shoe adjuster... I doing new wheel bearings but I learned on one side to pull the drum out a few inches and then gently push it back in, this leaves the wheel bearing nicely exposed, so you can remove it from the spindle without it falling on the floor when you pull the drum off.

No Pic

Step 5: loosened brake hard line from soft line... as mentioned before, I will have to figure out what to do about the missing bracket.

No Pic

That's where I ended for the night... Felt like good progress and no major trauma's so far. I did both sides one step at a time.

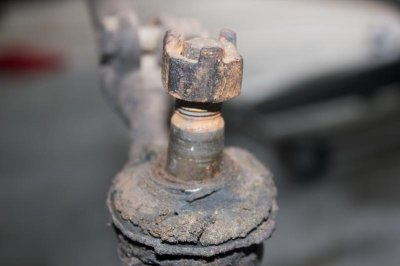
an interesting pic here...only about half the castle nuts had cotter pins in them! glad I'm tackling this, could have been disastrous on the road.

IMG_8811 - 2014-05-01 at 14-38-12.jpg
 

Attachments

  • IMG_8799 - 2014-05-01 at 14-02-16.jpg
    IMG_8799 - 2014-05-01 at 14-02-16.jpg
    55.8 KB · Views: 494
Last edited:
Good work. I agree, that stuff had to go. You changing out the UCA and LCA bushings as well?
 
Good work. I agree, that stuff had to go. You changing out the UCA and LCA bushings as well?

Yes, full deal... I got the big kit from PST and I broke down and bought a few of the tools from Mancini for removal and installation of the bushings.

Also will be building it back up with the Right Stuff Detailing disc brake kit.

My biggest concern is that it looks like one of the LCA's might be twisted a little and I'm adding a stiffer sway bar... I'm leaning towards getting some stiffening plates and boxing them...not sure what to do about the bent one, I'll see how bad it is when I get it off the car.


Does anyone know if the brake line clips/brackets are re-pop'd?
 
Last edited:
clips yes, brackets I don't know. I have a cople front frame sections, I can take a look this weekend and see if they are there. pm me if you want.
 
Clips I got at O'Riley auto parts. Brackets not sure.
 
Ok, Sunday morning update... Day 1 went so smoothly, the gods have decided to punish me in day 2...

UCAs are out, but the bushings were toast and the cam bolt was frozen in the bushing on one side, took a lot of hammering and a little heat to get it out.

Drivers side brake flare fitting on the hard line is rounded off, got it out but will have to be replaced.

Passenger side LCA is twisted... I supposed it could be heated and straightened, but one of the forum members has a straight one at a reasonable price.

My cheap air hammer worked on the tie rods and upper ball joints , but I can't seem to get the lowers free... Might be time to go the big hammer, pickle fork route.

Also, broke down and bought the Mancini bushing removal tool.. Tried it out yesterday but couldn't get it to budge without putting the impact wrench on it.. Even then, it was barely moving... Not sure if I'm doing something wrong... Seemed straight forward.

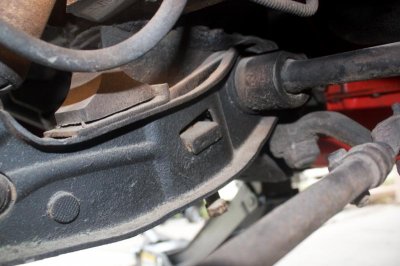
Anyway, I'll be back at it today... Looking forward to when I have clean new parts to put back on.... This suspension, looks like it was used in a post apocalyptic Australian outback movie.
 
Kroil penitrating oil works wonders!!!! Try putting some on a couple days before, nothing better.
 
Don't beat yourself up on those UCA bushings....Those can be a huge pain in the ***! Like mentioned, penetrating oil, some pops with a hammer and heat, if need be. Good luck with the lower ball joints. Sometimes they need just a little love...as in beating the snot out of them with a beefy pickle fork and 2lb hand maul. Oh, rapping the side of the ball joint several times sometimes helps as well.
 
Ok, Sunday morning update... Day 1 went so smoothly, the gods have decided to punish me in day 2...

UCAs are out, but the bushings were toast and the cam bolt was frozen in the bushing on one side, took a lot of hammering and a little heat to get it out.

Drivers side brake flare fitting on the hard line is rounded off, got it out but will have to be replaced.

Passenger side LCA is twisted... I supposed it could be heated and straightened, but one of the forum members has a straight one at a reasonable price.

My cheap air hammer worked on the tie rods and upper ball joints , but I can't seem to get the lowers free... Might be time to go the big hammer, pickle fork route.

Also, broke down and bought the Mancini bushing removal tool.. Tried it out yesterday but couldn't get it to budge without putting the impact wrench on it.. Even then, it was barely moving... Not sure if I'm doing something wrong... Seemed straight forward.

Anyway, I'll be back at it today... Looking forward to when I have clean new parts to put back on.... This suspension, looks like it was used in a post apocalyptic Australian outback movie.

Looking good GA, take your time and you will get it!

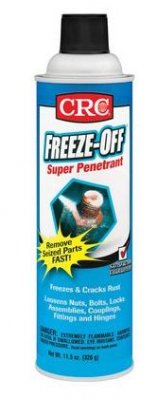
Those oil rig workers over here told me about CRC Freeze Off, I used it on my nasty front end and rear leafs, worked wonders.

CRC Freeze Off.JPG
 
Auto Transport Service
Back
Top