• When you click on links to various merchants on this site and make a purchase, this can result in this site earning a commission. Affiliate programs and affiliations include, but are not limited to, the eBay Partner Network.

Restomod charger pics

Damn!!! that is one gorgeous Charger! Can't get over how awesome that color combo is!

And yeah it's pretty nice in southern Oregon where I'm at, especially in the summer. Gonna be some fun drives to the river and drag strip next year. I keep telling you, Joel, Charlie, Will, and everyone else we gotta get together at MATS or something closer to my neck of the woods haha although a cross country drive does sound like a good adventure, maybe the nats one year or somethin
 
The dash you built sure looks sweet sitting in there with the color! Sweet looking car you have there 747, I see there's one seat in it, bet its tempting to "head out on the highway" looking for adventure or anyone that gets in my way.. ;)
 
That new paint sure looks sweet. I am VERY jealous of you right about now. Can't wait until mine is painted and parts can be bolted on.
 
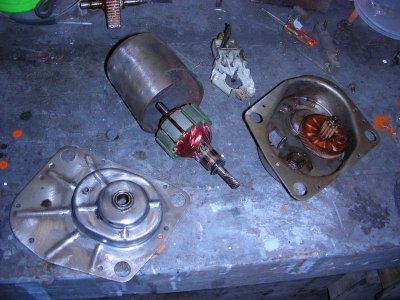
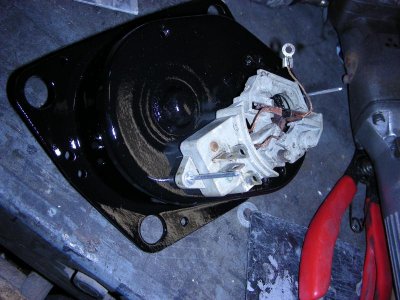
Thanks fella's, I tore down my 2 speed wiper motor last night for a good cleaning and paint so I figured I'd show what's in one. As you can see from the pic the windings, commutator, bushings and shaft are in excellent condition. To disassemble you just remove output shaft snap ring and washers, remove two bolts from motor and drill all of the heads off of the gear case and terminal block rivets. DSCN6925.jpg

- - - Updated - - -

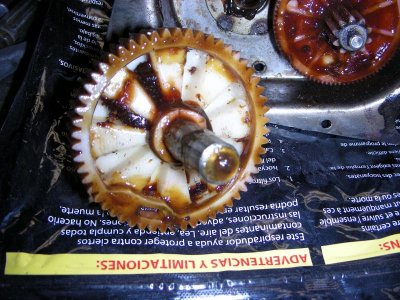
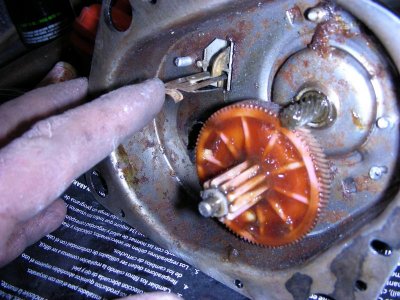
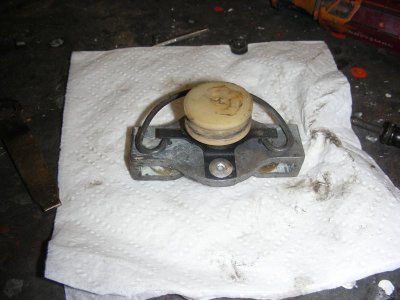
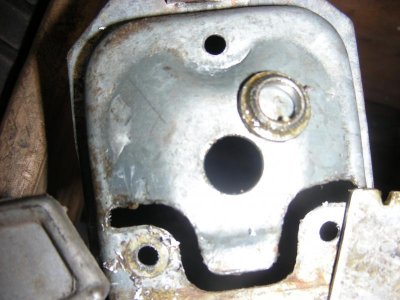
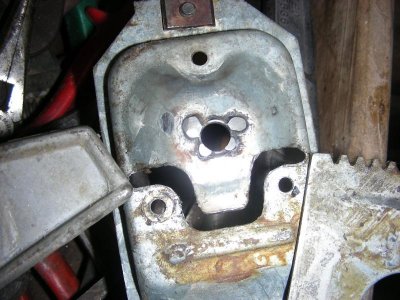
In these pics I'm showing where my problem was, the grease was so thick that it was causing problems with cam gear and switch (already cleaned and re lubed in pic). If you look at the inside of the gear you'll see a step sticking in, this is what opens the contacts for park. In the next pic I'm pointing to the internal switch that the gear opens and closes. DSCN6929.jpgDSCN6928.jpg

- - - Updated - - -

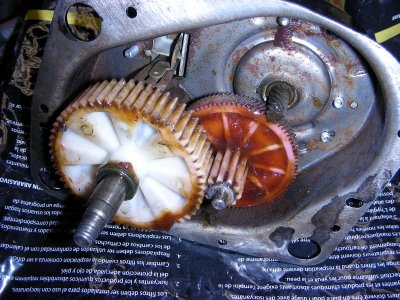
Here's a pic of the gearbox opened up.DSCN6930.jpg

- - - Updated - - -

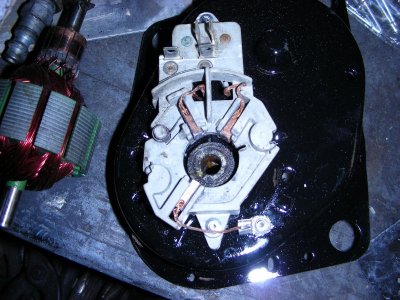
This is the terminal block being reinstalled (2 rivets). Once it's in you can push the brushes back and tuck the wires into the little slots. The slots hold the brushes back while you reinstall the commutator, once it's installed pop the wires back out. Oh yeah, one brush is riveted to the case for a ground. DSCN6926.jpgDSCN6927.jpg

- - - Updated - - -

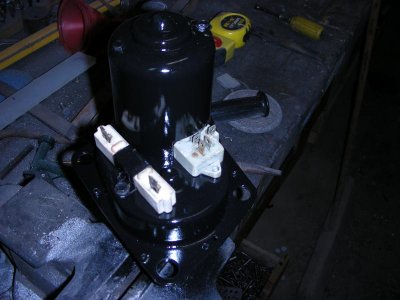
Next you just slip the motor back over, put the two bolts back in and rivet the gearbox back together (because of how close a couple rivets are to the case they had to be put in from the back instead)DSCN6934.jpg
 
I chose it because I think the others are ugly (wires sticking out of some glue):thatswck:. Tonight I'll reinstall it and show you my short harness (drilled a grommet hole right beside the motor) and more wet sanding and buffing "forgot to mention" I picked the worse part of the car last night and wet sanded and buffed it to perfection:headbang:. Maybe I'll have my rear seats to but I seriously doubt it "he's pretty slow with my stuff". One of the other things to do is get the overspray all cleaned up under the car "it's a bitch getting tape to hold masking to the rough bedliner under the car". Also started digging out all of the window parts and trim so if anyone can give me tips on installation of the side window as far as order in which things need to be done "lets hear it". Thanks guys, appreciate all the compliments especially coming from guys as talented as yourselves.
 
Great job!
Man I just love this, and all the other threads!
Great example I will refer to when I get to this point in my resto.
Thank you for sharing!
 
I can't wait but there will be lots of things slowing it down, door handles, mirror, grill trim, windshield, some odds & ends trim, WHEELS & TIRES, weatherstripping etc. Fortunately my cousin bought a polisher (bench mount) so I don't have to buy one of those to do the trim. Sorry but it will likely be pretty slow going from here, I'll be taking on a few side jobs to buy more parts so far it looks like building a kitchen table, replacing the front clip of a 1970 Duster, doing another total (Dart) for my sister in law and maybe repainting a hood for a co worker. I hope I don't have to take them all on to get enough money but we'll see.
 
Great "how to" with the wiper motor. I'm pretty sure mine will need work and I will use your photos for reference.
 
Cool! Looks real good and thanks for the how to, it does look like new!
 
I chose it because I think the others are ugly (wires sticking out of some glue):thatswck:. Tonight I'll reinstall it and show you my short harness (drilled a grommet hole right beside the motor)
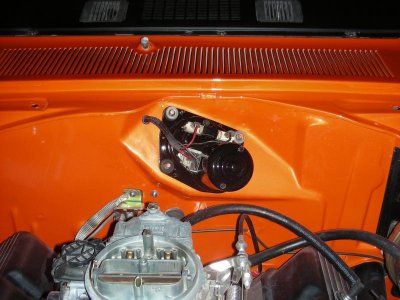
I was wondering how you were going to keep your engine compartment "clean" and hook up that washer motor . . . I'm trying to track down some plugs that you can mount to the firewall and make the hookups. Yeah, I think I'm going to follow your lead and clean up all my wires too . . . it looks GREAT ! !
 
O.K, finally remembered to bring the camera back from the garage. Here's the wiper motor installed with the shortened harness.DSCN8612.jpg

- - - Updated - - -

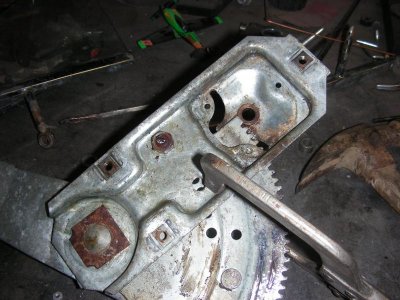
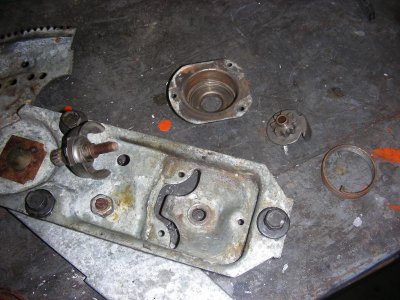
I decided to start putting some of the car together starting with the window regulator assemblies but should have known it wouldn't be that easy. The Ding Dongs that started this car decided it would be a good idea to blast it "STILL TOGETHER" ruined glass, sand threw the regulators, ruined mirrors, door handles etc. So as you can imagine this meant rebuilding it all. Here's a pic of what's inside.DSCN8592.jpg

- - - Updated - - -

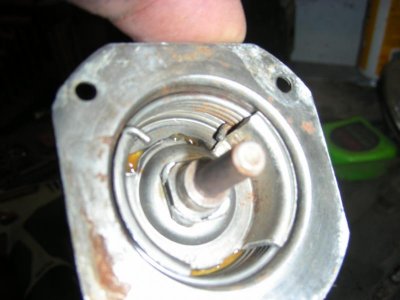
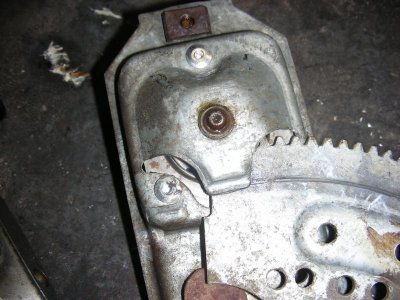
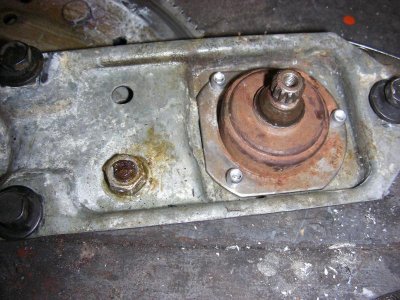
Not much to them, I will mention that the spring is pretty well wound and can inflict pain if not clamped before removing the gear. As suspected they were filthy and full of sand explaining the rough action. You have to move the regulator to one extreme to get the one rivet out and the other extreme for the other.DSCN8599.jpgDSCN8594.jpgDSCN8595.jpgDSCN8598.jpg After a good scrubbing and reassembly they work slick as new.:headbang:
- - - Updated - - -

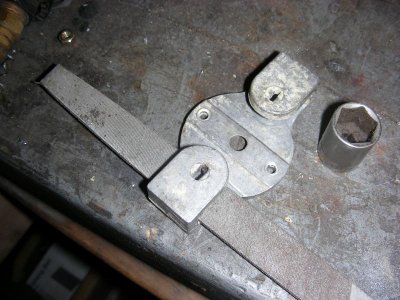
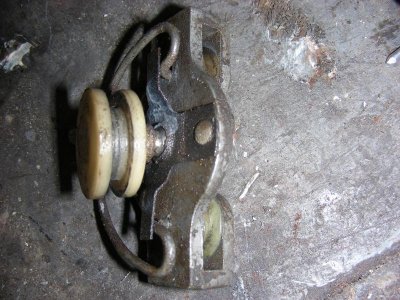
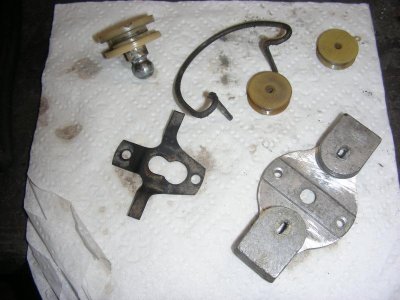
I got both fronts done and installed and stared on the rear "what a pain". I did the same as the fronts which went pretty quickly until I got to the little slides that run up and down the rail in the quarter window assembly. They have a big roller on a ball socket and two little rollers that were froze solid. Again this meant drilling out rivets, once drilled out and disassembled I needed to sand some high spots off of the wheels and clean up the opening they fit into with a file (corroded). A little grease and reassembly and they worked like new, I got one side completely done and in the car "wow is that a bunch of stuff just to roll a window up". The other side didn't go so swell "found three broken rollers right off the bat" so now I'll have to hunt down some parts.DSCN8603.jpgDSCN8605.jpgDSCN8604.jpgDSCN8609.jpg

- - - Updated - - -

I did have to weld a bushing back into the rear regulator (supposed to be pressed in). Tried to use the TIG for a neat job but it didn't like the galvanized steal so I just cranked up the MIG and put a few tacks on it.DSCN8601.jpgDSCN8602.jpg
 
Yeah great detail on your work with the regulators! Sucks about your glass, don't feel too bad though, some halfwit before I owned the car apparently rolled the door glass up and down with what must have been full-on driveway gravel in the felts; nasty vertical scratches on both of them and pretty sure they won't come out. Party on!
 
747Mopar - the wiring for the windshield wiper motor turned out great - found the place for the connectors, but I guess I'm a bit too late for that.

Great Job ! ! !
 
Great job on the window regulators - and nice "how to" pics. I will admit that getting all the window stuff back in my car and working correctly without damaging the new paint has me a bit worried.
 
Auto Transport Service
Back
Top