I like the Big Magnums too 500 & 460 S&W!! big gun, big hole!
You are using an out of date browser. It may not display this or other websites correctly.
You should upgrade or use an alternative browser.
You should upgrade or use an alternative browser.
Restomod charger pics
- Thread starter 747mopar
- Start date
Haha, That's all I got for now only 3" but it can get old on the highway after a while.747 - Either of those components should get the job done. Fosgates are good speakers and I don't know that I'd spend the coin to up to the Polk. Personally I have had good luck with even cheaper brands. If its a modern speaker with a tweater built in it will be 10x better then any stereo in a stock car these days. They are better then they've ever been but the aftermarket stuff is always ahead of a stock speaker. So needless to say any speaker for the most part will foot the bill you've layed out.
I think my stereo in mine will just be comprised of 2 2.5" pipes coming from 8 cylinders for a while! :headbang:
I wish I could come down and hang out. Kahn...while your there steal his 3.55's so I can put them in my extra carrier and build a sure grip center for the Coronet!
BTW that overflow tank is plain killer. Does he want to make another
I hope you guys have a blast. One day when all three of our cars are done we will have to meet in the middle somewhere..
Hey KB - wish you could have been there too . . . we had a blast . . .
Back to the scoop, I think I have a plan for the pan so I should at least get it done this weekend and start making the final mods to the form. The Goal is simple, FINISH IT BEFORE THE NATS. I bailed on Carlisle because I didn't like the 70 mph speed limit with my gears let alone for 5 hrs plus that's the weekend that worked out for doing Kahn axle but I won't miss the Nats. If I can get it running the way I think it should (it's running really good but not scary good) I'll take it down the 1/4 just for chits and giggles.
Eureka, I found them and they are about 3" longer. Thanks again to another FBBO member for another problem solved. They were green (original color) but I cleaned them really good with paint thinner and painted them black, if it doesn't hold up I'll buy new ones later. Full speed ahead for the Nats
Mr.SpeedFreak
Well-Known Member
That's an interesting difference, thanks for pointing that out guys. Good luck on the 'Nats push Dev, still can't wait to see the finished scoop!
That's an interesting difference, thanks for pointing that out guys. Good luck on the 'Nats push Dev, still can't wait to see the finished scoop!
Well your kinda in luck speedy because that's what I've been working on and have it ready to fiberglass this weekend, I'll update you today.
Bare with me because I've been without internet all week so I'm going to try and stuff all the updates in all at once. The final push to finish the scoop is on, first task was to match the angle of the hood for the scoop pan. I decided to make the pan in 2 pieces, the first bolts to the filter base and is bent at an angle that matches the hood so that when the other half is spot welded on it's a perfect match making it easy to seal. Here's the first pan being marked before bending the proper angle.
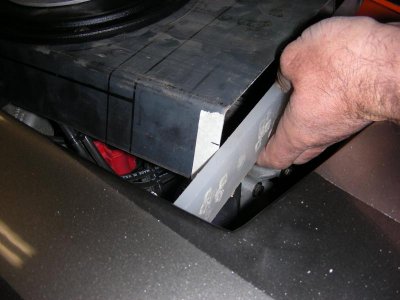
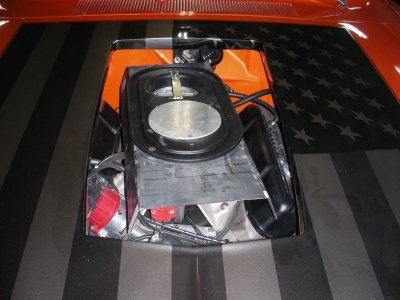
Here it is sitting on the motor.
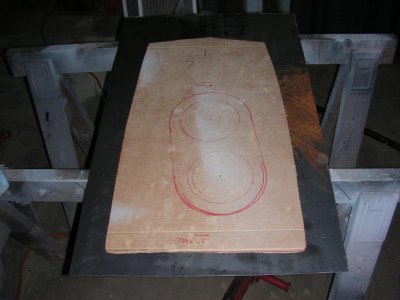
Next was marking the 2nd piece of the pan before bending the lip.
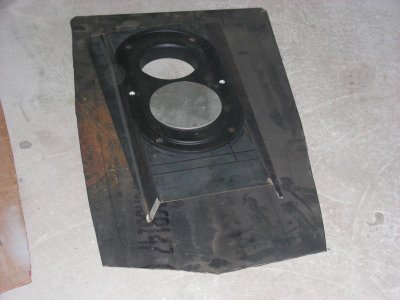
Here's the pan before bending, you can see the angled bends in the 1st piece that matches the angle of the hood.
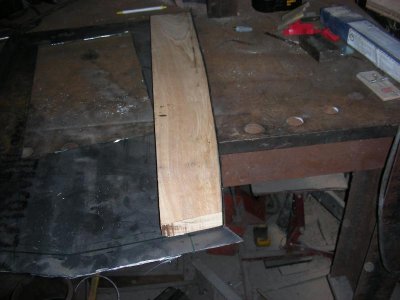
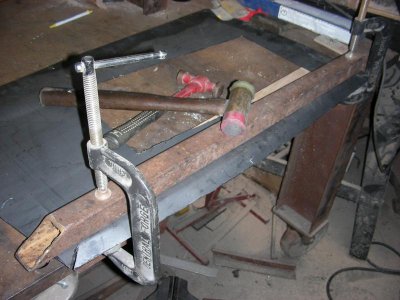
Next was forming the lip, since it's not a straight line I sawed out some bucks out of hard wood (Elm) and beat the hell out of it haha.
More fitting
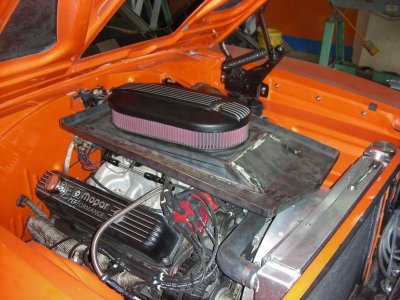
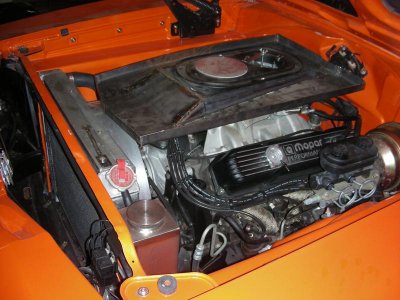
Had a clearance issue with the wiper motor that was quickly taken care of.
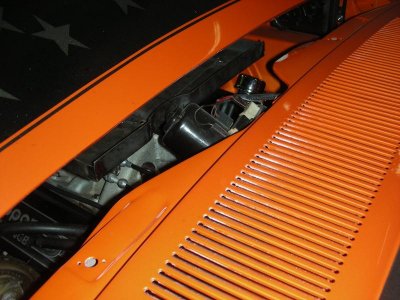
With it ground enough to shut the hood I made a little holder for a pencil out of plastic so I could run around the bottom of the hood and mark the pan where it needed cut (1" below).
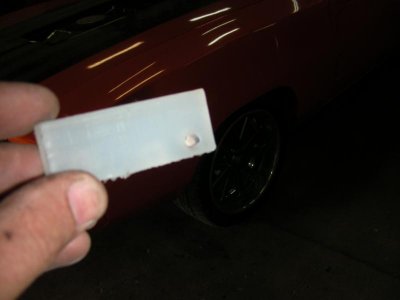
Next on the list was to check height, I used TIG wire and marks on the tape to locate the different heights. Then the scoop was placed on and the same heights checked NO GO. It needed raised anyhow so I added the extra height to clear the filter and checked again.
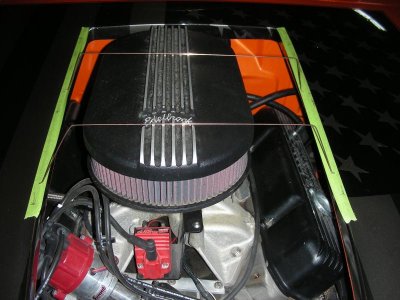
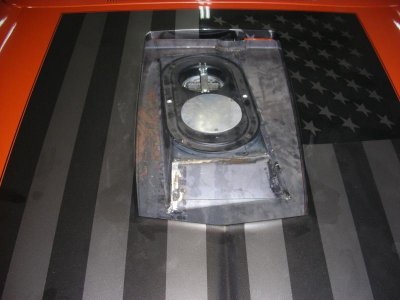
Now was time for the visual aspect of it all, here's what it looked like.
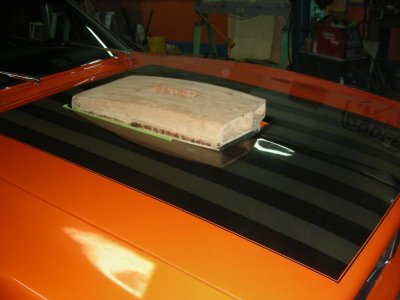
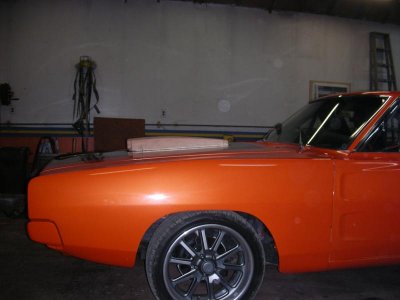
I didn't like the almost straight up sides so I angles them a bit more and did the same to the rear of the scoop. I'm pretty happy now and should be breaking out the fiberglass this weekend. Never mind the hole in the top, the form is several pieces so after it's glassed you can pull the pieces out one at a time without breaking the scoop (I just didn't have that piece in at the time).
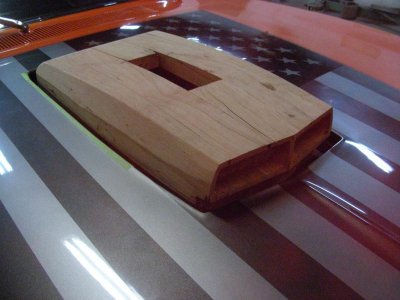
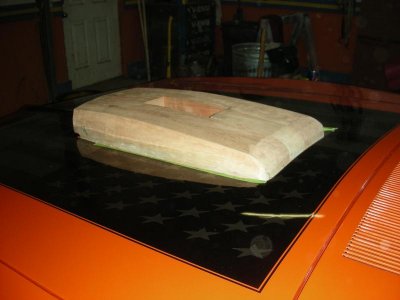
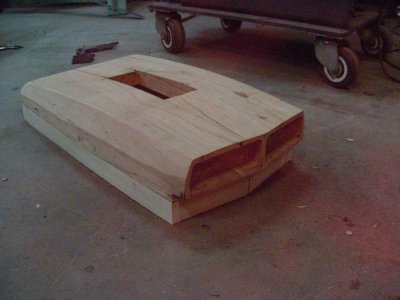
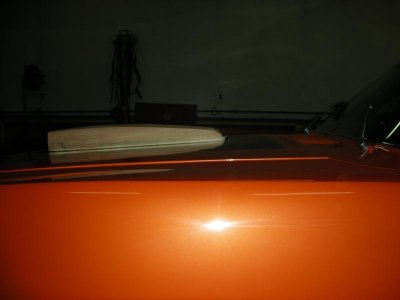
- - - Updated - - -
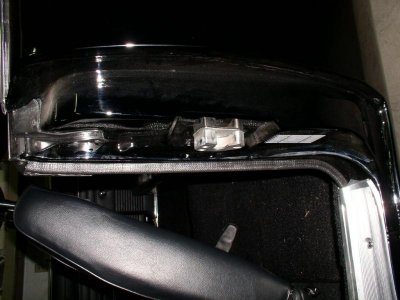
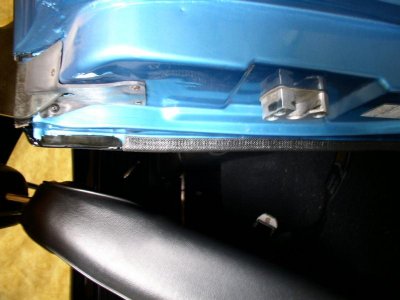
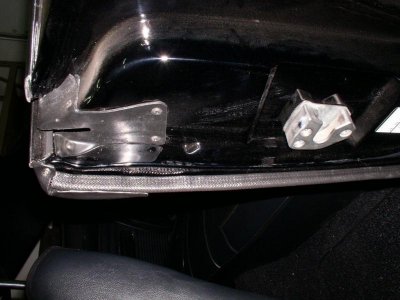
Thanks to Hunt my door jams look really nice now, Thanks again.
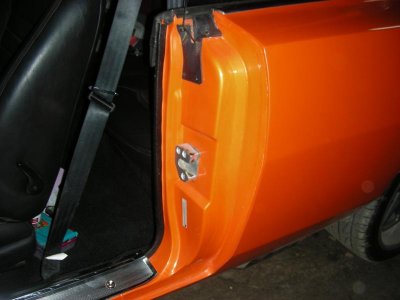
- - - Updated - - -
Things are really coming together, thanks to the guys here buying some of my unused parts I've been able to get my sill plates (huge difference that made) and all 4 Polk speakers. Once they come in I'll be able to make the package tray and cross that off as well not to mention actually have some tunes but I still need the amp. My buddy Larry is hooking me up with a nice head unit that has the USB port for the Ipod (boy am I going to owe him when this car is done!). Also got the trunk carpeted but forgot to take pics and with the kids going to VBS all week I've been able to get some extra Charger time:headbang:

Here it is sitting on the motor.

Next was marking the 2nd piece of the pan before bending the lip.

Here's the pan before bending, you can see the angled bends in the 1st piece that matches the angle of the hood.

Next was forming the lip, since it's not a straight line I sawed out some bucks out of hard wood (Elm) and beat the hell out of it haha.


More fitting


Had a clearance issue with the wiper motor that was quickly taken care of.

With it ground enough to shut the hood I made a little holder for a pencil out of plastic so I could run around the bottom of the hood and mark the pan where it needed cut (1" below).

Next on the list was to check height, I used TIG wire and marks on the tape to locate the different heights. Then the scoop was placed on and the same heights checked NO GO. It needed raised anyhow so I added the extra height to clear the filter and checked again.

Now was time for the visual aspect of it all, here's what it looked like.


I didn't like the almost straight up sides so I angles them a bit more and did the same to the rear of the scoop. I'm pretty happy now and should be breaking out the fiberglass this weekend. Never mind the hole in the top, the form is several pieces so after it's glassed you can pull the pieces out one at a time without breaking the scoop (I just didn't have that piece in at the time).


- - - Updated - - -
Thanks to Hunt my door jams look really nice now, Thanks again.

- - - Updated - - -
Things are really coming together, thanks to the guys here buying some of my unused parts I've been able to get my sill plates (huge difference that made) and all 4 Polk speakers. Once they come in I'll be able to make the package tray and cross that off as well not to mention actually have some tunes but I still need the amp. My buddy Larry is hooking me up with a nice head unit that has the USB port for the Ipod (boy am I going to owe him when this car is done!). Also got the trunk carpeted but forgot to take pics and with the kids going to VBS all week I've been able to get some extra Charger time:headbang:
BigBlock61
Well-Known Member
Just a quick question from the pics that you took. Is the hood going to open with the scoop installed? In the one pic the front edge looks like it's sticking out over the edge. Hopefully it's just light and shadows making it look like that. Other than that the scoops gonna look killer when its done. After all that I got the wrong pics lol. 4th pic from the bottom.
Yes it opens with plenty of clearance, I will however have to install a torque strap before I start driving with it installed because I've seen the motor torque enough to hit the hood.Just a quick question from the pics that you took. Is the hood going to open with the scoop installed? In the one pic the front edge looks like it's sticking out over the edge. Hopefully it's just light and shadows making it look like that. Other than that the scoops gonna look killer when its done. After all that I got the wrong pics lol. 4th pic from the bottom.
usaroadrunner
Well-Known Member
wow is that gonna look tough, imo the front of the scoop kinda mimicks the grill of the charger which looks awesome. it is kick *** to see you fab up these parts. look awesome. nice job!!!
wow is that gonna look tough, imo the front of the scoop kinda mimicks the grill of the charger which looks awesome. it is kick *** to see you fab up these parts. look awesome. nice job!!!
"The front of the scoop kinda mimicks the grill" That was kinda the idea and I wanted it to resemble a Challenger T/A scoop (look Dodge not Plymouth). Glad you like it USA and I'm hoping to have a fiberglass 101 post next (hopefully not one showing what not to do haha).
Propwash
Well-Known Member
- Local time
- 4:25 PM
- Joined
- Oct 29, 2009
- Messages
- 9,695
- Reaction score
- 4,338
- Location
- Island of Misfit Toys
HYRDGOON
Well-Known Member
- Local time
- 5:25 PM
- Joined
- Apr 20, 2013
- Messages
- 3,372
- Reaction score
- 2,745
- Location
- Breslau, Ontario, Canada
Looking forward to Fibreglass 101 this is going to look awesome!
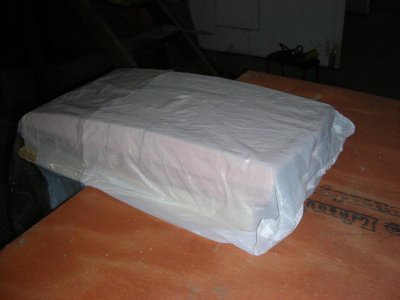
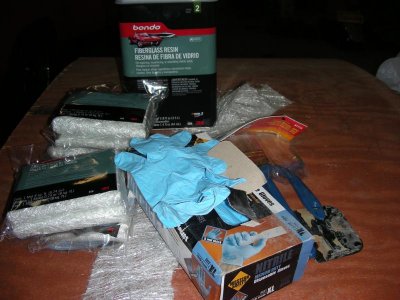
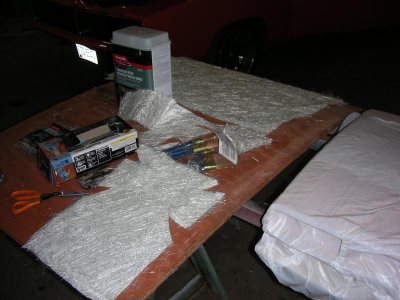
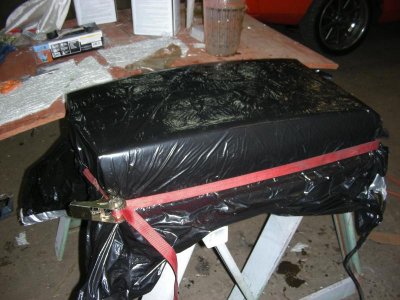
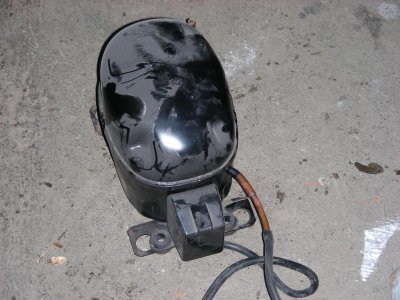
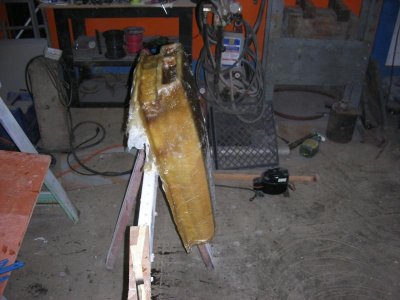
Fiberglass is well underway, got it all glassed last night but I want to make it a little thicker so tonight I'll sand the whole inside and apply a few more layers. Sorry, I forgot one very important thing when I said I'd show the whole process........YOU CAN'T TOUCH THE CAMERA ONCE YOU START. Here it is, I started off by planning how I was going to get it off the form and ended up making a jigsaw puzzle out of it. It was then held together with the plywood base, covered in a trash bag (so it doesn't get glued to the form) and glassed. I just lay one layer on at a time painting each layer heavily so once the next layer is laid it's saturated by the previous coat. I put 4 layers on and them wrapped it in a trash bag and taped it shut with a hose going to an old vacuum pump I robbed out of an old fridge. The problem I ran into was that gravity was working against me on the ports so I glassed everything but them and once the glass had hardened but was still tacky I screwed the form to a saw horse facing straight up and got them all done. I'll have pics up it cleaned up and hopefully ready for body work tomorrow.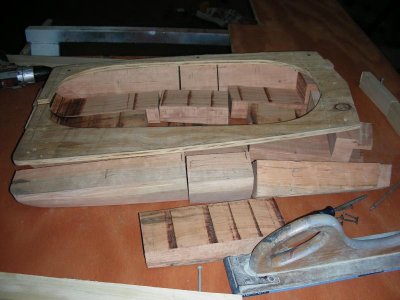
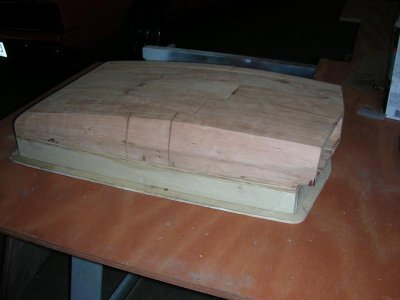


Wow. Very cool and awesome job. I can't wait to see the finished product.
Are you planning to paint it the same ghost stripes that are on the hood, or something different?
Thanks for the write up and pictures. Helps a lot of guys like me learn a lot!
Are you planning to paint it the same ghost stripes that are on the hood, or something different?
Thanks for the write up and pictures. Helps a lot of guys like me learn a lot!
usaroadrunner
Well-Known Member
Similar threads
- Replies
- 3
- Views
- 469

