Darius
Well-Known Member
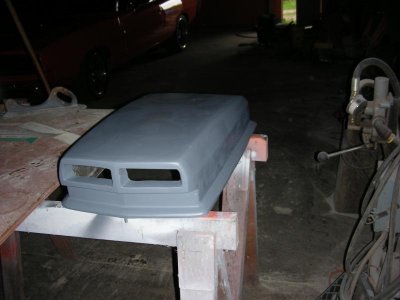
Very cool. I just love doing stuff like this and watching how others solve challenges as well. I love how sleek the scoop looks from the side view. never have been a fan of huge blowers and scoops projecting above the hood but you have designed one that flows with the car as good or better than anything I've seen. Can't wait for the finished product. Very ingenious way you have figured to get it all done. I just love people with a "mechanical" thinking process.


")