• When you click on links to various merchants on this site and make a purchase, this can result in this site earning a commission. Affiliate programs and affiliations include, but are not limited to, the eBay Partner Network.

Restomod charger pics

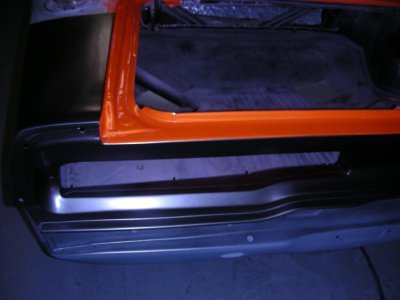
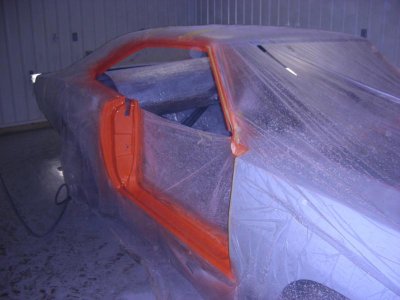
Man, painting is a love hate thing. I've been using House of Colors paint (white base, Tangelo Pearl and clear) and have to say this is some good stuff but very particular on how you apply it, if you topcoat it to quickly the white bleeds threw. I quit using the white base and just bought their white sealer instead (saves a step in the process). Anyways, I repainted the door jams and sprayed the charcoal on the rear taillight panel and where the rump stripe will be, now you can see the color contrast "kinda" the pics don't really show the charcoal very well. I'm hoping having this all done will make the paint job go smoother, just mask off the hood, rump stripe and taillight panel, paint it all pull the masking and clear "all done" sounds good anyways. I think I'll be painting my next car straight acrylic enamel, I have had really good luck with it and it isn't near the hassle or cost. DSCN7824.jpgDSCN7823.jpgDSCN7815.jpg
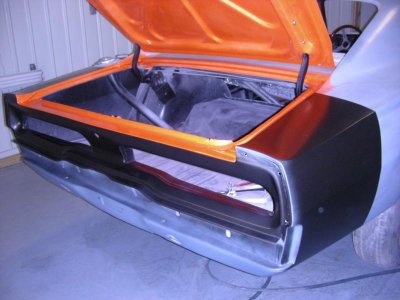
 
Can see the stripe real good. Looks great. Can't wait to see when you take the plastic off and paint the rest of the car.
 
Can see the stripe real good. Looks great. Can't wait to see when you take the plastic off and paint the rest of the car.
Keep in mind, that's not the stripe just a blotch of charcoal that will be feathered into the rest. I will later mask over it (1969 style rump stripe) before painting the rest of the car so when it's done it will look like the 1969 stripe. I just painted the whole rear because the taillight panel will be that color as well so this saves me some wet sanding to feather it in. Now if I can just pull 800.00 out of my @*$, oh well I got my replacement lifters from Comp so I guess for now it's back to the motor.
 
Looking nice, I love the color... good luck with your engine wows, keep us posted
 
I found these pics so I thought I'd post them, it may help someone. My grill was pretty busted up, I talked to a guy that restores them and he recommended plastic weld (it's not weld it's a plastic epoxy). I used a dremel for the prep work, the mini wire wheel works great for cleaning and roughing up the plastic. For the missing pieces I used foam for a form and just filled it with epoxy and then sanded to the final shape. I pried and wiggled them to make sure they wouldn't break. I'll take some pcs of the grill once I get around to washing it.
 

Attachments

  • DSCN5565.jpg
    DSCN5565.jpg
    69.7 KB · Views: 688
  • DSCN5564.jpg
    DSCN5564.jpg
    90.1 KB · Views: 692
Well, I had a little time to waste while I was waiting for my daughter to get off of the bus and managed to get all of the lifters and pushrods back in. I never pulled the intake and was able to get them back in easily with a telescoping magnet and didn't drop a one:hello2: All that is left is to set the preload, to bad things are about to get buisy at work and I'll probably not get around to it for a while.
 
Thanks for showing the grill work. Can you go into more detail of the repair work you did for it?
 
Thanks for showing the grill work. Can you go into more detail of the repair work you did for it?
Yeah, there wasn't much to it though. Like I said before all the prepping was done with a dremel and a small wire wheel (paint removal, cleaning, and it will actually remove material as well). The "plastic weld" can be bought a Walmart or any Auto store, I used both the Permatex brand and the Loctite the only real difference I noticed was the smell (both worked). They are a two part epoxy that comes in the small dual tube dispenser's just like 5 min epoxy and have to be mixed. For the pieces that were just broken and not missing I cleaned them with the wire wheel and V'd the crack out to get the epoxy all the way threw. For the big missing pieces like the mounting tabs I found some donor plastic (try to use a rigid plastic like the plastic your grill is made of) I cleaned up all the breaks making them nice and straight and then made a new piece and epoxied it in (gain V'ing the joints). For the small pieces like in the pics I just used foam as a form and filled them with epoxy. It is very important to do the prep work and make sure there is something for the epoxy to bight into, the wire wheel does a great job of that. After it was all repaired I used a rotary file on the dremel to knock off the bulk of the material,then used small files and finished it with sand paper (sand paper on a popsickle stick works for getting in the small area's) Then just prime, sand and paint. I suspect play doe may work better then the foam did but it worked. I really tested the repaired pieces, I'd say they are every bit as strong as before maybe even more so being I tried to leave extra material for strength. I hope that helps and like I said I'll get some pics of it as soon as I have time to clean it up.

- - - Updated - - -

On a side note, I may be back in business. I don't know what it is about this car but it seems to always work itself out for me. When I found the car I just happened to sell a mobile home for the asking price (I never have much money). This has happened over and over again throughout the build. I stopped up at a buddies house to drop off some tools I borrowed and someone just happened to say they needed a mower and "guess what" I just happened to have one "walla" I now have paint money.:headbang: Now the big problem will be finding the time to do it.
 
Thanks for taking the time to write up the details on your grill repair. Great work.
 
A little off subject but, There is some great working epoxies for fixing or assembling Golf Clubs/equipment, that may work really well also, form Golfsmith www.golfsmith.com in the Club making dept. under tools, called Golfsmith Van Epoxy, it's quick drying {30 minutes}, you may want to get the Applicator syringe too, there is also 12 hr & 24 hr epoxies that work very well on, mix 50/50 hardener to epoxy, for metals, or plastics or any combination of, pot metals, aluminum, steel, stainless, titanium, plastics, fiberglass & carbon fiber too, works great, need to rough up the surface & bee clean, for it to stick... I've used it for multiple type repairs... as long as it's used in areas that aren't exposed to 250*-300* heat for extended periods of time...
 
Don't see how that's off subject, maybe right on subject. Sounds a lot like what I used, thanks for the added info.
 
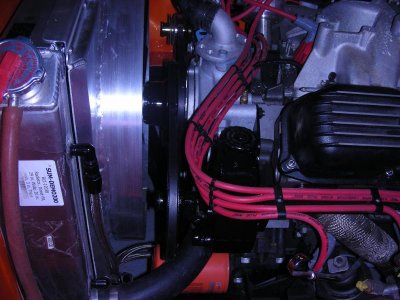
Finally victory is mine, the damn pulleys all line up at the cost of some dignity. It was all caused by an error on my account, both my motors used to built this (400, 440) were bought as basket cases and as a result the culprit was one incorrect bolt "the harmonic balancer bolt". I was messing with the crank pulley when I noticed that the crank bolt washer was loose "I know I torqued it" so I checked it again, then pulled it out to find out it was bottomed in the crank. I did some digging and found another bolt that was shorter and walla it pulled the balancer back enough that it all lined up. Running the motor must have walked the balancer back enough for the washer to become loose and luckily helping me find it "thank goodness". I managed to get the power steering pump rebuilt, repainted and installed to check the alignment of it "perfect". Now to get the fan shroud finished and I'm done with that and on to the mufflers again. On the upside I have all of my paint except the clear which is supposed to be in this weak "I can smell the rubber already". I'm getting excited now, shouldn't be long before I pull it out of the garage under it's own power and take it for a short drive with no windows, rear seat, mufflers or decent tires "maybe I'm getting ahead of myself". I also picked up a totaled Chevy Cruze for my wife so I'll have to make sure it takes a while to get the parts so I can buy some time for the Charger HAHA.
 
Awesome!! So close.........I know how you feel..lol Hopefully the last odds and ends go well for you and she's on the road in no time. Be sure to take some good vid or action shots when she makes it to the pavement.
 
Don't see how that's off subject, maybe right on subject. Sounds a lot like what I used, thanks for the added info.

You can also get black pigments to add if needed, I think there are other pigments available too, but never used any other than Black... Your car is sounding like it's getting really close, glad to see you found the problem with your pulley alignments, I use aftermarket SFI Rated Degreed 90*/360* marked Harmonic balancers/Dampeners all the time, you always end up needing to shim the accessories or the water pump pulley or the crank pulley, they almost never are correct spacing, I feel your frustrations, at-least it was an easy fix & you caught the mistake early.... Good luck, keep on keepen on, get R' done
 
Looking really sharp 747! Gonna be great to see the whole thing in paint, that color is awesome :icon_thumleft:
 
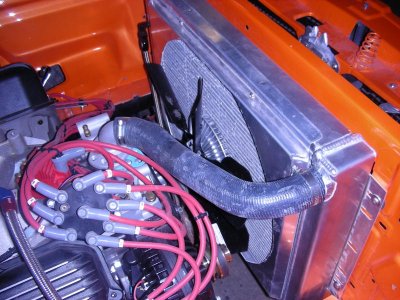
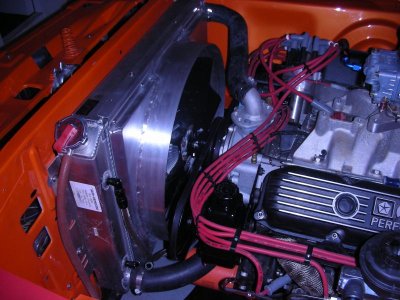
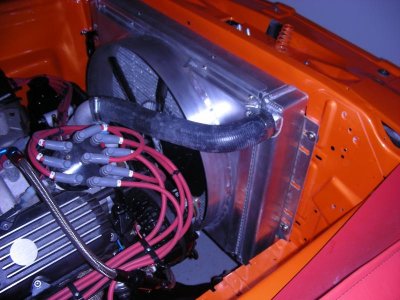
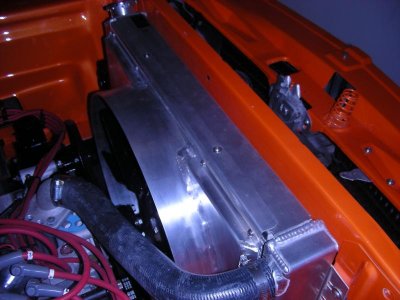
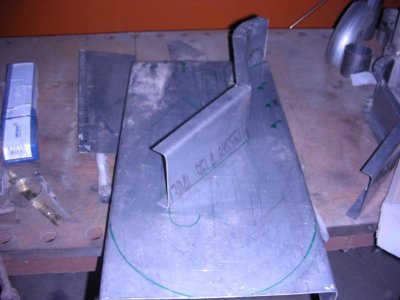
Lack of progress this past weekend but for a good reason "wiener roast with the kids and lots of smores". Anyways, what I did do was start the mufflers but ran out of stainless and finished up the front of the motor. I hated not using the electric fan shroud that I had bought so I cut the opening bigger had my dad roll me up an 18" dia peace of aluminum and weld it in "there, now it's not wasted". I rechecked everything and ended up shimming the alternator a little, only thing to finish up on the accessories is the power steering hose which is supposed to be here tomorrow. Please never mind the ridiculous looking water hose neck, it came with the pump and I'm getting rid of it as soon as I find a better looking one. To bad I'll be heading out for vacation next weak, "almost there". Oh well, I can't wait for a weak off work, waking up whenever I want, eating when I want and playing with the kids all weak. We're going to the 4X4 beach (Outer Banks) with my cousin and his family (his wife is an awesome cook):headbang: I'm a little nervous, we're taking an inflatable boat (one of the nice ones) with a 15 hp Mercury to do some fishing in the Sound "I am scared shitless of sharks". It's an awesome place if you don't like crowds, you have to drive for miles up the beach (no roads) to get to the house. DSCN7789.jpgDSCN7789.jpgDSCN7906.jpgDSCN7907.jpgDSCN7908.jpgDSCN7910.jpgDSCN7905.jpgDSCN7912.jpg
 
I'm really starting to think this car hates me, A simple power steering hose "yeah right". I got it today, figured since I used a Saginaw (doesn't look like the ones I've seen on a Charger) I might have an issue with the hoses fitting it "nope" they had one for the Saginaw but it didn't fit the fitting in the steering box. Everything fit great except the 3/8" tube nut fits right over the one on the car, right style fitting just bigger then what's on the car. Everything about putting this car together is a pain in the ***, I guess that's my fault for buying a basket case. So, is there more than one size male flare fitting for these things or did someone put a bastard fitting on the steering box. The parts store said that they show another hose (67 I believe) that has the smaller end on it so I'll see tomorrow when it comes in, if not I'll be getting out the lathe, torch and silver solder and making the thing fit. I really wanted to fire this thing again with everything hooked up and operational before vacation but these little issues keep mucking up the progress. No worries, I'm not slowing down until it's on the road.
 
Auto Transport Service
Back
Top