• When you click on links to various merchants on this site and make a purchase, this can result in this site earning a commission. Affiliate programs and affiliations include, but are not limited to, the eBay Partner Network.

Tremec 5 speed conversion in a 1970 Charger

Yesterday I did adhere the oil pan gaskets to the windage tray and the Milodon oil pan.
SST 580.jpg
SST 582.jpg

The combination of both Milodon products looks like pretty decent oil control.
SST 581.jpg
 
I bought that same windage tray for my Hemi. I am tempted to open up the drain back louvers more,because Hemi engines are known for top end oiling issues,and I want to be sure there is always oil at the pickup,to keep the valvetrain lubed. I thought the louvers looked kinda small.
 
I bought that same windage tray for my Hemi. I am tempted to open up the drain back louvers more,because Hemi engines are known for top end oiling issues,and I want to be sure there is always oil at the pickup,to keep the valvetrain lubed. I thought the louvers looked kinda small.
The plastic tray had smaller slots.

Windage 6.jpg
Windage 9.jpg
 
Bada-Bing!

SST 592.jpg


I left the drain plug UNpainted. The paint flakes off the edges after the first oil change anyway.


SST 593.jpg

SST 596.jpg


The tray sticks out past the pan a bit but that is probably because the pan is shorter than stock as I mentioned before. There is "The Right Stuff" at each side of the gaskets. Block-sealant-gasket-sealant-windage tray-sealant-gasket-sealant-oil pan.
The sandwich is in place.
When I built my first 440 in 2001, I used regular oil and a bottle of Comp Cams break in oil and that habit stuck with me. Over the years I have used Brad Penn, Joe Gibbs, Valvoline VR1, Royal Purple and Castrol. I didn't use a supplement with the Brad Penn or Joe Gibbs oil. I was at the local Speed Shop today and since they didn't have either of those, I bought 2 gallons of Redline 10w30. $48 a gallon ???
The regular oil I used before was often on sale for $20 a gallon, add the $15 for the Comp Cams supplement and I have $50 or so into the cost of oil. This other stuff never goes on sale and at $12 a quart x 6 quarts, that is $72 plus tax.
I know that owning these cars isn't cheap but jeez!
 
I pulled the carpet out of the box to flatten out.

SST 597.jpg


It looks pretty good as it is. Maybe because it was made just before I ordered it and it hasn't been in a box for a year?

SST 598.jpg


I ordered it with the "Mass Backing", it looks sort of like a bonded sound deadener.

SST 599.jpg


I used "Jigsaw" as my table for the carpet. The dogs like to come out to visit in the shop and they bring their muddy paws with them.

Pebbles shop dog.jpg
 
Nice to be loved by the furry buddies. Miss ours. Had to put them down on the 4th.
 
Bada-Bing!

View attachment 1069856

I left the drain plug UNpainted. The paint flakes off the edges after the first oil change anyway.


View attachment 1069859
View attachment 1069860

The tray sticks out past the pan a bit but that is probably because the pan is shorter than stock as I mentioned before. There is "The Right Stuff" at each side of the gaskets. Block-sealant-gasket-sealant-windage tray-sealant-gasket-sealant-oil pan.
The sandwich is in place.
When I built my first 440 in 2001, I used regular oil and a bottle of Comp Cams break in oil and that habit stuck with me. Over the years I have used Brad Penn, Joe Gibbs, Valvoline VR1, Royal Purple and Castrol. I didn't use a supplement with the Brad Penn or Joe Gibbs oil. I was at the local Speed Shop today and since they didn't have either of those, I bought 2 gallons of Redline 10w30. $48 a gallon ???
The regular oil I used before was often on sale for $20 a gallon, add the $15 for the Comp Cams supplement and I have $50 or so into the cost of oil. This other stuff never goes on sale and at $12 a quart x 6 quarts, that is $72 plus tax.
I know that owning these cars isn't cheap but jeez!

After break in, I have used the straight VR1 with NO problems, and it goes on sale occasionally.........
 
Sorry for the loss of your pet. That is always a heartbreaker.

Doggies A.jpg


I have been there, friend. They get into your heart and become part of you.
 
Last edited:
Still waiting on the drive shaft but that is okay.....I have things to do.

I put a little sound deadener on the tunnel patch.

SST 600.jpg
SST 601.jpg


Time to lay some C A R P E T !!!

The back section goes in first. I didn't have those thin aluminum strips that go in at the bottom of the rear kick panels so I tucked the carpet under the panels.

SST 602.jpg
SST 612.jpg


I used an awl to poke the holes for the seat belt bolts and seat mounting holes, then pushed a soldering iron through to enlarge the holes. This method melts the carpet around the hole and prevents the fabric from unwinding.

Now for the front section.
The center tunnel is easy on cars with bench seats because there isn't anything in the way. A console car has the mounting brackets to cut around.

SST 604.jpg


This carpet has heavy jute backing and that "Mass Backing" mat applied to the backside. I made sure to route the wires where they would reach. The wires seen above are for the electric trunk latch.


SST 603.jpg
SST 605.jpg
 
The old carpet was quite short.

SST 42.JPG


I bought it in 2001 or 2002. I knew it looked short but I didn't know until later that back then, there were a LOT of instances where people got short segments like this and were pissed off enough to send it back. I just thought that this was crappy but par for the course.
SST 60.JPG


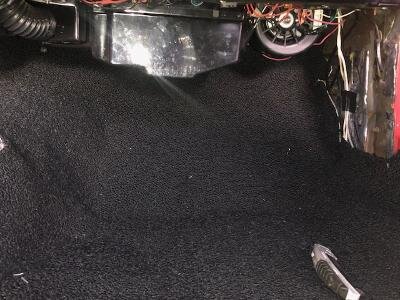
Sitting in the back seat, all those wires were visible. Not anymore!

SST 611.jpg


I ran the carpet up above the steering column. I even cut around the clutch pushrod.

SST 610.jpg


That is good because if I cut the carpet lower, I would have had to spray this shiny thing to hide:

SST 130_LI.jpg
 
I cut around the gas pedal bracket and cable. The carpet came with the grommet to put around the dimmer switch. I may or may not use it.

SST 607.jpg


SST 606.jpg


SST 611.jpg


The foot pad looks like it is a bit to the right OR that I may have the whole section to the right a bit. I'm not sure. Maybe the new, taller bulge of the transmission tunnel patch is responsible? I'm okay with it. I use floor mats anyway.
 
I was going to just put the console back in after a wipedown but...

SST 613.jpg
SST 614.jpg


There is a small crack on the back section. I may lay a section of plastic underneath it with glue to keep the crack from spreading.

SST 615.jpg


I also looked at the dingy condition and thought of how it sucks to see old faded bumpers on a fresh paint job. I can't do that!
 
I have a question about the shifter these transmissions "come" with.. I am used to external linkage types of Transmissions and having to add stock linkage or Hurst.. With these "toploader" types that have internal linkage when the supplier says " with this shifter" is that ONlY the small "tip" coming out of it? or do you have to buy the shifter handle that bolts to this also???
 
I like the attack positions your dogs are in. Get closer and I'll lick your face off! Your project is turning out nice. I'm hoping MATSLV and Spring Fling happen this year. Maybe run into you at one of them.
 
I have a question about the shifter these transmissions "come" with.. I am used to external linkage types of Transmissions and having to add stock linkage or Hurst.. With these "toploader" types that have internal linkage when the supplier says " with this shifter" is that ONlY the small "tip" coming out of it? or do you have to buy the shifter handle that bolts to this also???
The Tremec does have an internal rail design with this small stub.

SST 13_LI.jpg


The shift lever is part of the kit. The standard was the Pre-1970 shifter with a round , curved lever and a ball at the end. I wanted the Pistol Grip. That cost extra.
 
I like the attack positions your dogs are in. Get closer and I'll lick your face off! Your project is turning out nice. I'm hoping MATSLV and Spring Fling happen this year. Maybe run into you at one of them.
Yes..These doggies are just a couple of couch cuddlers. They love people as long as the Wife and I see them first.

Regarding the car shows....I'd love to see them happen. If they do, I'll see you there!
 
Last edited:
The drive shaft came in today.

SST 616.jpg


SST 617.jpg


SST 618.jpg


The new shaft is a 3 1/2" diameter, surely more beefy than the stock 3" shaft I had before.
It weighs a bit more too.

SST 619.jpg


Old shaft:

SST 620.jpg


Five pounds. The U joints in the new shaft feel so tight compared to the old ones.
 
For many years, maybe since before I bought this car in 2000, the parking brake wouldn't stick. The release lever had no tension to it. I had to press the brake and push the release lever IN to get the ratchet to hold.

SST 624.jpg


I didn't have a problem with it since for for over 50 years, the car has had an automatic transmission in it. Now with the manual trans, I need a functioning parking brake that anyone could use in the event that the Wife drives the car...... or a buddy drives the car. ( A real GOOD buddy!)

I had planned on swapping the parking brake assembly with the one in the other car, Jigsaw....

2 Chargers B.jpg


I thought that I could rig up some sort of alternate return spring to pull the release lever back toward the firewall.
Then I noticed....

SST 625.jpg


That coiled spring was all the way forward on the rod and touching the release lever. The spring had pushed through the hole in the bracket because....

SST 625_LI.jpg


The plastic retainer grommet had split, allowing the spring to get past the bracket. I pushed the spring back through, reinstalled the plastic grommet and then put a small hose clamp on the rod, leaving it loose enough for movement but snug enough to keep the spring on the other side of the bracket.

SST 627.jpg


SST 626.jpg


I just LOVE a free fix!
 
Last edited:
Auto Transport Service
Back
Top