• When you click on links to various merchants on this site and make a purchase, this can result in this site earning a commission. Affiliate programs and affiliations include, but are not limited to, the eBay Partner Network.

What did you do to your Mopar today?

Called a steel building manufacturer/fabricator. Currently, prices are up 10% because of tariff worries/etc. I'll wait it out while I explore other options.

Started cleaning, clay barring, polishing, and applying a paint protection product to my SS22L9R. Will finish up with carnuba wax afterwards because I am A-retentive. Paint finish is still bright and shiny after all these years. Car was originally polyglycoated by the dealer and I kept it waxed it when it was driven regularly. I'll post pictures after I am finished detailing the interior and exterior.

I just went with a pole barn, was a third of the price for double the size. if you can assemble yourself. framed walls and sided it after. permitting was a lot less if it applies in your area.
 
Reassembly after paint....did the body work and painted it myself (in pieces and sections) with base/clear.
Biggest job, as others have confirmed, is the prep work, base/clear is very forgiving.
Hoping to have it ready for Carlisle.
(Don't know why the pictures are double posting.)

AAAA - 1 (1).jpg
AAAA - 3 (1).jpg
AAAA - 2 (1).jpg
AAAA - 1 (1).jpg
AAAA - 3 (1).jpg
AAAA - 2 (1).jpg
AAAA - 1 (1).jpg
AAAA - 3 (1).jpg
AAAA - 2 (1).jpg
 
sweet looking color its awesome. whats between the fenders for go power. interior shots please and is the strip white or cream color.
 
I splashed a cab for my snowplow. No, it's not perfect. It will never be off my property so it isn't worth doing all the extra work to be straight. I love the way this color flips.


IMG_6417.JPG
IMG_6422.JPG
IMG_6423.JPG
 
Reassembly after paint....did the body work and painted it myself (in pieces and sections) with base/clear.
Biggest job, as others have confirmed, is the prep work, base/clear is very forgiving.
Hoping to have it ready for Carlisle.
(Don't know why the pictures are double posting.)

View attachment 617270 View attachment 617271 View attachment 617272 View attachment 617270View attachment 617271 View attachment 617272View attachment 617270View attachment 617271 View attachment 617272
Double posts twice as nice. Looking great.
 
sweet looking color its awesome. whats between the fenders for go power. interior shots please and is the strip white or cream color.

Thanks for the comments...color is as close as we could get to original color of Chestnut.
Engine: Originally a 361/727. Now 451 Stroker with a 4 speed, 3:23 sure grip. Will post interior pics soon.
The strip on the trim "spears" is the "turned aluminum" look.
 
Went to garage to cleanup for next job after a month of wife sick then me and doctors appointments. Well a fine howdy dew flat tire on my Satellite. Pulled it off and looked it over. Will take it to my tire guy for him to fined the problem. Car sat for 9 years low tires but none flat. Took the edge off garage time. Want to put a sure-grip in my 3.23's before I put them in my Satellite. Open rear is a joke, wish original owner had checked the box.
 
Called a steel building manufacturer/fabricator. Currently, prices are up 10% because of tariff worries/etc. I'll wait it out while I explore other options.

Started cleaning, clay barring, polishing, and applying a paint protection product to my SS22L9R. Will finish up with carnuba wax afterwards because I am A-retentive. Paint finish is still bright and shiny after all these years. Car was originally polyglycoated by the dealer and I kept it waxed it when it was driven regularly. I'll post pictures after I am finished detailing the interior and exterior.

Here is an installment. This pic of the roof is after the paint protectant step, but before applying the carnuba wax...which I will apply and buff tomorrow evening. Garage door and pine trees are reflecting off of the roof.

I still have the rest of the car to do and it is filthy. My summertime project... :eek:...therapy :rolleyes:.

IMG_20180617_152230652.jpg


edit:
p.s. I am the original owner...original paint!
 
Last edited:
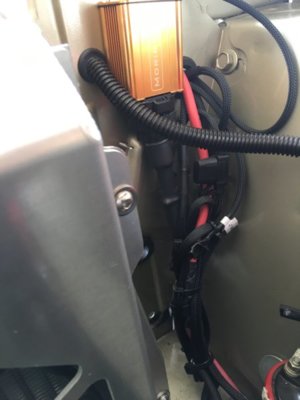
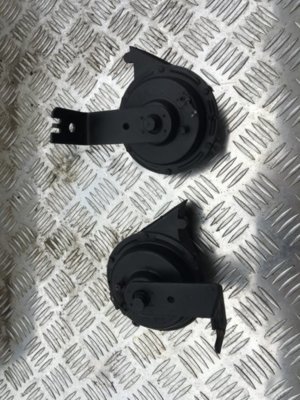
have the horns out due to headlight upgrade components taking their spot

gonna have to make up some new brackets n relocate or just find a new spot altogether


watermelon

E445A478-F212-40D6-B64D-406409FDAC07.jpeg 07173FE4-6240-4CCD-AB68-4D4173C34899.jpeg
 
Removed the pass side UBJ on the way to replacing the UCA bushings.

Fortunately the BJ broke loose with just hand power.

Got the SK breaker bar at a local pawn shop for $3.
Has a female 1/2" socket connector in the handle end so you can use it as a long extension, or as I did, add leverage with a long extension. Pretty cool idea.

Check out the odd BFH I got at the local flea market-
Not sure what the intended use is, but it's REAL easy to smack the spindle to separate the BJ, and it's intimidating as hell if I walk around with it when uninvited guests show up.
IMG_20180617_160723.jpg
IMG_20180617_160756.jpg
IMG_20180617_161731.jpg
IMG_20180617_162125.jpg
IMG_20180617_162410.jpg
IMG_20180617_163432.jpg
 
5915B7BC-7244-4296-88F2-73C694D65FF6.jpeg
DA6E7F49-8DD0-45C4-8B9C-431F7144FA26.jpeg
78100BB3-8CBF-4CD7-8662-BD7A8069E226.jpeg
So my brother got a good deal on a couple Be Cool radiators a while back. He also recently got a used one with a fan shroud. So I’m working on getting out the old radiator so I can figure out which one to use. He also has a 26” but I don’t think I want to do that much modification to get that in the Coronet.
 
Last edited:
this weekend me and my brother
taped off and painted the underside of the a12 bee
in a urethane paint that mimics the color of dip primer..
it will be off the rotisserie this week the first time in too many years!!
lZjIqiQ.jpg

2aQLpHv.jpg

I0SigCQ.jpg

also put in some time blasting the rear end of the 71
been doing it in sections
will throw some epoxy primer on it after its finished
and on to the next area..
RE0F4cG.jpg
 
Well this sucks, I gotta beat this mangled hole back in so I can figure out where to mount one of the radiators. No clue why this is in here. I may have to move the battery too.

IMG_1422.JPG


Not sure the New radiator is going to work, the inlet at the bottom is right in line with the oil filter. Once I get that hole flattened out I can get a better idea if the Used radiator and shroud will fit better. It has side mounted tanks so it'll move the lower inlet away from the oil filter and fan.

IMG_1415.JPG
 
Reassembly after paint....did the body work and painted it myself (in pieces and sections) with base/clear.
Biggest job, as others have confirmed, is the prep work, base/clear is very forgiving.
Hoping to have it ready for Carlisle.
(Don't know why the pictures are double posting.)

View attachment 617270 View attachment 617271 View attachment 617272 View attachment 617270View attachment 617271 View attachment 617272View attachment 617270View attachment 617271 View attachment 617272

Love the color. That's going to be a sweet ride. Congrats.
 
Reassembly after paint....did the body work and painted it myself (in pieces and sections) with base/clear.
Biggest job, as others have confirmed, is the prep work, base/clear is very forgiving.
Hoping to have it ready for Carlisle.
(Don't know why the pictures are double posting.)

View attachment 617270 View attachment 617271 View attachment 617272 View attachment 617270View attachment 617271 View attachment 617272View attachment 617270View attachment 617271 View attachment 617272


Beautiful!
 
Auto Transport Service
Back
Top