• When you click on links to various merchants on this site and make a purchase, this can result in this site earning a commission. Affiliate programs and affiliations include, but are not limited to, the eBay Partner Network.

1968 Plymouth GTX

Post a picture of what you have going on..

Trunk lid to high & raising the latch seems like the wrong adjustment to me..
 
Okay,
Here's the front gap and alignment:
Front Gap.JPG


Here's the rear gap with the latch engaged.
Right Rear Gap.JPG


Without the catch installed it will push down and look even.
Moving the catch upward on the trunk lid reduced this gap a lot but not enough.
 
Got it fixed:
Right Rear View.JPG


Left Rear View.JPG


Had to move the catch in the trunk toward the right side for better alignment and then lengthen the slots in the latch by 1/4".
 
The temperature door for my heater box.
I discovered that there are two different doors used on these non-A/C heater boxes.
One like this which has the swing arm facing into the box:
Wrong Door.jpg


And the one like this that has the swing arm facing out:
Example of temperature control door rod bend  length.JPG


Mine is like the second box but the original door had the swing arm broken off when I got it.
I was only able to find the door that fit the first box shown with the arm facing in. So I decided I would detach the rod from the door and then simply reposition it and weld it back in place.
The problem I found was that the inward facing swing arm is about 5/8" shorter than the outward facing arm.
So I took the broken shaft from my old door and put a bend in it. Then marked where to cut the rods in order to weld weld them together.
Rods to modify.JPG


I then beveled the cut edges and MIG welded them together:
Rod Extention welded into place.JPG


Positioned the rod to the door and weld the rod in place:
Rod Welded to Door.JPG


Dressed the welds and got it cleaned and painted:
Ready for Foam.JPG


Applied foam and installed:
Installed.JPG


Now all I have to do is get a new cable for it.
 
Trying to clear some space in my garage so I cleaned up the wiper linkage and painted the motor and then installed it.
Wiper Motor.JPG


Pulled the dash frame out to follow the suggestion of assembling on the bench before installing.
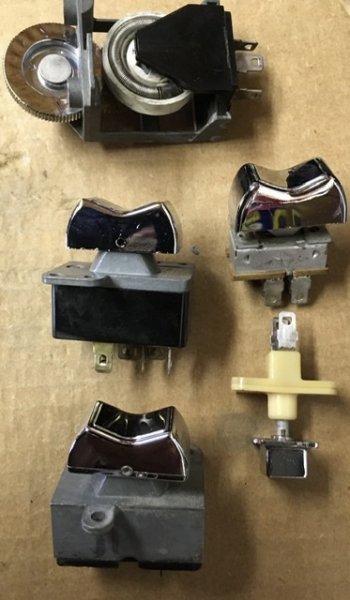
Noticed that the chrome rocker switch button on my headlight switch is in pretty bad shape. Started looking for some place to buy just the one I need but having no luck.
Anyone have a source for these? I don't want to have to buy a set when I only need one.
 
This guy has 2 for sale individually, but not sure if they would work for the X.

 
This guy has 2 for sale individually, but not sure if they would work for the X.

Thanks but they are not the same.
 
Trying to clear some space in my garage so I cleaned up the wiper linkage and painted the motor and then installed it.
View attachment 1501677

Pulled the dash frame out to follow the suggestion of assembling on the bench before installing.
Noticed that the chrome rocker switch button on my headlight switch is in pretty bad shape. Started looking for some place to buy just the one I need but having no luck.
Anyone have a source for these? I don't want to have to buy a set when I only need one.

Enjoy following your build. Don’t know how bad your switch plates are, but the chrome on mine was pretty bad. They were discolored & even appeared pitted. I used some windex with a toothbrush, then some diluted “Dawn’” with a piece of clay bar, followed by some plastic polish.
BEAB3BF3-D72A-42B8-89F0-DADBF686FD2B.jpeg
 
Waiting for some under dash insulation to arrive.
Decided to start assembling the dash as suggested by someone on here.
Gauges and Radio Installed.JPG


Took a look at my woodgrain trim and this is what I found:
Woodgrain trim badly faded.JPG


Decided to see what I could do with it. First I took some different colored objects and put them behind the faded area to see if it would make a difference.
A piece of treated wood seemed to match quite well and I happened to have some wood stain the same color.
I held the part up in front of a light so I could see my progress:
Woodgrain Restore Progress.JPG


I kept on with it trying to cover any areas where the light was shining through. I even found a red that matched the GTX letters but it was difficult to get good coverage. The chrome paint areas are extremely thin so not much I could do there but I did try.
Woodgrain Restored.JPG

Plan to shoot clear coat over it hoping to get a bit more depth to the color.
I still need to find a radio surround piece since I do not have one.
 
Began the nightmare of checking out the under dash wiring harness today.
Dash harness needs work.JPG


Repaired a few broken wires and was looking at the Map Light connections when I noticed the thing is broken.
Map Light Broken.JPG


I highly doubt anybody sells just the switch. Anybody else dealt with this?
 
Waiting for some under dash insulation to arrive.
Decided to start assembling the dash as suggested by someone on here.
View attachment 1501896

Took a look at my woodgrain trim and this is what I found:
View attachment 1501904

Decided to see what I could do with it. First I took some different colored objects and put them behind the faded area to see if it would make a difference.
A piece of treated wood seemed to match quite well and I happened to have some wood stain the same color.
I held the part up in front of a light so I could see my progress:
View attachment 1501905

I kept on with it trying to cover any areas where the light was shining through. I even found a red that matched the GTX letters but it was difficult to get good coverage. The chrome paint areas are extremely thin so not much I could do there but I did try.
View attachment 1501907
Plan to shoot clear coat over it hoping to get a bit more depth to the color.
I still need to find a radio surround piece since I do not have one.
FYI, the radio piece for '68 does not have any lettering.
 
Auto Transport Service
Back
Top