• When you click on links to various merchants on this site and make a purchase, this can result in this site earning a commission. Affiliate programs and affiliations include, but are not limited to, the eBay Partner Network.

My 1967 Belvedere Convertible Plans and Restoration (aka - Mad Scientist Build)

Damn that was a long read but I'm finally all caught up haha you've been doing some great work 67 and I can't wait to see this one finished. Gonna be one righteous ride!!

And good luck with the quarter return, sucks they're only "half" taking care of you on the customer service front. Maybe I missed it but did you get the new ones ordered yet? If it were me I would probably try my luck with Goodmark next. I can't say for sure since I've only bought AMD, but I haven't seen any horrible words about them that I remember :shruggy:

Thanks Speedy - nice to have you aboard ! ! !

I've got some hopes and some plans . . . now to see if I can make them reality ! ! ! ( smile )
 
Hemi time . . . got some parts to get installed on my engine . . .

Now I've had this bolt now for a couple months, dealing with missing parts . . . and forgot I had it.

So it's time to get started on getting this engine back together . . . might need to build a frame/cradle to hold it and the transmission . . .

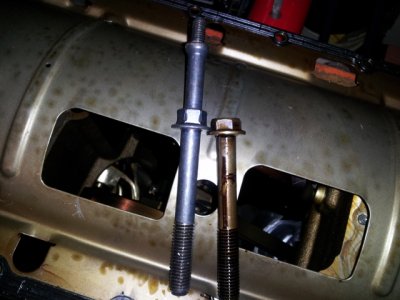
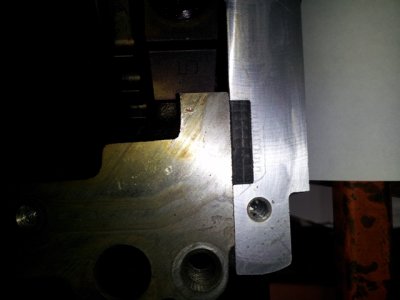
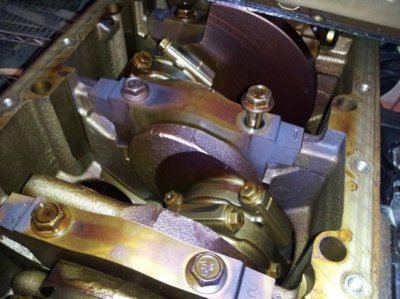
Here's what I've got done . . . not too much . . . First, the main bolt, that will be replace with the bolt to hold the oil pickup needs to be removed.

sm_hemioilpickup1.jpg

Here's a side-by-side of the two bolts so you can see what's happening - the extended stud will hold the oil pickup.

sm_hemioilpickup2.jpg

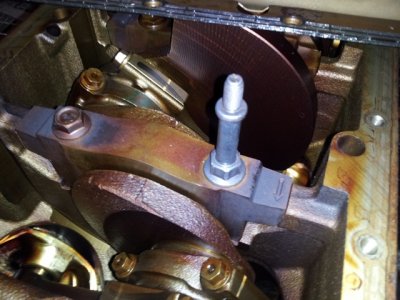
The new bolt gets replaced into the main . . . and gets tightened to specs ( 20 ft/lbs + 90 degrees ? ? - who thought of this ? ? ? )

sm_hemioilpickup3.jpg

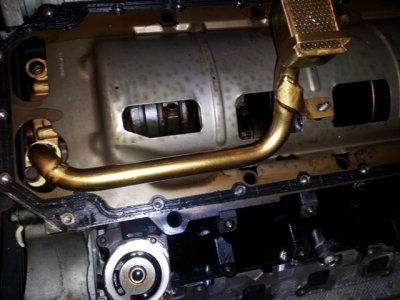
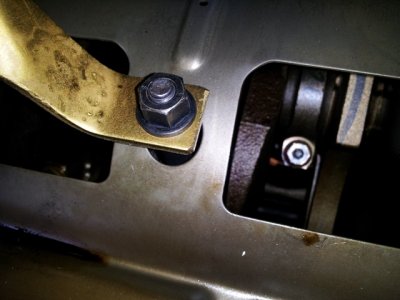
Then the center oil pickup can be bolted into place and be held securely . . . looking good ! ! !

sm_hemioilpickup4.jpg

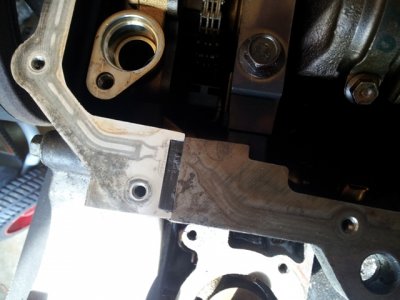
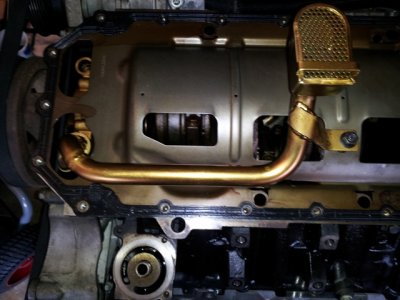
I've not tightened the pickup in place yet as I'm trying to figure out what to do with the gaskets. I've got a new set of (2) gaskets, which I assume go on over and under the windage tray to seal the oil pan. However - the windage tray has got a rubber gasket material in place that was used to seal the original oil pan. I know - don't re-use the gaskets . . . but IF I apply some high temp black RTV to both sides of the windage tray ( where the existing gasket material is ) would that not seal up the oil pan from leaking ? ?

NOTE: The existing gasket is rubber and is permanently attached on top and bottom of the windage tray - you can see it in the pictures near the edges.

1 - Do I apply high temp RTV and seal it up like that ?

2 - Do I need to buy a "new" windage tray - with a new gasket - to install this properly and keep it from leaking ?

3 - Do I use the double oil pan gaskets ( over and under the windage tray ) and just go with that ?

Thoughts . . . comments . . . alright ( nasty remarks ? ? - be gentle . . . ) . . . What do you think should be done ? ?
 
What are the new gaskets made out of? I personally don't like using RTV in conjuction with gaskets (makes them slippery and causes them to squirt out). If the new gaskets are cork I'd use a sealer that bonds it in place to eliminate excessive movement, Edelbrock makes one called Gassinch (?????). I use Permatex #2 and just snug everything and come back later after it's firm and final torque (seams to hold the gaskets in place very well and seals everytime). If you want to use the rubber over again which allot of them are reusable I'd just inspect it really good and put it together dry. P.S. All the windage trays I've seen just took two pan gaskets.

- - - Updated - - -

That motor really looks good inside.
 
you should be able to just re-use with nothing and it shouldn't leak. When I re-used mine the first time I just threw a tiny amount of rtv on it to help it seal. I bought a new one after that but shouldn't have. In the end I sold that one to 5.7 Hemi for his stroker build....
Do not use the "other" gaskets with the windage tray, it will cause it to leak. My vote is a very thin layer of rtv on both sides of the tray and bolt it back together.
 
Don't know as I haven't done it but I've been told to not use anything with them if they are like the combo windage/gasket deal for BB's from Summit and moder trans gasket. My trans guy used a reusable 727 trans gasket on the pan and told me to never put any sealer on it. He's been using the resuable trans gasket on his race car and has had it off and back on a half dozen times. He's also a mechaic for the local Chrysler dealer
 
Alright . . . unanimous vote to not use the (2) new gaskets - WHEW - didn't want to use them anyways ! ! ! This should be a nice, clean look . . .

Now I've got my marching orders . . . and the weekend . . . let's see what we can get done . . .
 
Good luck Khan .. check back in later and let us know how it's going or how it went if you get done quickly
 
This is incredible . . .

My neighbor informs me that a friend of his has an oak tree, that has fallen in his yard, he's got it all cut into firewood lengths, and that is free - I just have to come and pick it up . . . sounds good to me ( my firewood pile is almost GONE due to this winter ). So I call the guy up, make plans to go check out the oak, go pick him up and head to his son's house. Really nice guy . . . we get a full truckload of the small stuff, and I head back home to drop it off - get it stacked, and head back over to work on the bigger stuff ( some of it almost 3 feet in diameter ). So, me and this guy are driving wedges and mauls into the wood and splitting it - he's right there every step of the way, and I'm loading it up into my truck. We fill the truck a second time with split firewood and there are (2) odd shaped pieces that would not split - I'll go back and get them tomorrow . . . while were splitting the wood and talking . .

You're not going to believe this . . .

This guy just turned 80 years old last week and he was out there splitting fire wood ! ! ! I want to still be splitting firewood at 80 ! ! !

So I drop the guy off at his house, and he tell me he just took (3) oaks down in his yard, and if he'd known me 2 weeks ago, I would have had more oak for my fire - the guy that picked it up hauled 7 loads - with his truck AND a trailer full of wood ! ! !

Day late and a dollar short ! !

Story of my life . . .
 
Good for him, I'm quite curtain my back isn't going to let me act like that at 80 or even 65 for that matter "man does it suck to screw your back up". Firewood is a very sore subject around here haha, I usually pile it up during the summer but because of my back throwing a fit I'm way behind and ran out over a month ago. Since I need dry wood I'm now stomping the 6" deep woods in this freezing weather looking for dead trees to keep my fire going. Boy do I just love this winter! Congrats Kahn
 
My neighbor informs me that a friend of his has an oak tree, that has fallen in his yard, he's got it all cut into firewood lengths, and that is free - I just have to come and pick it up . . . sounds good to me ( my firewood pile is almost GONE due to this winter ). So I call the guy up, make plans to go check out the oak, go pick him up and head to his son's house. Really nice guy . . . we get a full truckload of the small stuff, and I head back home to drop it off - get it stacked, and head back over to work on the bigger stuff ( some of it almost 3 feet in diameter ). So, me and this guy are driving wedges and mauls into the wood and splitting it - he's right there every step of the way, and I'm loading it up into my truck. We fill the truck a second time with split firewood and there are (2) odd shaped pieces that would not split - I'll go back and get them tomorrow . . . while were splitting the wood and talking . .


You're not going to believe this . . .

This guy just turned 80 years old last week and he was out there splitting fire wood ! ! ! I want to still be splitting firewood at 80 ! ! !

So I drop the guy off at his house, and he tell me he just took (3) oaks down in his yard, and if he'd known me 2 weeks ago, I would have had more oak for my fire - the guy that picked it up hauled 7 loads - with his truck AND a trailer full of wood ! ! !

Day late and a dollar short ! !

Story of my life . . .


Awesome you got the firewood and DAMN that's impressive for the old guy! My parents had me late (I'm 35 my dad is 81) and all winter long he still does his driveway and four of the neighbours... He just won't stop even though you can tell he's slowing down
 
More hemi work . . .

In between collecting, splitting, and stacking firewood - I've been trying to make some progress on the Belvedere . . .

Working on cleaning up the pedal assembly and painting it . . .
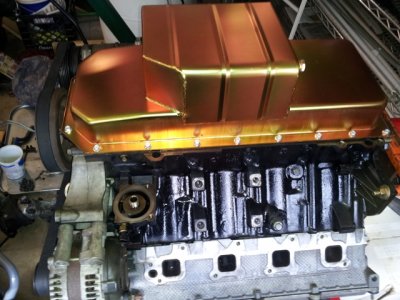
Getting the oil pickup and oil pan in place.

Here's the oil pan . . . getting ready to be bolted in place - there are (2) spots front and (2) spots rear where I added RTV - there was RTV on the gasket surfaces when I was getting them cleaned up - so I figured it would be best to follow suit and add a thin layer to help these (4) locations.

Front:

sm_oilpaninstall1.jpg

Rear:

sm_oilpaninstall2.jpg

Oil pickup secured in place - tightened to specs:

sm_oilpaninstall3.jpg

Here's how the new main bolt, that was replaced, works with the center pickup:
( notice the hole in the windage tray to accommodate the bolt . . . )

sm_oilpaninstall4.jpg

And finally - found the torque specs and the torquing pattern to get the oil pan torqued in place:

sm_oilpaninstall5.jpg

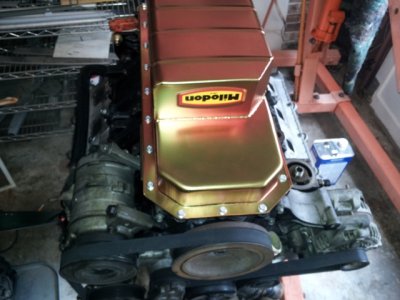
And the Side view:

sm_oilpaninstall6.jpg

Interestingly - I found this while digging for specs and torquing patterns:

NOTE: When the oil pan is removed, a new oil pan
gasket/windage tray assembly must be installed.
The old gasket cannot be reused.

15. Discard the integral windage tray and gasket and
replace.

Well . . . if it leaks I'll add RTV or discard and get a new windage tray/gasket . . .
 
Nicely presented Khan. Wonder if that's so they sell more or if the torquing affects the rubber O rings?
 
Pedal assembly work . . . got 'em in paint . . .

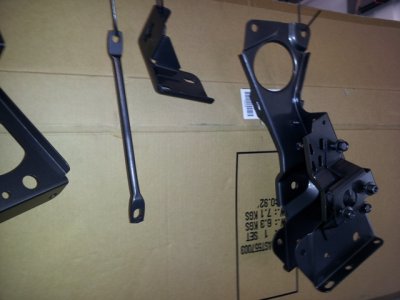
Along with some more firewood collection . . . I was able to get my pedal assembly over to my neighbors and get all the parts media blasted - all the old parts had a very light coating of rust from being on the car and unprotected for 45 years . . .

So now's the time to get them cleaned up, painted and ready to go back on the car ( when the time comes ) . . .

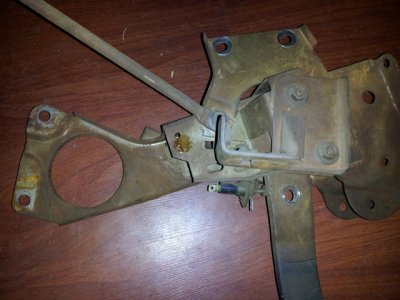
First the pedals as they were . . .

sm_pedals1.jpg

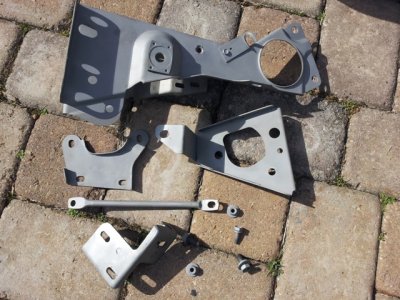
Then the parts after media blasting them:
( gotta love how that media blasting cleans up the parts ! ! )

sm_pedalcleanup1.jpg

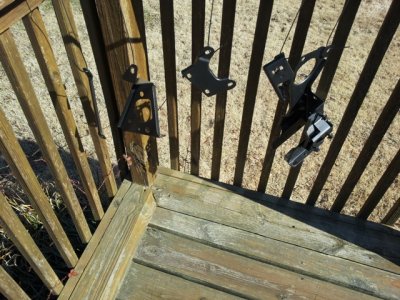
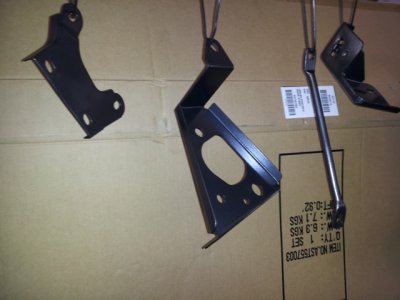
Then they got a coat of paint and hung outside in the sun to dry:
( wonder what color I should paint the pedal assembly ? ? )

sm_pedalcleanup2.jpg

And hanging in the garage to further dry:

sm_pedalcleanup3.jpg

And hanging in the garage to further dry:

sm_pedalcleanup4.jpg

Give them some time to get good and dry, and then I'll get the assembly put all back together . . . One more part almost ready for re-assembly.

- - - Updated - - -

Nicely presented Khan. Wonder if that's so they sell more or if the torquing affects the rubber O rings?

My guess Tallhair . . . so they can sell more and get more money out of us . . . the rubber gasket material looked in very good shape.
So I'll give it a shot and see if it's still intact before I go spend about $75-80 for the new windage tray and gaskets.
 
That's what I figure Khan .. on the gasket.

the pedals assy looks sweet all cleaned up and painted like that. Damn I'm going to have to get me a blaster !!!

What the specs on or compressor? Killer 2 stage?
 
Pedal assembly - the finished product . . .

I give up . . . couldn't wait any longer . . .

Wanted to see how it was going to look put all together . . .

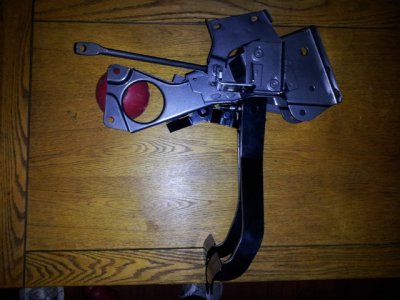
So here's the side by side comparison for the pedal assembly . . .

View attachment 168124.sm_pedalsdone.jpg

The assembly is painted with a rattle can, the color is a pewter metal flake . . . pretty cool ! ! !

Really like the way it turned out ! !
 
The curious case of the missing 3rd pedal is at or near the end .. just waiting to be installed now :) Nice job Khan
 
Auto Transport Service
Back
Top