• When you click on links to various merchants on this site and make a purchase, this can result in this site earning a commission. Affiliate programs and affiliations include, but are not limited to, the eBay Partner Network.

Viper T56 install

747 Mopar - that cross member looks fantastic ( now I know what I'll be needing to do with my TR-6060 6-speed install ) . . .

And you're right that cross member won't be going anywhere as is is the strongest part of the unibody ! ! LMAO . . .

GREAT WORK - as always . . .
 
Hey Dev,

I finally got home from my tradeshow and got caught up on the thread: the progress is amazing! One thing I can say; having a full frame under my car eliminates the need for the replacement cross-member you guys are having to fab up (one less thing for me to do).

Not trying to hi-jack the thread; just wanted to finish up with what we were discussing before I went out of town.

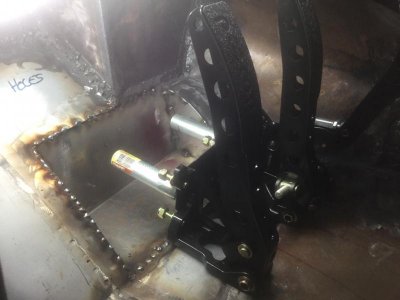
So I got my floor mounted pedals but haven't bought my MC's yet so I mocked up a plate and some conduit to simulate the real thing:

image.jpg

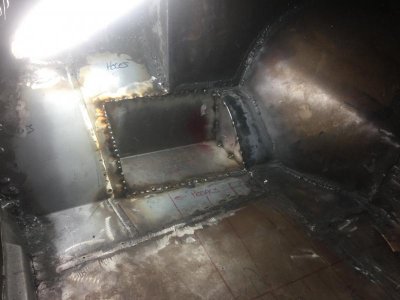
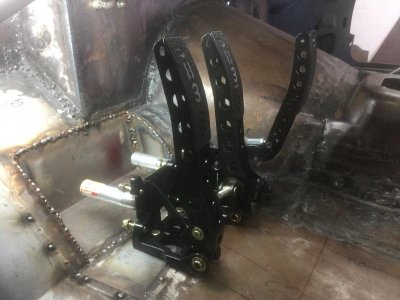
Once I had the "MC's" mocked up I put the pedals in the car and adjusted my seat where I like it, and as expected the MC's kept the assembly from sitting far enough forward, so I decided to cut out the base of the firewall where it meets the floor and built a box, giving the assembly the ability to sit nicely forward:

image.jpg

image.jpg

image.jpg

image.jpg

image.jpg

Considering all the work I had to do to get the floor mounted pedals to fit I don't believe hanging pedals were a real option; the engine set-back and firewall take up just too much room.

Just a word of advice:
Regardless of whether you use floor mount or hanging Wilwood/Tilton, or other similar style pedals, MAKE SURE you take into account the physical size of the MC's; they're about 4" long so they take up a lot of room.
 
That crossmember looks awesome Dev, great work!

And thanks for that post on the floor mount setup Bob! nice job frenching them in there, that's exactly what I figured I'd have to do if I ran them as well. Again sorry if I'm hijacking the thread here but how do the pedals feel as far as their hight up from the floor? That was kindof my main concern with them, if they might be too tall or something. Also how does the throttle setup work on the gas pedal? Some kind of hookup for a cable?

Thanks again to both you guys for all the info :icon_thumleft:
 
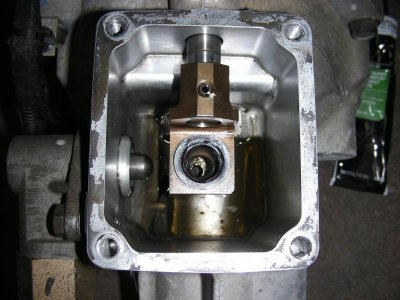
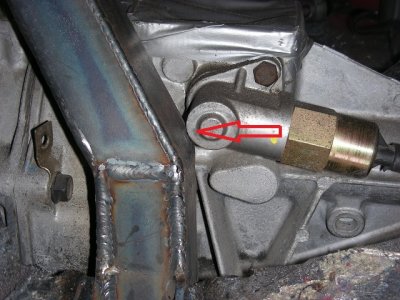
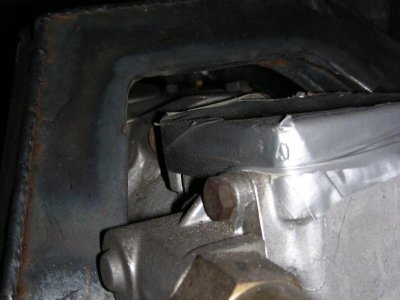
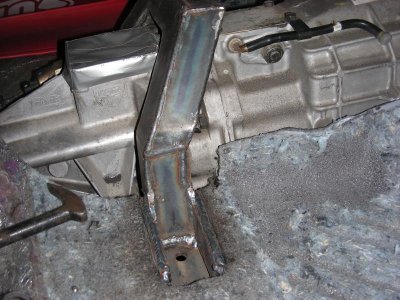
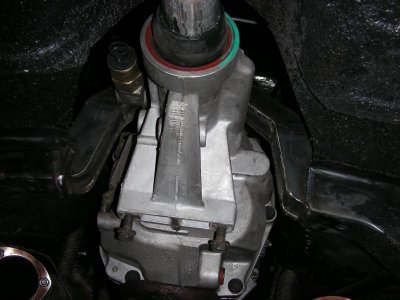
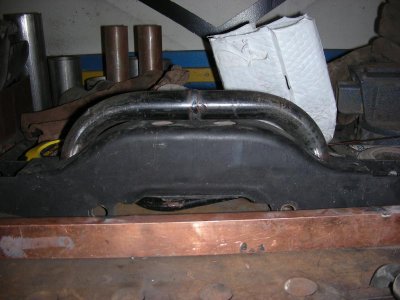
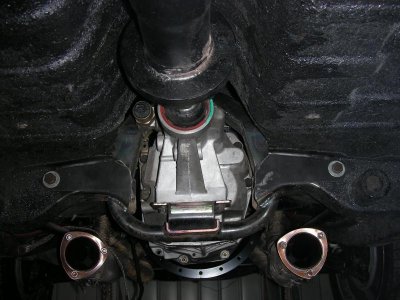
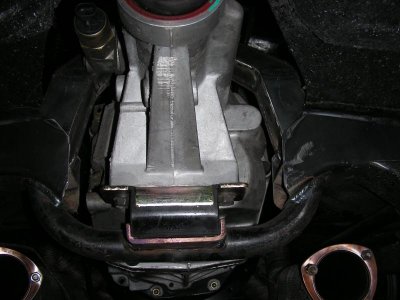
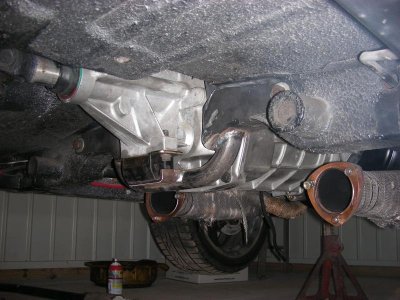
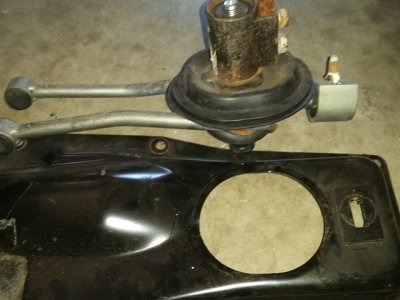
Don't worry about hijacking guys, it's something others are pondering so go for it. Tonight was a great night for getting r done! Having plenty of time I welded everything up on the cross member and went to town on the tranny mount. First I want to show something very interesting, I knew Goon wanted to use the forward shifter location so I thought it being a Viper trans will there even be a provision for it.................Nope. Here's a pic of the insides of both locations.
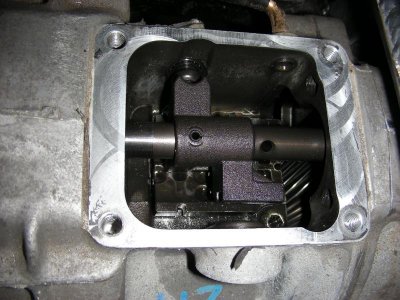
DSCN9516.jpg

DSCN9441.jpg

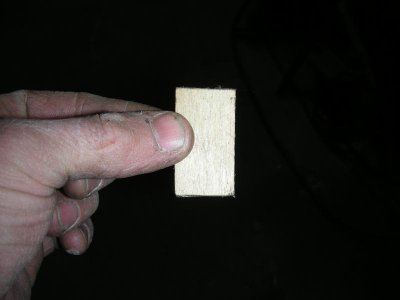
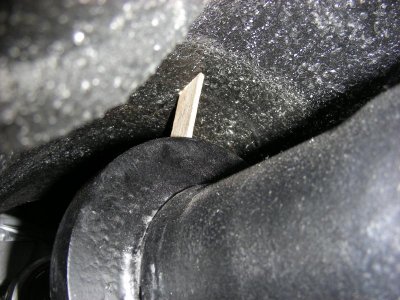
I made a trip to a buddies house to drop off some parts and made this little go no go gauge or you can just call it a paint stich haha. He has a 69 RR with the same driveshaft in it so I cut a paint stick to fit tightly between the floor and the donut on the drive shaft so now I know the height. I was close, had to drop it about a 1/4" which was great because it freed up some tight spots.

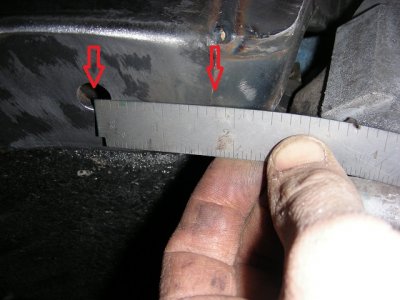
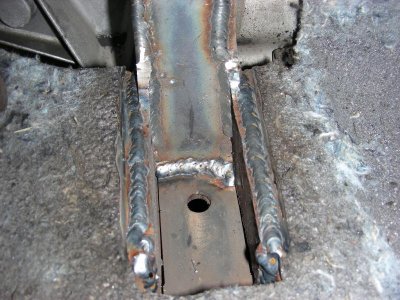
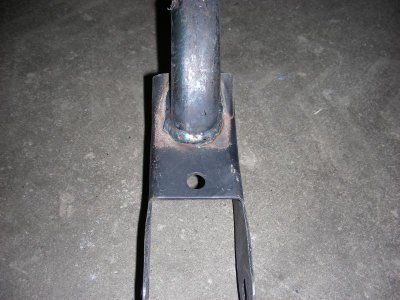
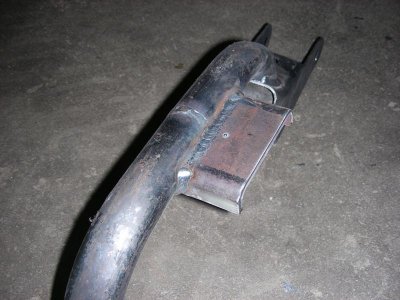
Sorry the computer is screwing with me and I can't put text to the individual pics so I'll try to explain. The pic where I'm holding the ruler shows how far in from the center of the hole in the bottom of the cross member to cut it off (about 1 3/4") on both sides.

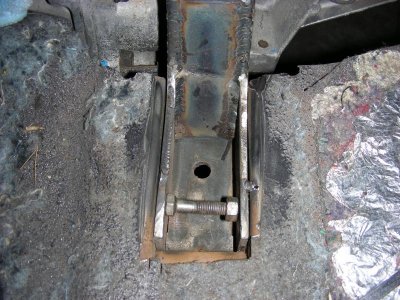
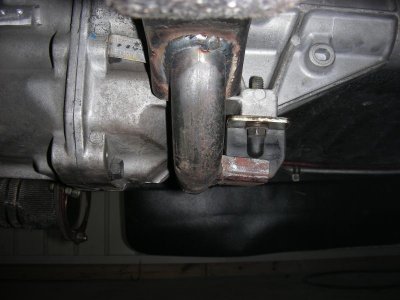
The ears bowed inward from the welding so the pic with the bolt in the cross member is showing how I pushed them out for a tight fit.

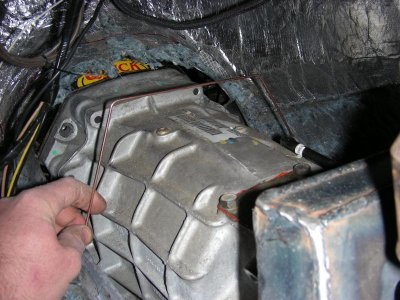
Dropping the tranny had one issue, you can see that the reverse lockout is now touching but I don't have the plate in front of the bell housing right now so it will go back 3/16" or so when that's in (may need some grinding).

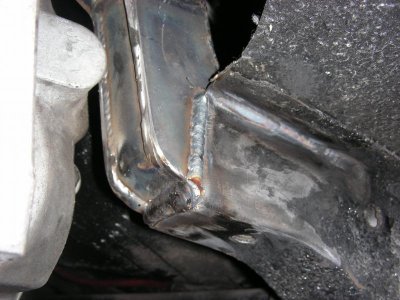
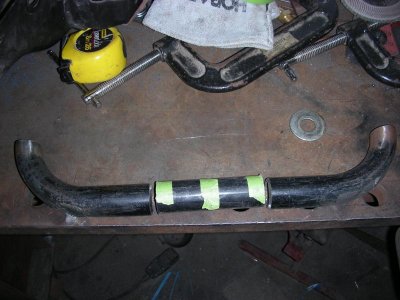
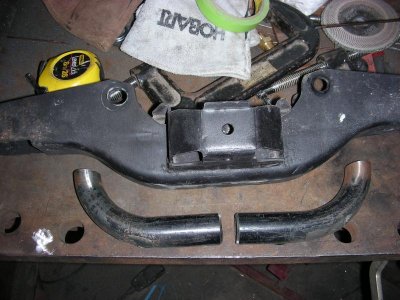
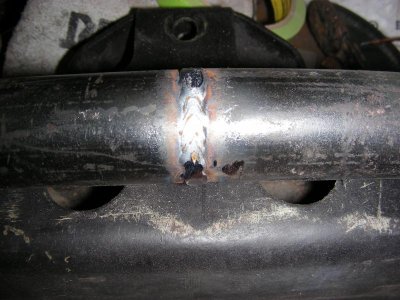
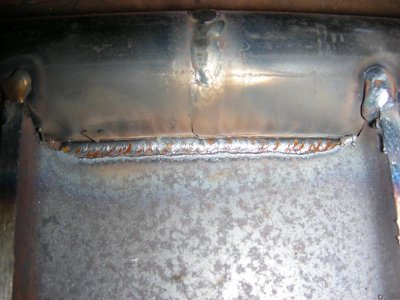
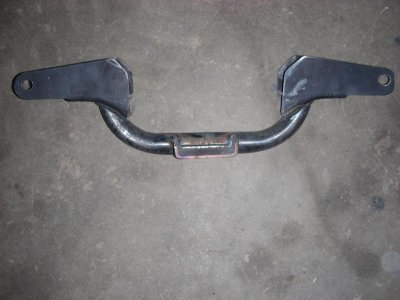
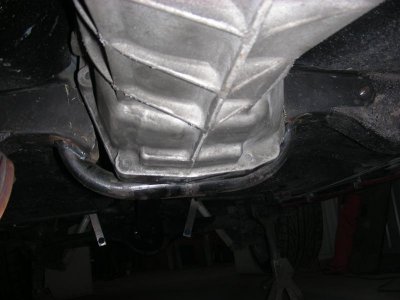
The last set of pics shows my lazey approach to building a tranny bracket haha, Hey it worked! With this tranny being so fat I really tried to tuck the tranny mount up in there like a G string. Still need to drill the extra 2 bolt holes in the frame and add sleeves in the cross member and drill the tranny mount holes.

There's one really close up of a weld, I wasn't trying to show off a weld but when I flipped the bracket over to weld the other side that was the weld that had penetrated threw (thought it was pretty cool seeing how I can't weld that good on the front haha).
 

Attachments

  • DSCN9502.jpg
    DSCN9502.jpg
    25.1 KB · Views: 470
  • DSCN9514.jpg
    DSCN9514.jpg
    87.4 KB · Views: 485
  • DSCN9505.JPG
    DSCN9505.JPG
    112.5 KB · Views: 471
  • DSCN9503.jpg
    DSCN9503.jpg
    107 KB · Views: 471
  • DSCN9506.JPG
    DSCN9506.JPG
    155 KB · Views: 463
  • DSCN9507.jpg
    DSCN9507.jpg
    46.6 KB · Views: 484
  • DSCN9508.jpg
    DSCN9508.jpg
    88.3 KB · Views: 466
  • DSCN9509.jpg
    DSCN9509.jpg
    94.2 KB · Views: 464
  • DSCN9510.jpg
    DSCN9510.jpg
    68.3 KB · Views: 469
  • DSCN9513.jpg
    DSCN9513.jpg
    61.2 KB · Views: 459
  • DSCN9520.jpg
    DSCN9520.jpg
    66.1 KB · Views: 478
  • DSCN9521.jpg
    DSCN9521.jpg
    79.3 KB · Views: 471
  • DSCN9522.jpg
    DSCN9522.jpg
    57.3 KB · Views: 473
  • DSCN9523.jpg
    DSCN9523.jpg
    77.3 KB · Views: 471
  • DSCN9525.jpg
    DSCN9525.jpg
    61.6 KB · Views: 462
  • DSCN9527.jpg
    DSCN9527.jpg
    52.7 KB · Views: 462
  • DSCN9528.jpg
    DSCN9528.jpg
    79.2 KB · Views: 473
  • DSCN9529.jpg
    DSCN9529.jpg
    71.6 KB · Views: 467
  • DSCN9530.jpg
    DSCN9530.jpg
    73.7 KB · Views: 465
  • DSCN9531.jpg
    DSCN9531.jpg
    58.3 KB · Views: 462
  • DSCN9532.jpg
    DSCN9532.jpg
    77.8 KB · Views: 482
  • DSCN9533.jpg
    DSCN9533.jpg
    54.1 KB · Views: 460
  • DSCN9534.jpg
    DSCN9534.jpg
    46.4 KB · Views: 453
Great job on the fab work and the figuring out...just goes to show,if you want it bad enough it can be done!
 
my wilwood pedals i bought used out of a racecar and had to have a custom bracket built and welded to the firewall and pedals bolted up to brackets. here is how we did my crossmember on top not a very good pic. the floor he cut out in one piece and added in about 2 inches an welded the stock hump back on. turned out pretty good. this thread is awesome gonna help out alot. if you guys have any questions i will try to help you out. im no expert just trying to build me a hotrod....FER RACIN lmao

Hey man, that has to be the cleanest trans tunnel mod I've ever seen. Looks fantastic, I'd bet 90% of people wouldn't even notice the mod even with the carpet off.

- - - Updated - - -

Great job on the fab work and the figuring out...just goes to show,if you want it bad enough it can be done!

Agreed, this is turning out great, 747!

- - - Updated - - -

Hey I was just reading that that generation viper tranny has a numerically higher 1st gear than the 727, so even if you choose a 4.10:1, it'll end up being closer to 4.30 or even 4.56. All I know is this tranny is gonna make this thing at home on a track, highway, side road, whatever!
 
WOW...dev those welds look beautiful. your a pure, skilled trade craftsman. OUTSTANDING JOB!!!!

- - - Updated - - -

Hey man, that has to be the cleanest trans tunnel mod I've ever seen. Looks fantastic, I'd bet 90% of people wouldn't even notice the mod even with the carpet off.

- - - Updated - - -


Agreed, this is turning out great, 747!

- - - Updated - - -

Hey I was just reading that that generation viper tranny has a numerically higher 1st gear than the 727, so even if you choose a 4.10:1, it'll end up being closer to 4.30 or even 4.56. All I know is this tranny is gonna make this thing at home on a track, highway, side road, whatever!


thanks ht but i cant take credit for it. my buddy did all the cutting an welding. he was trying to keep it stock looking, not bad for his first time.
 
WOW...dev those welds look beautiful. your a pure, skilled trade craftsman. OUTSTANDING JOB!!!!

- - - Updated - - -


thanks ht but i cant take credit for it. my buddy did all the cutting an welding. he was trying to keep it stock looking, not bad for his first time.
Thanks USA, I just hope my tunnel turns out as nice as yours like HT413 said (really clean looking). Unfortunately the TKO install left a big hole in my tunnel so I can't do what you did.
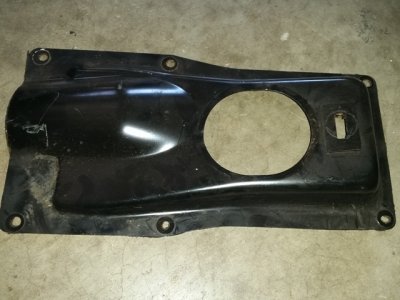
- - - Updated - - -

Thanks HT413, I'm still undecided on the rear gear. But since you brought it up here we go.


Here's the ratios to mph all givin at my 6,000 rpm shift points with 27" tall tires.

ratios............ 3.91 gears...... 4.10 gears

1st - 2.66.........46 mph...........44 mph
2nd - 1.78........69 mph...........66 mph
3rd - 1.30........95 mph...........90 mph
4th - 1.00.........123 mph.........117 mph
5th - .74...........166 mph.........159 mph
6th - .50...........246 mph.........235 mph Of coarse you can ignore this one haha

Looking at these numbers I'm leaning towards the 4.10s since they put me right at 1,800 at 70mph and only loose a few mph at my shift points. Just looking at those #s has me drooling.:headbang:
 
I think you have it about right. That 2.66 first gear compared to a 2.45 1st gear on a 727 will effectively turn that 4.10 rear into a 4.45:1 rear. If you went with a 4.56 rear, I'd bet you would hardly ever use 1st gear.

Lol just thinkin, with all that torque you'll be making you'll be cruising along at 3000 rpm in 6th gear at a comfy 120 mph.
 
By all means post away!

- - - Updated - - -

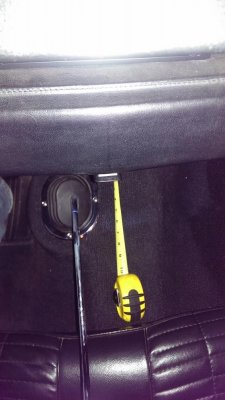
Just for you Goon this will give you a quick easy way to locate the shifter locations. Looking for an easy reference point that you could get to I stretched tape from door jam to door jam. You can see the front of the forward most location is about dead even with the door opening and in the other pic I'm holding the tape on the masking tape showing where the rear most location is.

View attachment 233382

View attachment 233384

View attachment 233383


Thanks Devin,

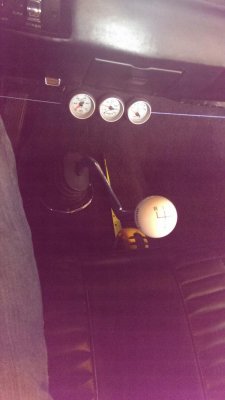
Was actually warm enough to be in my garage this morning, Even got the Hurst Tee handle and shaft switched out for the new White Ball and Shaft I had ordered before moving ahead with a new tranny so soon. I like the ball better.

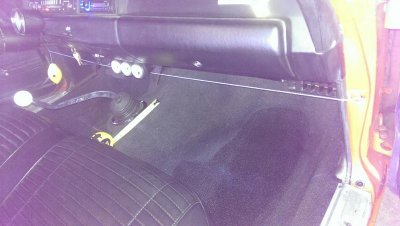
Not sure where my masking tape took off to so I used the string of my chalk line as the guage from jam to jam (A little more rough measurement than yours with my plastic trim in the way) but here's some pics to give people an idea of where the Viper Shifter location would land in direct comparison to the A833. Hopefully this helps someone in future as a reference point.

And with that said. I'm not sure why you guys even remotely think the helpful pics and comments your posting would be hijacking this thread. They're all helpful information in one convenient place now that is sure to help people with questions in the future :)

Tranny Measurements.jpgTranny Measurements1.jpgTranny Measurements2.jpgTranny Measurements3.jpgTranny Measurements4.jpgTranny Measurements5.jpg

- - - Updated - - -
 
Last edited:
Viper trans mods are going GREAT

Great looking work on the Trans cross member and trans support - LOVE the tubular version that you did for the support ! ! Looks fantastic.

You were asking about the "sealing" of the shifter through the tunnel . . . well, since I got a bunch of parts off a 2012 Challenger, I can share with you what they look like and how they did it . . . maybe you can get the rubber grommet and adapt it to work with your shifter too ? ?

Here's the plate that they have on top of the tunnel hump . . .

sm_tunnelseal01.jpg

And then the shifter level with the rubber grommet held next to it . . .

sm_tunnelseal02.jpg

Hope this is what you're looking for . . . I can get you measurements on the hole size if needed . . . Let me know if you need more . . .
 
The G string support is awesome. Nice job.

I can just see you... approaching 160mph: "Alright, are you ready for 6th????"
 
Killer job on that crossmember and trans mount dev, that's a great idea using the modified version of old trans bracket so it bolts up in there as normal. Pretty lucky everything is dimensionally close enough between the 833 and T56 to be able to do that, too. Awesome work!

Thanks USA, I just hope my tunnel turns out as nice as yours like HT413 said (really clean looking). Unfortunately the TKO install left a big hole in my tunnel so I can't do what you did.

- - - Updated - - -

Thanks HT413, I'm still undecided on the rear gear. But since you brought it up here we go.


Here's the ratios to mph all givin at my 6,000 rpm shift points with 27" tall tires.

ratios............ 3.91 gears...... 4.10 gears

1st - 2.66.........46 mph...........44 mph
2nd - 1.78........69 mph...........66 mph
3rd - 1.30........95 mph...........90 mph
4th - 1.00.........123 mph.........117 mph
5th - .74...........166 mph.........159 mph
6th - .50...........246 mph.........235 mph Of coarse you can ignore this one haha

Looking at these numbers I'm leaning towards the 4.10s since they put me right at 1,800 at 70mph and only loose a few mph at my shift points. Just looking at those #s has me drooling.:headbang:

x2! "Fer speedin" Speedfreak approved!
 
The G string support is awesome. Nice job.

I can just see you... approaching 160mph: "Alright, are you ready for 6th????"

The question is . . .

Is it a G-string support, or the way he's got it tucked up there in the cracks, does it qualify as a Thong support ? ?

Guess you'll all have to decide for yourself . . . ( smile )


Either way - the work is fantastic ! ! ! Nicely done there 747 Mopar . . . Very nicely done !
 
That crossmember looks awesome Dev, great work!

And thanks for that post on the floor mount setup Bob! nice job frenching them in there, that's exactly what I figured I'd have to do if I ran them as well. Again sorry if I'm hijacking the thread here but how do the pedals feel as far as their hight up from the floor? That was kindof my main concern with them, if they might be too tall or something. Also how does the throttle setup work on the gas pedal? Some kind of hookup for a cable?

Thanks again to both you guys for all the info :icon_thumleft:

Hey Speedy,

You're right, the pedals are definitely tall so I'm going to use a trick I've seen in some race cars: a "block" about an inch or so tall, about 10" wide, and 3" or 4" deep (front to rear)) to rest my heels on. Not sure if I'll weld it or bolt it in place but I'm leaning towards welding since it will act as an additional stiffener for the floor.

As for the throttle actuation, I invite you to visit my thread (I just posted an update regarding the throttle); regardless of how nice/patient Dev has been I feel lousy getting off subject in his thread.
 
Last edited:
Hey Speedy,

You're right, the pedals are definitely tall so I'm going to use a trick I've seen in some race cars: a "block" about an inch or so tall, about 10" wide, and 3" or 4" deep (front to rear)) to rest my heels on. Not sure if I'll weld it or bolt it in place but I'm leaning towards welding since it will act as an additional stiffener for the floor.

As for the throttle actuation, I invite you to visit my thread (I just posted an update regarding the throttle); regardless of how nice/patient Dev has been I feel lousy getting off subject in his thread.

Every standard needs pedals right? Not off subject.
 
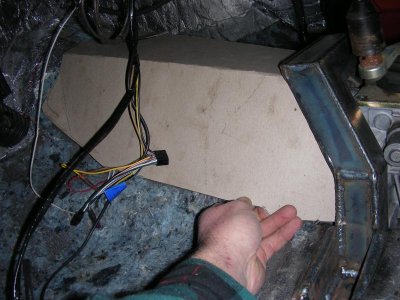
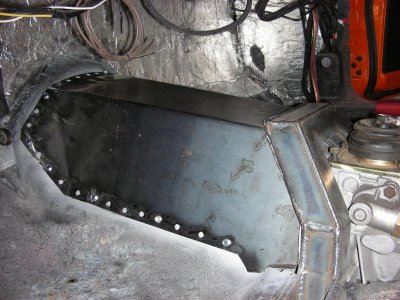
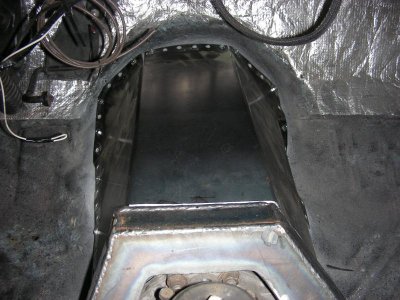
Not much time in the garage today but I managed to cut bend and beat out a tunnel hump that looks like it will do the trick and still allow for my console. I'm building it in 2 sections (each butting into the cross member) so I still have the small (easier) patch to make, plan on having them both done and welded in tomorrow. I was fighting the clock tonight so pics will come tomorrow.
 
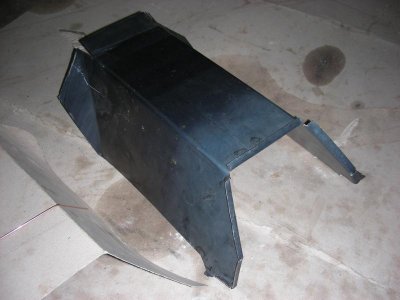
Here's the first part of the new tunnel.

I used some TIG wire to get my angles then cardboard for the pattern.

DSCN9535.jpg
DSCN9536.jpg

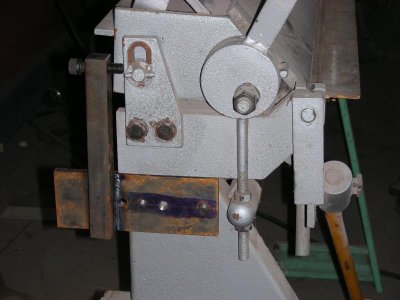
First order of business was fixing my break, the 2 bolts that hold the fingers were allowing the fingers to slide back everytime I tried to bend something (not anymore). These brackets that my dad made allow me to adjust the fingers while holding them in place, problem solved.

DSCN9541.jpg

A little bending and cutting and this is what I came up with. I chose to bend 90s where it meats the cross member instead of just but welding it.

DSCN9537.jpg
DSCN9538.jpg
DSCN9539.jpg

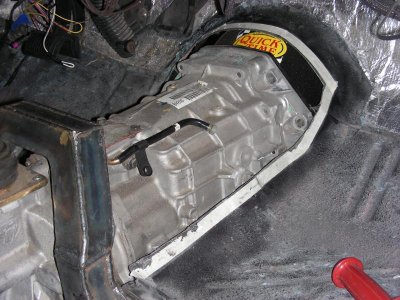
Once I had what I wanted I laid it in there and spray painted around it so I knew how much excess to trim off. I used 3/4" wide tape against the painted perimeter so that I'd have a 3/4" overlap for plug welding (less warpage).

DSCN9542.jpg
DSCN9544.jpg
DSCN9546.jpg
DSCN9547.jpg

And now all screwed down and ready for plug welding but that will be another day when I have someone to lay under the car so I don't burn it to the ground.

DSCN9557.jpg

DSCN9553.jpg

DSCN9551.jpg

DSCN9550.jpg

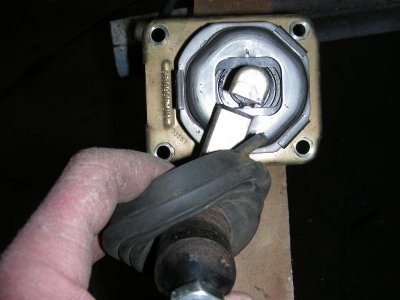
Also toyed with the shifter, originally it favors the driver side and forward a bit, now it's straight back. Might still need to come back a bit but I can unscrew the stem and make a new one to accomplish that. Here's the starting point for my pistol grip (will be mounted differently).

DSCN9548.jpg
DSCN9558.jpg
 
Some more great progress made Dev! The new hump looks real clean and like a nice fit! and it's great you're already test fitting your pistol grip and seeing where that will leave ya!
 
Auto Transport Service
Back
Top