• When you click on links to various merchants on this site and make a purchase, this can result in this site earning a commission. Affiliate programs and affiliations include, but are not limited to, the eBay Partner Network.

The Willomet Charger

Had a few days lost to outpatient surgery, and I'm back out in the shop...mostly. It gave me the chance to step back, measure, and make a few drawings for the planned frame overlays. These should transform the 48 year old 14ga front frame rails into something more like the new 11ga torque boxes and rockers.

040CFF3F-3736-4E3D-B637-3E3498AF30C2.jpeg


79BDC376-4933-47F8-808F-8D0FE92B7688.jpeg


I made several versions, but I think I like this overlay best.
6D72325D-DEF9-4BEC-9BF6-C619207F6606.jpeg


David
 
Those have really transformed the hobby as they’re now very accessible. I have two friends who each have one in their shops.
So true.

It would take me most of the day to layout, cut and drill, and finish all that, and assembly days are too valuable. I take my laptop and project book with me when I travel for work, and I’m always drawing up the next batch of parts.

You’re right. We couldn’t do that 10 or even 5 years ago.

David
 
You can see where this is going.

ED200A24-B14B-4814-8EA1-13993E5C6F37.jpeg


E6E00B28-4BFB-490D-A9D4-FCCC245751E5.jpeg


I have a handful of small client projects to get done before a long weekend getaway, so I’ll hit this early next week. Lots of squaring/checking/tacking/trimming to get these fitting just right.

David
 
Awesome fab work bro!
Shame people are hating on you for the engine and not seeing the art that you are creating. For me I find body work far more impressive than an engine. So keep the posts coming.have you decided on a color?
 
Awesome fab work bro!
Shame people are hating on you for the engine and not seeing the art that you are creating. For me I find body work far more impressive than an engine. So keep the posts coming.have you decided on a color?
Thanks! I really enjoy the chassis build process, and am excited to start mocking up tires and suspension.

Critical feedback can be useful, and I don’t begrudge anyone sharing it. I have taken lots of inspiration studying builds on this site, and while my direction is not that of a faithful restoration, there is stuff in my build that may be useful to others here. A vital part of our hobby is showing and discussing our progress with others, and I have no plans to stop.

Related to color, the car was originally F8 Green, and I’m still going in that general direction if somewhat darker. I’ve always thought the Charger’s lines showed best with dark and glossy finishes.
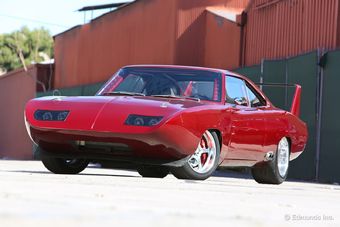
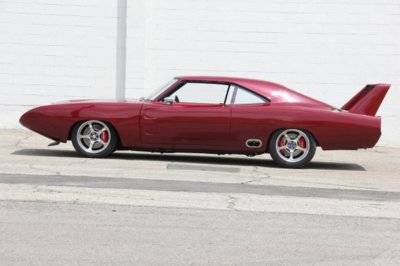
Not a 70 but a 69 with a ls engine
What’s really impressive about those F&F cars is that they built 6-10 nearly identical copies for each movie. The one “hero car” did have a 440 or 426 in it, but all the stunt cars ran LS3s with TH400s.

David
 
Short vacation, a busy week of work, and I happened to catch strep while traveling. I’ve missed working on the car.

Last night, 3 cans of Eastwood internal frame primer went into the rocker beams, front rails, and torque boxes. I adapted a 3M wand kit to get all the way to the center of the rocker beam. It’s good, thin stuff, and gets into cracks and crevasses very well.

Now the front frame is ready to assemble. Good to be back.

David
 
The torque boxes are burned in, and the front rails are again connected to the rockers.

3D94BE4F-D3B1-4C03-A2B8-39FC2C445246.jpeg


All these will get blended.
F0857A5B-D476-4A21-B2C2-40F1F53ADD65.jpeg


It’s hot.
FAC00601-7079-45A0-937A-4EE84EED9740.jpeg


Shiner time.

David
 
Looks great! When do the truss plates get welded on?
That’s the next series of steps. Three plates each side - two on each side of the current rail, and one that stretches from the inner face of the torque box to the rear K-member bolt.

Lots of fitting to come, and I’ll pace burning in the rear chassis welds along with it. I don’t want to put a ton of heat into the frame at once and lose level and square.

David
 
Got out in the shop early while it was still cool, and burned in the rear chassis.

A0399655-7C58-4D72-909A-6D0CC0A59288.jpeg


B89A5B8A-4641-4318-9293-784AF82220C2.jpeg


Now, off to cook venison burgers. Happy 4th.

David
 
those are some nice welds!
Thank you, sir. I feel like I’ve got my Hobart dialed pretty well since I switched out the potentiometer.

More progress today, really turning my attention to the front rail expansion.
88EB689C-3A21-4F79-B066-B173D5BD57C6.jpeg


Lots of pock marks and holes to fill.
E3D3FB0E-B86C-40AC-8721-BEB1053322FB.jpeg


TIG is really good for filling these.
C83DADC6-617B-4D02-B690-F400299C03B0.jpeg


Smoothed, ready to duplicate to the passenger side.
1D2E21DB-6512-4874-8B1D-AF27A8C86B27.jpeg


3DE3CD1E-5A83-42ED-BD3E-76B5BFC32E4E.jpeg


Just a closeup of the filling and smoothing left to be done on the next section of the frame.
2DE393ED-ABC8-4520-B4ED-BE020CA35B9B.jpeg


It’s slows me down, but these are details that matter to me.
215899D7-E112-4916-90C5-44973CEF3EBD.jpeg


David
 
Other side. Slightly less boogered than the driver rail, but still a good bit of smoothing to make it look right.

DA866E2F-E39A-4662-96A6-57CA81C4DCE0.jpeg


7AE8E8E9-FC41-471E-A92A-DB75A16EBDAF.jpeg


Inside of the other rail - gives an idea of why I’m expanding the profile. 2x the height and about the same multiplier for beam strength improvement.

C456BEA3-D545-45D9-8A77-DE035A255ED6.jpeg


David
 
Here’s a lot of pictures for very slight progress.

I started working on the center frame expansion plate. Here’s my office for the next little bit.
570B2F57-B06A-47FF-AF09-CADCFDDDE7D7.jpeg


Trimming and welding the inner flange - need a flush surface for the plate.
7C9A9002-0874-40CD-84F2-09F2DEDDEF53.jpeg


9FB66D83-08D1-48EC-B92F-4A191A0B4ECE.jpeg


37DCCC92-ACCB-4ACF-B68B-A8C0CDCAC7A3.jpeg


Lots of fitting later.
8C7573FE-B0FC-4570-8702-D04CAA86B72D.jpeg


4875FD1E-4A27-4677-A452-17D2032ACD5C.jpeg


3A1F1E1C-525D-4D43-995D-5F8117F9F206.jpeg


One more plate will go to the inside.
37B2935A-BB3D-4D8C-AB7E-9C3452E1A4C5.jpeg


Just a parting shot after sweeping the floor and getting ready to take the pup on a walk.
05CE97AB-792E-4435-A9EE-CC5197898068.jpeg


David
 
Love all the craftsmanship in this build, excellent work! Seeing builds like this gets me itching to start another....
 
Auto Transport Service
Back
Top